
Let’s start with a painful truth:
Muscle imbalances aren’t just a problem for bodybuilders obsessed with mirrors.
Actually, they can sneak up on anyone.
Especially if you train with just your bodyweight.
In fact, it’s surprisingly easy to fall into the trap — sometimes literally with one arm… usually the dominant one.
And I know because I’ve been there.
At one point, while doing push-ups like my life depended on it, I noticed my left pec was doing twice the work.
The right one? It was basically remote working.
And the freaky part? I hadn’t even realized.
What exactly is a muscle imbalance?
It’s not just about aesthetics — like one bicep being bigger than the other.
It’s something sneakier.
A muscle imbalance happens when one side of the body (or a specific muscle) is stronger, more active, more mobile, or simply more dominant than the other.
It’s like your body is in a tug-of-war… where one side is pulling hard and the other one’s just pretending.
The result?
- Inefficient movement
- Joint pain (shoulder, hip, knee)
- Plateaued progress
- Exercises that feel crooked, unbalanced, or forced
You won’t always notice it.
Sometimes you do push-ups and feel only one side firing.
Or you’re doing handstands, and the balance always leans one way.
Or maybe your left scapula acts up every time you try pull-ups.
When every movement starts feeling “off,” that’s your body screaming: “Dude, we’ve got a problem, and you’re ignoring it.”
Imbalances often start outside the gym (and you don’t even realize it)
Not all muscle imbalances come from training.
In fact… most of them are born from your daily habits.
Like:
- Always carrying your bag on the same shoulder
- Spending hours at the computer with your right hand on the mouse and that shoulder creeping up
- Sleeping on the same side every night, one leg hooked over the other
- Crossing your legs the same way all the time
- Training consistently… but only with your “favorite” exercises
These daily habits, repeated for months or years, create chronic tension on one side and deep weakness on the other.
It’s like one half of your body is always “on,” while the other is scrolling Instagram from the bench.
And you know what happens?
The muscles that are supposed to move your body start doing too much, while the ones that should stabilize and control movement start checking out.
Like a soccer team: if the striker runs forward but the defenders are napping…
you’re getting scored on.
Same thing with your body.
For every pushing muscle, there’s one meant to slow down and balance.
If that stabilizer muscle goes missing, here’s what shows up instead:
- Asymmetries
- Pain
- Weird compensations during movement
And often… you don’t realize until it’s too late.
That’s why it’s not enough to train just the “strong” muscles.
You’ve got to retrain the quiet ones. The lazy ones. The underdogs.
A quick example?
If all you ever do is push-ups for chest and front delts — great.
But if you don’t also strengthen the muscles that pull your shoulder blades back, open your chest, and hold your posture…
You’re building a door that’s always slamming shut.
And over time… it creaks.
Do bodyweight exercises help or make it worse?

Short answer: it depends.
Yes, you can correct imbalances with just bodyweight.
But if you’re moving mindlessly, eyes closed, on autopilot…
You risk reinforcing the dominance of what’s already strong.
Because your body always takes the easy route.
If one side’s stronger, it’ll keep hogging the load.
Even during “symmetrical” moves like push-ups or pull-ups.
That’s why you need to approach it with awareness.
The good news?
Bodyweight training gives you an insane level of control — sometimes more than weights ever could.
The secret weapon? Unilateral exercises (yes, they’ll hurt)
Want to really find out if one side is cheating?
Do single-limb exercises.
Like:
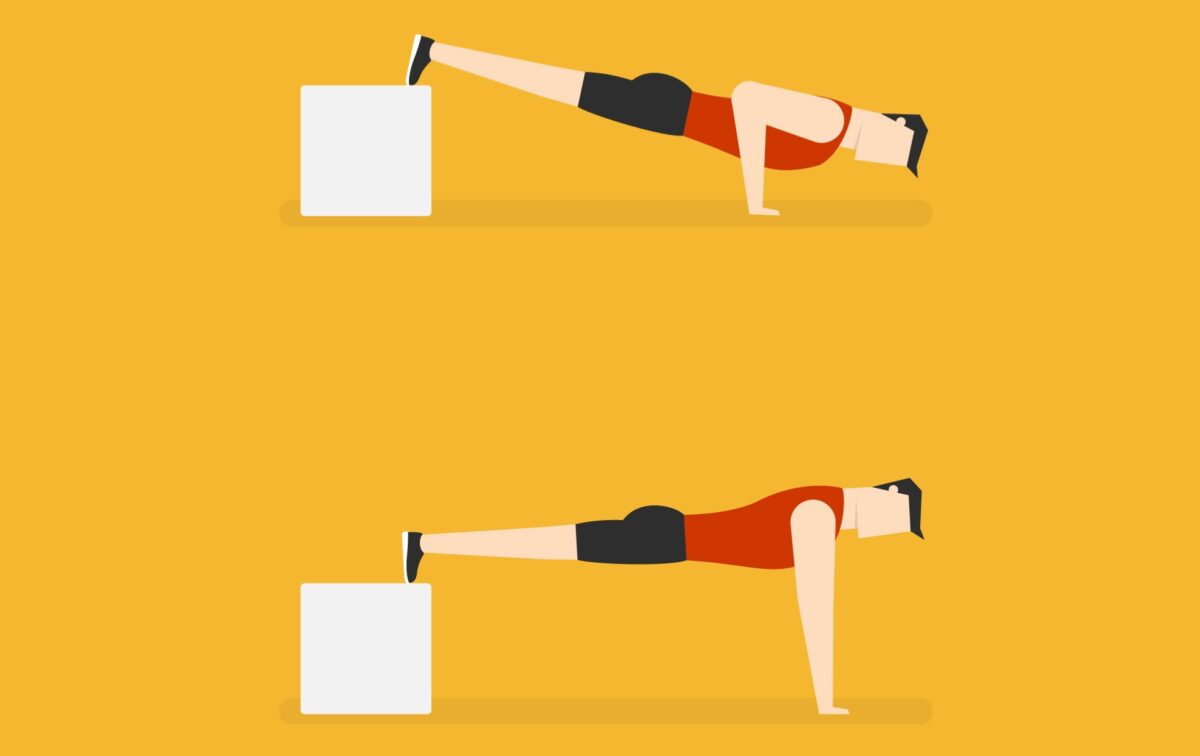
- Archer push-ups
- One-leg squats (aka pistol squats… more like execution squats)
- Uneven-grip pull-ups
- Planche leans with lateral shifts
- One-arm isometric holds
These are straight-up truth detectors.
When one side starts shaking halfway through the hold — and the other glides through?
You’ve just diagnosed yourself: imbalance.
And the best part?
These moves don’t just expose the problem.
They fix it — by forcing each side to work solo, without help from the dominant “big brother.”
Ego vs. form: guess which one needs to win
You feel like a beast because you can crank out 20 fast push-ups with your feet elevated?
Cool.
But if you record yourself and notice one arm bends more, or a shoulder pops up first…
Congrats — you just trained your imbalance deeper.
The truth is, bodyweight training lets you control everything:
- Speed
- Angles
- Symmetry
- Muscle engagement
But only if you want to.
You have to slow down.
Watch yourself.
Fix yourself.
And here?
Nobody’s handing out medals for reps.
Only clean form counts.
Can I do more reps on the weak side to fix it?
Yes — but carefully.
Doing a few extra sets on your weak side can help.
But don’t wing it.
It’s not about “pushing harder.”
Try this:
- Match reps on both sides only if the movement is clean
- Use isometric holds to feel the muscle working
- Add slow eccentrics (lowering phase) to boost neuromuscular recruitment
And remember: fatigue kills form.
When your body gets tired, it’ll go right back to cheating.
Can I really do progressive overload with bodyweight only?
Absolutely.
Anyone who says you can’t isolate, progress, or train with precision in calisthenics…
Has never spent 30 seconds in a front lever hold.
Bodyweight gives you infinite tools:
- Harder leverage (planche lean, pseudo push-ups, progressions)
- Isometric pauses
- Slowed tempo
- Offset hand or foot positions
- Supersets at different angles
Progressive overload isn’t just “more weight.”
It’s more neural demand, more control, more adaptation.
And you can dial that up — using nothing but your body.
Will I ever be perfectly symmetrical?
Let’s be honest.
No.
Nobody is.
Not even Olympic athletes.
Everyone has a dominant side.
One elbow that locks quicker.
One scapula that’s snappier.
One forearm that wakes up first.
The goal isn’t robotic perfection.
It’s efficient, safe, stable function.
Forget perfection.
Chase awareness.
Knowing you’re working to balance out, prevent injury, unlock harder progressions…
And knowing that every extra rep on the weak side is building a smarter body.
If I had to start over, I’d do this:
Here’s what I’d do if I could go back:
- Film every session
- Start unilateral push-ups from month one
- Prioritize scapular mobility before every workout
- No flashy progressions until the basics are flawless
- Dedicate one day a week just to isometric holds
And most of all… I’d listen to my body more.
That “normal” shoulder ache I kept ignoring?
It was my body saying, “Hey, you’re building a tower on crooked foundations.”
How to tell if you’re imbalanced (without a physiotherapist)
You don’t need a lab to tell something’s off.
Try these at-home tests:
- Mirror test: do slow reps of push-ups, squats, pull-ups in front of a mirror. Watch if your torso rotates, scapulae move differently, or one knee collapses.
- Back view video test: record your shoulders during pull-ups or dips. One side popping early? Scapula winging? Red flag.
- Feel test: close your eyes and raise your arms or twist. Where do you feel tightness first?
- Fatigue test: after a unilateral set (like archer push-ups), which side burns more? Which fails sooner?
Imbalances and pain: when it’s already an injury
Some people think, “If it doesn’t hurt, it’s fine.”
Big mistake.
Most joint pain doesn’t come from one wrong move.
It comes from years of uncorrected imbalance.
Watch out for:
- Weird pain in just one shoulder during push-ups
- One-sided elbow flare-ups after pull-ups
- Low back pain from one-leg squats
- Clicking or locking in one scapula
If that’s happening, don’t just train through it.
Sometimes two weeks of targeted work is all it takes to get back on track.
Stretching and mobility: the forgotten allies in imbalance
Fixing imbalances isn’t just about strength.
Sometimes the real issue is mobility.
A tight pec pulls your shoulder forward.
A stiff hip messes up your squat.
An immobile ankle throws off your pistol squat balance.
Smart stretching can work wonders — if done right:
- Dynamic mobility pre-workout (scap circles, thoracic openers, controlled rotations)
- Static stretching post-workout (pecs, hip flexors, lats)
- Self-massage with balls or foam rollers on dominant-side trigger points
The goal is to restore a neutral position where both sides can share the work.
Final thoughts
Yes, you can fix a muscle imbalance using only bodyweight exercises.
No question.
But it won’t happen by accident.
It happens if:
- You stop ignoring the signs
- You drop the ego
- You pause, observe, correct
- You train each side like it’s a solo athlete
It’s slow.
It’s picky.
It’s frustrating.
But when you hit that perfectly even push-up…
When both scapulae glide in sync…
When your pull-up shoots straight like a ruler…
You’ll realize every mindful rep was worth it.
And trust me — that clean, powerful sense of control?
Nothing beats it.
Train not just to get stronger.
Train to get balanced.
More aware.
More in charge of your body.
Because in the end…
That’s where the real progress lives.