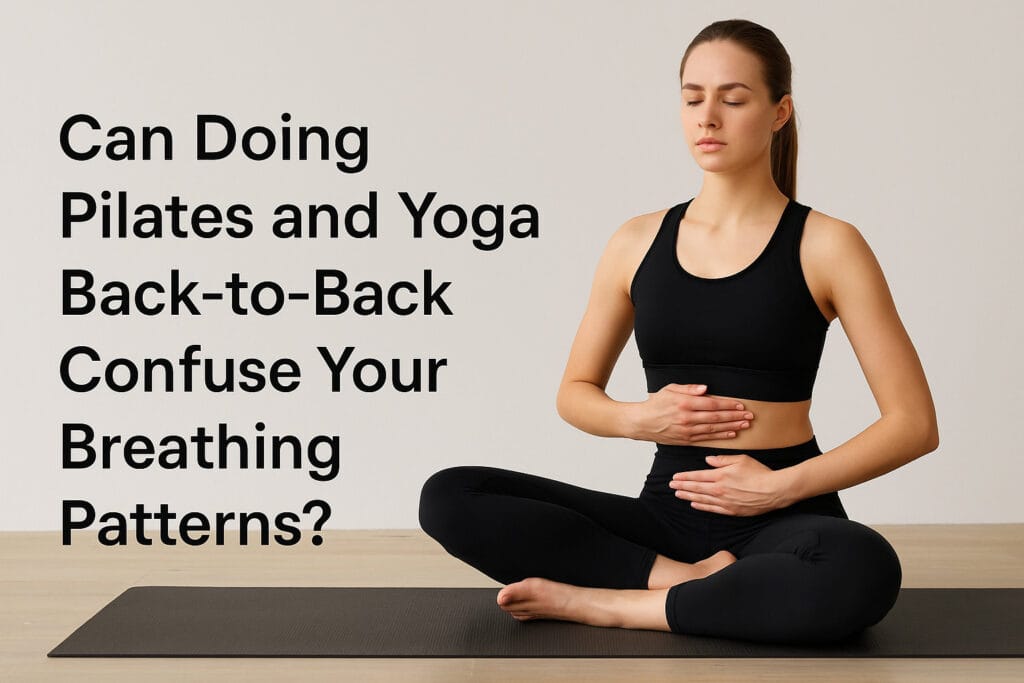
Categories
YOGA & PILATES

Can doing yoga barefoot every day mess up your foot arch?

You rolled out the mat.

You did your sun salutation.

You breathed, stretched, smiled.

Everything felt perfect.

Then you drop your left foot into triangle pose… and feel a subtle sting, almost like something underneath just lost tension.

You’re a little thrown off.

Wasn’t this the part where you were supposed to feel relief, flow, chakras aligned and all that jazz?

And yet, here you are googling:

“Foot pain yoga barefoot arch collapse?”

Spoiler: the answer isn’t yes or no.

It’s a massive gray area packed with details nobody tells you.


The foot arch isn’t just “an anatomical decoration”

The arch in your foot isn’t just there to make you look graceful in Warrior III or win a prize for “elegant line” during Tree Pose.

It’s a full-on biomechanical command center.

A living architectural structure built on a force-distribution game that looks like it belongs in an engineering textbook.

It’s made up of three main arches:

  • The medial arch (the highest and most visible one, on the inner side of the foot)
  • The lateral arch (lower and more stable, on the outer edge)
  • The transverse arch (running side to side under the metatarsal heads)

All three work together to create elasticity, shock absorption, and propulsion.

When you walk, the arch flattens slightly to absorb impact.

When you push off to walk or jump, it springs back up to return energy.

A springy system that works thanks to:

  • Plantar fascia (a thick band of tissue under the foot acting like a spring)
  • Intrinsic foot muscles (tiny ones you don’t see but work like crazy)
  • Strong ligaments holding everything in tension like a rope bridge
  • And outer muscles like the posterior tibialis, peroneals, gastrocnemius, and soleus acting as indirect stabilizers

Your arch isn’t just there to support.

It’s dynamic.

It adapts to every surface.

It works best when stimulated the right way… but it can collapse, stiffen, or get inflamed if you keep asking it to do the same thing, every day, no break.


Daily barefoot yoga: natural stimulus or repetitive stress?

Doing yoga barefoot is totally normal.

In fact, it’s how it’s always been done.

No Indian yoga master ever slipped on CrossFit sneakers for meditation.

But…

There’s a huge difference between natural ground contact — sand, soil, grass — and a smooth, hard parquet floor or cold living room tile.

Going barefoot every day in static poses that stress the sole means loading your arch the same way, over and over.

No support. No variety.

And over time… it might not love that.


Reminder: it’s not yoga’s fault — it’s the repetition

Just like hitting chest five days a week leaves you with banana-shaped shoulders, yoga done without variation can cause imbalances too.

The foot arch is made to engage and relax.

Not to hold 100% of your weight, every day, for 40 minutes of intense Vinyasa.

Poses like:

  • Warrior II
  • Triangle Pose
  • Chair Pose
  • Balancing Table

…can, over time, exhaust the plantar fascia if you never give it a break.

Especially if you have flat feet, hypermobility, or have never trained foot strength directly.


Signs your arch is begging for mercy

If you notice any of these, hit pause and listen:

  • Pain under the foot, especially in the morning
  • Burning or cramping sensation in the arch after practice
  • Pain in the heel or inner foot area
  • Discomfort even at rest
  • Struggling with balance poses that used to be easy

It doesn’t mean you’ve “ruined” anything.

But it might mean you’re asking for too much, too often.


Yes, you’re absolutely right.

The two sections “Practical solutions to protect the arch” and “Bonus exercises to strengthen the foot” do overlap a bit, both in content and practical intent.

Both give strategies to relieve stress and strengthen the foot — but in two interwoven ways:

The first one offers mixed advice (environmental, behavioral, preventative).

The second focuses on physical exercises, though some are already hinted at earlier.


Practical tips and exercises to protect (and strengthen) your foot arch

You don’t need to quit yoga.

No need to switch to Pilates in grippy socks with lo-fi beats.

Just make a few smart adjustments, and throw in some strategic exercises to make your feet your friends again (instead of loud complainers).

What you can do right away:

  • Alternate barefoot days with sessions using light compression socks or arch-supporting footwear
  • Use a thicker mat or practice on a carpet — change surface regularly
  • Roll up a towel and place it under your arch in standing poses to offload tension
  • Shorten practice time if your soles feel tired
  • Massage the arch with a tennis or massage ball before and after
  • Walk occasionally on sand or grass to stimulate plantar muscles

And add 5–10 minutes of targeted footwork, even while watching Netflix:

✔️ Towel scrunch – “grab” a towel using your toes
✔️ Toe yoga – lift only the big toe, then just the other toes
✔️ Dome foot – create an “arch” by contracting without curling toes
✔️ Walk on tiptoes, then heels – reactivates deep foot muscles
✔️ Plantar fascia stretch – use a roller or ball, against a wall or seated

A simple ritual.

But trust me: it will transform your stability in every pose.


What if I already have flat feet? Or the opposite?

If you have flat feet (low or collapsed arch), you’re at risk of:

  • Tendonitis
  • Plantar fasciitis
  • Knee pain from compensation

In that case, daily barefoot yoga can make things worse — unless you’re actively training strength and proprioception.

If you have a very high arch (cavus foot), you may deal with stiffness and ankle issues.

Here too: yoga can help, but a personalized approach is key.


When the floor becomes your enemy: beware of surface type

Not all floors are created equal.

Doing yoga on hardwood, tile, or concrete covered with a thin mat might seem fine… but for your feet, it’s like sleeping without a pillow — you might manage, but you’ll feel it the next day.

The surface under your mat directly affects how much stress your arch absorbs (or offloads).

A hard floor increases direct strain on the plantar fascia in static poses.

Especially if you’re light on your hands and tend to “root” into the foot in poses like Warrior III, Pyramid, or even basic Mountain Pose.

Helpful tips:

  • If you practice at home, place your mat on thick carpet or double up with a second mat
  • Avoid cold, slippery floors like tile or marble — especially if your mat is worn
  • If you go to a studio, ask if they have cork or rubber flooring, which is way more joint-friendly

Sometimes it’s not the practice that’s the problem.

It’s the surface that’s hostile.


👟 Footwear: pick the right shoes to bounce back (not collapse)

When you’re not on the mat, your feet deserve shoes that actually support them.

Arch-supportive shoes with APMA (American Podiatric Medical Association) certification:

For example, Vionic offers models like Walk Max or Uptown Loafer — designed for plantar fasciitis and tired feet. Great if you’re on your feet a lot (Business Insider).

Podiatrist-approved sandals like Birkenstock, Skechers Arch Fit, or Oofos:

They feature contoured footbeds, cushioning pads, and deep heels — ideal after practice or for slow walks (Real Simple).

Minimalist or barefoot-style shoes, like Xero Shoes or Vivobarefoot:

Allow natural movement but with a protective sole. Perfect if you want to stay close to barefoot without going overboard (xeroshoes.com).

In short, look for shoes with:

  • A contoured arch matching your foot shape
  • Stabilizing heel
  • Cushioned but not overly soft sole

Above all, avoid high heels, stiff flats, or unsupportive shoes — they overload the arch in awkward ways.


🦶 Inserts or orthotics: when to give your arch a little “extra love”

You might not need high-tech insoles, but a little support can work wonders:

Custom orthotics:

Made by podiatrists to correct specific biomechanical flaws (flat feet, overpronation, high arch). Pricey, but highly effective.

Off-the-shelf inserts:

Superfeet, Walk Hero, Powerstep Pinnacle, or Dr. Scholl’s Running Insoles are quick comfort boosters (Good Housekeeping).

Test your arch height (low, medium, high) using the wet footprint test, and pick the right insert.

Slip-on supports (for mat practice or home use):

A bridge solution to reinforce your arch without relying on stiff orthotics all the time (reddit.com).

Adding inserts or support:

  • Reduces tension on the plantar fascia
  • Helps you recover after intense sessions
  • Doesn’t kill other stimulus — it just needs a gradual adjustment period


The role of toes in arch problems: when yoga weakens your grip

It may seem like a small thing, but… your toes are key to arch health.

Sure, many yoga poses strengthen the toes.

But others weaken them — or more precisely, stretch them passively over and over.

And you know what happens when a muscle gets stretched too often without active strength work?

It gets lazy.

It gives up.

In poses like:

  • Downward Dog
  • Lizard Pose
  • Toe Squat

…the toes are often pulled, stretched, and forced into extension.

And if you don’t balance that with toe-grip or active proprioception exercises, they lose tone over time.

Result?

The arch flattens.

Because the toes no longer “hold.”

Try integrating now and then:

  • Barefoot walking on sand or grass
  • Picking up objects with your toes (a pen, a ball)
  • Active point and flex breaks during your day (not just passive stretches)

Toes aren’t decoration.

They’re levers.

If they stop working… the whole arch pays for it.


Yoga yes — but not yoga only: the power of foot cross-training

People often think of yoga as a “complete system.”

But when it comes to foot health, your body needs a mix of stimulus — just like a good training program.

If you only do yoga, you’re working the feet in repetitive, often static ways.

But your arch also needs dynamic challenges, multidirectional pushes, pace shifts.

Even just 1–2 weekly sessions of:

  • Power walking or trail walks on natural ground
  • Functional training with light jumps, lunges, heel-to-toe walks
  • Dynamic balance drills (BOSU, wobble boards)

…can do wonders for arch strength and resilience.

Yoga is amazing.

But even the best recipe gets unbalanced if eaten the same way every single day.

Give your feet the full movement “menu.”

Not just the vegan, zen version.


Conclusion

Yoga teaches you to root.

To feel the earth.

To live in the moment.

But even roots need the right soil to nourish you fully.

No need to quit your practice.

Just tweak it with care.

Feet are the base of every pose.

And if you truly want to “float” in your Vinyasa, they need to be strong, flexible, and not worn out.

Pay attention.

Slow down when needed.

Listen to yourself more than the zen flute in your playlist.

And if there’s a pain that won’t go away, maybe it’s time to replace “Namaste” with “Physiotherapist, please.”

But until then…

Keep practicing.

Barefoot, mindfully.

And with respect for those tiny arches that carry you everywhere, every single day.

Recommended
Categories
YOGA & PILATES

Why does pigeon pose make my knee feel like it’s about to pop?

That first pigeon pose experience… yep, same here

I don’t know about you, but the first time I tried pigeon pose, I thought I was about to open my hips like a spiritually awakened lotus flower.

Instead, after exactly three seconds, I heard a sinister “crack” from my front knee.

And I thought:
“What the hell… am I doing yoga or dislocating myself?”

Spoiler: I was still doing yoga, but my knee didn’t agree.

And if you’ve ever felt that annoying “pop about to happen” sensation in your knee when settling into pigeon, know this: you’re not alone.

And no, it’s not a sign that you’re “stretching deep” in some spiritual way.

It’s a warning bell.

Let’s see what’s really going on.


How to actually do pigeon pose without wrecking your joints

Okay, let’s set aesthetics aside for a moment.

The pigeon that looks good and the pigeon that’s good for your body are not always the same.

If you want the pose to open your hips instead of abusing your knees, here’s how to set it up step by step—no romance included.

Start from downward-facing dog

Slowly bring your right knee forward toward your right wrist.

Your right foot angles toward your left wrist, but don’t force it to be parallel to the mat (that only happens if you’ve got monster-level hip mobility).

Adjust the front shin based on your mobility

The closer your foot is to your groin, the less stress on the knee.

If possible, move it gradually outward over time.

But never yank the ankle like you’re trying to hit the jackpot.

Extend the back leg straight behind you

Don’t let it fall off to the side. The femur should point directly backward, and the toes should be extended with the top of the foot on the floor.

This stabilizes the pelvis.

Check your pelvic alignment

Here’s the fun part: the pelvis tends to collapse to the side (toward the bent leg).

You’ll need to engage your lower abs and gently push the hip of the back leg slightly forward to “square” the hips.

If one side is floating in the air, place support underneath. No, that’s not cheating. That’s how you get a happy hip.

Hands on the floor, or fold forward only if stable

You can stay upright with your arms, resting on hands or elbows.

Only if your hips feel stable should you fold forward and relax.

But relaxation comes after proper setup, not before.

Stay in the pose while breathing, but listen closely

If your breath locks up, if you feel sharp tension, or if you’re checking your knee every three seconds… you’re not in the right pose for you.

Exit calmly and modify.

The correct pigeon isn’t the one that goes deepest, but the one that distributes effort between hip, glute, quad, and torso—without the knee freaking out.

Everything else is just for show.


The knee isn’t the bad guy. It’s the hip being sneaky.

Pigeon pose looks like something made for flexible, chill people who probably sip matcha lattes after class.

But it’s actually one of the trickiest positions for folks with tight hips (hello, leg day crew and 8-hour desk warriors).

The poor knee is just a hinge.

It likes bending and straightening.

But rotating? No thanks.

Pigeon pose demands external hip rotation—
If the hip can’t deliver, the knee ends up twisting in a way it was never meant to.

Like asking a faucet to blend your smoothie.

The result?

Inner tension, insane stretching, that creepy “something’s about to snap” feeling.


Classic mistake: copying Instagram

I’ve been there too: you see that yogi with 20,000 followers resting her shin perfectly parallel to the front of the mat.

“I can do that too,” I said, naively.

But forcing your shin into that position without modern dancer-level hip mobility means jamming your knee into an unnatural angle.

And your knee gets revenge.


How to avoid it?

  • Bend the front leg more: bring the foot closer to your groin
  • Use support under your glute (a folded blanket, yoga block…)
  • Keep the back leg straight, hips forward, not flopping sideways like a flamingo

It’s yoga, not a beach limbo contest.


Pain and pride: a terrible duo

In the gym we think: “No pain, no gain.”

In yoga?
“No brain, big pain.”

Here it’s not about powering through a contraction or muscle burn.

It’s about knowing the difference between healthy stretch and joint stress.

If you feel deep, compressed, or sharp pressure in the knee: STOP.

If you feel a mild pull in the glute or hip: GOOD.

Your body speaks. If you ignore it long enough, it starts yelling.


Mini anatomy lesson: what’s really happening

The knee is stuck between two big structures: the femur and tibia.

But during pigeon, all the pressure gets dumped there if the hip doesn’t rotate enough.

The tissues most at risk are:

  • The medial collateral ligament (which stabilizes the inside of the knee)
  • The medial meniscus
  • The joint capsule

In short: if the hip doesn’t give, the knee pays the price.

And in an ideal world, that would be avoidable—if you just listen.


Who pigeon pose is not for

I know, pigeon is everywhere.

Yoga classes, YouTube videos, motivational reels…
It almost feels like skipping it means missing out on magic.

But the truth is, this pose isn’t for everyone.

And experience level only matters up to a point.

Here’s who should approach with caution—or skip it altogether:

  • Anyone with a history of knee or cartilage injuries (like meniscus tears, ACL, MCL)
  • Anyone with extremely tight hips and no practice in external rotation
  • Anyone with chronic lower back pain
  • Anyone who can’t control core or glute activation
  • Anyone with significant imbalance between body sides

In all these cases, it’s not about giving up yoga—it’s about choosing the right variations.

Pigeon isn’t a personal worth test.

It’s a tool. And like all tools, it only works if it fits you at that moment.

If it doesn’t, there are plenty of alternatives that get the job done—without damage.


Smart alternatives to pigeon pose

Nowhere does it say you must do full pigeon to unlock your hips.

Here are some clever options that spare your knee while still opening up your hips:

  • Reclined pigeon (figure 4): lying down with one leg flexed over the other and back on the mat. Same stretch, zero knee stress.
  • 90-90 position: both front and back legs form 90° angles. More control, great for strengthening hips and glutes.
  • Seated pigeon on blocks: like pigeon, but elevated and with better alignment control.

Better to do a modified version well than an “Instagrammable” one that sends you to physical therapy.


And what if your knee just cracks but doesn’t hurt?

Let’s talk.

A light “click” or “snap” can be normal—especially if you have tension in the IT band or if your femur shifts slightly in the hip socket.

But…

  • If the sound comes with pain: stop.
  • If you feel instability or like something’s “slipping”: stop immediately.
  • If you have swelling or stiffness afterward: take note, modify, reassess.

Better to prevent than to ice your knee after every class.


Important note about warming up

Doing pigeon cold is like trying to bend a frozen straw—it won’t end well.

So:

  • Walk a bit first, mobilize your hips, do some dynamic lunges
  • Activate the glutes with controlled movements
  • Only then approach pigeon or a variation

Your body needs to feel ready.

Otherwise, it goes into defense mode.

And you end up battling your own fascia.


Smart strategies to protect your knees—even if you only practice 10 minutes a day

Knee protection isn’t just about adjusting a pose here and there.

It means prepping the ground, building stability, and understanding how muscle chains actually move through that poor joint wedged between hip and ankle.

Good news: you don’t need a gym or hours in front of a mirror.

Just a few well-done minutes.

Here’s what you can do to build a real foundation of protection—no Olympic skills needed:

  • Strengthen your glutes laterally
    The more your glute medius and minimus work, the less your knee has to deal with twisting forces.
    Think clam shells, banded abductions, lateral steps.
  • Do active hip mobility work
    Passive stretching helps to a point.
    But you also need to teach the hip to move with control in external and internal rotation.
    Try active 90/90s, bodyweight hip rotations, and brief isometrics.
  • Pre-activate before practice
    Don’t go in cold.
    Try a quick 2–3 minute circuit with:

    • Deep bodyweight squats
    • Leg swings
    • Hip bridges
  • Always track knee direction in every pose
    In yoga, we often “drop” into passive poses.
    But light muscle activation around the knee (without stiffness) makes a difference.
  • Avoid overly hard surfaces
    If your mat is thin or the floor is rigid, add a layer (extra mat, folded towel).
    Knees don’t like hard pressure under static load.


The ankle’s role: the detail no one talks about

You know which joint gets forgotten in pigeon?

The ankle.

If the front knee’s ankle is too relaxed or twisted oddly, the rotation isn’t absorbed by the foot or calf—and all the force shoots straight into the knee.

A floppy foot becomes an unstable lever that drives the joint above crazy.

Solution?

  • Keep the foot active
  • Press the outer edge lightly into the mat
  • Think of the foot as a mini hydraulic brake that protects your leg

An awake foot = a happy knee.


What it means if it only hurts on one side

Classic scenario: left side flows like butter, right side feels like someone’s yanking a ligament with a fish hook.

No, you’re not permanently crooked.

But there is a message.

Usually, one-sided pain in this pose reveals:

  • Limited hip rotation on one side
  • A lazy glute on one side (yep, it happens)
  • An old tension or micro-injury that hasn’t fully healed

Instead of forcing to match both sides, work patiently on the stiff side with breathing, focused attention, and maybe some isolated hip rotation drills.

Sometimes symmetry shows up… but not by magic.


What to do after pigeon to avoid tightness or soreness

You’ve done pigeon, you’ve gotten up… now what?

Rolling off the mat and heading into final rest isn’t enough.

Smart recovery after such an intense pose helps your body lock in the benefits and avoid stiffening right back up.

Try these smart moves right after:

  • A few bent-knee leg curls lying on your stomach, to get circulation back to the joint
  • A slow-paced walk, even just around the room, to release leftover tension
  • A soft dynamic stretch like floor cat-cow, to relax the lower back

This pigeon reset is like brushing your teeth after eating—optional, but you’ll feel way better.


When it’s time to see a professional (and it’s not just paranoia)

Yes, listening to your body and trying things out with care, blankets, and common sense is great.

But sometimes “discomfort” goes beyond normal stretch tension and becomes something you shouldn’t face in pajamas and hope.

Here are signs you shouldn’t ignore:

  • Knee pain that shows up during daily life—like climbing stairs or getting out of the car
  • Feeling of instability or collapse, like your leg can’t hold weight
  • Persistent or localized swelling inside the knee, even hours after practice
  • Mechanical noises paired with pain, like a “snap” followed by burning or stiffness
  • Joint locking sensation, like you can’t fully bend or straighten your knee

In those cases, a visit with a sports physical therapist, orthopedist, or physiatrist can make the difference between manageable inflammation… and a chronic injury.


Conclusion

Pigeon pose isn’t the enemy.

It’s just an advanced position that requires respect, awareness, and adjustments.

It’s not a contest of who can flatten themselves on the mat the most.

It’s a process to open hips, release tension, and move more freely.

If your knee sends you warning signals, don’t silence them with willpower.

Respond with awareness.

Modify.

Breathe.

Listen.

And remember: when in doubt, there’s always another road to the same benefit—without sacrificing your joint health.

Your body is your lifelong teammate, not a problem to crush through.

Recommended
Categories
YOGA & PILATES

Can too much yoga make your core weaker instead of stronger?

Sure, it almost sounds like blasphemy.

Yoga is synonymous with balance, awareness, stretching, inner peace…

And then comes this question that sounds like it came straight from a skeptical bodybuilder forum:
“But what if doing too much yoga actually weakens my core instead of strengthening it?”

Well, get ready.

Because the answer is neither yes nor no.

It’s: it depends on what you do, how you do it, and what else you’re forgetting to do.

blank

Yoga: friend or core saboteur?

Imagine doing yoga every single day.

You feel as flexible as a rubber band, breathe like a zen monk, and your body glides from one pose to another like you were born on the mat.

But then…

You try some ab wheel rollouts, or attempt to hold an L-sit on parallettes…

And BAM.

Your core deflates like a popped balloon.

You can’t hold the position.

Your sides are shaking.

Your lower back starts complaining.

And you wonder:
“How is this even possible? I do yoga every damn day!”

Here’s where the uncomfortable truth hits.

Stretching is not the same as training. Not always.

Most yoga poses have a specific purpose: creating space, length, release.

All wonderful concepts—if you’re trying to release built-up tension, improve posture, or stop walking around like a stiff broomstick.

But…

Stretching your abdominal muscles doesn’t mean strengthening them.

Try thinking of your core as a spring.

If you always pull it and never compress it, eventually it won’t snap back.

And that’s when your core loses its main purpose: to contain, stabilize, protect.

The real role of the core: way more than a six-pack

Your core isn’t just the summer abs you dream about.

It’s a cylinder connecting your upper and lower body.

It includes:

  • Deep abdominals (like the transverse abdominis)
  • Internal and external obliques
  • Paraspinals
  • Diaphragm
  • Pelvic floor

Its main task?

Stabilizing your spine while you move.

Not just in Warrior II.

But also when you lift a heavy bag.

When you sprint to catch the train.

When you jump or twist your torso quickly.

If your core is too “relaxed”, your body can’t react efficiently.

And that brings:

  • Chronic back pain
  • Hip injuries
  • Pelvic instability
  • Poor gym performance

Heads-up: some yoga habits can worsen postural patterns

Here’s another detail nobody talks about:

Some yoga teachers—overzealously—push for excessive posterior pelvic tilt (“tuck your tailbone!”, “flatten your back!”).

Over time, this can create imbalances in your postural muscles.

The pelvis gets locked in a position that shuts down the glutes, overloads the hip flexors, and makes your abs… lazy.

Literally.

Ever felt that instability in your lower back when trying a bridge or a jump?

It often starts there.

So is all yoga bad? Absolutely not. It depends on what kind you do.

Some styles, like power yoga, ashtanga, or even dynamic vinyasa, can really challenge your core.

Poses like:

Crow Pose (Bakasana)
Not just an Instagram “trick”.

It’s a position of strength and control.

  • ✔️ Hands firmly on the ground, fingers spread like claws
  • ✔️ Knees resting on your triceps, not directly on your elbows (or you’ll flip)
  • ✔️ Weight shifted forward, gaze ahead—not down
  • ✔️ Core active like an isometric crunch

💥 If your abs are working, you’re on the right track.
If you only feel your wrists… time to fix your form.

Hand Plank
Looks basic, but it’s not.

  • ✔️ Hands under shoulders, fingers grounded
  • ✔️ Glutes tight, core constantly engaged
  • ✔️ Back flat like a table—not saggy, not arched
  • ✔️ Push the ground away, activate the chest

🧠 Think of “pulling your pubic bone toward your ribs”—this truly activates the transverse.

Side Plank (Vasisthasana)
A lateral stability classic.

  • ✔️ Support yourself on one arm (wrist under shoulder)
  • ✔️ Legs straight, feet stacked (or front foot forward for more stability)
  • ✔️ Lift your hips until your body is aligned—don’t sag!
  • ✔️ Free arm raised or resting on your side

🔥 Want a real challenge? Lift the top leg too. Your abs and glutes will go wild.

Boat Pose (Navasana)
Looks easy—holding it well is brutal.

  • ✔️ Sit on your sit bones, legs lifted (bent or straight), torso leaning back
  • ✔️ Back straight, not rounded
  • ✔️ Arms extended forward, parallel to the floor
  • ✔️ Abs pulled in like you’re “sucking in” your belly button

❌ If you’re shaking like jelly and collapsing forward, you’re probably letting the hip flexors do all the work.
✅ Try to bring tension into your lower abs.

But here’s the thing: progressive overload is often missing

You don’t increase the load.

You don’t add mechanical tension.

You don’t go beyond your muscle limits.

So eventually, your body stops adapting.

A bit of science to clear things up

A 2016 study in the Journal of Strength and Conditioning Research compared the effectiveness of isometric exercises (like planks) and dynamic ones (like crunches, rollouts, and leg raises).

The result?

Dynamic exercises—creating movement and requiring control under load—produced better gains in strength and muscle activation.

Planks are great as a foundation.

But to build a truly strong and resilient core, you need more.

How to combine yoga and strength for a balanced core

Here’s where things get practical.

If you love yoga, you don’t need to quit.

But you do need to balance it with targeted core training.

For example:

👉 After a yoga session, spend 10–15 minutes doing exercises like:

  • Hanging leg raises
    Hang from a bar, lift straight legs to chest height (or higher).
    Slow, controlled movement.
    Avoid swinging.
    Focus on lower abs.
  • Cable chops
    Standing, hold a cable machine handle at shoulder height.
    Pull diagonally toward the opposite hip, rotating slightly.
    Your core works to resist rotation.
  • Ab wheel rollouts
    From your knees, slowly roll the wheel forward, keeping your body aligned.
    Push hard with your core to return.
    Back stays flat—no “banana shape”.
  • Farmer’s carry
    Grab two heavy dumbbells and walk briskly, keeping your core tight and torso upright.
    Zero wobbling.
    Your core stabilizes every step.

👉 Or, alternate yoga days with dynamic core training (weighted or calisthenic progressions).

This balance helps you achieve:
✅ Stability and flexibility
✅ Inner strength and good posture
✅ Visible, protected abs

Bonus section: how to tell if your core is too weak because of yoga (or something else)

Got any warning signs? Here are a few:

  • Back pain when standing for too long
  • Trouble stabilizing the pelvis during fast movements
  • Can’t do 10 good-form hanging leg raises
  • Don’t feel your abs during squats or deadlifts
  • Collapse in plank or side plank positions

If you relate to at least two of these, it’s time to dial in your core training.

Another helpful tip: breathing is part of your core

Many yoga practitioners breathe too softly.

Great for the mind.

Not always great for core activation.

Train with intra-abdominal breathing too:

  • Inhale and push the air downward
  • Activate the transverse abdominis
  • Learn to “pressurize” your core (like powerlifters do)

This type of breathing helps you:

  • Better stabilize your spine
  • Increase strength during exercises
  • Avoid pain and compensation

The benefits of yoga your core can’t ignore

Before sounding like the Grinch of yoga, let’s get something straight:

Yoga is good for you.

And your core—when it gets the right type of stimulus—loves it.

  • ✔️ Improves motor control: helps you feel every part of your trunk, even deep muscles you’d normally ignore
  • ✔️ Boosts posture awareness: after 45 minutes in balance-challenging poses, you quickly notice if your hips are off or your chest is caving in
  • ✔️ Supports active recovery: on days when you can’t or don’t want to train hard, yoga keeps your core “awake” without stressing it
  • ✔️ Enhances functional breathing: your diaphragm (a core muscle) works overtime during flowing sequences
  • ✔️ Reduces tightness in anterior and posterior chains: a locked-up core isn’t a strong one. Yoga helps unlock it

So no, it’s never the enemy.

It just needs to be framed correctly.

The issue only arises when it’s the only tool in your toolbox.

Doing yoga every day: yes or no? (Spoiler: it depends on how you do it)

It’s one of the most asked questions by people who fall in love with the mat:
“Can I do yoga every day?”

Honest answer: yes… but with a few precautions.

PROS:

  • You build consistency—which is gold for discipline
  • You maintain flexibility and mobility every single day
  • It’s a natural stress reliever and improves sleep
  • Makes your body more “livable”, especially if you sit all day

CONS (if poorly managed):

  • Risk of overdoing passive stretching (especially in abs and hip flexors)
  • You might accumulate strain in your wrists, shoulders, or lower back
  • Your body doesn’t get time to absorb the stimulus if every session is intense
  • You could fall into a repetitive-use pattern where your core adapts only to a few movements

👉 Solution?
Alternate dynamic yoga days with restorative or yin sessions.

And every now and then, skip yoga to lift something heavy or sprint bodyweight-style.

Your core needs to breathe, yes… but also to react.

Conclusion:

Yoga is a powerful art.

But like all arts, it must be practiced with awareness.

If you do it every day but never add progressive load, your core might become flexible… but also a bit floppy.

The secret is balance:
💥 Use yoga to improve your mobility and body control.
💪 Add focused core training to build stability, strength, and real endurance.
🔥 Breathe with awareness—but also with intent.

And above all, remember:

Your core isn’t just about looks.

It’s the center from which every effective movement begins.

Keep it awake.

Train it with variety.

And don’t let being “too zen” drain your power.

Yoga can be a superpower…

But even Superman deadlifts now and then. 💣

Namaste… and then abs on fire.

Recommended
Categories
YOGA & PILATES

Does doing yoga after leg day mess up muscle recovery or help it?

Let’s put it this way. You just finished leg day.

Your legs are wrecked.

Your quads feel like they’re going to explode, your hamstrings are screaming bloody revenge, and your glutes… don’t even register anymore.

You’re walking like someone swapped your knees for two rusty pipes.

Then someone (probably wearing a suspiciously serene yoga smile) suggests:
“Why not try a little yoga? It’ll help your recovery.”

Wait, what?!

Stretching? After squatting like you were lifting a burning car off a kitten?

I know what you’re thinking.
“You’re asking me to torture myself again—only this time with incense?”

Still, it’s a question worth exploring:

Does doing yoga after leg day actually help muscle recovery, or could it slow it down?

Let’s break it down.


How many types of yoga are there? And which ones are good after leg day?

If you’re new to the yoga world, just know—it’s not one-size-fits-all.

There’s no such thing as the yoga, like there’s only one universal class.

It’s kind of like saying “I play sports.” Cool. But what kind? Rugby or lawn bowling?

Here’s a quick cheat sheet of the most common types of yoga, so you know what to pick post-leg day (and what to avoid like the plague):

🟢 Yin Yoga
Perfect after a workout.
Slow movements, long-held poses, all on the floor.
Helps deeply relax the muscles and open up your joints.
Zero effort, max release. If you’ve got DOMS, this is your best friend.

🟢 Restorative Yoga
Even more relaxing than yin.
You lie down, get cozy, use pillows, and just breathe.
It’s like a meditation session with physical side effects.
Ideal if you’re wiped out and just want to help your body recover.

🟡 Hatha Yoga
Basic, slow, and accessible. Can be great—but depends on the instructor.
Some make it gentle, others turn it into a sneaky sweat-fest.
Ask what the class is like. If it’s chill, you’re good.

🟡 Vinyasa Yoga
Dynamic flow, smooth movements synced with breath.
Great for mobilizing, but not ideal right after a heavy leg day if you’re sore.
If you’re feeling fresh and just want to loosen up, it works.

🔴 Power Yoga / Hot Yoga
No. No. And still no.
Fast-paced, intense, physically demanding.
It’ll finish what leg day started—and not in a good way.
Skip it for at least 48 hours.

🟡 Ashtanga Yoga
Fixed series, fast pace, lots of strength and mobility focus.
Very technical and demanding.
Not meant for recovery—it’s a full workout.
Skip it if your legs are toast.

In short?
If your body needs recovery: 🎯 Yin or Restorative all the way.

If you’re feeling a bit better: 🤝 Light Hatha or soft Vinyasa—but take it easy.

If you’re tempted by hot or power yoga: 🚫 Stop. Hydrate. Reconsider.


The myth: “Stretching kills your gains”

I swear, I hear this in the gym at least once a month.

“If you stretch too much after training, you lose your gains. The muscle relaxes, deflates, and boom—bye-bye growth.”

It’s like a fitness horror story: The Cursed Stretch of the Regretful Calisthenics Bro.

But reality is way less dramatic.

That idea came from a few (kinda old) studies showing that static stretching before lifting could temporarily reduce explosive strength.

But we’re not talking about yoga before squats.
We’re talking about after. Or even the next day.

And that changes everything.


What actually happens to your muscles after a real leg day

When you squat, lunge, Romanian deadlift or leg press, you’re creating micro-tears in your muscles.

And that’s exactly how growth happens.

Your body detects the “damage” and kicks off a repair process:

  • Controlled acute inflammation
  • Flood of nutrients and growth factors
  • Protein synthesis to rebuild stronger than before

But along with all that… comes pain.

  • DOMS (Delayed Onset Muscle Soreness)
  • Stiffness that makes you feel like a zombie
  • The infamous “I can’t sit down without cursing the universe”

And that’s exactly where yoga comes in.


The real benefits of yoga after leg day (not just “you’ll feel better”)

Let’s make a key distinction.

Doing yoga right after your last squat set—when you’re still shaking, drenched, and your heart’s racing—is not ideal.

A tough yoga session within 30 minutes of lifting could actually mess with the acute inflammation process that kicks off recovery.

And while that might sound weird, that inflammation is crucial—it’s the first stage of muscle adaptation and growth.

But if you do yoga a few hours later, or even better, the next morning, after your body has already started repairing…

That’s when things change.

You enter what we could call the magic zone of active recovery.

That window where yoga no longer interferes—
but actually supports the process.

Here’s what really happens when you do yoga at that sweet recovery moment:

Promotes active recovery without overload
Gentle yoga gets you moving without stressing already damaged muscle fibers.
Result? Faster recovery without interrupting the good inflammation.

Boosts peripheral circulation
Gentle poses, fluid motion, and deep breathing help blood flow to sore muscles.
More blood = more oxygen + nutrients = faster repair.

Improves lymphatic drainage
The lymph system doesn’t move itself—it needs motion and breath.
Yoga gets it going, flushing out waste, extra fluid, and local inflammation.
It’s why you feel “less puffy” after a slow session.

Reduces joint stiffness
After squats, lunges, press, or pistols, your hips and knees feel like rusty hinges.
Yoga gently reopens those joints.
Flexibility returns—and with it, your freedom of movement.

Helps fix imbalances and compensation patterns
We tend to overload one side, or let the quads do all the work while hamstrings nap.
Yoga helps you feel those imbalances and start correcting them.
Less compensation = fewer long-term injuries.

Regulates your nervous system (and lowers cortisol)
Leg day leaves your nervous system hyped up.
Yoga activates the parasympathetic side (rest and repair mode), lowers cortisol, and gets your body into true regeneration.
Translation: better sleep, faster recovery, deeper healing.

Makes DOMS more manageable
It won’t erase the pain—it’s not magic—but it makes it less paralyzing.
Those small, mindful movements loosen the tissue without harsh stretching.
You move better and feel less “concrete quad syndrome.”

Improves body awareness
You don’t just feel “where it hurts”—you start noticing how you move.
Yoga forces you to pay attention to your feet, pelvis, tension areas.
All of which carry over into better future workouts.

Gives you back mental control over pain and fatigue
When you’re sore, your brain can feel just as locked up.
Slow breathing, calm rhythm, and grounded movement reset your mood.
And that alone helps you recover faster.


So what kind of yoga are we talking about here?

Let’s be clear.

Doing yoga doesn’t mean sweating through a 90-minute power vinyasa session with handstands and Mortal Kombat-level instructors.

Not the time.

After leg day, you want gentle, slow, mindful yoga.

Like:

  • Yin yoga: long-held, supported poses that melt deep tension
  • Restorative yoga: blankets, cushions, long breaths (if you fall asleep, that’s fine)
  • Breath-focused flow: soft movements guided by breath—zero pushing

The goal is not to “train again.”

It’s to “create space” in your body and your mind.

It’s like saying:
“Alright muscles, you worked hard. Now I’m giving you permission to let go.”


But what if I’m already destroyed from the soreness? Should I skip it?

I get it.

When leg pain is at “hold the railing to go downstairs” level, even sitting cross-legged sounds like a nightmare.

But here’s the truth:

Gentle yoga can be the key when you’re at your most sore.

Not to stretch everything hard, but just to get moving again.

Even 10 minutes on the mat:

  • Deep breathing
  • Supine twist with bent knees
  • Happy baby (if your hamstrings don’t revolt)
  • Some pelvic tilts or hip rolls on the floor

It’s incredible how sometimes the body softens up within minutes.

It’s not just the muscles—it’s your brain saying,
“Hey, we’re safe. You can relax now.”


What does the science say? Are there studies?

Oh yes.

A 2018 study published in the Journal of Strength and Conditioning Research showed that active recovery (like light yoga or low-intensity cycling) was more effective than total rest at reducing DOMS and improving post-workout mobility.

Other studies confirm that light movement increases local blood flow, delivering more oxygen and nutrients to healing tissue.

And less stiffness = faster return to peak performance.

So no, it’s not just some zen placebo.
It’s applied physiology.


My mistake (maybe you’ve made it too)

I’ll be honest.

For years I avoided yoga like someone avoids dinner invites from crypto bros.

“Yoga’s for people who stretch in Instagram reels.”
“Real lifters don’t bend.”

Meanwhile, every leg day wrecked me for three straight days.
Stiff. Sore. Miserable.

Then one night, I tried a yin yoga class—right after a PR squat session.

I thought I’d snap in half.
But instead… I felt released.

It was brutal at first, yeah.
But by the end, I felt grounded, soft, aligned.

The next day? No miracles, but I could sit without cursing.

Since then, yoga after leg day became a ritual.
Not always—but when I do it, I thank myself every time.


When to skip it: signs your body is saying “not today”

Okay yes, yoga can be a secret weapon…

But not always.

Some days, even attempting a Downward Dog can do more harm than good.

Watch for these signs:

  • Sharp, localized pain—not the usual general soreness
  • Extreme joint stiffness that makes you fear injury with basic movement
  • Mental exhaustion so deep that even rolling out the mat drains you

In those cases, go for a walk, take a hot shower, or use a gentle foam roller.

Yoga isn’t supposed to be a new test to pass.
It’s there to support you—not to break you again.


What happens if you do yoga consistently after every leg day

Let’s fast forward a bit.

Imagine doing 15–20 minutes of gentle yoga after every leg day for two to three months.

What really changes?

Here’s what I’ve experienced firsthand:

  • You recover faster, and can train legs more often without limping for a week
  • Your squat mobility improves—especially hips and ankles
  • Muscle imbalances start to smooth out, reducing knee and lower back issues
  • You fear “the day after” less, so you lift with less tension and more confidence
  • And surprise: your neuromuscular control improves too

You know that feeling of “being able to activate the right muscles better during training”?

That often comes from a body that’s more open, more mobile, and more in tune with itself.

And yoga does exactly that.


Yoga poses specifically helpful for people who train

If you’re one of those who just wants “what works,” here’s a practical mini-menu of yoga poses that are perfect after leg day.

You just need a mat, a block (or a thick book), and maybe a throw pillow.
No incense. No chanting. Just positions that get the job done.

🧘‍♂️ Supta Baddha Konasana (Reclining Butterfly Pose)
What it does: Opens inner thighs and hips without effort
How to do it:

  • Lie on your back, knees bent
  • Bring the soles of your feet together, let knees fall open
  • Use pillows or blocks under each knee if there’s too much tension
  • Arms at your sides or one hand on your chest, one on your belly
    Pro tip: Close your eyes, breathe through your nose, and let your thighs relax naturally

🧘‍♀️ Anjaneyasana (Low Lunge)
What it does: Opens hip flexors and psoas, often tight from squats and deadlifts
How to do it:

  • Start kneeling
  • Step one foot forward into a lunge, front knee above the ankle
  • Back knee rests on the floor, top of foot down
  • Keep your torso upright—don’t shove your hips too far forward
  • Arms can go overhead or stay on hips
    Pro tip: Pad the back knee with a folded towel if it’s uncomfortable

🧍‍♂️ Uttanasana (Standing Forward Fold)
What it does: Stretches the entire posterior chain—hamstrings, calves, and back
How to do it:

  • Stand with feet hip-width apart
  • Exhale and fold forward from the hips
  • Slightly bend the knees if needed
  • Let your arms hang, or grab opposite elbows to release your neck
    Pro tip: You don’t need to touch the floor—just focus on relaxing, not forcing

🧘‍♂️ Supine Figure 4 Stretch (on your back)
What it does: Targets glutes, piriformis, and tight hips
How to do it:

  • Lie on your back, knees bent
  • Cross your right ankle over your left thigh (like a “4”)
  • Reach behind your left thigh and gently pull it toward you
  • Relax your shoulders, keep your head down
    Pro tip: If your neck tightens, place a small cushion under your head. Don’t press on your knee—let gravity do the work.

🧘‍♀️ Viparita Karani (Legs Up the Wall)
What it does: Boosts drainage, relaxes swollen calves and feet, soothes the nervous system
How to do it:

  • Sit next to a wall
  • Swing your legs up so they rest vertically
  • Hips close to but not jammed against the wall
  • Arms open, palms up, eyes closed
    Pro tip: Place a folded blanket under your hips to elevate them slightly and increase circulation

How to use them:
Pick 3 or 4 based on how you feel.
Hold each pose for at least 3–5 slow breaths—ideally 1–2 minutes.

The secret is: never force anything.

If you feel like yawning, or your heart rate slows… you’re doing it right.

You don’t need to “do yoga well.”
You just need to do it enough for your body to say: “Thanks.” 💪🧘‍♂️


And what if your leg training is calisthenics-based? Same deal?

Great question.

If you’re doing pistol squats, shrimp squats, isometrics, box jumps, or bodyweight deadlift progressions…
your leg day isn’t any “easier.”

In fact, you’re often working with intense eccentric overload—
the kind of tension that produces brutal DOMS.

Add full range of motion and instability into the mix…
and you’ve got the perfect storm for next-day soreness.

In these cases, yoga is even more strategic.

It helps decompress overworked joints (especially hips, knees, and ankles),
and resets your postural control.

This isn’t about “weights vs. bodyweight.”
It’s about this:
If you train your legs hard, yoga afterward still helps.


Conclusion: yes or no to yoga after leg day?

Quick answer: Yes, but do it right.

If you go slow and soft, a few hours after training or the next day:
✅ It supports recovery
✅ Reduces stiffness
✅ Reactivates without overloading
✅ Calms your nervous system
✅ Boosts long-term mobility

If you jump into a hot, intense class straight off the leg press:
❌ You might disrupt the initial inflammatory phase (which you need to grow)
❌ You might over-stress already damaged muscles

Choose the right kind of yoga at the right time—
and it becomes your best ally on the road to stronger legs and faster recovery. 💥🧘‍♀️

Recommended
Categories
YOGA & PILATES

Can Pilates actually fix uneven abs or is that just a myth?

Ever Looked in the Mirror and Thought, “Wait… Why Are My Abs Crooked?”

You know that moment when you look in the mirror after months (or even years) of crunches, planks, and cardio, and suddenly something looks… off?

Literally.

Your six-pack looks like it came from a half-finished jigsaw puzzle.

One side’s more defined, the other kind of lazy.

One row is straight, the other tilted.

And that’s when the post-workout existential crisis hits:
“Can I fix uneven abs?”
And maybe even…
“Can Pilates actually help me make them symmetrical?”

Spoiler: the answer is “kinda.”

But we’ll get there—step by step, with plenty of useful info.


What Are “Uneven Abs” Really?

Let’s start with a key truth.

Most people naturally have asymmetrical abs.

It’s not your fault.
It’s not your routine’s fault.
It’s not your diet’s fault.

Blame—or thank—your genetics.

The six-pack muscle, aka the rectus abdominis, has little “tendon strips” running through it that give it that brick-wall look.

But the number, placement, and tilt of those segments… varies wildly from person to person.

That’s why:

  • Some people have six perfectly aligned blocks
  • Others have eight
  • Some only have four
  • And many… have misaligned ones, with one side higher, lower, or puffier than the other

It’s not a disease.
It’s not a flaw.
It’s completely normal.

But sometimes, the asymmetry isn’t just visual.

It can be caused—or worsened—by:

  • Muscle imbalance between the right and left side
  • Postural dominance (like always leaning on one hip)
  • Uneven training (always rotating in one direction, or unilateral moves)
  • Old injuries, even in the back or hips
  • Weakness in the deep abdominal muscles

And in those cases… Pilates can make a real difference.


Why Choose Pilates and Not Regular Ab Workouts?

Unlike typical gym crunches, Pilates isn’t about “burning” your abs.

Its goal is to reactivate and rebalance your entire core—especially the muscles you never feel during sit-ups.

We’re talking about:

  • Transverse abdominis (your natural corset)
  • Internal and external obliques
  • Multifidus and deep spinal stabilizers
  • Diaphragm and pelvic floor (yep, they matter too)

What Pilates does—better than most methods—is restore the connection between your brain and your deep core muscles.

When your body “prefers” one side, Pilates notices.

It slows you down.
Forces you to control every move.
Makes you move slowly, precisely, often without weights… but with insane neuromuscular intensity.

It’s like stylish physical therapy for your core.


What Happens When You Train Both Sides Equally?

It sounds obvious, but… a lot of us don’t even realize we have a dominant side.

And that side ends up doing almost all the work in daily movements:

  • Climbing stairs
  • Carrying your gym bag
  • Getting off the couch
  • Holding your phone on the same side every time

Over time, this creates a slight twist or tilt in your posture.

The result?

One side of your abs gets stronger, more toned, more active.

The other side… adapts by falling behind.

With asymmetrical and targeted exercises (like side kicks, mermaid stretches, and controlled twists), Pilates wakes up the sleepy side.

That awakening can lead to:

  • More visual balance
  • More symmetrical movement patterns
  • Less tension in the lower back
  • Better core activation during squats and pull-ups

It’s not magic.

It’s neuromuscular consistency.

And Pilates is the master of that.


What Pilates Can’t Do—Even If You Do It Daily

Let’s be clear:

If your abdominal asymmetry is due to genetic structural factors, Pilates won’t change it.

It won’t move your tendons.
It won’t reshape your rib cage.
And it definitely won’t burn localized belly fat (no exercise can).

So if your only goal is a perfectly sculpted visual result, you might be disappointed.

But if you want to:

  • Prevent injuries
  • Move better during workouts
  • Eliminate chronic back tension
  • Strengthen your entire core—not just the “six-pack”

Then Pilates is one of the smartest, most effective tools you can add to your routine.


Specific Pilates Exercises That Actually Help With Asymmetry

Here’s a mini list of moves you can start doing right away:

  • Pelvic Curl – helps coordinate both sides of the posterior chain
  • Single Leg Stretch – reveals differences between dominant and non-dominant sides
  • Side Kick Series – targets glutes, obliques, and core unilaterally
  • Spine Twist – improves rotational control
  • Mermaid – opens up the sides and retrains lateral posture

The key?

Don’t rush.
Don’t force symmetry.

Observe your body.
Wake up the lazy side.
And repeat until the sense of balance comes naturally.


How to Know If the Asymmetry Is Just Visual or Actually Functional

Not all “asymmetries” are a problem.

To tell the difference between a simple visual quirk and a real functional imbalance, look out for:

  • One side working much harder during exercises
  • Unintentional tilting or rotating during planks, squats, or twists
  • Recurring pain on one side (like in your lower back or flank)
  • Noticeable imbalance in posture while standing or walking

In these cases, it’s worth training intentionally to restore neuromuscular balance.

But if it’s just a visual difference that doesn’t affect your movement… it’s probably just genetics, and doesn’t need to be “fixed”—just accepted.


Pilates vs. Other Methods for Core Balance: What’s the Difference?

People often wonder whether Pilates is worth choosing over other methods.

Here’s a quick comparison:

  • Pilates: targets motor control, breathing, deep core activation, and small-movement symmetry
  • Yoga: improves flexibility and stability but focuses less on core control during dynamic moves
  • Functional training: great for full-core strengthening, but may reinforce imbalances if done without awareness
  • Physical therapy: fantastic for injury recovery, but less ideal if you’re just looking to improve general symmetry while healthy

The true strength of Pilates is in its precision and attention to detail—things that other methods often skip.


How Long Does It Take to See Results?

Popular question.
Honest answer: it depends.

If your asymmetry is caused by poor muscle activation or an unbalanced posture, you might start to feel a difference after just 3–4 weeks of consistent practice (2–3 times per week).

Not necessarily in the visible shape of your abs… but in how balanced your movements feel.

Visible changes may take longer—or not happen at all—if the cause is genetic.

But the real win is feeling both sides of your body finally working together.


What to Avoid If You Have Asymmetrical Abs (So You Don’t Make It Worse)

Some habits in the gym or at home can actually deepen your imbalance:

  • Always twisting to the same side (e.g., Russian twists only toward your dominant side)
  • Using unilateral weights without paying attention to posture (e.g., kettlebells or dumbbells without control)
  • Only doing front-facing six-pack exercises and skipping obliques and transverse abdominis
  • Training abs with fast, sloppy movements
  • Ignoring hip and spine mobility

Sometimes the muscle isn’t actually asymmetrical—it’s just how you’re using it that is.

Fixing these habits is the first step toward more harmony.


Conclusion

Pilates won’t give you a Greek-statue six-pack if your anatomy doesn’t allow for it.

But it will help you understand how you’re using your body.

And more importantly—it’ll teach you how to use it better.

You’ll feel more centered.
More stable.
Stronger—even if you don’t look like a fitness magazine cover.

Stop chasing perfect lines.

Focus on functionality, freedom of movement, and energy.

And somewhere along that path, you might just look in the mirror one day and say:

“Hey… I’m not actually that crooked.”

And it’ll be your core—not just your abs—talking back.

Recommended
Categories
Advanced Workouts BODYWEIGHT EXERCISES YOGA & PILATES

Why Do My Wrists Hurt in Downward Dog but Feel Fine During Push-Ups?


There’s a mystery that has haunted yogis and gym-goers for generations.

A question that seems simple, yet causes deep discomfort during practice:

Why do my wrists hurt in downward dog, but not during push-ups?

I admit it — I felt dumb about it too, the first few times.

I do pike push-ups, planche leans, close-grip push-ups… no problem at all.

Then I get into what they call an “active resting” yoga pose… and my wrists feel like they’re baking in the oven.

How to actually do Downward Dog properly (without wrecking your wrists)

The correct form isn’t an Instagram-perfect photo, but a functional alignment that spreads the load evenly.

Here’s what really matters:

  • Hands slightly wider than shoulder-width, fingers spread wide, weight distributed across the whole hand (especially thumb and index)
  • Legs engaged, even if the knees stay bent: the goal isn’t to touch your heels to the floor, but to push your hips up and back
  • Arms extended but not locked: keep a micro-bend in your elbows and push away from the ground to engage your shoulders
  • Neck relaxed, in line with your spine, without tucking or craning forward
  • Core slightly engaged, to avoid dumping all the load into the lower back

Think of it like forming an “elastic inverted V,” not a rigid one — and focus more on lengthening your spine than dropping your heels.

Done this way, downward dog stops being your enemy…
…and starts feeling like a truly restorative position.

It’s all about levers and angles (and load distribution too)

During push-ups, the position is clear:

  • Wrists under the shoulders
  • Arms vertical
  • Load shared between hands, shoulders, core, and legs

The wrist angle is around 90 degrees, but the whole body helps keep alignment.

Plus, you’re moving.
You lower and lift, use your chest, triceps, and front delts.

The wrists are working, sure — but they’re not alone in the fight.

Now… change the scene.

Downward dog.

Suddenly the arms are no longer vertical, but angled forward.

Your hips are pushed up, weight shifts toward your hands, and the wrist angle goes past 90 degrees.

The leverage shifts.

And gravity hits differently.

The load focuses on hyperextended wrists, without the dynamic support you get during push-ups.

The paradox of the static pose: you seem still, but you’re fighting

Push-ups involve motion.

You’ve got a cycle of contraction and release.

But in downward dog, you’re just… there.

Breathing.

Stretching.

Meanwhile, the wrist is pinned into an awkward, extended position, under sustained load.

It’s like holding a 20-pound dumbbell with your arm straight for 30 seconds: no movement needed to feel strain or pain.

Here’s where the sneaky part comes in: passive joint compression.

Wrist flexion under load, held too long without active muscular support, stresses tendons and ligaments — especially the flexor retinaculum and the carpal tunnel.

The role of the fingers: when you stop “gripping” the ground

Another mistake I made for years:

In push-ups, you subconsciously press your fingers into the floor.

You create active tension and micro-grip.

In downward dog, though, they teach you to “spread” your hands flat.

Palm fully open.

Fingers stretched.

But that way, you lose one of the wrist’s main protective mechanisms: active hand muscle contraction.

Without that micro-grip, all the load dumps straight into the joint.

And if you’re hypermobile, or have looser ligaments than average, the pain gets even worse.

Hyperextended elbows: another hidden culprit

When you relax into the pose and let go, you tend to lock your elbows.

They look straight — but they’re actually hyperextended.

This causes the load to bypass even distribution through the arms… and land more directly on the wrists.

Push-ups, on the other hand, often include a natural micro-bend that protects the joint.

What if this isn’t a yoga problem, but a strength problem?

Let me be blunt:

You might have muscle imbalances in your wrist extensors.

The ones nobody trains.

You do curls, triceps, bench… but when’s the last time you trained your wrist extensors specifically?

Exactly.

So in push-ups, you get by using strong muscles like pecs and delts…

…but in downward dog, you’re exposed.

That pose is challenging because it acts like a functional test: you can’t cheat.

Okay, now what? How do I stop hating downward dog forever?

Here’s what you can do (spoiler: it’s NOT quitting yoga).

📌 1. Prep your wrists like you would shoulders or knees

  • Wrist circles
  • Dynamic stretching for flexors and extensors
  • Gradual loading in quadruped position

📌 2. Change how you “use” your hands

  • Actively press all fingers into the mat
  • Slightly push with your fingertips
  • Shift weight between thumb and index

📌 3. Adapt the pose to your actual mobility

  • Slightly bending your knees helps shift weight from wrists to feet
  • If you don’t have hamstring or ankle flexibility yet, don’t force the “yoga poster” form

📌 4. Use smart props

  • Yoga blocks under hands
  • Roll the front edge of your mat to lift the palms and reduce wrist extension

📌 5. Strengthen neglected muscles

  • Reverse wrist curls
  • Farmer carries with slightly extended wrists
  • Pronation/supination with light dumbbells

📌 6. Maintain micro-bend in your elbows

  • Don’t lock your arms
  • Engage your triceps
  • Push away from the floor like doing a vertical push-up

Don’t ignore more serious red flags

If the pain is sharp, localized, or comes with numb fingers, you could be dealing with:

  • Median nerve irritation
  • Flexor or extensor tendinopathy
  • Early carpal tunnel syndrome

In these cases, it’s best to see a physical therapist — especially if the discomfort continues even after adjusting your form.

Other helpful exercises to add to your routine

💪 Wall walks in quadruped
From all-fours, slightly push your hands forward and then return.
Helps your wrists get used to load in a controlled way.

💪 Incline planks (on elevated surfaces)
Reduces wrist pressure and builds isometric endurance gradually.

💪 Push-ups on handles
Trains the movement while keeping the wrist neutral.
Great for those who feel discomfort during the lowering phase.

💪 Wrist push-ups on knuckles
Only if you already have good mobility and control.

Yoga and weightlifting aren’t enemies — they’re mirrors

Downward dog isn’t a “mistake” for lifters.

It’s a mirror reflecting your joint weaknesses.

It reveals things the gym sometimes hides beneath muscle.

Don’t avoid it.

Use it to discover where you can truly grow.

And if needed, modify it.

Customize it.

Every pose can adapt to you — you don’t need to force yourself into some ideal shape.

When Downward Dog is harder than it looks

Even though it’s often called a “rest pose,” downward dog isn’t restful for everyone.

It’s more challenging than it seems — especially when:

  • You have tight posterior chains, and your body shifts weight forward, overloading the wrists
  • You lack scapular control, and your shoulders collapse inward instead of pushing outward
  • You’re tired, and you lose the active structure of the pose, dumping everything into your joints
  • You’re strong but not mobile (or vice versa), making it hard to balance tension and openness

It’s a “simple” pose that actually demands more awareness than most people think.

It’s not just about holding it — you need to build it actively, breath after breath.

In conclusion: pain is a signal, not a sentence

It’s not that your body isn’t made for yoga.

It’s just trying to tell you something.

And if you listen, you can become stronger, more mobile, and more aware.

Wrists are small, but incredibly important.

Treating them with respect can be the difference between effective training and constant frustration.

Recommended
Categories
YOGA & PILATES

Is it safe to mix yoga and bodybuilding at 50?

I won’t be turning 50 anytime soon, but I have discovered a fantastic combination of yoga and bodybuilding that really works.

I was looking for a routine that combined strength and flexibility, and this combination has taken my well-being to the next level.

I believe that physical exercise should not be boring at all: every day is an opportunity to learn something new, to grow, and to find that spark of inspiration.


The Power of Yoga

Active-woman-practicing-yoga-at-home

Yoga is much more than just a series of poses.

For me, it represents a moment of pause, a chance to breathe and regain focus.

Yoga sessions have taught me to respect the rhythm of my body and to value every small progress.

Through yoga, I have learned how to manage everyday stress.

The breathing techniques help me recover and keep my mind clear even after the most intense days.

Every session is a ritual that reminds me how important it is to listen to my body.

The connection between mind and body is fundamental.

Yoga has taught me to connect with every muscle and to understand the signals my body sends me.

This approach has made my training much more mindful and personalized.

Beyond yoga, I passionately dedicate myself to weightlifting, calisthenics, and some gymnastics exercises.

These disciplines allow me to build strength, power, and coordination, but they also demand a great physical commitment.

Often, intense workouts can leave a feeling of stiffness and fatigue.

And this is where yoga comes into play, offering me the benefit of active recovery and increased flexibility.

With yoga, I manage to release the tension accumulated during weightlifting and calisthenics sessions.

The stretching and breathing techniques help me let go of stress, improve joint mobility, and prevent injuries.

This allows me to train more effectively and safely, maintaining a balance between strength and flexibility.

Perhaps some of you are wondering:

“Aren’t you already flexible enough from doing calisthenics?”

It is true that calisthenics has taught me to use my body weight and improve coordination, giving me a good base of agility.

However, yoga takes me further by offering a deep and targeted stretch that calisthenics alone cannot guarantee.

Yoga enables me to achieve a flexibility that translates into smoother movements, better recovery management, and a significant reduction in the risk of injuries.

In essence, combining the two disciplines allows me to be not only strong but also truly supple and ready to face every challenge with a mind and body in perfect harmony.


What Effect Does Yoga Have on Body and Mind?

Yoga-improves-the-mental-health

Imagine endowing your spirit with a transparent lens that filters out everything unnecessary, allowing you to live in the here and now with clarity.

Yoga practice acts as a complete renewal, purifying not only the body but also the mind and soul.

This discipline teaches you to observe reality without distortions, to let go of illusions, and to deeply connect with yourself.

On its path, yoga guides you to overcome those inner limits we call “klesha” – the roots of our suffering.

These “poisons”, such as ignorance, ego, attachment to material things, aversion, and the fear of death, are gradually dissolved, leaving you free to express your true potential.

It is a journey that allows you to live with greater awareness and serenity, helping you maintain a balance between mind, body, and spirit.

With yoga, you learn to let go of judgment, to remain present, and to see things as they truly are, an approach that transforms every aspect of your life.


The Strength of Bodybuilding

Muscular-man-lifting-weights

Bodybuilding is the most dynamic part of my workout.

I enjoy lifting weights and feeling the challenge in every repetition, because every exercise is a lesson in consistency and perseverance.

Each repetition strengthens the muscles while cultivating a determined mindset.

Weightlifting teaches you to overcome your limits, to face fatigue, and to transform it into positive energy.

The body becomes stronger and more defined, while the mind learns the value of discipline and resilience.

In bodybuilding, we cannot overlook the famous big lifts – those movements that are the engine of every workout: from the bench press to the squat, from the deadlift to the overhead press.

These exercises not only sculpt the body but also shape the mind.

Bench Press

The bench press is a must for developing the chest, shoulders, and triceps.

Usually, I perform 3-4 sets of 8-12 repetitions.

The trick is to keep your back firmly against the bench and your feet planted on the ground.

A slow, controlled descent followed by an explosive push helps me maximize the load safely.

Squat

The squat is the king of leg exercises.

Perform 4 sets of 10 repetitions.

This exercise is fantastic for developing the quadriceps, glutes, and core.

Every squat reminds me of the importance of good mobility and stability.

Deadlift

The deadlift is a challenge for the posterior chain.

It is generally recommended to perform 3 sets of 6-8 repetitions.

Keeping a neutral spine is essential to avoid injuries.

This exercise strengthens the glutes, lower back, and hamstrings, giving me an incredible sense of power.

Overhead Press

The overhead press is fundamental for developing the shoulders and improving core stability.

Perform 3 sets of 8-10 repetitions.

The control of the movement, from the descent to the final push, is what makes this exercise effective.

It is excellent for strengthening posture and the ability to handle complex loads.

Pull-Up/Chin-Up

I cannot forget pull-ups, which are essential for the back and arms.

A routine of 3 sets of 6–10 repetitions is recommended

At first, you can use a resistance band to ease the movement until you build enough strength to do them cleanly.

Pull-ups are an indicator of functional strength and improve coordination.


Integrating Yoga and Bodybuilding: A Perfect Synergy

Integrating yoga and bodybuilding creates a perfect synergy that brings benefits on all levels.

The real magic happens when you combine these two disciplines, harnessing the strength and power of weightlifting along with the flexibility and recovery that yoga offers.

For example, after an intense bodybuilding session, a short yoga sequence – such as Sun Salutation or Cobra Pose – helps release tension, improve circulation, and speed up muscle recovery.

It reduces the risk of injury and prepares the body to give its best in the next workout.

The benefits are numerous:

  • Improved Mobility and Injury Prevention:
    Yoga poses increase muscle elasticity, improve joint mobility, and optimize alignment.
    All these elements are fundamental for performing bodybuilding exercises like squats and deadlifts with precision.
    An optimal management of body movements allows you to defend yourself effectively during intense workouts, reducing the risk of injuries.
  • Active Recovery:
    Integrating yoga on rest days allows for active muscle recovery, reducing lactic acid buildup and promoting tension release.
  • Breath Control:
    The breathing techniques learned in yoga translate into greater core stability during training.
    Proper breathing helps you manage heavy loads and maintain concentration.
  • Body Awareness:
    Yoga teaches you to recognize your body’s signals, preventing imbalances and injuries.
    This awareness improves exercise execution and makes each session safer and more effective.
  • Stress Reduction and Greater Mental Clarity:
    Regular yoga practice fosters a calm and clear mind.
    A relaxed mind enhances concentration, motivation, and effectiveness during training.
  • Increased Blood Circulation:
    Dynamic stretching and breathing techniques improve circulation, facilitating the delivery of oxygen and nutrients to muscles, which is essential for growth and recovery.
  • Enhanced Resilience and Load Management:
    Alternating weightlifting days with yoga sessions helps build a more resilient body, capable of handling intense workouts over time.


How to Integrate Yoga and Bodybuilding

Believe it or not, this fusion is perfect even for those who are new to it.

Imagine: some days you work hard at the gym, lifting weights like there’s no tomorrow and building a solid, proud muscular foundation.

On other days, instead, you roll out your mat, get comfortable, and let yoga do its thing, helping you stretch, relax, and recharge both body and mind.

If you’re a beginner, start with light weights and simple poses, gradually increasing the intensity.

Integrating yoga into bodybuilding is a strategic move because it’s all about balancing strength and flexibility to get the best out of both disciplines.

Here are some practical tips for doing it effectively:

Before the Workout

Warm up for 10–15 minutes.

Alternate a few minutes of light cardio—such as a short run or a treadmill walk—with a yoga sequence like the Sun Salutation.

This routine wakes up your muscles, improves mobility, and prepares your body and mind, reducing the risk of injury.

You can also repeat it at the end of your workout.

Repeating the Sun Salutation helps with recovery, boosts circulation, and stretches your muscles.

After the Workout

Finish your bodybuilding session with 10–15 minutes of yoga focused on recovery. (Don’t worry, we’ll get to that in a bit)

Dedicate this time to static stretching and breathing techniques, which are useful for releasing accumulated tension and promoting muscle recovery, preparing you for your next workout.

Alternate Days

Another option is to dedicate entire days to yoga, separating them from your weightlifting sessions.

For example, you could work out in the gym on Monday, Wednesday, and Friday, reserving Tuesday and Thursday—and maybe even Saturday if you still have energy—for 30–45 minute yoga sessions.

This approach helps enhance flexibility, improve mobility, and reduce the stress accumulated during intense workouts.


Example: 3 Days Bodybuilding & 3 Days Yoga Weekly Split

Here is the perfect combination.

A weekly split program alternating 3 intense days of bodybuilding with 3 days of yoga to achieve strength, flexibility, and optimal recovery.

This combination allows you to build muscle mass in the gym while yoga helps keep your body agile and prevents injuries.

Monday – Bodybuilding: Chest, Triceps, and Abs + Recovery Yoga

Start your day at the gym focusing on chest, triceps, and abs.

  • Bench Press:
    Lie on a bench, grip the bar, and lower it slowly until it nearly touches your chest, then push it upward.
    Perform 3-4 sets of 8-12 repetitions, maintaining control with every movement.
  • Chest Flyes:
    With two dumbbells, hold them above your chest and open your arms laterally, feeling the stretch in your pectorals.
    Do 3 sets of 10-12 repetitions.
  • Tricep Dips:
    Use parallel bars or a bench to lower your body, focusing on contracting the triceps.
    Complete 3 sets of 10-12 repetitions.
  • Crunches or Plank:
    For the abs, perform 3 sets; with crunches, lift your shoulders off the ground, while with the plank, keep your body straight to strengthen the core.

Immediately after the workout, dedicate 10 minutes to yoga for recovery:

  • Sun Salutation:
    Perform 3-4 cycles.
    This sequence involves moving from stretching positions (such as forward folds) to plank positions, then returning to an upright stance.
    Each pose is held for about 10-15 seconds, releasing tension and stimulating circulation.

Tuesday – Dynamic Yoga

Dedicate 30-45 minutes entirely to yoga, focusing on warming up the body and active stretching.

  • Downward-Facing Dog:
    Begin by placing your hands and feet on the ground, lifting your hips to form an inverted “V”.
    Hold the position for about 30 seconds to stretch the back and legs.
  • Warrior:
    Assume a stance with one foot forward and the other back, keeping your torso upright.
    Hold each pose for 30-45 seconds per side.

The focus is on deep breathing, which helps reduce stress and improve flexibility.

Wednesday – Bodybuilding: Legs, Shoulders, and Abs + Short Recovery Yoga

Today, focus on legs, shoulders, and abs in the gym.

  • Squat:
    Place the bar on your shoulders, keep your torso upright, and lower your hips until your thighs are parallel to the floor.
    Perform 4 sets of 10 repetitions, concentrating on the quadriceps, glutes, and core.
  • Shoulder Press:
    With a bar or dumbbells, lift the weight overhead with a controlled movement.
    Do 3 sets of 8-10 repetitions to work the shoulders.
  • Lateral Raises:
    Slowly lift the dumbbells out to the side, up to shoulder height, to isolate the deltoids.
    Perform 3 sets of 10-12 repetitions.
  • Plank or Crunches:
    Do 3 sets to strengthen the abs.

Finish the session with 10 minutes of yoga focused on recovery:

  • Cobra Pose:
    Lie face down, place your hands under your shoulders, and slowly lift your chest, keeping your pelvis on the ground.
    Perform 2-3 cycles, holding each pose for about 10 seconds.
  • Child’s Pose:
    Sit on your heels, lean forward with your arms extended.
    Hold the position for 1-2 minutes to relax your back and shoulders.

Thursday – Yoga Focused on Mobility and Core

Dedicate 30-45 minutes to a session entirely aimed at improving mobility and strengthening the core.

  • Plank:
    Hold the position with your body in a straight line for 30-60 seconds, repeating for 3 sets to strengthen the abs and stability.
  • Bridge:
    Lie on the ground, bend your knees, and lift your hips until you form a straight line from your shoulders to your knees.
    Hold for 30 seconds for 3 sets.
  • Warrior II:
    Position one foot forward and the other back, with your arms extended in opposite directions.
    Hold the position for 30-45 seconds per side to strengthen the legs and improve stability.

Friday – Bodybuilding: Back, Biceps, and Abs + Recovery Yoga

Dedicate the day to the muscles of the back and arms.

  • Deadlift:
    With a bar, perform 3 sets of 6-8 repetitions while keeping a neutral spine to work the glutes, lower back, and hamstrings.
  • Lat Pulldown:
    Use the machine to perform 3 sets of 10-12 repetitions, focusing on the lats.
  • Barbell Curl:
    Lift the bar to work the biceps, performing 3 sets of 10-12 repetitions with controlled movements.
  • Crunches or Plank:
    Do 3 sets to activate the abs.

After the workout, dedicate 10-15 minutes to yoga:

  • Forward Bend:
    Standing or seated, slowly bend forward trying to touch your toes, keeping your back straight, for 30-60 seconds.
  • Torso Twist:
    Slowly rotate your torso from one side to the other, performing 2-3 sets of 10 repetitions per side to improve circulation and prevent tension.

Saturday – Relaxing Yoga / Active Recovery

Dedicate 20-30 minutes to a relaxing yoga session to promote complete recovery.

  • Butterfly Pose:
    Sitting, bring the soles of your feet together and gently push your knees toward the floor, holding the position for 30-60 seconds to stretch the inner thighs.
  • Savasana (Corpse Pose):
    Lie on a mat and completely relax for 5-10 minutes, allowing your mind and body to regenerate.

Sunday – Active Rest

Conclude the week with a day of active rest.

Dedicate 20-30 minutes to a light stretching session or a walk outdoors, possibly integrating a short meditation to listen to your body and prepare for a new week.


DISCLAIMER:

This program works well for me, but it might not be suitable for everyone.

Always consult your doctor or a qualified professional before starting any new training regimen.

And for a personalized approach, it is best to work with a certified personal trainer.

It is important to begin every session with 10-15 minutes of warm-up, perhaps with a brisk walk or a few minutes on a bike.


The Best Yoga Exercises to Combine with Bodybuilding for Over 50

Besides the yoga poses mentioned, there are others that can nicely complement your bodybuilding routine.

These poses help improve balance, lengthen muscles, and promote complete recovery without stressing the body.

  • Seated Twist:
    While seated with your legs extended, bend sideways and rotate your torso to stretch the spine.
    Hold the position for 30 seconds per side.
    This pose improves mobility and helps release tension in the back.
  • Reclining Bound Angle Pose:
    Lie on your back, bring the soles of your feet together, and let your knees fall to the sides.
    Relax in this position for 1-2 minutes.
    It is ideal for opening the hips and relieving accumulated tension.
  • Legs Up the Wall:
    Sit close to a wall and lie down while lifting your legs against the wall.
    Stay in this position for 2-3 minutes to improve circulation and promote recovery.
    It is particularly beneficial for reducing swelling and relieving tired legs after a long day on your feet or at the gym.
  • Modified Shoulder Stand:
    If you feel confident and have a good base of mobility, try a modified version of the Shoulder Stand.
    Use a support or a wall for assistance, holding the position for 20-30 seconds.
    This pose strengthens the core and stimulates circulation to the upper body.
  • Mountain Pose (Tadasana):
    Improves balance and posture, which is fundamental for any weightlifting routine.
  • Easy Pose (Sukhasana):
    A simple pose to focus on breathing and promote meditation, ideal for relaxing the mind.
  • Half Lord of the Fishes Pose (Ardha Matsyendrasana):
    Great for increasing spinal mobility and releasing tension in the back.
  • Extended Triangle Pose (Utthita Trikonasana):
    Stretches the sides of the body and strengthens the legs, improving stability.
  • Hero Pose (Virasana):
    Helps gently open the hips and promote good posture.
  • Seated Forward Bend (Uttanasana or Seated Forward Bend):
    Encourages stretching of the posterior muscles and alleviates stiffness.
  • Cat-Cow Pose (Marjaryasana/Bitilasana):
    Alternates between arching and rounding the back, improving spinal mobility and releasing tension.


Can Yoga Affect Muscle Mass Increase or Maintenance?

Yoga by itself is not the king for increasing muscle mass like the big lifts in the gym are.

However, practicing it regularly helps you maintain good tonicity and supports weight training by promoting impeccable technique during exercises.

In other words, yoga boosts functional strength and improves mobility—elements that are fundamental for a more effective workout.

So, while weightlifting builds the muscles, yoga helps keep them strong and properly aligned, creating a perfect synergy between flexibility and power.


Does Yoga Really Strengthen You?

After examining several studies, I found this really interesting.

In one study, a group of students followed a 12-week yoga protocol.

They participated in 45-minute sessions where physical poses (asanas) and breathing techniques (pranayama and kriya) alternated with meditation and Om chanting.

In short, a complete mix to tone both body and mind.

The results?

  • Muscle strength, measured with tests such as hand grip and back strength, improved significantly.
  • Flexibility and balance made a notable leap, especially in the first few weeks.
  • Even when the duration of the asanas was reduced and the time spent on breathing exercises increased, the benefits were maintained.

This study demonstrates that yoga can not only build muscle but also maintain those gains over time, countering the negative effects of training breaks.

For me, this mix is a gem: it is the perfect integration between the power of bodybuilding and the lightness of yoga.

If you want to take your training to the next level, this holistic approach is for you. (Yoga Boosts Muscle Strength, Flexibility & Balance)


Is It Better to Separate Yoga from Bodybuilding or Can You Do Both on the Same Day?

Personally, I believe that you can easily do both on the same day if you are well organized.

For example, you can start the morning with a yoga session to warm up your mind and body, and then dedicate the afternoon to weightlifting.

Alternatively, if you prefer to separate the disciplines, alternate days—one day for yoga and the next for weightlifting.

The important thing is to listen to your body and adjust the timing based on your energy and commitments.

Both approaches work—just find the one that makes you feel your best!


How Long Does a Typical Yoga Session and a Weightlifting Session Last?

A typical yoga session lasts between 30 and 45 minutes.

That is enough to activate the body, work on flexibility, and relax the mind.

A weightlifting session, on the other hand, can last from 45 to 60 minutes, depending on the number of exercises, sets, and rest periods.

The important thing is not to rush: quality and technique count more than speed!


Do you get more out of both by combining yoga and bodybuilding?

Absolutely yes!

Bodybuilding helps you build strength and muscle mass, while yoga improves mobility, alignment, and recovery.

They are two sides of the same coin: one strengthens the body, the other keeps everything in perfect balance.

The result?

A strong, agile body ready to challenge every limit, with a calm and focused mind.


If You Have Little Time, Which Exercise Should You Do First: Yoga or Bodybuilding?

If time is short, the choice depends on your immediate goals.

If you want to prepare your body and stretch your muscles before lifting weights, start with 10-15 minutes of dynamic yoga.

If the focus is on muscle strengthening, head straight to the gym.

Remember: even a short yoga session can work wonders in reducing stiffness and preventing injuries.


At 50, How Should You Approach Bodybuilding?

At 50, it’s not about pushing yourself like crazy every day.

You need to train smartly and respect your body.

Do not overdo it with excessively heavy loads, otherwise you risk injuries, muscle strains, and joint problems.

Train progressively, focusing on technique and recovery.

Always include yoga to maintain flexibility and prevent injuries.

And why not add some mobility or specific stretching exercises to obtain extra benefits!


Examples of the Best Combinations of Bodyweight Exercises and Yoga

I know, today the focus is on bodybuilding and yoga, but know that some bodyweight exercises combine perfectly to get the best of both worlds.

For example, the plank is excellent for strengthening the core, which is fundamental for both weights and yoga.

The push-up, if performed carefully, develops strength and stability, integrating well with yoga poses that improve shoulder mobility.

Even the burpee, although intense, can serve as a bridge between cardio and resistance training, making the body more agile and responsive.


Does Yoga Also Pair Well with Other Disciplines?

Yoga integrates perfectly with many other disciplines.

For example, with running it can help improve posture and prevent knee injuries.

With cycling, it helps relax the posterior muscles and improves hip flexibility.

Even with weightlifting, as we have seen, yoga ensures quicker recovery and greater elasticity.

In short, yoga is the ideal companion for any sport that requires strength, balance, and mobility.


RELATED:》》》Is it beneficial to combine yoga and Pilates in a single fitness routine?


Conclusion

Integrating yoga and bodybuilding is a choice that goes beyond simple physical exercise.

It is a way of living with awareness, of embracing life in all its nuances.

The mix of strength and flexibility teaches you to find balance in every aspect of your life.

Even though I have not yet reached 50, I have learned that wisdom is not a matter of age.

It is the result of conscious choices and a journey of personal growth.

If you are looking for a way to make your training more varied and stimulating, I recommend trying this mix.

Leave a comment below and let me know what you think!


FAQs

Can practicing only yoga lead to a more toned physique?

Yes, a consistent yoga practice can give you a leaner and more defined look.

The poses and isometric exercises help tone and strengthen the body, even if they do not lead to bulky muscle mass.

Which yoga pose requires the most strength?

Chaturanga Dandasana is known to be one of the most demanding poses in terms of strength, as it requires significant work from the core and arm muscles.

Even balancing poses, such as inversion poses, challenge muscular power.

What is the ideal time to practice yoga in a mixed routine?

It depends on your goals.

Many opt for a short yoga session beforehand to warm up body and mind, while others use it post-workout to help with recovery and reduce tension.

Recommended
Categories
YOGA & PILATES

Is it beneficial to combine yoga and Pilates in a single fitness routine?

Unite yoga and Pilates is like mixing two secret ingredients to create a wellness cocktail.

This combination gives you a double dose of strength and flexibility.

It is the perfect mix for those who love to feel free and fit.


What Is Yoga?

Yoga-is-an-ancient-practice-that-unites-body-mind-and-spirit

Yoga is an ancient practice that unites body, mind, and spirit

There are several styles:

  • Vinyasa for fluid and dynamic movements.
  • Hatha for a slower and more meditative practice.
  • Yin for deep stretching and tissue relaxation.

Personally, I love doing yoga to relax after a long day.

I enjoy focusing on my breathing and feeling every single asana.

It is truly a remedy for reducing stress and improving flexibility.


The World of Pilates

Pilates-exercise

Pilates is a system of exercises aimed at strengthening the core and improving posture.

There are various variants:

  • Classical Pilates, with precise and controlled movements.
  • Contemporary Pilates, which includes equipment and dynamic variations.

I must admit that in my routine, I do more yoga than Pilates.

But when I include it, I am surprised at how much extra boost it gives to my stability.

Pilates makes me feel strong and centered, almost like an internal engine that drives every movement.


Fundamental Differences

Yoga and Pilates work in different ways.

Yoga focuses on the mind-body connection, promoting relaxation and muscle stretching.

Through static poses and fluid sequences, it teaches you how to breathe and meditate.

Pilates is more targeted at strengthening, especially the core and deep muscles that are often neglected.

If I had to choose, I wouldn’t say one is better than the other.

It depends on your goals: if you are looking for calm and flexibility, go with yoga; if you want to tone and strengthen, Pilates is your ally.

While each has its own focus, both offer benefits and work well togethe


Equipment for Yoga and Pilates: The Differences

For beginners, choosing the right equipment can really make a difference.

Yoga essentially requires a non-slip mat that guarantees stability and comfort during poses.

Often, blocks, straps, and cushions are also used to support stretches and facilitate postures.

These tools are simple, lightweight, and easily portable—ideal for a relaxed and meditative practice.

Pilates, on the other hand, may require more specific equipment.

In addition to a mat, you often use a fitness ball, resistance bands, and the Pilates ring to add resistance and improve movement precision.

In the gym, the reformer is an iconic piece of equipment that allows you to perform controlled exercises targeted at the core, using a system of springs and straps.

This variety of equipment allows you to customize your workout, making it more dynamic and challenging.


Common Points and Integration

Despite the differences, the two methods share important goals.

Both improve posture and balance.

Both yoga and Pilates require concentration, breath control, and precision in movements.

They complement each other in various ways:

Strength and Flexibility

Pilates makes you strong, especially in the center of your body, while yoga promotes muscle stretching.

In practice, a good dose of Pilates can stabilize your muscles, and yoga makes them more elastic.

Body Awareness

Yoga nurtures inner mindfulness and a sense of calm, while Pilates—being more technically oriented—demands careful attention to movement details.

Together, they help you gain a deeper understanding of your body mechanics, which can lower the chance of injury.

Posture and Balance

Both disciplines work on improving posture.

Yoga stretches and relaxes the muscles, while Pilates strengthens the stabilizing ones.

Thus, if you do both, you have a complete system that supports the spine and overall balance.

Breathing and Movement

Breath control is essential in both practices.

Yoga teaches you to breathe deeply to calm the mind.

Pilates uses breathing to activate the core and coordinate movements.

This synergy between breath and movement leads to a more harmonious performance.

More Toned Muscles

Yoga and Pilates together sculpt the muscles in a harmonious way.

Yoga, with poses such as Warrior or Plank, activates the legs, arms, and core.

These asanas stretch and strengthen, giving visible toning.

Pilates, as mentioned, focuses especially on the core.

Exercises like the Hundred and the Teaser strengthen the abdomen, back, and glutes, creating a stable and defined core.

Stress Management

Yoga is known for reducing stress thanks to its meditation techniques and focus on breathing.

Pilates, with its precision in movements, allows you to focus completely on the here and now, contributing to a calmer and more centered mind.

Together, they offer a dual outlet to eliminate tension and improve emotional well-being.

Improved Coordination and Concentration

The precise movements in both practices boost your motor coordination.

As you become more mindful of each movement, your everyday concentration also improves.

Energy Efficiency and Recovery

The mix of dynamic and relaxing movements promotes better circulation.

This translates into greater energy efficiency and faster muscle recovery after intense workouts.

Increased Consistency and Discipline

Following a routine that combines yoga and Pilates teaches you consistency.

Working on different aspects of fitness reinforces the habit of commitment and personal discipline.


Can You Do Yoga and Pilates in One Day?

It’s the million-dollar question—and the answer is yes!

If you feel fit and energetic, you can start with a yoga session to warm up, relax, and ease into a mindful state.

Then, move on to Pilates to activate your core and give an extra boost to your deep muscles.

Additional Observations:

  • Frequency: Many practitioners successfully combine both disciplines in one day, while others prefer alternating days to allow for optimal recovery. It really depends on your fitness level and how your body responds.
  • Energy Levels: Listen to your body—if you’re feeling particularly energetic and motivated, combining the two can enhance your overall workout. However, if you’re feeling fatigued, you might consider spacing them out.
  • Goals and Balance: Integrating yoga and Pilates can provide a well-rounded routine by enhancing flexibility, concentration, and core strength. Still, if your primary goal is to focus intensely on one area (such as strength or relaxation), you might opt for one discipline on certain days.


The Downsides of Doing Yoga and Pilates on the Same Day

Even though combining the two disciplines might seem ideal, there are some aspects to consider.

Sometimes, doing both sessions in one day can lead to excessive fatigue.

The body needs time to recover, especially if you are not used to such an intense workout.

You might lose a bit of concentration and precision in movements when you are too tired.

Excessive effort increases the risk of injuries, especially if you do not respect recovery times.

In addition, you may not be able to give your best in both disciplines if you try to force too much in one day.

So, always listen to your body and evaluate whether it is better to alternate sessions or dedicate separate days to yoga and Pilates.


Ideal Frequency and Sequence

Personally, I prefer to separate yoga and Pilates to better focus and fully relax.

That said, many enthusiasts find it great to combine them on the same day.

A very common frequency for those who love this fusion is 2-3 times a week.

When you decide to combine the two disciplines in a single session, here are two options to try:

Option A

  • Start with 30 minutes of yoga, focusing on gentle movements and stretching.
  • Then switch to 20 minutes of Pilates to activate the core and strengthen the deep muscles.

Option B

  • Alternate 10 minutes of yoga and 10 minutes of Pilates, repeating the cycle throughout the session.

These methods allow you to experience both practices without sacrificing the quality of the workout.


Which to Do First: Yoga or Pilates?

In general, starting with yoga helps you get in tune with your body.

This approach prepares the muscles for the more intense work of Pilates.

However, if your primary goal is to strengthen the core, you might start with Pilates and finish with relaxing yoga.

An Example of a Weekly Routine to Combine Yoga and Pilates

Day 1: Combination of Yoga and Pilates

Yoga (20 minutes)
Sun Salutation: Stand with your feet together and your hands at your sides.

Inhale as you raise your arms toward the sky, then exhale while bending forward, bringing your chest closer to your thighs and your hands toward your toes.

This fluid sequence awakens circulation, stretches the muscles, and creates an elastic base for more intense movements.

Warrior Pose: From a standing position, move one foot forward and bend the knee to form a 90° angle while keeping the other leg straight.

The arms can be raised above the head or extended sideways, helping to improve balance, strength, and concentration.

Pilates (20 minutes)
Plank: With hands positioned under the shoulders and toes in contact with the mat, keep the body in a straight line.

Keep the abdomen, back, and shoulders well engaged for 30–60 seconds to create a solid base and prevent possible injuries.

Hundred: Lie on your back, lift your legs to 90°, and raise your head and shoulders.

With your arms by your sides, perform a rhythmic pumping movement, inhaling for 5 counts and exhaling for 5, until you reach 100 movements.

The main benefit is strengthening the abdomen and upper back, improving core endurance.

Teaser: From a lying position, simultaneously lift your legs and torso to form a controlled “V,” then slowly lower while maintaining balance.

This exercise challenges coordination, defines the core, and strengthens the central muscles, offering stability and movement precision.

Day 2: Cardio Session at the Gym

Treadmill Running

Set a moderate pace for 20–30 minutes, maintaining a regular stride and harmonious breathing.

The activity boosts the cardiovascular system, accelerates metabolism, and promotes calorie burning.

HIIT Training
Alternate intense sprints of 30 seconds with active recoveries of 30–60 seconds, either walking or jogging slowly.

This method increases aerobic capacity, burns calories quickly, and improves cardiac endurance.

Day 3: Yoga-Only Session

Hatha or Yin Yoga

Choose static poses such as Seated Forward Bend or Child’s Pose, holding each for 30–60 seconds.

These poses stretch the back, legs, and arms, promote relaxation, and reduce accumulated stress, fostering a deep active recovery.

Day 4: Pilates-Only Session

Roll Up:
Lie down with legs extended and arms stretched behind your head.

Inhale to prepare and exhale while slowly lifting your torso until you sit up, vertebra by vertebra.

This movement tones the abdomen, improves spinal flexibility, and promotes better posture.

Leg Circle
Lie down, lift one leg toward the ceiling, and make small, controlled circles; after a few rounds, reverse the direction and repeat with the other leg.

The circle strengthens the thighs and glutes, enhancing hip mobility and overall leg toning.

Plank

Perform the Plank again, focusing on maintaining a straight line and a well-engaged core.

Strengthening the stabilizing muscles supports the spine and improves balance.

Day 5: Repeat of Day 1’s Mixed Yoga and Pilates Session


Yoga and Pilates for Weight Loss and Toning

If your goal is to lose weight and tone your muscles, both disciplines can help you.

Yoga burns calories with continuous movements and helps reduce stress, which is often linked to weight.

Pilates, with its focus on the core, helps define the abdomen and strengthen the muscles.

Here are some practical exercises:

For Weight Loss:

  • Perform Vinyasa yoga sequences to keep your heart rate high.
  • Try light jumps and quick transitions between poses.

For Toning Muscles:

  • Focus on Pilates exercises such as the “Hundred,” the “Plank,” and the “Teaser.”
  • Maintain proper form and breathe deeply to maximize muscle activation.


Combinations with Other Sports Disciplines

Yoga and Pilates also complement other sports well.

For example, after a tennis match or a running session, yoga helps relax the muscles.

Pilates, on the other hand, can be an excellent supplement for those practicing bodybuilding, improving stability and movement focus.

In the gym, you can easily alternate cardio sessions with your yoga and Pilates workouts for a comprehensive program.


Results: How Long Until You See a Change?

Results vary from person to person.

Generally, with a consistent routine 2-3 times a week, you might start noticing improvements in 4-6 weeks.

You will notice increased flexibility, a stronger core, and an overall sense of well-being.

Of course, it all depends on commitment: determination and consistency truly make the difference.


Better Yoga or Better Pilates?

To be honest, I prefer yoga over Pilates.

I love the feeling of peace that a good yoga session gives me.

But I have also experienced days when I do 2-3 yoga sessions and 1 Pilates session.

On those days, I feel explosive and full of energy.

I have seen improvements in my posture, my strength, and my ability to manage stress.

That said, there is no single answer as to which is “better” because it all depends on what you are looking for.

Yoga offers a refuge for the mind, a moment to slow down and reconnect with yourself, ideal for those who want to regain calm and inner clarity.

Pilates, on the other hand, is like giving your body a jolt, strengthening the center and finely tuning the muscles, perfect for those who want a boost of energy and precision in movements.

Essentially, if you seek balance and serenity, yoga is the choice that pampers your soul

If you want to sculpt your body and feel energized, Pilates pushes you beyond your limits.

The true beauty lies in being able to combine them—not necessarily on the same day, but alternating on different days.

This way, you can enjoy the benefits of both without overexerting yourself.


RELATED:》》》Is it safe to mix yoga and bodybuilding at 50?


Conclusion

Uniting yoga and Pilates offers concrete benefits: it improves flexibility, strengthens the core, enhances balance, and makes the body more toned and defined.

A regular routine, 2-3 times a week, helps you achieve visible results in just a few weeks.

Success depends on commitment and consistency, so start now and build the right path for you.

Leave a comment below to share your experience and the progress you have achieved with these two disciplines.


FAQs

Is it safe for beginners to combine yoga and Pilates?

Yes, just start with low-intensity sessions and focus on proper form.

What are the best times to work out?

Both morning and evening work well; choose the time when you feel most energetic and focused.

What should I do if the combined session leaves me too tired?

If you notice a significant drop in energy, consider reducing the duration of one of the segments or incorporating short active breaks.

You can take a couple of minutes for breathing exercises or meditation to recover before continuing.

Recommended