Categories
CARDIO & ENDURANCE Running

How Can You Begin Running and Still Maintain Your Bodybuilder Physique?

Ok, let’s be frank.

You’ve sweated in the gym, lifted heavy weights, and eaten healthy (more or less).

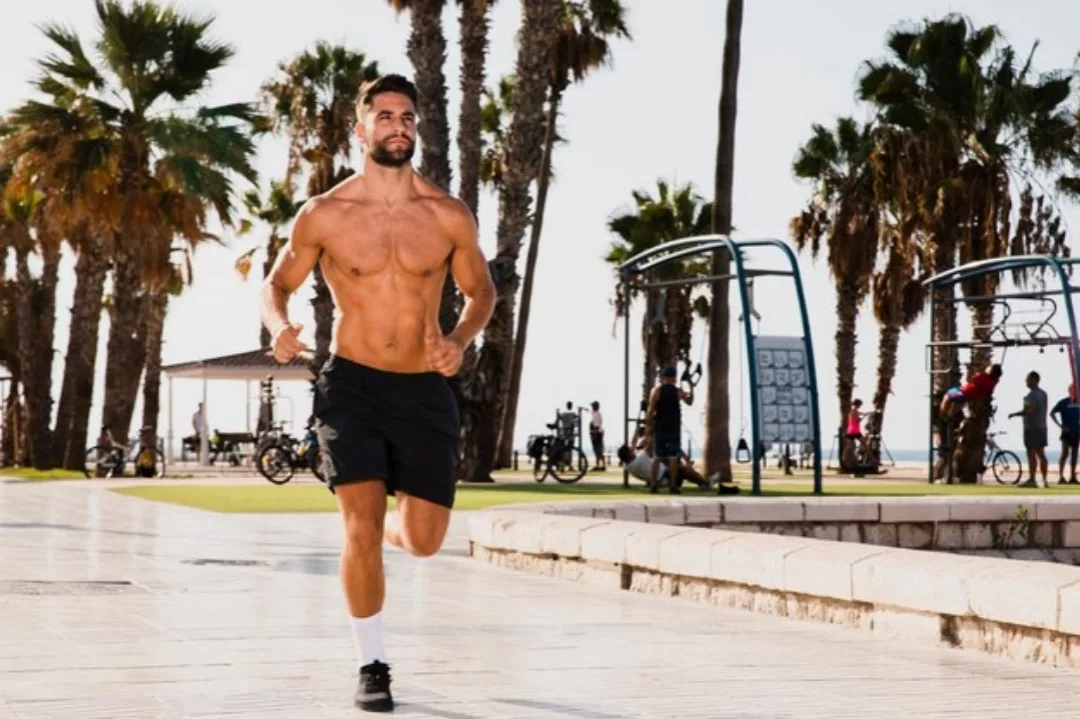
You’ve built a muscular physique that turns heads and raises eyebrows.

Everything seems perfect, right?

But now you get this strange idea: “What if I started running?” Running?!

Really, cardio – the sworn enemy of your beloved muscles?

Calm down, my friend, put that protein shake aside for a moment and let’s talk it through.


The Benefits of Adding Running to Your Routine

Running-brings-a-cascade-of-benefits

Look, I know well: the idea of running might seem like an insult to the power of your biceps.

But let me explain.

Running, when done the right way, brings a cascade of benefits.

For example, it improves your cardiovascular capacity, helping you recover faster after a weightlifting session.

Additionally, it helps reduce that extra fat that sometimes stubbornly shows up, leaving your muscles even more chiseled.

And that’s not all: running also strengthens your mind, teaching you patience and determination—qualities essential for any true bodybuilder.


Which Type of Running to Choose?

Not all runs are created equal.

There are different modes, and each has its own unique flavor, just like choosing between a strong espresso and a light cappuccino.

LISS: The Active Recovery

LISS-The-Active-Recovery

Imagine an easy run on the treadmill or outdoors, where you enjoy the scenery and let your body warm up gently.

A LISS session usually lasts 20–30 minutes.

It’s perfect for active recovery: you don’t have to push too hard, but you help your cardiovascular system work steadily, improving circulation and speeding up recovery from your weight workouts.

HIIT: The Turbo That Makes You Sweat

Interval-training

Then there’s interval training, or HIIT.

Here we’re talking about bursts: 30-second sprints followed by 60 seconds of walking or recovery, repeated for a total of 15–20 minutes.

This type of run is a bomb: it burns calories, boosts your metabolism, and leaves you with that euphoric feeling that only an adrenaline rush can give.

HIIT is ideal for those days when you feel like a superhero, pushing every muscle fiber to its limit.

Hill Running: The Vertical Challenge

Hill-Running-The-Vertical-Challenge

And then, if you want to take it to the next level, try hill running.

The goal here is to work on your leg strength.

Alternate uphill and downhill repeats for 20–30 minutes: each uphill is like a mini high-intensity squat session, while the downhill teaches you to control the movement and improve balance.

It’s challenging, yes, but the benefits are immediate: stronger legs, better balance, and that extra grit you need to face any challenge.

Mixing LISS and HIIT Occasionally

Personally, I alternate LISS and HIIT to keep motivation high and vary the stimulus.

Some days I feel like taking an easy run, where I can listen to my favorite playlist and enjoy the scenery.

Other days, I go for short, high-intensity sprints to feel the adrenaline charging my batteries.

This variety not only prevents boredom but also allows my body to adapt to different types of exertion, keeping performance at its peak.


HIIT and Muscle Growth: Turning Cardio into Muscle Mass

It may seem strange, but there is a form of cardio that, if integrated correctly, stimulates muscle growth.

The infamous HIIT (High-Intensity Interval Training) is much more than a way to burn fat.

It also works on releasing anabolic hormones, such as testosterone and growth hormone, which are fundamental for muscle development.

The secret lies in the way HIIT pushes your metabolic system to the limit, creating a stimulus that, besides improving endurance and cardiovascular efficiency, promotes protein synthesis and muscle recovery.

In practice, by alternating periods of intense effort with short recovery intervals, this type of training offers a double benefit: it helps eliminate excess fat while simultaneously supporting muscle growth.

Integrating HIIT sessions into your routine can, therefore, transform cardio from a simple endurance activity into a real anabolic tool capable of giving your muscle mass an extra boost.


Bodybuilding + Running, Goals: Growing or Maintaining?

Not everyone aims to become gigantic in the gym.

Some of us just want to maintain that perfect shape that already captivates everyone, while others aim to gain even more mass to make every bodybuilder envious.

So, why should you add running to your routine?

It all depends on your goals and, above all, on how you want your body to work for you.

If You Want to Grow: Boost Your Mass Without Burning Too Much

If your goal is to increase mass, you know that every calorie counts.

In this case, running must be managed carefully so as not to compromise the caloric surplus needed for muscle growth.

Imagine this scenario:

After an intense weight session, you do a short, easy run—in practice, a LISS (Low-Intensity Steady State) mode as we already discussed.

The result? An increase in cardiovascular capacity without throwing your metabolism off track.

For example, limit yourself to 15–20 minutes of a gentle run, just enough to stimulate the heart and improve circulation.

If You Want to Maintain: Definition and Top-Endurance

Now, if the goal is to maintain that chiseled and defined physique, the game changes a bit.

Here, running becomes your secret weapon to eliminate excess fat and refine every muscle.

Think about it:

  • 3–4 sessions of moderate running per week (20–30 minutes each) can work wonders.
  • Not only do you keep your body fat percentage in check, but you also boost your metabolism, improving overall endurance.

It’s like giving your body a boost, keeping it agile and ready to respond to your weight training sessions.

In this scenario, you can afford to play more with the intensity.

Maybe alternate between an easy run and some HIIT sessions, where short sprints liven things up.

The result? 

A definition that doesn’t go unnoticed and a physique perfectly balanced between strength and endurance.


Goal Type of Run Weekly Duration Focus
Muscle Growth Easy Run 2 sessions of 15–20 minutes Active recovery, improved blood flow
Maintenance/ Definition Combination: Moderate Run + HIIT 3–4 sessions of 20–30 minutes (with variations) Fat burning, increased endurance


RELATED,:》》》 Balancing HIIT and Strength Training: Is This An Effective Approach to Fitness?


Running Essentials You Need

You can’t run well dressed for this challenge, right?

You must be ready to give your best, and for that, the right equipment is essential.

Running Shoes:

  • Invest in a quality pair of running shoes.
  • They must offer excellent support and cushioning to protect your feet and reduce the impact on your knees and ankles.
  • It’s not just about style: a good shoe can be the difference between a smooth run and post-workout aches.

Breathable Clothing:

  • No stagnant sweat, my friend!
  • Opt for technical fabrics that allow your body to breathe.
  • A breathable t-shirt, lightweight shorts, and vibration-reducing socks can greatly improve your comfort and performance.

Technology on Your Side:

  • A good smartwatch or a running tracking app is a must.
  • These tools keep you updated on pace, distance, calories burned, and even your heart rate.
  • This way, every run becomes a measurable challenge, and you can progressively improve.

Extra Accessories:

  • Don’t forget a water bottle to stay hydrated and a towel to wipe off sweat.
  • A headband or a cap can also be useful, especially if you train outdoors in hot or sunny conditions.


Training: Mass Gain vs. Maintenance

Alright, let’s admit it: when it comes to weights, there’s no one-size-fits-all formula.

If you want to gain mass, your workout must be a true power marathon, while if you want to maintain the physique you’ve painstakingly built, you can afford a slightly more relaxed approach.

For Mass Gain

If the goal is to grow, you need to push your muscles beyond their current limit.

The secret here is progressive overload: heavy loads, a low number of repetitions, and sets designed to stimulate growth.

Imagine working with squats, bench press, and deadlifts, performing 3–5 sets of 6–8 repetitions, where each set is a battle to beat your previous personal record.

Recovery between sets is crucial: give yourself 2–3 minutes to recharge and prepare for the next explosive effort.

In this scenario, every extra gram lifted is a statement of intent: your muscles must be constantly challenged to grow, and your nutrition must support you, with a well-targeted caloric surplus.

For Maintenance

If instead the goal is to preserve that physique you’ve already earned, the game changes.

You don’t need to push yourself to the limit every session.

Here, weight training becomes more of an art of preservation: maintaining strength and definition without overstressing the nervous and muscular systems.

You can work within an 8–12 repetition range per set, with a slightly reduced number of sets, to avoid an excessive volume that could lead to overtraining.

The focus is on maintaining the quality of movement, with targeted exercises that continue to stimulate the muscles without exhausting them.

Substantial Differences in the Gym

  • Volume and Intensity:
    • For mass gain, volume (total number of sets and repetitions) is often combined with heavy loads and longer rests.
    • For maintenance, the volume can be slightly reduced, but with close attention to technique and recovery to preserve strength without overtaxing the muscles.
  • Training Frequency:
    • Those aiming for growth might train each muscle group twice a week, while for maintenance it’s possible to reduce the frequency without losing the mass gained, maintaining high stimulus efficiency with well-distributed sessions.
  • Nutritional Approach:
    • If you want to gain mass, every workout is accompanied by an aggressive nutritional strategy, with a caloric surplus and high protein intake.
    • For maintenance, a balanced and slightly hypocaloric diet is ideal to keep the definition without losing strength.


Key Exercises for Developing Mass: Not Just Big Muscles

Nothing is more gratifying than seeing a well-sculpted body, and the secret lies in the right exercises.

Sure, compound exercises are what made every bodybuilder famous.

But don’t stop there: isolation exercises and circuit training are like the secret seasoning that turns a good dish into a real delight for the muscles.

The Fundamentals

Squats:

  • This exercise not only builds your legs and glutes but also engages your core muscles, improving overall stability.

Deadlifts:

  • The king of exercises for the back, legs, and core.
  • Every repetition is an explosion of strength that leads to steel-like musculature.

Bench Press:

  • Fundamental for the chest, shoulders, and triceps.
  • A classic that never fails.

The Importance of Isolation Exercises and Circuit Training

It’s not enough to build big muscles; you also need to strengthen the stabilizer muscles.

Exercises like bicep curls, tricep extensions, or lateral raises, though isolated, are essential for a balanced musculature.

A great approach is to combine compound exercises with isolation movements.

For example, after a session of squats and deadlifts, add a few sets of lunges and leg curls to work on those stabilizing leg muscles that make the difference.

This mix not only builds mass but also prepares you to give your best in any activity, from running to sudden sprints.


If You’re a “Big” Bodybuilder and You Want to Run: It’s Possible

Probably, if you have muscles that would make a comic book hero envious, the idea of running might raise an eyebrow, as if you were about to embark on an impossible adventure.

But hey, don’t despair!

An imposing physique can absolutely run, provided you take a few precautions to ensure those super-developed muscles don’t become an obstacle.

Mobility Issues:

Your muscles, as spectacular as they are, can limit flexibility.

This means you might be more prone to injuries if you’re not careful.

A good warm-up and targeted stretching become your best friends, preparing your joints and tendons for the impact of running.

Treadmill or Outdoor Running?

If you’re a “big” bodybuilder, the treadmill might be your salvation.

Why?

It allows you to control pace, incline, and impact, offering you a smoother and more manageable run.

Outdoors, you might have to face uneven surfaces, increasing the risk of injury.

Recommended Duration:

There’s no need to turn into a marathoner.

To start, the usual 15–20 minutes of an easy run is a good starting point.

This short period allows your body to get used to the movement without exhausting the reserves needed for your weight workouts.

Alternatives for Those Who Prefer to Avoid Traditional Cardio:

If traditional running seems too demanding, don’t worry.

You can opt for cycling or the elliptical.

These alternatives reduce joint stress, allowing you to work on your cardiovascular system without compromising your impressive muscular structure.

Do It Right:

The secret is to start slowly and increase the pace only when you truly feel comfortable.

Don’t force yourself to reach overly ambitious goals right away: every bit of progress, even the smallest, is a victory.

That way, you can integrate cardio into your regimen without sacrificing the muscles you’ve worked so hard to build.


Calibrating Your Running Time to Avoid Burning Your Precious Muscles

Alright, listen up: don’t overdo it, my friend!

Too much running risks turning those hard-sculpted muscles into pure ash.

The time you devote to cardio must be calibrated based on your body type and your specific goals.

To give you an idea, here’s a table that summarizes the concept:

Body Type Goal Weekly Running Time
Muscular Ectomorph Maintenance 2–3 sessions of 20–25 minutes
Powerful Mesomorph Mass Gain 2 sessions of 15–20 minutes of light running
Robust Endomorph Maintenance/Definition 3 sessions of 25–30 minutes

Remember: besides body type, you must also consider factors like age, the frequency of weight training sessions, and your level of experience.


Weekly Kilometers: How Much Running Is Too Much?

If your goal is to maintain a chiseled physique, you need to find the right balance in the number of kilometers you run each week.

Imagine this: a bodybuilder who runs between 10 and 15 km per week, evenly distributed between easy and moderate sessions.

This approach allows you to maintain definition, improve the cardiovascular system, and most importantly, avoid that dreaded muscle catabolism that can compromise the mass you’ve worked so hard to build.

Why can too much cardio become an enemy?

When running exceeds 15–20 km per week, especially at high intensity, it risks throwing your metabolism off balance, depleting the muscle reserves essential for recovery and growth.

Integration: How to Combine Bodybuilding and Running

For beginners, integration must be gradual.

Here’s an example of a weekly program that will show you progress without overhauling your routine:

Day Activity Exercises and Details Notes
Monday Weights (Upper Body) • Bench Press: 4 sets x 8–10 reps, 60–90 sec rest
• Lat Pulldown: 3 sets x 10–12 reps, 60 sec
• Shoulder Press: 3 sets x 8–10 reps
• Bicep Curls: 3 sets x 10–12 reps
• Tricep Extensions: 3 sets x 10–12 reps Intense session focused on strength and technique
Tuesday Light Running (LISS) 20 minutes of a moderate-paced run on the treadmill or outdoors Maintain a steady pace to stimulate the cardiovascular system without excessive stress
Wednesday Weights (Lower Body) • Squats: 4 sets x 8–10 reps, 90 sec rest
• Stiff-Legged Deadlifts: 3 sets x 10–12 reps, 60–90 sec rest
• Leg Press: 3 sets x 10–12 reps
Calf Raises: 3 sets x 15–20 reps Leg-focused workout, concentrating on technique and control
Thursday Active Recovery / Walking 20 minutes of brisk walking on the treadmill Low intensity to promote muscle recovery
Friday Weights (Full Body – Circuit) Circuit Training (repeat the circuit 3 times):
• Push-Ups: 15 reps
• Bodyweight Squats: 20 reps
• Dumbbell Rows: 10–12 reps per side
• Plank: 45–60 sec
• Burpees: 10 reps Minimal rest between exercises to keep heart rate high and stimulate endurance
Saturday HIIT Running HIIT: Alternate high-intensity sprints and recovery. For example, 30 sec sprint + 60 sec walk, for 10–12 cycles (totaling 15–20 minutes) Intense session that boosts metabolism and promotes definition without exhausting the muscles
Sunday Rest or Stretching/Yoga 20–30 minutes of stretching or yoga Focus on active recovery, reducing tension, and improving flexibility

This mix allows you to harness the best of both worlds without sacrificing gym results.


Nutrition: More Calories for Weights and Cardio

Adding running also means rethinking your meal plan.

When you combine weights and running, your caloric needs increase.

You must boost carbohydrates and proteins to ensure energy and optimal recovery.

Here’s an example of a meal plan for someone training 3 times a week with weights and running:

Meal Example Calories (Approx.)
Breakfast Scrambled eggs, oatmeal, fruit, and yogurt 500
Morning Snack Nuts and a protein shake 300
Lunch Brown rice, chicken breast, grilled vegetables 600
Afternoon Snack Protein bar or toast with peanut butter 300
Dinner Salmon, sweet potatoes, and salad 500

Total: Approximately 2200 calories.

Remember: these numbers are indicative and should be personalized based on your metabolism and goals.


Weights and Running on the Same Day: Order and Recovery

Now, the question that keeps you up at night: weights and running on the same day—how do you manage them?

If you decide to combine the two, the golden rule is to start with weights.

That way, you preserve your strength for the fundamental exercises and give your muscles the chance to perform at their best in the gym.

After lifting heavy and pushing your limits, a light run is the perfect finishing touch.

A short cardio session helps flush out lactic acid, promoting recovery and keeping the cardiovascular system active.

For those who prefer a less intense approach, there’s always the option to alternate:

One day dedicated to weights and the next focused on cardio.

This method allows you to give each discipline its proper space without overloading your body.

The final choice depends on the time available, your energy level, and, of course, your goals.


RELATED:>>> Can you safely lift weights the day after an intense sprint session?


Conclusion

Integrating running into your bodybuilding routine requires planning and a personalized approach.

The goal is to find the right balance between cardio and weightlifting to maintain or improve muscle mass without draining your energy.

Carefully consider how to distribute your cardio and strength sessions, balancing intensity and recovery according to your specific needs.

Let me know in the comments how you’ve integrated running into your training and what results you’ve achieved!


FAQs

Can a runner benefit from weight training?

Certainly!

Adding bodybuilding exercises to your running training improves posture, balance, and power during sprints.

Is it better to separate leg workouts from running?

Yes, it’s advisable to separate them.

An intense leg day followed by a heavy run can cause fatigue and increase the risk of injury.

If you can’t separate them, opt for a light run after leg day.

What is the best time of day to run if you also do bodybuilding?

There’s no fixed rule.

Some prefer running in the morning to “wake up” the body, while others choose the afternoon to take advantage of accumulated muscle warmth.

Experiment to see what works best for you.

Can running improve my flexibility and mobility?

Absolutely.

A light run, accompanied by proper stretching, can help keep your joints mobile and improve flexibility, supporting your strength work in the gym.

Recommended
Categories
CARDIO & ENDURANCE Running

Can treadmill sprints help improve my acceleration and burst speed?

Treadmills are an excellent ally for those who want to improve speed and explosive power.

But we know well that there are also limits to consider.

For example, most commercial models have a maximum speed of around 20 km/h.

Outdoors, a sprint can exceed 30 km/h for well-trained athletes.

This difference is thought-provoking: the treadmill is useful, but it does not completely replace the experience of running outdoors.


Sprint: What They Are and How to Make the Most of Them

Sprints-are-short-high-intensity-runs-that-build-explosive-power

I will never tire of repeating it: sprinting is an explosion of pure energy.

It is not just running fast for a few seconds, but rather a mix of technique, strength, and endurance.

There are various types of sprints:

  • Short bursts over distances of 10–30 meters.
  • Uphill sprints, to further stimulate explosive strength.
  • Medium-distance sprints, where endurance and speed meet.

Each of these types requires a specific approach.

For example, to improve acceleration, it is useful to train with short and intense bursts, even by jumping onto the treadmill while running to simulate an explosive start.

Imagine having to chase a bus: that initial burst makes all the difference!


Treadmill Challenges and How to Overcome Them

The treadmill has some drawbacks for speed training.

As I mentioned at the beginning of the article, one of these is the speed limit.

Many models reach a maximum of 20 km/h, while outdoors you can unleash all your power.

However, I have discovered that there are professional and specialized versions that allow for much higher speeds.

For example, the Woodway Curve is a non-motorized treadmill that relies on the user’s power and can allow you to reach speeds well beyond 30 km/h, making it ideal for those seeking an extremely dynamic workout.

Another challenge of the treadmill concerns the surface.

Being more uniform and cushioned than a road or track, the belt reduces impact on the joints but also alters the natural running rhythm.

The foot does not “land” in the same way, influencing some aspects of technique.

To overcome this, you can slightly incline the treadmill, by about 1–2%, in order to simulate ground friction and improve running dynamics.


Practical Tips for Training on a Treadmill

How-to-achieve-explosive-bursts-on-the-treadmill

For those wondering how to achieve explosive bursts on the treadmill, here are some practical tips I have learned in the field.

I always start with a 5–10 minute warm-up.

This prepares both body and mind.

Then I perform maximum sprints for 20–30 seconds.

The technique involves placing your feet on the “shoulders” of the treadmill.

I start the belt, already set at a predetermined speed, and jump on it quickly.

This way, I launch at full speed and activate my fast-twitch muscles.

During the sprint, I focus on explosiveness and visualize a powerful push that lifts me off the ground.

Warning: this technique is recommended only for those with experience.

If you’re new to this, don’t jump on a treadmill at full speed; start with a lower speed to get used to the movement.

This way, you will avoid injuries and improve your technique safely.

When it’s time to slow down and I need to catch my breath fast, I shift my feet back onto the treadmill’s “shoulders” and manually ease off the belt.

After each burst, I allow myself active recovery: I walk or jog slowly for 40–60 seconds.

This step is fundamental to allow the heart to regain its rhythm and the muscles to catch their breath, ensuring you are ready for the next burst.

I usually repeat the cycle 6–10 times, depending on my training level.

When I was starting out, I did 6 repetitions; now that I am fitter, I push up to 10 bursts to further challenge my limits.

I also like to vary my workouts:

  • One day I focus on pure speed, pushing to the maximum for short and intense bursts.
  • Another day, I challenge myself with uphill sprints, increasing the treadmill’s incline to simulate working against gravity.

This approach allows me to continuously improve burst, acceleration, and endurance.

It also integrates perfectly with my strength and bodyweight training.


Treadmill Training Techniques

On the treadmill, you can experiment with a world of sprint techniques.

Try varying the burst time: for example, sprint at maximum for 10, 20, 30 seconds, or even 1 minute, depending on your level.

Each time interval engages different aspects of your physique.

Short bursts activate fast-twitch muscles, while longer intervals also stimulate anaerobic endurance.

Sprint-Recovery

20 seconds of full sprint, followed by 40 seconds of controlled deceleration while walking.

Alternatively, try 30 seconds at maximum with 1 minute of active recovery.

The real advantage of Sprint-Recovery is twofold.

On one hand, you train your heart and muscles to recover quickly.

On the other, you simulate race situations where, after maximum effort, you must restart without losing momentum.

It’s like learning to reignite the engine’s spark after every acceleration.

Pyramid

Start with 10 seconds of sprint, then 20, 30, 20, and finally 10 seconds, always alternating with proportionate recovery periods.

This technique allows you to vary intensity progressively.

The advantage here is twofold:

  • It teaches you to manage energy optimally and distribute effort throughout the workout.
  • In other words, you learn to push when needed and recover gradually, just like in a marathon of explosive efforts.

Sprint with Progressive Braking

After 20 seconds of sprinting, gradually reduce your speed over 10 seconds, almost as if you were braking a sports car.

This technique is ideal for refining neuromuscular control.

The main advantage is that it improves your ability to decelerate in a controlled manner, reducing the risk of injury.

It’s like learning to use the brakes precisely: you control your speed and prepare to restart safely.

Virtual Uphill Sprint

Set an incline of 3–5% and challenge your body with intervals of 15–20 seconds of intense running, followed by 45 seconds at a reduced pace.

Running uphill makes your muscles work more intensely.

The benefit is mainly seen in leg strength and push power.

Working against gravity also develops better stability and increased movement efficiency, as if you were preparing a race car to overcome every obstacle.

Sprint with Quick Start

Begin each interval from a complete stop: after recovery, burst in 5 seconds as if you were starting from a starting grid.

This technique sharpens your reactivity.

The advantage is clear: you improve the speed of going from zero to maximum velocity, which is essential for explosive starts.

It’s like that initial boost that makes you feel ready to beat every personal record every time you leave the starting line.

Fartlek on the Treadmill

Alternate rhythms and speeds in a random manner: for example, sprint for 15 seconds, then run at a moderate pace for 45 seconds, then sprint again for 10 seconds, and so on.

Fartlek allows you to break the monotony and make your workout unpredictable.

The benefit translates into simultaneous improvements in endurance and speed.

You get used to changing pace without warning, just like in real life, where every situation requires a different response.


Other Sprint Tests to Try: New Challenges to Push Your Limits

There are other sprint tests that we have not yet discussed.

When I train, I love trying new ways to measure my progress.

These tests help me understand where I can improve and give me an incredible boost.

Instinctive Acceleration

When I start from zero, I like to measure how quickly I can reach my maximum speed.

Start from a standstill, activate a timer, and burst at maximum, recording the time it takes you to reach the top.

This test gives me a precise idea of my readiness and reaction speed, as if I were measuring my “initial burst.”

Progressive Speed Increase

Another challenge I love is gradually increasing speed.

Set the treadmill to 10 km/h for one minute, then increase to 12 km/h for the next minute, continuing until you reach your sustainable limit.

This way, I understand when my body starts to give in, identifying my “critical point” where targeted training is needed.

Pure Effort in 10 Seconds

To feel pure adrenaline, I launch into an all-out sprint for only 10 seconds.

With the help of a stopwatch, I record the average speed reached in that brief interval.

It is a simple yet extremely motivating test: every increment, even a small one, is a personal triumph.

Dynamic Recovery Time

After a maximum burst of 20 seconds, I focus on the time it takes to return to 70–80% of my maximum speed.

This helps me evaluate the efficiency of my recovery and understand how quickly my body regenerates.

It’s like measuring how quickly I can “recharge the batteries” between actions.

Reactivity Challenge

To make the workout even more interactive, I involve a partner who gives me a visual or auditory signal at random moments.

My goal is to burst at full speed as soon as I perceive the signal.

This exercise sharpens reaction time and turns the workout into a real “ready, set, go!” challenge.


1-Month Treadmill Sprint Plan to Boost Speed and Acceleration

Here’s a simple example of how to integrate the sprint techniques we’ve just covered.

Keep in mind that it’s not a one-size-fits-all plan—it’s just meant to give you an idea.

If you have some experience with speed training and want to add a little excitement to your routine, this might be exactly what you need.

Week Day Sprint Type Description Notes & Tips
Week 1 Day 1 Sprint Recovery Warm-up (5–10 min); 6 rounds of 20 sec max sprint + 40 sec active recovery; Cool-down. Focus on form and explosiveness.
Week 1 Day 3 Pyramid Session Warm-up; perform sprints of 10, 20, 30, 20, 10 sec with equal recovery periods; Cool-down. Learn to manage energy throughout the workout.
Week 1 Day 5 Quick Start Sprint Warm-up; 5 rounds: from a standstill, explode in 5 sec then sprint for 20 sec; 60 sec active recovery; Cool-down. Enhance your burst off the line.
Week 2 Day 1 Intensified Sprint Recovery Warm-up; 6 rounds of 30 sec max sprint + 1 min active recovery; Cool-down. Push your anaerobic endurance further.
Week 2 Day 3 Virtual Hill Sprint Warm-up; 6 rounds: 15–20 sec sprint at 3–5% incline, followed by 45 sec recovery; Cool-down. Strengthen your legs and simulate outdoor resistance.
Week 2 Day 5 Fartlek Session Warm-up; 6 rounds alternating 15 sec sprint and 45 sec moderate pace; Cool-down. Keep it dynamic and fun with varied pace changes.
Week 3 Day 1 Light Incline Sprint Warm-up; 6–8 rounds of 20 sec sprint at 1% incline + 40 sec recovery; Cool-down. Boost acceleration and stability simultaneously.
Week 3 Day 3 Progressive Deceleration Warm-up; 6 rounds: 20 sec sprint followed by 10 sec gradual deceleration; Cool-down. Improve control and learn to safely decelerate.
Week 3 Day 5 Mixed Sprint & Strength Warm-up; 6 rounds: 20 sec sprint + 30 sec calisthenics (push-ups, squats, lunges); Cool-down. Combine explosiveness with strength training for overall power.
Week 4 Day 1 Instant Acceleration Test Warm-up; from a standstill, sprint max for 10 sec and record your time; Cool-down; repeat for progress tracking. Track reaction time improvements; every millisecond counts.
Week 4 Day 3 Progressive Speed Increase Warm-up; increase treadmill speed every minute starting at 10 mph until you reach your sustainable limit; Cool-down. Identify your critical speed threshold for focused training.
Week 4 Day 5 Final Mixed Session Warm-up; 8 rounds alternating Sprint-Recovery and Fartlek; Cool-down. Mix techniques to challenge yourself and gauge overall progress.


The Secrets of Running: Technique and Improvements

To get to the heart of the matter, technique is fundamental.

Let’s talk about some key parameters:

  • Stride Length:
    • A stride that is too long can slow you down.
    • Maintain a natural rhythm, with a smooth gait.
    • Train to gradually increase your stride length with specific exercises, such as skips.
  • Step Frequency:
    • Cadence is the secret to efficient running.
    • A faster step reduces ground contact time.
    • Use a metronome or dedicated apps to gradually increase your cadence.
  • Ground Contact Time:
    • Less contact time means more speed.
    • Train to “bounce” lightly, reducing the time your foot remains on the ground.
    • Plyometric exercises and jumps can help.


The Role of Strength: Complementary Training

To truly improve sprinting, speed alone is not enough.

Strength training is a fundamental component.

Think of exercises like squats, lunges, deadlifts, and push-ups.

These exercises make you stronger and prepare your muscles to handle explosive efforts.

Personally, I love combining weight training and bodyweight exercises with sprint sessions.

This way, I achieve a perfect balance between power and speed.

For example, consider a circuit that alternates treadmill sprints with sets of burpees or plyometric jumps.

The result?

A dynamic and complete workout that pushes your limits in every way.


Improving VO2 Max and Breathing Techniques for Sprinting

Another key aspect of mastering sprinting is VO2 max.

This indicator measures your body’s ability to use oxygen during exercise.

To improve it, include high-intensity workouts, such as short, intense sprints.

An effective technique to boost VO2 max is controlled breathing.

I focus on deep breathing: inhaling abundantly through the nose and exhaling forcefully through the mouth, trying to synchronize the breathing rhythm with the sprints.

A practical tip: try counting the seconds during inhalation and exhalation to maintain a constant rhythm.

This technique will help you avoid wasting energy and maintain optimal oxygenation.

How can you tell if your VO2 max is improving?

For ordinary people, measuring it precisely in a lab can be expensive and complicated, but there are simple ways to get an idea of your progress.

Personally, I use apps and smartwatches that roughly estimate VO2 max based on data collected during workouts.

These devices analyze heart rate and other parameters to give you an estimate of your aerobic fitness level.

If you notice that over time you can maintain intense sprints with a slightly lower heart rate or recover more quickly, it’s a sign that your VO2 max is improving.

Another practical indicator is my overall endurance.

If I can do more sprint repetitions or extend the duration of high-intensity workouts without feeling exhausted, I can be sure that my ability to utilize oxygen has increased.


Progress and Monitoring

To know if you are improving, it is important to record every progress.

Use a training log or an app to record:

  • The times of your sprints.
  • The frequency of your workouts.
  • The sensations during and after each session.

For example, if you notice that you can maintain a longer sprint or recover more quickly, it means you are moving in the right direction.

Analyze the data weekly and adjust the program according to your needs.

This approach will give you a clear view of your improvements and motivate you to continue.


Treadmill Sprints to Enhance Other Disciplines

Running and sprinting on the treadmill isn’t just about improving your speed in sprints and running.

These workouts are a secret weapon also for those who practice disciplines that require explosiveness and speed.

Personally, I have found that my treadmill sprints help me develop lightning-fast reactivity and power that translate into a quick start in any high-intensity activity.

Every time you launch into a sprint, you train those fast-twitch muscles that then propel you forward explosively.

Think of it this way:

  • Even if you don’t play basketball or soccer, treadmill sprints prepare your body to react in an instant, to burst as if facing a sudden challenge.

This ability is fundamental, for example, in disciplines that require lightning accelerations or sudden changes of direction, such as track and field, rugby, martial arts, or even some combat sports.

You will see that this explosiveness is reflected in every movement, making you more agile, faster, and ready to face any challenge you choose to pursue!


RELATED:》》》 Is One Squat Day and Two Sprint Days Enough to Boost Leg Strength and Speed?


Conclusion

The treadmill can be an extremely powerful tool when used intelligently.

It does not replace outdoor running, but it offers a safe and controlled platform to train speed and acceleration.

A mix of sprints, strength, technique, and monitoring will help you achieve those much-desired results.

Experiment, record, correct, and most importantly, have fun.

And you, what techniques do you use to give your best on the treadmill?

Leave a comment below and share your experience!


FAQs

How many times a week should I do treadmill sprints?

For most athletes, 2–3 sessions per week are ideal, ensuring adequate recovery and reducing the risk of injury.

How long does a typical treadmill sprint session last?

A complete session, including warm-up and cool-down, usually lasts between 20 and 30 minutes, depending on the intensity and chosen protocol.

What is parachute training?

It involves wearing a sports parachute during running to create extra resistance.

This method enhances acceleration, explosive strength, and top speed, making the workout more dynamic and fun for those who already have a solid running base.

What type of clothing is recommended for treadmill sprints?

It is essential to wear proper running shoes and breathable clothing.

These items ensure support, freedom of movement, and better moisture management during the workout.

How can I prevent injuries during treadmill sprints?

To prevent injuries, it is crucial to maintain correct posture: land on your midfoot, keep your back straight, and engage your core.

Look ahead, let your arms swing naturally, and do not force the speed if you’re not ready, ensuring fluid and safe movements.

What features should you look for in a treadmill for sprint training?

A good treadmill for sprints should have a powerful motor, a high maximum speed, a wide and stable surface, and the ability to precisely adjust speed and incline to customize the workout.

Recommended
Categories
CARDIO & ENDURANCE Cycling

Does cycling for one month contribute to increased quad power?

What happens if you dive into a 30-day biking challenge?

In this article, we delve into the world of cycling to see if a consistent pedaling routine can really boost your quads.

From steep hills to flat sprints, every ride becomes an opportunity to sculpt and strengthen your leg muscles.

Let’s see if this regular commitment can truly make a difference.


Which Bike to Choose to Sculpt the Quads?

Choosing-the-right-bike to-maximally-stimulate-your-quadriceps

The choice of bike is crucial if your goal is to maximally stimulate your quads.

Fixed-gear bikes are famous for making your legs work without any pauses.

On these bikes, there is no room for coasting: every pedal stroke requires continuous effort, turning your quads into real engines.

Road bikes, on the other hand, offer a good combination of speed and endurance.

With a low gear ratio, tackling climbs becomes an intense workout for the legs.

If you prefer to train at home, exercise bikes like Peloton, Schwinn, or NordicTrack allow you to precisely adjust the resistance, challenging your quads in every session.

Other types, such as mountain bikes or hybrids, are perfect for those who want a comprehensive workout.

Even though they do not isolate the quads like a fixed-gear bike, they still offer an excellent full-body workout thanks to the variable terrain.


How to Develop More Muscular Legs Using Only a Bike

How-to-Ride-a-Bike-to -stimulate-significant-Leg-Growth

You know, even though a bike is not the classic equipment for building muscle mass, it is possible to stimulate significant leg growth if used in a targeted way.

Here are some practical ideas to turn your ride into a real workout for strong, muscular legs.

1. Climb Higher: The Hill Workout

Look for routes that include steep climbs.

Hills force your quads, glutes, and calves to work at their maximum.

Try dedicating 3-5 minutes to an intense climb, focusing on smooth and controlled pedaling.

The extra load of the climb is like adding resistance to a squat: more effort means more growth potential.

2. High-Intensity Interval Training

Don’t just pedal at a constant pace.

Include intense sprints: for example, 30 seconds of full-out sprint followed by 90 seconds of active recovery.

Repeat this cycle 8-10 times.

This approach stimulates muscle fibers to contract explosively, offering a workout similar to weight training.

3. Play With Resistance and Cadence

Take advantage of the resistance modes on your exercise bike or choose routes with headwinds.

Alternate moments of low-cadence pedaling with high resistance (to push hard on the pedals) with moments of high cadence and lower resistance.

This mix forces the muscles to work differently, developing both strength and endurance.

4. Focus on Pedaling Technique

It’s not just about pushing the pedals, but executing a 360-degree pedal stroke.

Try to “pull” your foot back in addition to pushing, so that every muscle in your leg is engaged.

A correct technique not only improves workout efficiency but also prevents injuries.

5. Long Sessions for Muscular Endurance

Do not underestimate the power of long rides: a 60- to 90-minute ride at a moderate pace can help build endurance and promote a slight increase in muscle mass.

These rides, if done regularly, consolidate your muscle base and improve aerobic capacity, creating a balanced mix of strength and endurance.


Cycling: A Complete Workout for the Quads?

The question many ask is: “Is cycling alone enough to develop big quads?

The answer is not that simple.

Let’s be clear: pedaling is fantastic for toning, strengthening, and improving endurance.

Cycling primarily stimulates muscular endurance and aerobic capacity.

The quads work constantly, especially on climbs or during intense sprints, improving both strength and endurance.

But beware: cycling tends to give you lean and toned legs, without a huge increase in muscle mass.

This is because the activity is characterized by repetitive muscle contractions and a load that is not comparable to strength exercises like squats or leg presses.

So, if your goal is to have quads with significant volume, you might need to supplement cycling with specific leg workouts.


30 Days of Biking for Beginners to Boost the Quads

This gradual program will help you develop stronger and more resistant quads, even if you’re just starting out.

Week 1: Muscle Awakening

Monday: 30 minutes of moderate-paced riding to get your muscles used to the work.

Wednesday: 20 minutes with short accelerations—15 seconds of sprint followed by 45 seconds of recovery (only if you feel ready).

Friday: 30 minutes on a route with gentle climbs to stimulate the quads.

Sunday: A relaxed 40-minute ride to promote recovery.

Week 2: Increasing the Intensity

Monday: 35 minutes, alternating 20 minutes at a constant pace with 15 minutes at higher resistance.

Wednesday: 25 minutes of interval training: 20-second sprints followed by 40 seconds of recovery.

Friday: 30 minutes on a slightly more challenging hilly route.

Sunday: A relaxed 45-minute ride.

Week 3: Focusing on Strength

Monday: 35 minutes of riding, focusing on the push during climbs.

Wednesday: 25 minutes of light sprints (20 seconds sprint, 40 seconds recovery).

Friday: 35 minutes on a mixed route, maintaining a constant pace.

Sunday: 45-50 minutes of a slow ride to promote muscle recovery.

Week 4: The Final Push

Monday: 40 minutes alternating 30 seconds of sprint with 1 minute of recovery.

Wednesday: 40 minutes, focusing on a long climb.

Friday: 30 minutes of steady riding with resistance variations to stimulate the quads.

Sunday: A relaxed 45-minute ride to consolidate the work done.


Common Quad Problems for Cyclists

If you are a cyclist, you have probably dealt with some annoying quad issues.

Here are some of the most common problems and a few tips to tackle them with a smile.

Fatigue and Soreness

After an intense ride, it is normal to feel your quads a bit sore.

This sensation, known as DOMS, is the sign that your muscles have worked hard.

Remember: a good post-ride stretch and proper recovery are essential!

Muscular Overload

Pushing too hard on the pedals, especially on climbs or during intense sprints, can lead to micro-tears and excessive tension.

The solution?

Alternate intense rides with recovery days and do not forget to warm up.

Trigger Points and Stiffness

Sometimes, after long rides or repetitive training, knots can form in the muscles.

A targeted massage or using a foam roller can help release these tensions and restore fluid movement.


How to Combine Cycling and Strength Training

For a beginner, a good starting point might be to cycle 2-3 times a week.

A typical session can last from 30 to 45 minutes.

For example, you can alternate 3 minutes of high-intensity riding with 2 minutes of active recovery.

When you decide to combine cycling with strength training, try dedicating different days:

  • 3 days of cycling to improve endurance and cardiovascular fitness.
  • 2 days of weight training focusing on exercises like squats, lunges, and leg presses to increase muscle mass.

This combination allows you to develop strong, resilient, and functional legs.

But don’t forget: strength training isn’t limited only to the legs!

For a complete body workout, include exercises for the entire body, for example:

Upper Body:

  • Bench press or push-ups: for chest and triceps.
  • Rowing or pull-ups: for back and biceps.

Core:

  • Planks, crunches, and Russian twists: for strong abs and overall stability.


When Cycling Becomes Too Much

It is also important to know how to balance your workouts.

For most people, exceeding 5-6 hours of cycling per week could lead to fatigue and an increased risk of overuse injuries.

From my experience, I have noticed that when I overdo the rides without allowing adequate recovery, the muscles start protesting with pain and tension.


Complementary Sports to Cycling

Cycling pairs well with other sports.

For example, running further improves endurance and strengthens the cardiovascular system.

Swimming is excellent for the upper body and for muscle recovery.

Yoga and Pilates also help improve flexibility and core stability, which are fundamental for a well-rounded cyclist.

Hiking and trekking, finally, offer another way to train the legs on variable terrain, stimulating muscles that the bike might not reach.


The Ideal Cyclist Physique: Practicality and Power

The perfect physique for a cyclist is not that of a bodybuilder, but of an efficient athlete.

Imagine lean, toned legs, a strong core, and endurance that never fails you.

This is the result of training that mixes intense rides with targeted strength sessions.

The best cyclists have legs that work like well-oiled engines: powerful, resilient, and capable of tackling long distances without giving up.


The Strength of Cycling on Leg Day

The strength you build on the bike becomes a valuable ally for leg day at the gym.

Muscles used in aerobic mode integrate perfectly with resistance exercises.

This mix allows you to have legs that are not only aesthetically pleasing but also functional and ready to give their best, whether on two wheels or with weights.

My Personal Experience

It doesn’t take a genius to understand that alternating leg day with bike rides is the perfect recipe for strong and resilient legs.

I usually dedicate leg day just once a week, especially during the winter.

That session at the gym is sacred; I give it my all with heavy squats, lunges, leg presses, and everything else to give that extra push to the muscles.

But then, when the weather gets milder and friends invite me on a little ride, sometimes we do two bike rides a week and sometimes I add one or two solo rides.

This is because when I ride alone, I want a more intense workout.

For example, on an autumn afternoon, I prepare for a ride where I alternate 5 minutes of intense sprint with 2 minutes of active recovery.

This mix allows me to work on both endurance and power, keeping my muscles always in training.

And it’s not just a matter of quantity: it’s all about quality.

Leg day at the gym helps me develop explosive strength, while bike rides enhance muscular endurance and tone.

One day after leg day, maybe in the afternoon, I go out for a light ride to flush out lactic acid and boost recovery.

The combination of the two workouts creates a virtuous cycle: the legs become stronger and more resilient, and every bike ride prepares you even better for the gym session.

Riding gives me a mental boost that immediately reflects in the gym.

The other day, after a good ride, during squats at the gym, I noticed the weight slid off with ease.

It was as if my legs had completed an Olympic warm-up!

Every movement, from squats to lunges, felt smoother, almost as if my mind and body were in perfect sync.

Even on a hill during a sprint, my speed improved significantly.

I don’t consider myself a professional, but every ride teaches me to manage stress and improve my technique.


A Study That Reveals Everything

I don’t want to stop at just my own experiences: here is what science says!

One study compared two high-intensity exercise protocols in trained men.

One group worked on a cycle ergometer, performing 4 sets of 30-second sprints, while the other focused on the leg press, doing 4 sets of 10-12 repetitions until momentary failure.

Both groups trained 3 times a week for 5 weeks.

Before and after the training period, they performed 10RM tests for knee extension and an incremental treadmill test to measure time to exhaustion and peak oxygen consumption (VO₂peak).

They also evaluated the composition of the lower limbs using DEXA technology.

The results?

Knee extension (10RM) and time to exhaustion increased in both groups, demonstrating that both biking and leg press offer similar benefits in terms of strength.

But there’s more: only the group that used the cycle ergometer showed a significant increase in VO₂peak, a sign of improved aerobic capacity.

As for the muscle composition of the lower limbs, the changes were minimal.

In other words, 5 weeks of intense training, whether on the bike or in the gym, produce similar strength adaptations.

If your goal is to push your cardiovascular endurance as well as strength to the max, biking might give you that extra boost.

This study confirms what I have learned in the field: integrating different types of training can lead to truly comprehensive benefits.

(Bike & Weights: Equal Strength Gains)


Ideal Frequency: Leg Day + Bike Rides

I admit I’m not a bike fanatic, but when there’s a beautiful day and the wind in your face, I jump on without a second thought.

Listen, here’s the truth: if you don’t take risks, you won’t win.

When I managed to squeeze in 4 bike rides along with my 2 gym leg days – which is a rare treat for me – the results were nothing short of explosive.

This is not just theory: I saw strength, power, and muscle increase in an incredible way.

Biking fires up the muscles like a booster, while leg day sculpts them thoroughly.

Let’s break down these benefits in detail:

Benefit 1: Amplified Strength and Greater Efficiency at the Gym

After an intense bike ride, the muscles are not just warmed up, but seem to have an extra boost, ready to lift heavier loads.

It’s as if the pedaling activated a turbo mode: when you arrive at the gym, every squat is deeper and the weights feel less burdensome.

This natural activation transforms every exercise into an opportunity to push beyond your limits.

Benefit 2: Explosive Power for Sprints and Dynamic Exercises

During bike rides that alternate intense sprints with brief recoveries, you feel your muscles charge with extra energy.

These high-intensity workouts allow you to experience immediate strength, as if your legs were already primed to explode.

At the gym, this translates into greater effectiveness in explosive exercises—lunges and dynamic squats respond with a significantly increased power, almost as if the muscles were prepared for battle.

Benefit 3: Improved Endurance and Faster Recovery

The effect of biking is not limited to strength.

Riding for 45 minutes or more, alternating intensity and recovery, has improved my muscular endurance.

After a long ride, I notice that post-workout recovery at the gym is quicker.

The muscles seem to flush out lactic acid more effectively, reducing that annoying feeling of fatigue.

I never underestimate the impact of fresh air and a change of scenery.

When I’m out biking, I feel reinvigorated, with a mental charge that pushes me to give my best even at the gym.

Every ride becomes a way to “refresh” both mind and body, making the whole training week more varied and stimulating.


My Typical 2-Day Gym Leg Workout

My-recent-2-Day-Gym-Leg-Workout

Here’s a recent strategy that’s giving me great results:

Day 1: Strength and Power

Warm-Up:

I always start with 10 minutes on the exercise bike or a light jog to prepare the muscles.

Barbell Squats:

I do 4 sets of 8-10 repetitions.

I focus on correct posture, keeping my back straight and lowering until my thighs are parallel to the floor.

Leg Press:

4 sets of 10 repetitions to really load the quads.

This exercise allows me to safely lift heavy loads.

Dumbbell Lunges:

3 sets of 12 repetitions per leg.

I alternate legs and keep the movement fluid to evenly stimulate both the quads and the glutes.

Romanian Deadlifts:

3 sets of 10 repetitions to target the hamstrings.

A fundamental exercise for a complete leg workout.

Calf Raises:

3 sets of 15 repetitions to strengthen the calves.

I make sure to perform the movement slowly to maximize muscle work.

Cool-Down:

I finish with targeted stretching to recover and prevent injuries.

Day 2: Volume and Endurance

Warm-Up:

Again, 10 minutes of cardio; often I opt for a light jog or a ride on the exercise bike.

Bodyweight Squats or Kettlebell Squats:

3 sets of 12-15 repetitions.

I focus on controlling the movement to give extra work to the quads in a less heavy but higher volume manner.

Walking Lunges:

3 sets of 12 repetitions per leg.

I walk along a controlled route, maintaining correct posture and lengthening each step well.

Step-Ups on a Bench:

3 sets of 12 repetitions per leg.

I step up onto a bench or a step, focusing on balance and pushing with the working leg.

Leg Curls:

3 sets of 15 repetitions to work on the hamstrings.

This exercise is ideal to balance the work done on the quads.

Hack Squat (Optional):

3 sets of 10-12 repetitions to vary the load and stimulate the muscle differently.

Cool-Down:

Stretching and a few minutes of light walking to aid recovery.


Will Riding Every Day Tone the Rest of Your Body Too?

You know what?

Even though biking primarily works the legs, it’s not just about quads and glutes.

Riding regularly involves the whole body in surprising ways.

For example, when you push on the pedals, your core activates to maintain stability and balance.

This means stronger abs and lower back muscles that help you keep the perfect posture.

And let’s not forget the arms!

Even if to a lesser extent, the pushing movement and changing posture activate the shoulders and arms, making them more toned over time.

Besides toning, riding every day also helps you burn fat.

Constant activity boosts your metabolism, promoting calorie burning and helping reduce body fat.

In practice, if you commit to daily rides, you’re not just sculpting your legs: you’re training a complete circuit.

The key is to maintain good technique: sit well on the bike and use your body to balance the movement.

Naturally, this won’t turn you into a competitive bodybuilder.

Hypertrophy—that massive muscle growth—requires specific exercises with weights and progressive loads.

That said, don’t get me wrong: cycling can contribute to increasing muscle mass to some extent, especially if you’re a beginner.

Over time, however, the body adapts and muscle growth slows down.

To achieve significant muscle mass results, it is ideal to combine cycling with weight training sessions.


Conclusion

In short, cycling for a month can significantly improve the strength and endurance of your quads.

Don’t expect bodybuilder-like legs if you only ride, but enjoy the benefits of stronger and more functional legs.

The combination of cycling and strength training is the secret to achieving a balanced and high-performing physique.

Whether you are an avid cyclist or an occasional rider, the key is to find the right balance and have fun along the way.

Pedal, push, and most importantly, have fun: your body will thank you!


FAQs

Can I build noticeable quad strength in just one month of cycling?

Yes, with consistent, high-intensity sessions, many cyclists notice improved quad endurance and power within a month.

How does bike fit affect quad power?

A proper bike fit—correct saddle height and position—ensures optimal quad activation for stronger pedal strokes.

Can cycling lead to quad dominance?

Quad dominance means these muscles become overdeveloped relative to your glutes and hamstrings. To correct this imbalance, incorporate targeted exercises like hip thrusts, deadlifts, and hamstring curls into your routine.

Is outdoor cycling more effective than indoor cycling?

Outdoor rides offer varied terrain and natural resistance changes, which can provide a dynamic stimulus for quad development.

Can cross-training boost quad strength?

Incorporating activities like running or plyometrics can complement your cycling routine and further boost quad strength.

Recommended
Categories
CARDIO & ENDURANCE Cycling

Can 15 km of daily cycling really melt belly fat?

To tell the truth, I don’t consider myself a bike fanatic.

I use it for a few rides in the summer, but my true passion remains running and hiking in the mountains.

This guide was born from my curiosity to understand whether riding 15 km a day can really affect abdominal fat.

Here you will find numbers, practical examples, and useful tips for anyone who wants to get on a bike and see concrete results.


The Calorie-Burning Mechanism

How-your-body-burns-calories

Cycling is a cardio activity that helps create a caloric deficit.

For example, for a person weighing about 70 kg, 15 km of cycling can burn between 450 and 600 calories.

For someone who weighs 60 kg, the value is around 400 calories, while for someone who weighs 85 kg it can reach up to 600 calories.

The secret is intensity: the harder you push on the pedals, especially uphill, the more your energy expenditure increases.

Imagine your body as a high-performance engine: it needs to be fueled and pushed hard to achieve maximum performance.


The Mathematics of Weight Loss

One kilogram of fat is equivalent to approximately 7,700 calories.

If you create a deficit of 500 calories each day by cycling, in a month you accumulate a deficit of about 15,000 calories.

In theory, this could translate into a loss of about 2 kg per month, provided that your diet does not compensate for the burned energy.

Here is a summary table to give you an idea of the estimates based on the distance traveled:

Daily Distance Calories Burned (Approximate) Estimated Loss in 3 Months Estimated Loss in 6 Months
5 km 150 – 200 1,5 – 2 kg 3 – 4 kg
10 km 300 – 400 3 – 4 kg 6 – 8 kg
15 km 450 – 600 4,5 – 6 kg 9 – 12 kg
20 km 600 – 800 6 – 8 kg 12 – 16 kg
25 km 750 – 1000 7,5 – 10 kg 15 – 20 kg

These numbers are theoretical estimates and depend on many factors: weight, intensity, incline, duration, and above all, diet.


Real-Life Examples

Browsing fitness forums and listening to stories from other cyclists, I discovered that many have obtained excellent results.

Some talk about losing 48 kg in only 3 months by simply integrating cycling into their daily routine.

My favorite story is that of a 55-year-old friend who, when he started cycling, weighed 28 kg more than his ideal weight.

In just 7 months, thanks to a mix of consistency and a targeted diet, he lost a whopping 26 kg.

He now weighs 73 kg and not only has he lost weight, but he has also regained energy and vitality.

These testimonies demonstrate that cycling, combined with good nutrition, can be a real game-changer.


Why Abdominal Fat Takes So Long to Disappear

Abdominal-fat-is-a-tough-beast

Abdominal fat is a tough beast.

It clings on like that friend who just doesn’t know when to leave.

Our body is designed to protect the organs.

That extra layer is like armor.

It is an evolved defense mechanism.

When you lose weight, your body decides where to shed the pounds first.

Legs and arms often respond faster.

The stomach, however, is always the last to give in.

Imagine it like peeling an onion.

The outer layers come off easily, but the core requires more patience and commitment.

There is science behind all of this.

Visceral fat, the fat around the organs, is more metabolically active.

Meanwhile, subcutaneous fat, right under the skin, is stubborn.

It stores energy for times of need.

Let’s get technical.

Insulin resistance can make abdominal fat cling even more.

It’s like trying to shake off a wet blanket.

Hormones also play an important role, slowing down fat burning in that area.

Think of your body as a busy factory.

Metabolism is the assembly line.

It works hard, but sometimes it gets clogged.

Abdominal fat becomes that stubborn delay that is hard to eliminate.


Slow or Fast Cycling? Uphill or Flat?

Fast-cycling-phases-and-uphill-stretches

Not all cycling sessions are equal.

A slow and steady ride on a flat course burns calories, but adding some uphill segments significantly increases energy expenditure.

For those looking to maximize fat loss, alternating between fast cycling phases and uphill stretches is ideal.

For example, on a 15 km ride, you could start at a moderate pace, tackle a hill with extra effort, and then recover on a descent.

This variation stimulates the metabolism and helps burn more calories in less time.


Practical Examples to Eliminate Stubborn Abdominal Fat

Interval Cycling

Start with a 5-minute warm-up at an easy pace.

Then, for the next 10 minutes, include sprints:

  • Ride at maximum effort for 1 minute.
  • Recover by riding slowly for 2 minutes.

Repeat this cycle for the entire duration.

Finish with 5 minutes of cool down.

This technique helps burn more calories and stimulates the metabolism.

Sprints on Short Segments

If the 15 km ride is on flat terrain, try to identify 1–2 km stretches where you can significantly increase your speed.

Focus on maintaining good posture and a steady push.

Alternate these segments with periods at a moderate pace.


The 15 km Issue

Riding 15 km a day is fantastic for staying active.

However, if your goal is to completely eliminate abdominal fat, a fixed distance on flat terrain might not be enough.

The key is intensity and variety: alternating sprints and recovery moments increases the efficiency of your ride.


How to Track Progress: Scale and Waist

It’s not enough to just weigh yourself.

Measuring your waist is crucial to monitor progress.

Weight can fluctuate for various reasons, like water retention.

The waist, on the other hand, is a more accurate indicator of changes in abdominal fat.

Tracking both gives you a complete picture.

The scale shows the overall picture, while the waist reveals the details.

For example, you might notice that your weight remains stable while your waist shrinks.

This means you are losing fat and improving your physical shape, even if the scale doesn’t show it.

Use a measuring tape and record your measurements every 2–4 weeks.

That way, you can clearly see improvements and stay motivated.


The Muscles Involved in Cycling

Legs Take Center Stage

The legs are the true protagonists.

The quadriceps work at full capacity every time you push the pedals.

The hamstrings and glutes come into play to provide power with each pedal stroke.

And let’s not forget the calves, which help you maintain the push until the end.

The Core: Your Secret Ally

Maintaining good posture on the bike also engages the core.

Abdominals and lower back muscles work to stabilize the body.

It’s like having a little internal army supporting you every kilometer.


The Difference Between Road Bikes and Stationary Bikes

Many wonder if a stationary bike can give the same results as an outdoor bike.

The answer is yes, but with some differences.

Outdoors, you have variable terrain: wind, natural inclines, and different surfaces that make the workout more dynamic.

A stationary bike, if well adjusted, can simulate similar resistance, but it lacks that element of unpredictability that pushes your body to work harder.

The important thing is to maintain intensity and consistency, regardless of the chosen equipment.


How Long Does It Take to See Results?

Visible changes, like a reduction in belly fat, can appear after 4–6 weeks of consistent training.

Do not expect miracles in a few days: the body needs time to adapt and respond to exercise.

For a beginner, it is advisable to start gradually with 3–4 sessions a week and then increase the frequency as endurance improves.


Tips for Beginners: Start on the Right Foot

If you are not used to regular physical activity, do not jump immediately into 15 km a day.

Start with 5–10 km, three times a week, and gradually increase.

Make sure to do stretching before and after each workout to prevent injuries.

Invest in a well-adjusted bike and safety gear like a helmet and gloves.


What to Eat Before and After Riding

Nutrition plays a crucial role in your weight loss journey.

Before riding, choose complex carbohydrates: a slice of whole-grain bread, oatmeal, or a banana can give you the energy you need.

Avoid heavy meals that might make you feel sluggish.

If your ride exceeds 60 minutes, consider a light snack, such as an energy bar or some nuts.

After your workout, focus on a protein source (eggs, yogurt, a protein shake) to aid muscle recovery, paired with carbohydrates to replenish glycogen stores.


Long Rides: More Carbohydrates for More Energy

Those who train with a bike need a higher carbohydrate intake than those who only exercise in the gym.

This is because long rides quickly deplete energy reserves.

Opt for whole foods: sweet potatoes, quinoa, brown rice, and durum wheat pasta.

A balanced diet will help you maintain high performance and achieve better results over time.


Additional Benefits of Daily Cycling

Cycling every day is not just about the calories burned.

It brings many extra benefits that improve daily life.

  • Heart Health: Cycling is a great ally for the cardiovascular system. It helps improve circulation and lower blood pressure.
  • Energy and Vitality: A morning ride gives you a positive boost. It reduces stress by releasing endorphins, sharpening your focus, and boosting your overall energy levels.
  • Balance and Coordination: Cycling improves coordination and balance. Every pedal stroke requires perfect synergy between the mind and body.


The Right Bike Makes the Difference

The choice of bike really makes a difference.

Do not underestimate the importance of a bike that suits your needs.

When riding 15 km a day, having the right companion on your bike is essential.

Road Bike

This option is synonymous with lightness and speed.

The frame is slim and the sporty geometry allows you to reach high speeds.

Less weight means more agility and less effort to accelerate.

With a road bike, you burn more calories in less time thanks to the aerodynamics that push you to cut through the air.

If your goal is to maximize efficiency and push hard on every pedal stroke, this is the ideal choice.

Trekking Bike

This is the versatile and comfortable friend.

Designed to handle not only paved roads but also less-trodden paths, it offers a more relaxed ride.

The gear range is often broader, useful for managing steep climbs and variable terrains.

Ergonomic seats and a robust structure guarantee comfort over long distances.

If you prefer an approach that combines calorie burning with a pleasant and less aggressive ride for your body, the trekking bike is perfect.


Don’t You Burn Calories at High Speed on a Descent?

When you are descending, gravity does most of the work.

You only need to control the bike, maintain balance, and brake if necessary.

Your body is less active compared to pedaling against resistance.

Sure, even while descending there is a minimal energy expenditure to coordinate your movements, but it is not comparable to an intense ride.

So, if your goal is to burn calories, take advantage of hills or high-intensity intervals.


Wind or Rain: Does Cycling Burn More Calories?

Cycling against the wind or in the rain makes your body work a bit harder.

When the wind opposes you, you have to push more to maintain speed.

This increased effort leads to burning more calories.

Rain, although it may slow you down, still requires extra energy to stay focused and control the bike.

Keep in mind, however, that extreme conditions can affect safety and comfort.


Heart Rate Monitor: Measure Your Effort and Calorie Burn

Using a heart rate monitor can be truly enlightening for your fitness journey.

It allows you to understand in real time whether you are working in the right zone to burn fat.

Low Intensity (100–120 BPM)

If you are just starting out or in a recovery phase, a rate of 100–120 BPM is ideal.

In this zone, you can burn about 5–7 calories per minute.

It is perfect for warming up and light rides, helping improve circulation and preparing the body for greater efforts.

Medium Intensity (130–150 BPM)

This is the typical “fat-burning zone.”

At 130–150 BPM, the consumption is about 8–12 calories per minute.

It is ideal for 30-minute sessions, with an estimated calorie expenditure between 240 and 360 calories.

Great for improving endurance and aerobic capacity.

High Intensity (160–180 BPM)

When you push to the max, you reach 160–180 BPM.

Here you can burn about 12–16 calories per minute.

This zone is indicated for sprints or interval training but requires caution and attention to your body’s signals.

Important Note:

These values are very general estimates.

Every person is different, and results may vary based on age, weight, fitness level, and environmental conditions.

It is essential to talk to your doctor before starting any training program and not to follow these guidelines on your own.


Calculate Your Caloric Needs: Practical Examples

To understand how many calories you need each day, you can use formulas like the Harris-Benedict equation.

It is a simple way to estimate your basal metabolic rate (BMR) and daily caloric needs.

How it works in practice:

  • Calculate the BMR and then multiply it by an activity factor.
  • To lose weight, create a deficit by burning or reducing about 500 calories a day.

Examples for Men:

Example 1 – Mario:

Mario is 35 years old, weighs 80 kg, and is 175 cm tall.

His BMR is approximately 1,750 calories per day.

With a moderate activity level (factor 1.55), his daily needs rise to about 2,700 calories.

If he wants to lose weight, he could aim to burn or cut about 500 extra calories, arriving at around 2,200 calories.

Example 2 – Luca:

Luca is 45 years old, weighs 90 kg, and is 180 cm tall.

His BMR is around 1,800 calories.

With an active lifestyle (factor 1.75), his needs are about 3,150 calories per day.

To create a deficit and lose weight, Luca might aim for an expenditure of about 500 extra calories or reduce intake to around 2,650–2,700 calories.

Examples for Women:

Example 1 – Anna:

Anna is 30 years old, weighs 65 kg, and is 165 cm tall.

Her BMR is around 1,450 calories.

With a moderate activity level (factor 1.55), her daily needs become about 2,250 calories.

To lose weight, Anna could aim for a deficit of about 500 calories, targeting around 1,750–1,800 calories per day.

Example 2 – Giulia:

Giulia is 50 years old, weighs 70 kg, and is 160 cm tall.

Her BMR is approximately 1,350 calories.

With a moderately active lifestyle, her needs rise to about 2,100 calories.

To create a deficit and lose weight, Giulia might aim to consume or burn 500 calories less, reaching around 1,600–1,650 calories.


How to Personalize Your Diet to Lose Weight

To lose weight, it is crucial to achieve a targeted caloric deficit.

Let’s see for Mario, Luca, Anna, and Giulia which foods and combinations can help them reach their goal.

For Mario (Goal: about 2200 calories)

Breakfast – 500 calories
For example, a bowl of oatmeal with skim milk, fresh fruit, and a handful of nuts.
Carbohydrates: about 70 g.

Morning Snack – 200 calories
A Greek yogurt with a tablespoon of honey and some berries.
Carbohydrates: about 30 g.

Lunch – 700 calories
A balanced plate with grilled chicken breast, quinoa, mixed vegetables, and a drizzle of extra virgin olive oil.
Carbohydrates: about 90 g.

Afternoon Snack – 200 calories
A handful of almonds and an apple.
Carbohydrates: about 30 g.

Dinner – 600 calories
Baked fish, sweet potatoes, and a good mixed salad.
Carbohydrates: about 50 g.

Approximate Total: 2200 calories and about 270 g of carbohydrates.

This plan allows you to create a deficit of about 500 calories compared to your maintenance needs.

For Luca (Goal: about 2650 calories)

Breakfast – 600 calories
An omelet with vegetables, whole-grain bread, and a portion of fruit.
Carbohydrates: about 80 g.

Morning Snack – 250 calories
A protein smoothie with banana and spinach.
Carbohydrates: about 35 g.

Lunch – 800 calories
A hearty plate of whole-grain pasta with tomato sauce, vegetables, and a lean protein source (such as turkey or legumes).
Carbohydrates: about 100 g.

Afternoon Snack – 300 calories
Whole-grain crackers with hummus and carrots.
Carbohydrates: about 40 g.

Dinner – 700 calories
Lean steak, brown rice, and a side of grilled vegetables.
Carbohydrates: about 60 g.

Approximate Total: 2650 calories and about 315 g of carbohydrates.

Again, the deficit of about 500 calories is targeted for gradual weight loss.

For Anna (Goal: about 1750 calories)

Breakfast – 400 calories
A yogurt with whole-grain cereals and dried fruit.
Carbohydrates: about 50 g.

Morning Snack – 150 calories
A banana or a pear.
Carbohydrates: about 20 g.

Lunch – 600 calories
Mixed salad with tuna, legumes, tomatoes, and a bit of whole-grain bread.
Carbohydrates: about 70 g.

Afternoon Snack – 150 calories
A cereal bar or a few apple slices with almond butter.
Carbohydrates: about 20 g.

Dinner – 450 calories
Vegetable soup with a small piece of whole-grain bread and a protein source like tofu.
Carbohydrates: about 40 g.

Approximate Total: 1750 calories and about 200 g of carbohydrates.

For Giulia (Goal: about 1600 calories)

Breakfast – 350 calories
A serving of smoothie bowl with fresh fruit and a bit of granola.
Carbohydrates: about 45 g.

Morning Snack – 150 calories
An apple with a small handful of nuts.
Carbohydrates: about 20 g.

Lunch – 550 calories
A quinoa salad with vegetables, avocado, and a protein source like salmon or legumes.
Carbohydrates: about 60 g.

Afternoon Snack – 150 calories
A low-fat yogurt or a light protein bar.
Carbohydrates: about 20 g.

Dinner – 400 calories
A light plate of brown rice with steamed vegetables and chicken breast or tofu.
Carbohydrates: about 35 g.

Approximate Total: 1600 calories and about 180 g of carbohydrates.

Important Note

These are very general examples and everybody responds differently.

It is always important to consult a doctor or a nutritionist before starting a new dietary plan.


HIIT: Running vs. Cycling and the Role of the Microbiota

Recently, I read a really interesting study comparing HIIT training on a bike versus running.

The idea is simple: to compare two isoenergetic 12-week HIIT programs to understand which sport helps reduce body fat, particularly abdominal fat, and how this might be linked to our gut microbiota.

In simple terms, overweight or obese men participated in HIIT workouts three times a week.

One group did HIIT on a bike (10 sprints of 45 seconds with 90 seconds of recovery) and the other group ran (9 sprints of 45 seconds with 90 seconds of recovery).

Both groups worked at maximum effort, maintaining an intensity between 80% and 85% of their maximum heart rate.

The results?

Both groups lost weight and reduced total and visceral fat mass.

But here’s the catch: those who did HIIT running lost a higher percentage of abdominal fat compared to those who cycled.

This significant difference suggests that running might be more effective at targeting that problematic area.

Another intriguing aspect concerns the gut microbiota.

The study highlighted that the diversity of the microbiota, meaning the richness of intestinal bacteria, was linked to the amount of abdominal fat lost.

In practice, a more varied microbiota seemed to help more in reducing abdominal fat.

Changes in the composition of bacteria were correlated with losses in total fat and specifically with abdominal/visceral fat.

What does all this mean for us?

Both running and cycling, if used in a well-structured HIIT program, can improve body composition.

However, if your primary goal is to reduce abdominal fat, you might want to give running a chance.

And don’t forget: what we eat and the health of our gut could play a crucial role in our success.

In short, while the mechanisms behind the greater loss of abdominal fat with running still require further study, this comparison gives us interesting insights.

It’s not just about sweat and burned calories, but also about how our body reacts internally, down to the microbiota.


Conclusion

Cycling, when practiced consistently, along with a balanced diet and proper rest, can help you lose weight and improve your health.

Riding 15 km a day won’t make abdominal fat disappear overnight, but it represents a solid foundation on which to build a healthy lifestyle.

If you’re a beginner, start gradually and listen to your body.

Increase the intensity and duration of your rides over time.

Prepare a good dietary strategy that includes the right mix of carbohydrates and proteins, and you will see the results!

And you?

Do you really think that 15 km of daily cycling can melt away abdominal fat?

Share your experience and opinions in the comments!


FAQs

Are 5 km a day enough?

Yes, if done consistently and paired with a balanced diet, 15 km a day can help you create a significant caloric deficit.

What results can be expected after 2 months?

With consistency, you could lose between 3 and 5 kg, with an evident improvement on the scale, as long as your diet doesn’t counteract the created deficit.

How long should I ride?

To see significant results, at least 30 minutes a day is ideal.

If you are a beginner, start with 15–20 minutes and gradually increase.

Can I combine cycling with strength training?

Absolutely! Cycling improves endurance and burns calories.

Strength training builds muscle and stabilizes the core. Together, they offer a perfect balance for overall fitness.

Does sleep affect weight loss?

Yes, good sleep is essential. A proper rest regulates hunger hormones and aids muscle recovery.

So, 7–9 hours of sleep help burn more calories. Keep riding, sleep well, and watch your progress!

What are some tips to stay motivated with daily cycling?

Try varying your routes and challenging yourself with uphill segments or sprints.

Listen to your favorite playlist or an interesting podcast. Join cycling groups or participate in local events to share your passion and keep motivated.

Is cycling suitable for all ages?

Absolutely! It is a low-impact activity that can be adapted to different ages and fitness levels.

It’s a fun way to stay in shape and improve cardiovascular health.

Recommended
Categories
CARDIO & ENDURANCE Running

Can you safely lift weights the day after an intense sprint session?

After a heart-pounding sprint session that left energy levels soaring, the question naturally arises:

Is it wise to dive into a weightlifting session the very next day?

This is one of the many situations in which I have had to choose how to proceed:

There are days when I feel I can handle a heavy workout.

While on other days, I prefer to modulate the intensity and give my muscles the proper rest.

If my body is charged and the signals are positive, then I dive headfirst into weights as well.

But if I still feel that slight post-sprint fatigue,

I adopt a lighter approach, respecting recovery so as not to compromise progress.

Let’s say that the trick is to find the right balance, respect recovery times, and listen to your body, a secret I learned at my own expense and now happily share.

The Power of Sprinting: An Explosion of Energy

Male-athlete-sprinting-full-speed-track

Sprinting is pure explosion.

It’s like unleashing a firework in your muscles, an explosion of energy that lights up every fiber of your body.

The legs, the heart, the entire body vibrates with adrenaline, as if every cell were awakening in a moment of pure power.

It is that moment when you feel invincible, as if you could break down any barrier.

However, like every wild party, this too has its aftermath.

After the initial adrenaline rush, the muscles, put to the test, begin to demand their well-deserved rest.

They need time to recover and repair the micro-tears caused by the intense effort.

This balance between explosion and recovery is fundamental to progress without risking injury.

It is a natural cycle: pushing to the limit, enjoying the power of the moment, and then listening to the body as it calls for care and attention.


Muscles Involved in Sprinting

During a sprint session, the legs are the true stars.

The quadriceps kick in from the very first moment, providing the initial push needed to start strong.

The glutes and hamstrings work in synergy to maintain power throughout the run.

The calves, on the other hand, provide that final burst that allows you to accelerate and maintain speed.

Let’s not forget the core muscles, which stabilize the body and help transfer energy efficiently.

The back and shoulders also contribute, ensuring fluid movement and good balance.

It’s as if every fiber works together in perfect teamwork, turning energy into pure speed.


Variant Sprint
Track Sprint A classic for developing speed and technique.
Uphill Sprint The incline increases intensity and further stimulates strength and power.
Resisted Sprint Using a parachute or sled increases explosive strength.
HIIT with Sprints High-intensity sprints alternated with short recoveries improve speed and endurance.


Weightlifting the Day After: Risk or Opportunity?

Weightlifting-after-an-explosive-session

The temptation to jump right back into weightlifting after an explosive session is almost irresistible.

After an adrenaline surge during sprinting, the idea that if you can give your all in one mode, you can do it in the other too, seems natural.

I, too, in the past, have succumbed to this impulse.

I recall an episode where, right after an intense workout, I decided not to give myself any break.

The following day, I woke up with pain so intense it reminded me that every great effort requires the proper recovery time.

Imagine having just finished an overwhelming party: the lights are sparkling, the music makes you vibrate, and adrenaline is coursing through your veins.

But as happens at the end of a party, your body also needs to calm down and recharge.

After a sprint, muscle fibers require a break to repair micro-tears and regain elasticity.

Lifting heavy weights too soon is like over-stretching an old spring, increasing the risk that it will break.


The Science of Recovery

During recovery, the body activates protein synthesis processes to repair the micro-tears caused by intense exercise.

Studies conducted on elite athletes show that respecting recovery times can improve performance and significantly reduce the risk of injuries.

Proper recovery allows for better regeneration of muscle fibers, which is essential for tackling future sessions with more energy.

It is interesting to note how different types of exercise stimulate different types of muscle fibers.

Sprinting primarily recruits fast-twitch fibers, capable of generating bursts of power in just seconds – that explosive energy fires me up like nothing else.

In contrast, weightlifting involves both fast-twitch and slow-twitch fibers, offering an ideal mix of strength and endurance.

This dual stimulus allows for a balance between power and longevity, making training more complete and effective.


Managing Sprinting and Weightlifting Without Exhaustion

If, after a high-intensity session like sprinting, you immediately jump into an equally demanding weightlifting session, you seriously jeopardize muscle recovery.

During sprinting, fibers suffer micro-tears and accumulate fatigue.

Intervening too soon with heavy loads not only increases the risk of injury, but can also compromise the progress you’ve built.

On the other hand, if after an intense weightlifting session you engage in high-intensity cardio, your body might not have the resources to adequately repair itself.

This scenario leads to a decrease in performance and an increased risk of burnout.

The key lies in balance: scheduling sessions to allow the body time to regenerate is fundamental for achieving consistent and lasting results.


Examples of Weekly Workouts: Sprinting and Weightlifting

Here are some practical examples of how you might structure your week:

Monday: Intense Sprint

  • Warm-up: 10 minutes of light jogging and dynamic stretching.
  • Workout: 5 x 100-meter sprints with 90 seconds of recovery between sets.
  • Cool-down: 5 minutes of walking and static stretching.

Tuesday: Light Full-Body Weightlifting

  • Warm-up: 10 minutes of joint mobility exercises.
  • Workout:
    • Squats: 3 sets of 10 reps.
    • Bench Press: 3 sets of 10 reps.
    • Dumbbell Rows: 3 sets of 10 reps.
    • Plank: 3 x 30 seconds.
  • Cool-down: Stretching and foam rolling.

Wednesday: Sprint and Active Recovery

  • Warm-up: 10 minutes of light jogging.
  • Workout: 3 x 200-meter sprints with 2 minutes of recovery between sets.
  • Active recovery: 15 minutes of yoga or deep stretching.

Thursday: Strength-Focused Weightlifting

  • Warm-up: 10 minutes of mobility exercises.
  • Workout:
    • Deadlifts: 4 sets of 6 reps.
    • Military Press: 4 sets of 6 reps.
    • Lunges: 3 sets of 8 reps per leg.
  • Cool-down: Stretching for the muscle groups involved.

Friday: Mixed HIIT Workout

  • Warm-up: 10 minutes of light jogging.
  • Workout:
    • 20 seconds of sprinting + 40 seconds of walking (repeat for 10 minutes).
    • Immediately after, a bodyweight circuit: push-ups, squats, and burpees (3 rounds of 10 reps each).
  • Cool-down: 5 minutes of walking and stretching.

Saturday: Active Recovery and Technique

  • Light activity: 30–40 minutes of walking, swimming, or cycling at a moderate pace.
  • Technical work: Mobility and stretching exercises, focusing on weak points.

Sunday: Complete Rest or Light Activity

  • Complete rest or a short walk to promote circulation.
  • Reflection time: Review the week’s progress and plan for the next.


Sprint or Weights, Which Comes First?

This debate is always heated, and the choice largely depends on personal goals.

When my intention is to unleash all that explosiveness and adrenaline rush, I start with sprinting.

That lightning-fast run not only wakes me up but also puts me in a mindset ready to give my all.

Other times, if the focus is on building solid and controlled strength, I prefer to start with weights.

Starting with weightlifting allows me to focus on technique and work with precision, without the “rush” effect that sprinting can bring.

It’s not just a physical matter, but a mental one as well.

My experience has taught me to vary the order based on how I feel and the day’s goals.


Practical Tips for a Safe Workout

Never skip your warm-up.

It is fundamental to prepare the muscles for the effort.

Use light weights the day after an intense sprint.

Focus on technique and proper body alignment.

If you feel pain or excessive fatigue, take a break.

Recovery is just as important as the workout itself.

Maintain a good diet and stay consistently hydrated.

Remember: the energy you invest in recovery transforms into strength.


RELATED:》》》 Is one squat day and two sprint days enough to boost leg strength and speed?


Conclusion

In conclusion, whether tackling weights the day after an intense sprint is the right choice depends on how you feel and your personal goals.

Every workout is an adventure, made up of moments of pure energy and moments of pause.

I have learned that the secret lies in balance: pushing when you can, and recovering when necessary.

Adjusting intensity and giving yourself the proper recovery time is a personal journey.

Find the right balance that allows you to progress safely, properly integrating cardio and weightlifting into your routine.


Frequently Asked Questions

Do I always have to wait a full day after sprinting before lifting weights?

There is no fixed rule. It depends on how you feel and your training level.

What intensity is recommended for weightlifting the day after sprinting?

Opt for a light workout, focusing on technique and form, without overdoing the weights.

Is it possible to do sprinting and weightlifting on the same day?

Yes, but organize the sessions well. If you split the workout, make sure you have enough recovery time between each part.

Recommended
Categories
CARDIO & ENDURANCE Running

Is one squat day and two sprint days enough to boost leg strength and speed?

I’ve always loved the explosive mix of strength and speed.

For years, I’ve done bodyweight exercises and weightlifting.

More recently, I added a weekly sprint session to feel even more athletic and dynamic.

But after a while, one session felt like too little.

So I switched to doing sprints twice a week along with squats.

I’ll show you how I transformed my training to build powerful legs and boost my speed.

Join me on this journey through squats and sprints.


Squats: The Foundation of Every Progress

Woman-performing-barbell-squat-gym-strength-training-fitness-weightlifting

I will never forget the first day I immersed myself in an intense squat session.

A squat is a fundamental lower-body exercise where you lower your hips from a standing position, often with a loaded barbell across your shoulders.

My mind was completely focused.

Every repetition felt like sculpting not just my muscles, but also my determination and resilience.

It’s amazing how one exercise can become the cornerstone of an entire training philosophy.

Squat Variations to Maximize Results

I explored several squat variations that work especially well for sprinters, helping develop strength, speed, and power:

  • Front Squats: Shift the load to the front of the body, improving posture and core engagement.
  • Single-Leg (Pistol) Squats: Focus on unilateral strength and balance—crucial for explosive running.
  • Box Squats: Help refine form and build explosive power from a paused position.
  • Jump Squats with Light Weight: Boost speed and vertical power, translating directly to sprint performance.

These are just a few of the many squat variations out there.

Each one contributed to my progress, showing that variety and self-awareness are essential for ongoing improvement.

The Explosiveness of Sprints: The Adrenaline Rush That Transforms Training

Male-sprinter-starting-from-blocks-on-a-track

There is nothing more liberating than feeling the wind against your face during a sprint—a short, intense burst of running at top speed.

Each sprint taught me to push my limits, transforming the power built from squats into quick, decisive movements.

Surpassing yourself in just a few seconds is priceless.

It’s precisely this feeling that motivates me every time I put one foot in front of the other.

Specific Benefits of Sprints

Sprints not only improve cardiovascular endurance, but they are true accelerators of muscular power.

They have the advantage of:

  • Stimulating fast-twitch muscle fibers.
  • Enhancing coordination and neuromuscular timing.
  • Contributing to a more efficient movement economy.

Every session left me with legs that felt ready to take off!


The Perfect Synergy: Squats and Sprints Together

Integrating one squat day with two sprint days creates a synergy that goes beyond simple training.

The squat day is like preparing the ground, laying the foundations of strength.

The sprints, on the other hand, transform that strength into explosiveness, making every movement quicker and more powerful.

This approach revolutionized my concept of training, making me understand that true progress comes from balancing stability and speed.


My Weekly Plan for Stronger Legs

Here is how I organize my week to maximize results:

Monday (Squat Day + Sprint Intro)
I dedicate the session to warming up, followed by classic squats and progressive variations.

I focus on technique, gradually increasing the load.

Immediately after the squat work, I insert a few short sprints.

I perform 4–6 30-meter dashes, concentrating on explosive starts and ensuring complete recovery between sets so as not to compromise power.

Wednesday (Sprint Day 1)
After a dynamic warm-up, I launch into short, high-intensity sprints.

The challenge is to maintain maximum speed in every sprint, pushing the body to its limits and perfecting the starting technique.

Friday (Sprint Day 2)
I add variations such as uphill sprints to load the muscles and interval sprints – 6×30m sprints with 30 seconds of active recovery.

Active recovery is a brief period during which you continue moving at low intensity (like walking or light jogging) to keep the muscles warm and ready for the next sprint.


Scientific Analysis: The Science Behind Squats and Sprints

Neuromuscular Effects of Squats

Several studies show that squats:

  • Improve the connection between the brain and muscles.
  • Increase neuromuscular coordination.
  • Promote muscle mass growth in the quadriceps and glutes.

Personally, I have noticed that this exercise made me more aware of my body, leading me to execute smoother and more powerful movements.

Impact of Sprints on the Energy System

Sprints, as studied in scientific research, focus on activating fast-twitch muscle fibers, which are essential for power and speed.

These dashes also improve the body’s ability to utilize ATP, the primary energy for intense movements, leading to high performance even in physically stressful situations.


Mistakes During Squats

Many fall into the error of:

  • Not maintaining proper posture.
  • Loading the weight too early without adequate preparation.

I learned to respect every phase of the movement, focusing on technical execution before increasing the load.


Mistakes During Sprints

During sprints, the most common mistake is:

  • Not warming up adequately, which can lead to muscle injuries.

Make sure to perform joint mobility exercises and dynamic stretching to prepare your body for intense efforts.

Also, avoid forcing speed too much if you do not have a solid strength base.


Balancing Antagonistic Muscles

Training only the legs in one direction can lead to imbalances that not only slow your progress but also increase the risk of injuries.

I have learned that to achieve explosive energy and harmonious movement, it is essential to also pay attention to the antagonistic muscles.

These muscle groups work in opposition and are often neglected.

I can’t forget when, during my training, I decided to integrate Romanian Deadlifts.

It was as if I had finally given the hamstrings the opportunity to shine.

This exercise transformed my running style, providing a solid foundation and improving my posture at crucial moments of the sprint.

Then there is the Hamstring Curl, a true blessing for isolating and strengthening the hamstrings.

Whether you choose to do it with a machine or a fitball, you will immediately feel how these movements counterbalance the intense work of the quadriceps, creating an essential balance.

And I cannot fail to mention Glute Bridges and Hip Thrusts: essential exercises for the glutes, which are the secret engine of explosive power.

When I started including them in my routine, I noticed a decidedly more incisive push during starts.

It was as if every jump and every sprint had an extra gear, thanks to the well-distributed strength throughout the pelvis.

Finally, Reverse Lunges taught me how important it is to work dynamically.

These exercises not only engage the quadriceps and glutes but also improve stability and coordination, crucial elements for maintaining balance during rapid and sudden movements.


More Squats, More Power: The Impact of Adding Extra Squat Days on Leg Strength and Speed

Sometimes I wonder if one squat day is truly enough to maximize the benefits in terms of strength and speed.

From my experience, I have learned that increasing the volume with additional squat sessions can make a difference.

In this section, we will explore how to integrate more squats into your weekly training routine and the benefits it can bring to your sprint.

Why Add More Squat Days?

I discovered that muscles grow and strengthen thanks to constant repetition and adaptation.

Adding a second (or even a third) squat day:

  • Improves Technique: Each session offers the opportunity to perfect the movement, correct errors, and work on posture.
  • Increases Total Volume: More time under tension leads to greater muscle stimulation, essential for increasing strength and endurance.
  • Promotes Neurological Adaptation: Frequent training reinforces the brain-muscle connection, making the movement smoother and more efficient during sprints.

How to Structure the Weekly Plan with 2 Squat Days

Integrating additional squat days requires attention and planning.

Here is an example of how to organize the week:

Monday: Squat Day (Strength and Progressive Load)
Dedicate the session to warming up, followed by classic squats and variations to progressively increase the load.

Focus on technique and posture, ensuring controlled movements to maximize strength.

Thursday: Squat Day (Technique and Volume)
In this session, focus on bodyweight squats or front squats to perfect your form.

Work with a slightly higher volume but reduced intensity.

This approach not only boosts leg strength but also contributes to improving the explosiveness necessary for effective sprints.

Extra Benefits on Explosiveness and Speed

More squat sessions translate into:

  • Increased Explosive Power: A body constantly trained with squats can convert strength into quick, decisive movements.
  • Better Stability and Coordination: Repeating the movements helps stabilize the core and synchronize leg movements, making sprints more efficient and safe.
  • Reduced Risk of Injuries: Uniform strengthening of the leg and core muscles improves muscle balance, reducing the risk of injuries during high-speed sprints.


Squats and Sprints: Same Day or Separate Days?

Many wonder whether it is better to perform sprints immediately after a squat session or dedicate separate days to maximize recovery and performance.

Personally, I have experimented with both solutions, and I can tell you that the choice depends greatly on your goals and training level.

On one hand, combining squats and sprints in the same session can be a strategic move.

I always start with squats, which, as mentioned, prepare the ground by activating and strengthening the legs.

Immediately after, incorporating sprints takes advantage of that residual “spark” of energy to transform strength into explosiveness.

This mode taught me to manage fatigue and push my body beyond its limits, achieving surprising results in terms of speed and neuromuscular endurance.

It is a challenge, but if you love the thrill and want to test your muscle synergy under fatigue, it might be for you.

On the other hand, dedicating separate days to squats and sprints has its advantages, especially if your goal is to maximize strength and technique in each exercise.

Training squats on a dedicated day allows you to load the muscles well without worrying about having to then express all your power for sprints.

The next day, focusing exclusively on sprints allows you to give your maximum without the residual effect of muscle fatigue.

This way, you ensure more explosive starts and impeccable technique.


Complementary Exercises to Boost Explosive Power in Sprints

When it comes to sprints, having strong legs is not enough: you also need that spark of explosiveness that allows you to burst forward like an arrow.

Over the years, I discovered that integrating complementary exercises into my training made an enormous difference.

Here are some of my favorites that will help you push your limits!

Plyometrics: The Secret of Explosive Athletes

Plyometric movements are my ace in the hole.

For example, box jumps taught me to generate power starting from the feet.

When you jump onto a box, you are not just thinking about leg strength, but also the speed at which you convert that strength into movement.

Another useful variant is depth jumps, where, after jumping from a height, you immediately perform an explosive jump, making the most of the muscle stretch-shortening cycle.

Explosive Lunges and Lunge Jumps

Explosive lunges are another secret weapon to boost power.

This exercise not only works the quadriceps and glutes, but also stimulates balance and coordination—key elements for sprinting.

I like to perform dynamic variations, such as lunge jumps, where I quickly switch positions, simulating that rapid movement needed in a sprinter’s start.

Uphill Sprints and Resisted Dashes

To transform strength into explosiveness, uphill sprints are unbeatable.

Running against gravity increases the load on your muscles, forcing them to work even harder.

In addition, resisted sprints—whether using a parachute or a simple resistance band tied around the waist—are excellent for training the start and acceleration phase.

Over time, they’ve noticeably boosted sprint speed and effectiveness.

Integrating the Core for Complete Stability

We cannot forget the importance of a strong core.

Exercises such as planks, side planks, and Russian twists are essential for maintaining a stable posture during running.

A well-trained core transmits the power of the lower limbs more efficiently, making you feel even more ready to sprint at maximum speed.


Explosive Legs: A Sample Weekly Plan

Here’s a sample weekly training schedule that blends barbell squats, jump squats, and complementary exercises for explosive leg power:

Monday – Squat Day 1 (Strength & Explosiveness)

  • Barbell Squats: 4 sets x 4–6 reps
  • Jump Squats: 3 sets x 6–8 reps
  • Core Work (Plank): 3 sets of 30–45 seconds

Tuesday – Sprint Day 1 (Speed & Acceleration)

  • Warm-up with dynamic stretches and mobility drills
  • Resisted Sprints (using a parachute or resistance band): 4 sets x 20m
  • Uphill Sprints: 6 sets x 30m
  • Core Work (Side Planks): 3 sets per side, 30 seconds each

Wednesday – Squat Day 2 (Plyometrics & Technique)

  • Box Jumps: 3 sets x 8 reps
  • Depth Jumps: 3 sets x 6 reps
  • Explosive Lunges (Jumping Lunges): 3 sets x 8–10 reps per leg
  • Core Work (Russian Twists): 3 sets x 15 reps per side

Thursday – Active Recovery

  • Light cardio (jogging or cycling): 20–30 minutes
  • Full-body mobility and stretching exercises
  • Optional light core work or foam rolling

Friday – Sprint Day 2 (Power & Acceleration)

  • Warm-up with dynamic drills
  • 30m Sprints at maximum effort: 6 sets x 30m
  • Explosive Start Drills: 4 sets x 20m
  • Core Work (Plank Variations): 3 sets, 30–45 seconds each

Saturday – Optional Squat/Plyometric Day (Volume & Recovery)

  • Light Barbell or Bodyweight Squats: 3 sets x 12–15 reps
  • Additional Jump Squats or Box Jumps (if feeling fresh): 3 sets x 8 reps
  • Core Work (Russian Twists): 3 sets x 15 reps per side
  • Stretching and foam rolling

Sunday – Rest and Recovery


Targeted Nutrition for Powerful Legs

My nutrition strategy underpins all my goals.

A proper diet rich in protein, complex carbohydrates, and healthy fats is indispensable to support such an intense training routine.

I recommend including:

  • Lean proteins (chicken, fish, legumes) for muscle recovery.
  • Whole grains for lasting energy.
  • Good fats (avocado, nuts) for a balanced caloric intake.

Supplementation and Hydration

Besides food, supplements can make a difference.

Creatine, for example, is a great ally for improving muscular power, while BCAAs help in preventing muscle fatigue.

Do not forget the importance of hydration: a well-hydrated body responds better to stimuli and recovers more quickly.


Success Stories and Testimonials

I am not the only one benefiting from this approach.

I know friends and colleagues who have integrated squats and sprints into their routines, and the results speak for themselves:

  • Increased explosive power.
  • Improved sports performance.
  • Reduced risk of injuries thanks to a balanced training routine.

These testimonials confirm that the combination of strength and speed is a winning strategy.


Conclusion

I’m not sure what your specific goal is, but one thing is certain: you need to make room for upper-body exercises.

Strengthening your shoulders, chest, and back not only helps you maintain overall muscle balance, but also provides extra stability.

This stability directly benefits sprints, where strong arms and a solid core support explosive leg drive and better performance.

So, while you push to the maximum during your squat and sprint sessions, do not forget to strengthen your upper body.

A balanced body is the key to achieving extraordinary results!


FAQs

How long to see results with 1 squat day and 2 sprint days?

With a consistent and well-structured training routine, you should begin to notice improvements within 4–6 weeks, although times may vary depending on your fitness level and recovery practices.

How do I know if this routine works for me?

Monitor your progress by tracking your squat loads, sprint times, and overall performance improvements to see measurable gains.

Is this routine effective for beginners or only for advanced athletes?

It can work for both, but beginners should start with lighter loads and simpler sprint exercises to develop proper technique before progressing.

How can I apply progressive overload to this training plan?

Gradually increase the loads, sprint distances, or exercise intensity, while also varying the exercise types to continuously stimulate the muscles and promote progress.

Recommended
Categories
CARDIO & ENDURANCE Kettlebells

Am I Using Kettlebells Right for Weight Loss?

When I first picked up a kettlebell, I had no idea what I was doing.

It was awkward, heavy, and, honestly, I probably looked like a lost puppy.

But the truth is, since then I’ve learned that kettlebells aren’t just for building musclethey can actually help with weight loss.

So, are you using kettlebells the right way to lose weight?

Well, let’s crush it!


What Makes Kettlebells Special for Weight Loss?

Man-lifting-kettlebell-sweaty-gray-shirt

Kettlebells are not like traditional dumbbells.

Their unique shape and design allow for dynamic movements, such as swings, that engage multiple muscle groups simultaneously.

This means you work your entire body with every movement: swings, snatches, or cleans.

And guess what?

The more muscle groups you engage, the more calories you burn.

I still remember the first time I did a kettlebell swing—I looked like a circus act in motion.

I was out of breath after just five seconds.

But by pushing past my limits, I realized just how effective they are at burning fat.

The key is to focus on power and control, not just on the number of repetitions.


Kettlebell Workouts Increase Your Heart Rate

Heart-rate-line-red-heart-icon

Here’s the crucial point: kettlebell workouts are an explosive blend of strength training and cardio.

When you do a kettlebell swing, you’re not just strengthening your legs, back, and arms.

You’re also getting your heart working.

And we all know that a higher heart rate means more calories burned.

In fact, studies show that a high-intensity kettlebell workout can burn up to 20 calories per minute.

Crazy, right?

So, if you want to lose weight, kettlebells are a bomb, because they combine strength and cardiovascular benefits in one workout.

It’s like hitting two birds with one stone!


How Often Should You Use Kettlebells for Weight Loss?

Now, the million-dollar question: how often should you use kettlebells to lose weight?

Well, it depends on your current fitness level and your goals.

Personally, I like to incorporate kettlebells into my routine about 2–3 times per week.

This allows me to keep my muscles active and my metabolism constantly moving, without overdoing it.

If you’re just starting out, I recommend beginning with 1–2 workouts per week and gradually increasing as your strength and endurance improve.

Remember, consistency is key.


Which Kettlebell Exercises Are Best for Weight Loss?

Woman-kettlebell-workout-intense-training

Okay, you’ve got your kettlebell and you’re ready to get started.

But which exercises should you do to achieve the best weight loss results?

Here are my favorite exercises:

1. Kettlebell Swings

Woman-kettlebell-swing-gym-training

This is the quintessential kettlebell exercise that gets your heart pumping and works your entire body.

When performed correctly, kettlebell swings engage the hamstrings, glutes, core, and shoulders.

Plus, they provide that cardio boost you’re looking for.

To perform it properly, position your feet shoulder-width apart, slightly bend your knees, and push your hips back.

Swing the kettlebell with an explosive movement originating from your hips.

Remember, you should feel the work in your glutes, not in your lower back!

2. Kettlebell Goblet Squats

Squats are great, but when you add a kettlebell, they take things to the next level.

Goblet squats help build strength in your legs, glutes, and core, while keeping your heart rate elevated.

They’re a real game-changer when it comes to burning fat.

Simply hold the kettlebell close to your chest with both hands, squat down while keeping your back straight and your knees in line with your feet.

Then rise back up with power.

It’s a simple yet incredibly powerful movement!

3. Kettlebell Snatches

Man-kettlebell-snatch-gym-training-red-shirt

This is a slightly more advanced move, but it’s one of the best for a full-body workout.

The snatch engages your shoulders, core, and legs, while also giving your metabolism a boost.

The faster you perform it, the more calories you burn.

Basically, start in a squat position, then with an explosive movement, lift the kettlebell overhead with one extended arm, lowering it in a controlled manner to repeat.

It might take some time to perfect the technique, but once you get the hang of it, it’s incredibly effective.


Does Nutrition Play a Role in Using Kettlebells for Weight Loss?

Kettlebell-nutrition-weight-loss-fitness-illustration

Now, no fitness discussion is complete without talking about nutrition.

While kettlebells can certainly help you burn fat, you can’t work miracles with a poor diet.

I learned the hard way (yes, I’m still working on it) that you need to properly fuel your body.

Don’t get me wrong, kettlebells are fantastic for burning calories, but without a proper diet, the results in weight loss may not come.

1# Eat Enough Protein

After an intense kettlebell workout, I know how crucial it is to refuel my body with quality protein.

For example, I love grilled chicken breast, which is rich in lean protein, or a nice baked salmon, which is not only tasty but also provides omega-3s.

If you prefer vegetarian options, tofu and legumes like chickpeas and lentils are excellent choices.

There are also eggs, which I love to cook as an omelette with fresh vegetables, and Greek yogurt, perfect for a post-workout snack.

Even a protein shake, perhaps enriched with a bit of peanut butter and fruit, becomes a valuable ally in helping your muscles recover and grow.

2# Carbohydrates: Essential Energy

Don’t forget carbohydrates: they are the fuel for your kettlebell sessions.

Opt for complex carbs like oatmeal, brown rice, or sweet potatoes for a gradual energy release.

Sometimes I indulge in whole-grain pasta, but always in moderation.

With the right carbohydrates, your workout will be more effective and your recovery optimal!

3# Keep Calories in Check

Kettlebells will help you burn calories, but if you consume more than you burn, weight loss becomes a challenge.

Tracking your calories can be a good starting point to see if you’re headed in the right direction.

To do this, I started using apps and a simple food diary—tools that allowed me to create the essential deficit to push my body to burn excess fat.

It’s a delicate balance, but essential: monitoring what I eat ensures that every kettlebell workout translates into real, visible progress.


An Example Meal Plan for Kettlebell Training

Here’s a practical example of a meal plan to support your kettlebell workouts, with a daily intake of approximately 1900–2000 calories:

  • Breakfast (350–400 calories):
    • 2 scrambled eggs with spinach.
    • 1 slice of whole grain bread.
    • 1 piece of fruit (a small apple or half a banana).
      • Approximately 28–30g of protein, 30–35g of carbohydrates, and 12–15g of fat.
  • Morning Snack (150–180 calories):
    • 150g plain Greek yogurt with a small handful of nuts.
      • Approximately 12g of protein, 10–12g of carbohydrates, and 8g of fat.
  • Lunch (450–500 calories):
    • 120–150g of grilled chicken breast.
    • 3/4 cup of brown rice.
    • Mixed vegetables drizzled with about 1 teaspoon of olive oil.
      • Approximately 35–40g of protein, 40–45g of carbohydrates, and 8–10g of fat.
  • Afternoon Snack (150 calories):
    • Protein shake with almond milk and a serving of fruit.
      • Approximately 15–18g of protein, 15g of carbohydrates, and 4g of fat.
  • Dinner (500–600 calories):
    • 120–150g of baked fish (e.g., salmon).
    • 1 small sweet potato.
    • Mixed salad lightly dressed (about 1 teaspoon of olive oil).
      • Approximately 35–40g of protein, 45–50g of carbohydrates, and 10–12g of fat.

If you manage to create a calorie deficit, combining this plan with intense workouts, you will burn fat while maintaining muscle mass.

Of course, every body is different, so it might be useful to monitor your results and make small adjustments according to your needs.

In short, it’s a solid foundation for reaching your weight loss goals!


How Long Should a Kettlebell Session Last?

Let me tell you something: when it comes to kettlebell workouts, it’s not about how long you spend swinging them, but how intensely you make every rep count.

Over the years, I’ve tried everything from lightning-fast 15-minute bursts of pure explosiveness to marathon 45-minute sessions.

I’ve found that the sweet spot is really in that magical 20–30 minute window.

In that short period, every swing, every clean, and every snatch turns into a burst of energy.

This transforms an ordinary routine into an intense adventure that burns calories, fills you with adrenaline, and prepares you to conquer the rest of the day.

And if you’re just starting out, don’t worry— even a brief but focused session can ignite that spark of transformation.


How Do I Know What Intensity Is Right for Me?

Before each workout, I take a few minutes to warm up and gauge how I feel.

If I’m pumped up, I know I can push harder; but if my body is asking for a bit of calm, I dial the intensity back a bit.

To lose weight with kettlebells and see results, follow a protocol of 3–4 sets for each exercise.

For example, perform about 15 kettlebell swings, 12 goblet squats, and 10 kettlebell rows per side, arranging them in a circuit with 30–60 seconds of rest between sets.

I keep a journal where I record repetitions, weight, and post-workout feelings.

If I can speak without gasping, I know the intensity is just right; if I feel overwhelmed, it means I need to ease up a bit.

This approach works for any goal.

With small adjustments, you’ll also find the ideal balance to burn calories and achieve results without overdoing it.


How Many Calories Can a Kettlebell Session Burn?

Buddy, I was amazed when I discovered kettlebells.

I used to think an iron ball couldn’t replace my long cardio sessions.

Then I read a study from ACE Fitness and the University of Wisconsin, La Crosse.

They had everyday people do kettlebell snatches for 20 minutes straight.

The results were mind-blowing!

They burned as many calories as running a 6-minute mile.

Every kettlebell snatch is a full-body workout that sends your heart soaring.

I mean, who wouldn’t love torching 300 to 500 calories in just 20–30 minutes?

It’s not just about the numbers—there’s real science behind this.

The movement challenges your entire body and pushes your heart rate to near its max.

I love how kettlebells fit perfectly into my busy lifestyle.

Trust me, if you’re short on time but want a killer workout, kettlebells are the real deal!


30-Day Kettlebell: The Easy Weight Loss Program

Get ready to feel the difference: this 1-month kettlebell program for weight loss transforms both body and mind.

Each week brings new challenges, blending strength, cardio, and active recovery to achieve tangible results—without ever getting boring!

Week 1 – Foundations

Monday:

  • 3 sets of 15 kettlebell swings.
  • 3 sets of 12 goblet squats.
  • 3 sets of 10 kettlebell rows (alternating arms).
  • 3 sets of 10 kettlebell presses.
  • 3 sets of 30-second planks.

Tuesday:
Active recovery: 30 minutes of walking or light stretching.

Wednesday:
Repeat Monday’s workout to consolidate your technique.

Thursday:
20 minutes of light cardio (jogging or biking).

Friday:
Return to the base workout.

Saturday:
Light activity such as yoga or a long walk.

Sunday:
Complete rest to recharge.

Week 2 – Increased Intensity

Monday:

  • 4 sets of 15 kettlebell swings.
  • 3 sets of 15 goblet squats.
  • 3 sets of 10 kettlebell clean and press per side.
  • 3 sets of 20 Russian twists.

Tuesday:
30 minutes of stretching or yoga.

Wednesday:
Repeat Monday’s workout, maintaining high focus.

Thursday:
20 minutes of light cardio.

Friday:
Return to the full workout, aiming to improve the fluidity of your movements.

Saturday:
Moderate aerobic activity (brisk walking or swimming).

Sunday:
Rest to allow your body to assimilate the increased intensity.

Week 3 – Total Circuit

Monday:
Perform 3 rounds of the following circuit, resting 60–90 seconds between rounds:

  • 20 kettlebell swings.
  • 15 goblet squats.
  • 12 kettlebell rows per side.
  • 10 kettlebell push presses per side.
  • 10 kettlebell lunges per leg.

Tuesday:
Active recovery: 20 minutes of walking or dynamic stretching.

Wednesday:
Repeat the circuit, maintaining high intensity.

Thursday:
A short HIIT session without kettlebells (burpees and jumping jacks).

Friday:
If you’re feeling energetic, try completing 4 rounds of the circuit.

Saturday:
Choose a light activity, such as a light jog or a long walk.

Sunday:
Complete rest for full recovery.

Week 4 – Final Intensity with HIIT

Monday:
After an energetic warm-up, alternate 30 seconds of kettlebell swings with 30 seconds of burpees for 4 rounds, with 60 seconds of recovery between rounds.

Tuesday:
30 minutes of yoga or deep stretching to relax your muscles.

Wednesday:

  • 4 sets of 15 goblet squats.
  • 3 sets of 12 kettlebell clean and presses per side.
  • 3 sets of 10 kettlebell snatches per side.
  • 4 sets of 45-second planks.

Thursday:
Active recovery: a refreshing walk or some stretching.

Friday:
Final mix: 2 rounds of HIIT (30 seconds of swings / 30 seconds of burpees) followed by 2 combined sets of goblet squats and clean and presses.

Saturday:
30 minutes of moderate cardio, such as running or cycling.

Sunday:
Complete rest, to celebrate all the progress made.


Should You Combine Kettlebells with Other Workouts?

Don’t get me wrong: I love kettlebells and consider them one of the most versatile tools in the gym.

However, I’ve learned the hard way that varying your workouts is key to avoiding a monotonous routine and, most importantly, to preventing dreaded plateaus.

I remember when I relied solely on kettlebells for months.

There was a constant sense of progress, but then, all of a sudden, the results seemed to slow down.

It was like eating the same meal every day: delicious at first, but eventually predictably boring.

》》Add Cardio to Burn Even More Calories

On days when I’m not using kettlebells, I treat myself to a solid cardio session—whether it’s a quick run in the park, a bike ride along the trail, or even a burst of explosive HIIT.

There’s nothing better than feeling your heart race while giving your muscles a well-deserved break from weightlifting.

For me, cardio isn’t just a way to burn extra calories (even though it does that amazingly!), but it’s a true remedy for overall well-being.

It helps me keep my energy up, relieve the stress of the day, and regain that sense of freedom that is often lost in repetitive lifting sessions.

》》Traditional Strength

Kettlebells are fantastic, but when I really want to push my limits, I turn to barbell squats and deadlifts.

To make the routine even more comprehensive, I’ve always incorporated bench presses, pull-ups, and military presses.

Bench presses give me that power that turns sweat into glory, pull-ups are my daily battle against gravity, and the military press is the finishing touch that strengthens my shoulders and core, preparing me for every new challenge.

These exercises provide a solid foundation that helps you always give your best.


Conclusion: Are Kettlebells Right for Your Weight Loss Goals?

Here’s the bottom line: kettlebells can absolutely help you lose weight, but like anything, consistency is key.

When used correctly, they provide a full-body workout that burns calories, boosts metabolism, and builds strength.

If you’re not already using kettlebells, I highly recommend them.

But remember to focus on your form, work on endurance, and fuel your body properly.

Before you know it, you’ll be swinging your way to a leaner, stronger version of yourself.

I’d love to know how you’re using kettlebells in your weight loss routine.

What’s your favorite exercise?

Let me know in the comments!


FAQs

What makes kettlebell training effective for fat loss?

The explosive, compound movements raise your heart rate and accelerate calorie burning.

What weight should beginners choose?

Beginners typically start with an 8–12 kg kettlebell, adjusting based on fitness level.

Can kettlebells provide a full-body workout?

Yes, kettlebell routines target multiple muscle groups for a comprehensive full-body session.

How many muscles work during a kettlebell swing?

With a kettlebell swing, practically your entire body is engaged!
From your glutes to your core, from your legs to your shoulders and arms, you’re working more than 12 muscle groups in a single movement.
It’s the ultimate full-body workout!

Can kettlebell workouts replace traditional cardio?

Kettlebell workouts blend strength training with cardiovascular benefits, making them a viable alternative for many. However, if your primary goal is endurance, you might still want to include traditional cardio sessions.

Are kettlebell workouts ideal for busy schedules?

Yes, their high-intensity, short-duration sessions are perfect for fitting into a busy lifestyle.

Where can I find kettlebell routines for weight loss?

Many fitness websites, apps, and YouTube channels offer kettlebell workout routines tailored for weight loss.

Recommended
Categories
CARDIO & ENDURANCE Kettlebells

Can a 12 kg Kettlebell Help You Lose Weight and Tone Your Abs? Absolutely Yes!

I’ve lost count of how many times people have asked me if a 12 kg kettlebell really can help burn calories and sculpt the abs.

The truth is, when you decide to swing this “cannonball with a handle,” you realize that your entire body—and especially your core—is under positive stress.

It’s like doing a mini “cardio + strength” workout in a single session.

The best part?

It’s fun, and you hardly ever get bored.


My First Encounter with the Kettlebell

Mythical-kettlebell-fitness-inspiration

I remember the day I decided to set aside my classic dumbbells for a few weeks.

I wanted to try something different.

A friend showed me the kettlebell swing and said: “You’ll see, it will change your perspective.”

I grabbed a 12 kg kettlebell, and he explained the basic technique:

  1. Place the kettlebell on the floor in front of you.
  2. Slightly bend your knees, grab the handle, swing the weight between your legs, and push through your hips explosively, lifting it up to chest height (or slightly above if you have some experience).

After three sets of swings, my legs and glutes were literally begging for mercy.

But that good burn made me realize I was on the right track.

I felt like an explosive athlete, even though I was just moving the kettlebell back and forth.

In a few minutes, my heart was racing, and my shirt was soaked in sweat.

From that moment on, it became a must in my workouts.

In a nutshell, it’s like doing short bursts of running, but with an added advantage: you’re also strengthening your muscles, particularly the core and posterior chain.

Of course, today I use much heavier weights.

Over the years of training both with weights and bodyweight, I’ve built up the strength to handle more challenging loads.

But starting with 12 kg was crucial for learning the movement correctly.

Understanding the technique—how to engage the core and harness the power of the hips—was the foundation I built everything on.


Why 12 kg and Not 8 or 16?

8kg-and-12kg-kettlebell-comparison

Choosing the right weight is a bit like finding the right dance partner.

If it’s too light (like 8 kg), you might get tired quickly because you don’t feel enough challenge.

If it’s too heavy (16 or 20 kg), you risk overexerting yourself and possibly losing technique, increasing the risk of injury.

The 12 kg is the perfect “middle ground.”

It’s ideal for those who have some workout experience but aren’t weightlifting champions.

It’s a load that lets you do a good number of reps while maintaining control, and it still leaves you nicely wiped out.

On the other hand, my wife is comfortable with an 8 kg kettlebell because a lighter weight allows her to focus on technique and endurance without risking overload.


Losing Weight and Gaining Muscle at the Same Time

Woman-flexing-arm-fitness

“But wait, you can’t lose weight and build muscle simultaneously!”

I admit, for years I believed this old story too.

It almost seemed like you had to choose between a “leaner” version of yourself or a stronger one.

Then the kettlebell came along and turned everything on its head.

The beauty of this tool is that it allows you to combine two seemingly opposite goals: burning fat and building lean mass.

And it doesn’t do it in a boring or repetitive way.

Each exercise—be it a swing or a clean & press—combines explosive movement and load, forcing your body to work at maximum capacity on multiple fronts.

With every rep, you’re burning calories, because your heart is pounding and your metabolism speeds up.

At the same time, you’re also challenging your muscles with a substantial strength stimulus.

That’s why, with a balanced diet, you can see a gradual reduction in body fat and an increase in muscle definition.

I remember the first time I truly realized the potential of the kettlebell.

I was doing a simple circuit with 15 swings and 10 goblet squats for 3 rounds.

By the end of the first round, my heart was beating as if I had just sprinted, but my legs and core felt that deep work that only a well-distributed load can provide.

It was like combining the best of cardio and strength in a single piece of equipment.

But let’s be honest: it’s not magic.

You can’t just pick up a kettlebell and shake it around like it’s a toy.

You need consistency, correct technique, and that bit of determination that pushes you to do one more rep even when your muscles start to burn.

That’s where the transformation happens.

The key is progression.

Start with basic movements, like swings, to learn how to handle the weight and engage the right muscles.

Then add more complex exercises, like clean & press or windmills, which require strength, coordination, and stability.

As you get stronger and more confident, you can increase the load, shorten your rest times, or incorporate the kettlebell into even more challenging circuits.


The Big Question: Does Diet or Training Matter More?

Apple-tape-measure-weight-loss

The truth is they’re like two essential pillars that support each other.

You can give your all and sweat buckets during a killer kettlebell circuit, but if you then dive into fries and giant hamburgers like there’s no tomorrow… well, it’s a bit like putting water in a race car’s gas tank.

Diet is the high-quality fuel your body needs to perform at its best.

It doesn’t mean giving up that Friday night cheat meal forever (who doesn’t love a good pizza now and then?).

It just means being more selective and making sure that most of your meals support your goals.


What to Eat to Maximize Results

I often hear: “If I eat less, I’ll lose weight faster.”

It’s a tough myth to bust.

If you’re training at a certain intensity, you need protein to rebuild your muscles, carbs to have the energy you need, and healthy fats to keep hormones balanced.

  • Lean Proteins: chicken breast, turkey, oily fish, legumes. Occasionally (in moderation) even lean cuts of red meat if you like it. Muscles love protein!
  • Complex Carbs: brown rice, spelt, whole wheat pasta, quinoa. They provide steady energy, unlike refined sugars, which cause spikes and crashes.
  • Good Fats: avocado, extra virgin olive oil, nuts (almonds and walnuts). A bit of peanut butter (the real stuff, 100% peanuts) is great, too, if you don’t go overboard.
  • Fruits and Vegetables: colorful, fresh, full of fiber, vitamins, minerals, and essential micronutrients. Yes, grandma was right: eating lots of veggies is good for you.
  • Water: it may seem obvious, but tons of people don’t drink enough. Hydration is key for a well-functioning metabolism and for quick recovery after workouts.


And Which Foods Should Be Avoided Like the Plague?

Basically, anything ultra-processed, overloaded with sugar, or packed with saturated fat will hold back your weight-loss efforts.

Think packaged snacks, industrial sweets, and super-sugary sodas.

Also, be careful with sauces: some contain more sugar than candy.

It doesn’t mean you have to eat like a monk.

A little treat here and there is good for your mood (and sometimes even your body, which shakes off monotony).

However, your baseline diet should remain as clean and nutrient-rich as possible.


Why Weighing Your Food Opens Your Eyes

I know, it sounds “sad” and not very spontaneous.

Pulling out the kitchen scale at every meal isn’t exactly exciting.

But trust me, doing it for even just a couple of weeks can flip a switch you’ll never turn off again.

For a while, I was convinced I was doing everything right: I ate “healthy,” trained regularly, and figured results would come on their own.

Yet the scale wouldn’t budge.

Then I decided to weigh what I was eating, more out of curiosity than anything else.

Guess what?

Those famous “80 grams of pasta” portions were actually 130-140.

And my spoonful of oil?

Let’s just say that spoon was more like a mini bowl.

When I started measuring the amounts and tracking calories, everything started making more sense.

As soon as I adjusted the portions (without giving up anything, mind you), the weight dropped naturally, and my muscles started getting more defined.

It was like flipping a switch.


The Secret: Creating an Intelligent Caloric Deficit

Here’s the key to it all: the calorie deficit.

To lose weight, you have to burn more calories than you take in.

Simple, right?

Well, on paper it is, but in real life, it’s not so immediate.

If you don’t know how many calories you’re consuming, how do you know if you’re in a deficit?

This is where weighing food comes into play.

You don’t need to track obsessively forever.

Knowing what’s on your plate helps you spot where to cut back without losing key nutrients.

For example, your “light” cereal breakfast might be 500 calories.

A bowl of oatmeal with fruit and Greek yogurt?

Half the calories and just as filling.

It’s not about deprivation, but about making smarter choices.


How to Monitor Without Stressing Out

STEP DESCRIPTION
Do a 1-Week Test Weigh everything you eat and use an app to track calories. Don’t change anything; just see where you’re at.
Learn from the Numbers Discover what real portions look like and which foods have more calories than you think.
Create Your Deficit Cut 300-500 calories per day for sustainable weight loss. Reduce carbs or fats, but keep enough protein to preserve muscle mass.


Example of a Caloric Deficit for Weight Loss

To recap, creating a caloric deficit doesn’t mean eating very little, but rather balancing your meals to ensure you consume fewer calories than you burn.

At the same time, ensure you’re getting a good intake of essential nutrients.

Here’s an example of a daily meal plan for a deficit of about 500 calories per day, ideal for losing around 0.5 kg (about 1 lb) per week.

Breakfast

  • 40 g oats with 150 ml skim milk
  • 1 teaspoon of honey or some cinnamon for sweetness
  • 1 coffee or tea without sugar
    Total: 220-250 calories

Mid-Morning Snack

  • 1 Greek yogurt, low fat (about 150 g)
  • 10 g almonds (6-7 almonds)
    Total: 150 calories

Lunch

  • 100 g grilled chicken breast
  • 50 g brown rice
  • Unlimited veggies (zucchini, carrots, spinach) dressed with 1 teaspoon olive oil
    Total: 350-400 calories

Afternoon Snack

  • 1 apple or 1 pear
  • 1 tablespoon peanut butter (15 g)
    Total: 150-180 calories

Dinner

  • 150 g oven-baked salmon or 120 g tofu
  • 70 g quinoa or spelt
  • Mixed sautéed vegetables with 1 teaspoon olive oil
    Total: 400-450 calories

Evening Snack (Optional)

  • 1 unsweetened herbal tea
  • 1 square of dark chocolate (10 g)
    Total: 50 calories

Daily Calorie Total: 1400-1600 calories

If your daily maintenance calorie requirement is around 1900-2100 calories, this plan creates a deficit of about 500 calories.

Remember to adjust portions according to your needs and physical activity.


Which Kettlebell Workouts to Do for Weight Loss

Kettlebells can be used in many different workout protocols.

The important thing is to keep the pace high, breathe properly, and not exceed recovery times.

Explosive Circuit (3-4 rounds)

  • 15 Swings
  • 10 Goblet Squats
  • 5 Clean & Press (each arm)
  • Rest 30 seconds

Tabata Style

  • 20 seconds of swings at maximum intensity
  • 10 seconds rest
  • 8 total rounds (4 minutes of fire)

Time-Saving Pyramid

  • 5 Swings + 5 Squats
  • 10 Swings + 10 Squats
  • 15 Swings + 15 Squats
  • Then back down: 10 + 10, 5 + 5
  • 30-second rest at the end

The post-workout feeling is pure euphoria.

It’s like you’ve climbed a small mountain of effort that makes you stronger each time.


Pairing Kettlebell with Jump Rope

You’ve probably noticed by now that I’m a huge fan of the jump rope.

There’s something about its rhythm and simplicity that always wins me over.

Add kettlebell power moves into the mix, and it’s a next-level workout.

I’ve done this combo countless times, and it never gets old—your heart rate spikes, your muscles work hard, and your coordination improves.

A simple example:

  1. 30 seconds of jump rope (intense)
  2. 10 Swings
  3. 30 seconds of jump rope (moderate)
  4. 8 Goblet Squats
  5. Rest 30 seconds

Repeat 3 or 4 times.

By the end, it’ll feel like a bootcamp session, but with just one piece of equipment (plus the rope, of course).

How Long Does It Take to See Results?

The magic word is: “it depends.”

Yes, every body is unique, and not everyone responds at the same pace.

Some people who are already in decent shape notice improvements within a few weeks—tighter abs, more toned legs, maybe even the beginnings of core definition.

Personally, I started using the kettlebell as an extra challenge.

I had already been working out for a long time, but I wanted a new element to spice up my routine.

What I noticed right away was increased explosiveness in my movements and a deep core workout.

On the other hand, my wife, who had never set foot in a gym, started seeing changes after just two weeks of training with an 8 kg kettlebell.

In general, after 4-6 weeks of consistent workouts (2-3 times a week) and a balanced diet, you’ll start to feel the difference.

Don’t expect the scale to be your best friend right away, because when you train intensely, as with the kettlebell, you’re gaining muscle while losing fat.

Here’s the beauty: muscle weighs more than fat but takes up less space.

So while the scale might act stubborn, your clothes will tell a different story.

Pants that button without having to hold your breath, shirts that fit better around the shoulders… these are unmistakable signs you’re moving in the right direction.

In terms of tangible progress, aiming to lose about 0.5 kg (1 lb) of fat per week is realistic and sustainable.

These numbers ensure healthy progress without going to extremes.

When it comes to building muscle, though, it’s less about numbers and more about steady progress—your strength, definition, and how you feel will speak for themselves.


Beginner Kettlebell Workout: Weekly Program

This program is ideal for anyone new to kettlebell training.

The exercises are simple but effective for building strength, improving endurance, and learning correct technique.

The goal is to work out 3 times a week, leaving a day of rest between sessions for recovery.

Day 1: Full Body Base

Warm-Up: 5 minutes of jump rope or marching in place.

Circuit (3 rounds):

  1. Kettlebell Deadlift (10 reps): learn to lift safely, engaging glutes and back.
  2. Goblet Squat (10 reps): descend slowly, holding the kettlebell in front of your chest.
  3. Kettlebell Swing (10 reps): focus on the hip drive, not the arms.
  4. Push Press (8 reps per arm): work the shoulders with a controlled push.

Cool-Down: 5 minutes of stretching for glutes, quads, and shoulders.

Day 2: Strength and Core

Warm-Up: 3 minutes of jumping jacks and torso rotations with the kettlebell.

Circuit (3 rounds):

  1. Kettlebell Deadlift High Pull (8 reps): lift the weight and pull it toward your chest, keeping your elbow high.
  2. Russian Twist with Kettlebell (10 reps per side): work the obliques while keeping your core stable.
  3. Lunges with Kettlebell (8 reps per leg): the weight adds intensity to the lunges.
  4. Plank with Kettlebell Pull Through (8 passes): in a plank position, drag the kettlebell from one side to the other.

Cool-Down: Stretch focusing on hips and shoulders.

Day 3: Cardio and Endurance

Warm-Up: 5 minutes of fast marching or on-the-spot jumping with torso rotation.

HIIT Circuit (4 rounds):

  1. Kettlebell Swing (30 seconds): do as many reps as possible while maintaining proper form.
  2. Clean & Press (20 seconds per side): combine power and precision in the movement.
  3. Kettlebell Halo (10 rotations in total): rotate the kettlebell around your head, keeping your core active.
  4. Kettlebell Deadlift (15 reps): finish the round with control and strength.

Cool-Down: 5 minutes of stretching for back, legs, and shoulders.


Other Factors That Influence Weight Loss

  1. The Superpower of Sleep
    Getting enough sleep is crucial. If you sleep poorly, hunger hormones (ghrelin) increase and satiety hormones (leptin) decrease. The result? You crave carbs at all hours.
    Make sleep a priority: 7-8 quality hours every night.
  2. Stress: The Silent Enemy
    Chronic stress raises cortisol levels, which promotes fat storage, especially in the abdomen.
    Manage stress with kettlebell workouts, walks, or 10 minutes of meditation.
  3. Water: Your Secret Weapon
    Not drinking enough slows your metabolism and makes you feel bloated.
    Sometimes I mistake thirst for hunger.
    Always keep a water bottle with you and try drinking a glass before each meal.
  4. Patience: The Necessary Virtue
    Losing weight takes time and consistency.
    Expecting immediate results is a recipe for frustration.
    Focus on small milestones: 5 more swings or one less dessert.
  5. Body Composition: It’s Not All Fat
    The number on the scale doesn’t tell the full story. You’re building muscle with the kettlebell, and muscle weighs more than fat.
    I’ve seen the scale stuck, but my clothes told a different story: broader shoulders, looser pants.
  6. Consistency: The Secret to Success
    Weight loss is not a sprint but a marathon.
    There will be off days, but the important thing is to stay on course.
    One slip-up doesn’t erase your progress.
    Pick yourself up, and the results will come.


What Does Science Say About Kettlebells and Weight Loss?

When it comes to kettlebells, reactions usually range from “Wow, they’re so effective!” to “Do they really work for weight loss?”

Well, they’re not just a cool-looking tool straight out of a gladiator movie—there are scientific studies showing how helpful they can be.

Here’s what the science says (and why you should believe it).

The Tabata Method with Kettlebells: Watch Your Metabolism Soar

One study compared two groups: one did classic strength training, the other did the famous Tabata method with kettlebells.

The result?

The kettlebell group burned more calories and improved cardiovascular endurance and metabolism (Sport Conditioning).

Translation: 20 seconds of furious swings, 10 seconds off, repeated 8 times—it’s like sprinting at an Olympic level.

Trust me, after those 4 minutes, you’ll feel like a hero… or maybe just a puddle of sweat.

The Kettlebell Swing: Not Just for Show

The swing is one of the most iconic (and devastating) kettlebell exercises.

A study showed it activates the core like few other movements (Science and Movement).

Basically, every time you drive the kettlebell up with your hips, you’re building strength, stability, and yes, burning fat.

For me, swings are like a double espresso: fast, intense, and they give you energy (even though they leave you breathless).

If you want a stronger core and a heart that pumps like a race car, this is your exercise.

Strength and Power: The Kettlebell Bonus

Another study analyzed 10 weeks of kettlebell training, showing significant improvements in strength and power (Training Lab Italy).

And here’s the best part: While you’re building muscle and burning calories, your metabolism stays revved up for hours after the workout.

I recall a particularly intense session where I thought, “This is going to kill me.”

But when I saw the improvements in lifting weights and my overall daily energy, I realized the sweat was worth the price.


Intensity and Progression: The Keys to Success

The comfort zone is nice, sure.

You work out, sweat a bit, and finish without too much drama.

But it’s also where progress goes to die.

Muscles adapt quickly to repetitive stimuli, and if you don’t challenge them, they’ll stop growing or responding the way you want.

If your 12 kg kettlebell starts feeling more like a toy than a challenge, it’s time to upgrade.

And no, I’m not saying you should run off and buy a heavier weight immediately.

There are different ways to raise the bar and keep your muscles in “Wow, this is real training!” mode.

  • Increase Reps
    The simplest yet most effective method. If you were doing 10 swings per set, why not try 12 or 15?
    But be careful: increase gradually. Doing 30 swings per set right away might wear you out too soon.
  • Reduce Rest Time
    Now things get serious. If you usually rest 30 seconds between exercises, try cutting it to 20.
    At first, it might feel like you don’t have enough time to breathe, but trust me, your heart and muscles will thank you.
  • Incorporate Advanced Exercises
    If you really want to test your strength and coordination, add moves like the Turkish get-up or windmill.
    The first time I tried the Turkish get-up, it felt like solving a puzzle with my body.
    But once mastered, you realize how much it engages every single muscle, from your core to your shoulders to your legs.
  • Add Extra Rounds
    This is for days when you feel especially energetic (or want to burn off that extra slice of cake).
    If you normally do three rounds, try adding one or two.
    I guarantee that extra round seems easy on paper, but by the end, you’ll feel like you climbed a mountain.


Conclusion

My 12kg kettlebell was once my go-to, but now I’ve progressed to heavier weights—it served its purpose perfectly.

It’s taught me that intensity beats endless hours of boring cardio and that you don’t need an entire gym for an incredible workout.

All it takes is the desire to challenge yourself, consistency, and keeping an eye on your diet.

Whether you want to lose weight or define your muscles, the kettlebell offers explosive exercises that engage your entire body.

And that feeling of power after finishing a tough set of swings or clean & presses?

It’s an adrenaline rush few tools can match.

Now, I’m not sure if you’ll feel comfortable starting with a 12kg kettlebell or if you might prefer something lighter.

That’s up to you—everyone’s different.

Get your body moving, fuel it well, and soon enough, you’ll see the results in the mirror and feel a renewed energy in your life.

Happy training, and… keep swinging!


FAQs

Do swings help lose belly fat?

Yes, they’re great for burning calories and engaging the core. However, losing belly fat also requires a balanced diet and a consistent caloric deficit.

Can you build muscle mass with just kettlebells?

Yes, it’s possible. Kettlebell exercises work large muscle groups and stimulate growth through explosive movements and progressive loads. However, for optimal results, it’s important to vary exercises, increase intensity, and ensure a diet high in protein to support muscle growth.

What’s the biggest risk for beginners?

Poor technique. It’s better to master the perfect swing before increasing load and speed. Always keep your back in a safe position.

Can I train with the kettlebell every day?

It depends on your recovery capacity and the variety of exercises. Generally, 2-3 weekly sessions with rest or light activities on off days is a great start.

Recommended
Categories
CARDIO & ENDURANCE Kettlebells

Why 100 Kettlebell Swings a Day for a Month is a Full-Body Game-Changer

Before diving into kettlebell training, I already had years of experience with bodyweight exercises and gym workouts.

I pushed my body to its limits with pull-ups, push-ups, weightlifting, and countless gym hours.

Yet, before committing to 100 swings a day, I had to build up gradually.

Starting directly with 100 wasn’t realistic—even for a seasoned athlete.

I began with smaller goals:

  • First 20 swings
  • Then 30, 50, and so on

This gradual increase helped me perfect my form and build confidence before committing to the full 100.


When I Decided to Try Kettlebells

Man-kneeling-on-gym-floor-with-a-kettlebell

When I decided to give kettlebells a shot, I have to admit I had a pretty shallow view of them.

I used to think kettlebells were more about quick, easy workouts.

Nothing that could actually push you hard.

Turns out, I was way off.

With my very first swing, my perspective completely changed.

Thanks to an instructor, I learned how much technique is behind this movement.

It’s not just your arms doing the work—your hips, core, and legs all play a huge role in creating that power.

We started with just 20 swings, focusing on form over quantity.

The goal wasn’t to hit 100 right away but to master the proper technique first.

I discovered that it’s all about driving the movement from your hips, not your arms, and maintaining control is key to avoiding injuries.

By the end of those first 20 reps, I was already sweating, and my heart was racing.

It wasn’t just a physical workout—it was a mental challenge too.

The sense of accomplishment from trying something new and intense was incredibly motivating.

What I once thought of as “not for me” turned out to be one of the most engaging and rewarding challenges I’ve ever taken on.


Muscles Activated by Kettlebell Swings

Shirtless-man-lifting-kettlebell

Kettlebell swings engage the entire body.

They’re not just for the arms—every muscle group is activated.

  • Legs and Glutes: The hips are the engine behind each swing, activating your glutes, hamstrings, and quads for a powerful lower-body workout.
  • Core: Your abs and lower back stabilize each swing.
  • Shoulders and Arms: They assist in controlling the kettlebell’s momentum.

This exercise delivers a comprehensive workout that complements and enhances other training routines.


The Full-Body Benefits of Kettlebell Swings

The-power-of-kettlebell-swings-strength-and-beyond

Let’s be real—when you first see someone swinging a kettlebell, it looks a bit… odd.

I mean, who thought flinging a weight back and forth could actually transform your fitness game?

But once you try it, you realize this isn’t just some trendy gym fad.

Kettlebell swings are the ultimate full-body workout that sneaks up on you in the best way possible.

They’re efficient, they’re challenging, and they make you feel like you’ve unlocked some hidden fitness hack.

So, what’s the deal with these swings? 

Let’s break it down.

1# Strength and Cardio, Combined

After just a few weeks, the results became undeniable.

The new movement felt challenging at first, but as my muscles adapted, I noticed improvements across the board.

My glutes, hamstrings, quads, and even my back felt stronger with each session.

What’s more, the movement keeps the heart pumping, making it a perfect mix of strength and cardiovascular benefits.

2# Strong Core, Better Posture

Every kettlebell swing challenges your core.

Your abs and lower back are constantly engaged to stabilize the movement.

This means better posture, reduced risk of back pain, and a stronger foundation for other exercises.

A solid core improves your balance and coordination, making you feel more in control of your body during any activity.

3# Enhancing Functional Fitness

Kettlebell swings mimic real-life movements, making them one of the best exercises for functional fitness.

The explosive motion strengthens the muscles you use daily—like lifting, bending, and twisting.

This translates to improved performance in sports, better agility, and fewer injuries in everyday activities.

It’s not just about looking fit—it’s about moving better, too.

4# Burning Fat Efficiently

If fat loss is your goal, kettlebell swings are a game-changer.

The high-intensity movement torches calories and keeps your metabolism elevated even after your workout.

This afterburn effect, known as EPOC (excess post-exercise oxygen consumption), means you’re burning calories long after you’ve set the kettlebell down.

You’ll not only shed fat but also build lean muscle, which helps boost your metabolism even further.

5# Mental Resilience and Discipline

Committing to 100 swings a day required daily discipline.

There were mornings when motivation was low.

But I reminded myself of the gradual progress I made from 20 to 100 swings.

Each day’s effort built mental toughness and consistency.

I learned to push through discomfort and self-doubt.

This mindset spilled over into other parts of my life, making challenges more manageable.

6# Improving Grip Strength

Kettlebell swings are an excellent way to improve grip strength.

Holding and controlling the kettlebell activates your forearms and hands in ways traditional exercises don’t.

This improved grip strength translates into better performance in other lifts and day-to-day tasks.

Whether you’re opening a jar or deadlifting, you’ll feel the difference.

7# Increasing Mobility and Flexibility

The dynamic movement of kettlebell swings enhances hip mobility and flexibility.

The repeated hip hinge stretches and strengthens the muscles in your hips and hamstrings.

This improved range of motion helps prevent stiffness and injuries, especially if you spend a lot of time sitting.

It’s an exercise that keeps you flexible and functional at the same time.

8# Strengthening the Posterior Chain

Kettlebell swings target your posterior chain—the muscles on the back of your body, including your glutes, hamstrings, and lower back.

A strong posterior chain is crucial for power, posture, and overall athletic performance.

Whether you’re running, jumping, or lifting, these muscles are the key to unlocking your full potential.


The Science Behind the Swing

As I’ve already highlighted, kettlebell swings are a powerhouse for building strength, endurance, and cardiovascular health. 

But what’s going on behind the scenes?

The magic lies in the mechanics. 

Kettlebell swings activate multiple muscle groups simultaneously, creating a chain reaction of movement that starts with the hips and radiates outward. 

This synchronized effort is what makes them so efficient.

Studies confirm that the explosive nature of swings taps into fast-twitch muscle fibers—those responsible for power and speed. 

Unlike slow-twitch fibers, which handle endurance, fast-twitch fibers thrive on high-intensity, short-duration efforts like kettlebell swings.

On the cardiovascular side, researchers have found that swings elevate your heart rate to levels comparable to sprinting, making them an excellent alternative for those who want both strength and cardio in one session.

The hip hinge—the foundational movement of the swing—is also a biomechanical marvel. 

It protects your lower back by distributing force evenly through the posterior chain while engaging your core to stabilize the movement. 

This is why swings are often recommended for improving posture and reducing back pain.

In short, the science backs up everything you feel during a kettlebell swing: the burn in your legs, the tightness in your core, the racing of your heart. 

It’s a well-oiled system designed to push your body to perform better in less time.


Correct Execution and Technique

Good form isn’t optional—it’s what keeps you injury-free and ensures your effort pays off:

  • Set Your Stance: Start with your feet shoulder-width apart. Place the kettlebell about a foot in front of you on the ground. Your toes should point slightly outward for stability.
  • Grip the Kettlebell: Hinge at your hips (not your knees!) and reach forward to grab the kettlebell handle with both hands. Keep your back straight, chest up, and shoulders pulled back.
  • Engage Your Core: Tighten your abs and maintain a neutral spine. This will protect your lower back throughout the movement.
  • Initiate the Swing: Pull the kettlebell back between your legs like you’re hiking a football. Your forearms should touch your inner thighs as you push your hips backward.
  • Drive with Your Hips: Explosively push your hips forward, using the momentum to swing the kettlebell up to about chest height. Your glutes and hamstrings should do most of the work.
  • Control the Arc: Let the kettlebell swing naturally back down, but don’t let it pull you forward. Keep control by maintaining a strong core and steady posture.
  • Repeat the Motion: Once the kettlebell swings back between your legs, hinge your hips again and go straight into the next rep. Keep the rhythm smooth and consistent.
  • Finish Safely: When you’re done, let the kettlebell swing back down between your legs one last time, and place it gently on the ground. Stand up straight to reset.

Watching tutorials and seeking advice from trainers helped refine my form.


Tips for Starting Your Own 100 Swings Challenge

Tip Description
Start Small Begin with a manageable number of swings.
Perfect Your Form Focus on technique before increasing the number of reps.
Gradual Increase Incrementally raise your swing count as strength builds.
Consistency is Key Make it a daily habit, even on tough days.
Journal Your Progress Track improvements to stay motivated.
Listen to Your Body Rest when needed to prevent injuries.
Warm-Up and Cool Down Prepare your muscles before and after workouts for better recovery.


Overcoming Challenges and Plateaus

There were days when 100 swings felt like an insurmountable wall.

Your body gets used to the routine, progress slows down, and boredom starts creeping in.

That’s exactly when you need to take a step back and find a way to shake things up.

The first trick was playing around with the weights.

When my usual swings started to feel too easy (or too repetitive), I increased the weight to add a challenge.

On days when I felt more tired, I dropped the weight to focus on technique and explosiveness.

It’s amazing how much of a difference a small adjustment can make.

Then came the set strategy.

Breaking up the 100 swings into smaller chunkslike 5 sets of 20 or 4 sets of 25—helped me maintain high intensity without feeling overwhelmed.

I even gave each set a different focus: one for speed, another for technique, and so on.

It made the challenge more engaging and less repetitive.

And when that still wasn’t enough, I added complementary exercises.

A few lunges, push-ups, or core exercises between sets of swings not only kept the routine interesting but also helped fill in any gaps in my training.


Common Mistakes When Doing 100 Kettlebell Swings

Let’s face it—swinging a kettlebell 100 times sounds simple enough, right?

Wrong.

If you’re not paying attention, it’s easy to mess up and turn a great workout into a frustrating (or painful) experience.

Here are the common mistakes I’ve seen—and maybe made—so you don’t have to.

1. Trying to Lift with Your Arms

I get it, you see a kettlebell, and your brain thinks, “Lift it with my arms!”

But nope, that’s not how this works.

Your hips are the MVP here.

Think of your arms as passengers, not drivers.

If you’re feeling it in your shoulders, it’s time to reset and let your hips do the heavy lifting (literally).

2. Letting Your Back Round Out

Been there, done that, regretted it.

If your back starts looking like a sad question mark during swings, you’re asking for trouble.

Keep it straight, chest up, and core tight.

3. Skipping the Warm-Up

I know, warming up can feel like the boring cousin of your workout, but trust me, it matters.

Swinging a kettlebell with cold muscles is like starting a car in winter without defrosting the windshield.

Bad idea.

A quick warm-up—think leg swings or hip stretches—goes a long way.

4. Going Too Heavy Too Soon

We’ve all been there, thinking, “I’m strong, I can handle the big kettlebell!”

Spoiler alert: If your form is trash, the weight doesn’t matter.

Start lighter, master the swing, and then go heavy.

Your ego can wait.

5. Holding Your Breath

Apparently, some of us think we can power through swings by just… not breathing.

Big mistake.

Exhale on the upswing, inhale on the downswing.

Simple, but game-changing.

Breathing makes everything feel less like you’re about to pass out.

6. Leaning Too Far Back

When you get to the top of the swing, you don’t need to bend backward like you’re auditioning for The Matrix.

Stand tall, squeeze your glutes, and keep your core tight.

You’re here to swing, not to break your back.

7. Rushing Through It

Look, I get it—you just want to hit 100 and call it a day.

But rushing leads to sloppy form, and sloppy form leads to regret.

Take your time.

Controlled swings are where the magic happens.

8. Skipping Recovery

After 100 swings, your body deserves some love.

Stretch, foam roll, or at least sit on the floor and pretend you’re stretching.

Whatever it takes to keep your muscles happy and ready for the next round.

9. Ignoring Your Grip

If your kettlebell feels like it’s about to fly out of your hands, we have a problem.

Find a grip that’s firm but not death-clutch tight.

And if your hands get sweaty, keep a towel nearby—no one wants a flying kettlebell incident.

10. Forgetting to Check Your Form

Even if you’ve done swings a million times, bad habits can creep in.

Record yourself or ask a trainer for feedback.

Your future self will appreciate it when you’re swinging like a pro instead of wincing from poor form.


Beginner-Friendly Plan to Master 100 Kettlebell Swings a Day

Week Daily Goal (Total Swings) Sets Weight Tips to Avoid Boredom
1 30-40 3 sets of 10-15 swings Start with a light kettlebell (8-12 kg) Add music or a podcast during your session.
2 50-60 4-5 sets of 10-12 swings Maintain the same weight Alternate between standard swings and single-arm swings.
3 70-80 4 sets of 15-20 swings Gradually increase weight if comfortable Change your environment—train outdoors or in a new space.
4 90-100 5 sets of 20 swings Use a challenging but manageable weight Set a timer and challenge yourself to complete swings within a specific time.
5+ 100 5 sets of 20 swings or 10 sets of 10 swings Adjust weight based on progress Mix in variations, like alternating swings or heavier kettlebells.

This is just an example to help you gradually work up to 100 swings in 30 days.

If it feels too challenging, adjust the number of swings or take extra rest days to match your pace and comfort level.


What I Learned After a Month of 100 Kettlebell Swings a Day

Let me start by saying this wasn’t my first fitness challenge. 

With over 20 years of training behind me, from calisthenics to weightlifting, I’ve tackled my fair share of grueling routines. 

But something about committing to 100 kettlebell swings every day felt like a fresh test of discipline—and I was right.

The biggest takeaway? 

Even after decades of working out, there’s always room to learn.

For one, I had to slow down and respect the basics. 

Technique is everything with kettlebell swings, and any sloppiness quickly made itself known. 

I learned to let my hips power the movement, keep my core tight, and stop rushing through reps.

Speaking of core, this challenge turned into an unexpected ab workout. 

Sure, I’ve done my fair share of planks and crunches, but nothing engages your midsection quite like 100 well-executed swings.

But what stood out most wasn’t the physical transformation—it was the mental shift. 

Even with years of training, there were days I didn’t want to show up. 

Pushing through those moments reminded me why I started in the first place: not just for strength, but for resilience.

By the end of the month, I wasn’t just stronger—I felt determined, more disciplined, and ready for whatever challenge came next. 

For me, this wasn’t about reinventing the wheel—it was about reinforcing what I’ve learned over two decades of fitness: consistency is king.


FAQs

What weight should I start with?

Begin with a lighter kettlebell to master your form, even if you’re experienced.
You can gradually increase the weight as your strength improves. 

How long does it take to complete 100 swings?

It varies per person. Some may finish in 10 minutes, while others might take longer depending on form and pace.

Can kettlebell swings replace cardio?

Yes, they can. They effectively boost your heart rate and build endurance, providing an excellent cardio workout. 

What if I miss a day?

Missing a day is okay. Just get back on track the next day without guilt or frustration. Consistency over time brings results, so one missed day won’t derail your long-term progress.

If I have back pain, should I skip kettlebell swings?

If you have back pain, it’s important to proceed with caution. Kettlebell swings can help strengthen your back and core, but only if performed with proper form. Consult a healthcare professional or physical therapist before starting.

Can beginners do 100 swings?

Beginners should start small, gradually building up to 100 swings. Focus on quality over quantity, ensuring each swing is performed with proper form before increasing the count.

Recommended
Categories
CARDIO & ENDURANCE Kettlebells

How Long Before Kettlebell Workouts Show Results? Find Out Fast!

Have you ever stared at a kettlebell and thought, “How long will it take to see decent results with this thing?”

You’re not alone.

When I grabbed my first kettlebell, I thought it was just an excuse to sweat more in less time.

Boy, was I wrong.

Within minutes, I realized that this “cannonball with a handle” meant serious business.

If you’re curious to see what it can do for you, keep reading.

What Exactly Is a Kettlebell?

Colorful-kettlebells-on-wooden-floor

Don’t be fooled by its rugged appearance.

A kettlebell isn’t just a lump of iron.

When you lift or swing it, you engage a ton of muscle groups: glutes, core, shoulders, back—you name it.

It’s like a total-body workout compressed into a few intense minutes.

Still skeptical?

Consider this: in countless fitness forums, many users say they prefer kettlebells over traditional dumbbells.

Why?

Simple: “It works everything in less time.”

It’s not hard to see why.

With one movement, you can train strength, endurance, and coordination.

For me, it was love at first swing.

Not only do you save time, but you avoid boredom too!


Why Kettlebells Deliver Fast Results

I’ve learned firsthand (or rather, through my sore muscles) that kettlebell training is fast, fun, and highly effective.

Take the iconic swing, for example—it activates your legs, glutes, core, and arms all at once.

Every rep moves you closer to the fitness level you’re aiming for.

What’s more, kettlebell exercises are never boring.

There’s always a variation to try, keeping your muscles on high alert.

Many practitioners report tangible changes—like looser-fitting pants—after just one month of consistent training (about three times a week).

It’s the combination of consistency and movement that starts to make a difference.

And yes, I’ve seen it myself.

After just a few weeks, climbing stairs felt smoother—almost like I had the lungs of a marathon runner.


Kettlebells: A Rush of Endorphins

Many studies, including one published in the Strength and Conditioning Journal, show that intense exercise kicks those endorphins into high gear.

They don’t just make you feel amazing—they crush stress and give you the kind of energy that makes everything seem possible.

Pair your workout with the right playlist or a training buddy, and you’ll amplify that feel-good vibe even more.

And trust me, this isn’t just theory.

A solid swing session can turn a bad day into a much better one.

I’ve noticed that my post-work stress levels drop dramatically when I release some energy with a few rounds of kettlebells.

And let’s not forget the satisfaction of watching yourself grow stronger week after week.

Not only will you feel better, but you’ll also become noticeably more resilient—both mentally and physically.


When Do You Start Noticing Results?

Insights-from-kettlebell-practitioners

Drawing from insights shared by kettlebell practitioners and a recent survey, here’s a realistic timeline for results. 

Most people notice changes within the first two months, with many experiencing a boost in energy and strength as early as the third week. 

Let’s break down what you can expect at each stage:

Weeks 2-4: The “I Feel Different” Stage

Within the first couple of weeks, don’t expect a ripped six-pack to suddenly appear.

What you will notice, though, is more energy in your day-to-day life.

Carrying groceries?

Easier. Climbing stairs? 

Not exactly a sprint, but no more huffing and puffing like you’re scaling Everest.

Survey Insight: Roughly 40% of practitioners reported seeing results during this time frame, highlighting it as a sweet spot for early progress.

Tip for this phase: Focus on mastering the basics—swings, goblet squats, and clean & press. Perfect form now will pay off big later.

Weeks 4-6: The “Hey, Am I Getting Stronger?” Phase

This is where things start getting exciting.

The exercises that left you gasping for air now feel more manageable.

You might even catch yourself thinking, “Wait, did I just add an extra rep without dying?”

Survey Insight: About 26% of participants reported noticeable changes during this period, including enhanced muscle tone and quicker recovery after workouts.

Pro Tip: Incorporate supersets (e.g., swings + goblet squats) to maximize your gains.

Weeks 6-8: The “Mirror Check” Zone

Now we’re talking results you can see.

Arms look a little more sculpted, thighs feel a bit firmer, and that waistline? 

It’s starting to shrink.

Survey Insight: A whopping 90% of practitioners said they noticed results within 8 weeks. This is where consistency and proper technique really shine.

What to Do Now: Push yourself further by testing heavier kettlebells, provided your technique is refined.

Weeks 9 and Beyond: The Transformation Phase

If you’ve made it this far, congratulations—by now, you’ve likely seen significant changes.

Your strength and endurance have reached new heights, and your body has transformed visibly—stronger core, defined shoulders, firmer glutes, and a leaner frame.

Survey Insight: Around 5% of practitioners mentioned noticing results at this stage or later. Progress may slow after 9 months as the body adapts to the routine.

Pro Tip: Add variety to your workouts, such as snatches or Turkish get-ups, to challenge your body and keep progressing.


What Happens After a Year of Kettlebells?

Imagine I told you that one year with a kettlebell could completely change the way you feel, look, and move. 

You might think I’m exaggerating, but here’s the thing: I’m not. 

After twelve months of swinging, pressing, and squatting, the results speak for themselves.

Your body doesn’t just get stronger—it becomes a machine. 

Muscles you didn’t even know you had start showing up. 

Your core? 

Unshakable. 

And those exercises that once seemed impossible?

They’re now part of your regular routine.

But if I said it’s all about aesthetics, I’d be lying. 

Sure, your physique will look better, but the real game-changer is how you feel

Your posture improves without you having to think about it

Your metabolism speeds up, and suddenly, burning calories becomes something your body does even when you’re chilling on the couch.

And when it comes to stress? 

It doesn’t stand a chance when you’ve got a kettlebell in your hands. 

A tough day? 

Swing it out. 

By the end of the session, it feels like you’ve left all the negativity on the floor.

If you’re still skeptical, I get it. 


Factors That Influence How Quickly You See Results

1# Frequency and Intensity

If you train just once in a while, progress might take its time.

But if you really push yourself three times a week, using exercises like swings, goblet squats, and clean & press, your muscles will respond big time.

2# Nutrition

Cutting back on snacks and prioritizing real food like meat, eggs, and legumes made all the difference.

A solid diet isn’t optional if you want serious results.

3# Rest

Think you can push through on 5-6 hours of sleep?

Think again.

Progress slows to a halt without proper rest.

7-8 hours is the sweet spot for muscle repair and growth.

4# Genetics and Starting Point

Let’s admit it: some people are born with a natural advantage, while others have to work a little harder.

If you’re a beginner, you’ll enjoy what’s called “beginner gains”—those rapid improvements because your body isn’t used to this kind of effort.

If you’ve been active in other sports, kettlebells will awaken “dormant” muscles, and your progress speed will depend on how you’ve trained before.


Kettlebell Workouts to Maximize Your Progress

Tabata Swing

  • 20 seconds of intense swings, 10 seconds of rest, for 8 rounds.
  • That’s 4 minutes, but it’ll feel like you’ve just done 30 minutes of cardio.
  • Watch out—your quads might be on fire!

Clean & Press + Squat

  • Perform 5 clean & press reps per side, followed by 10 goblet squats.
  • Repeat for 3-4 rounds.
  • It’s like being in a bootcamp—but the sense of accomplishment is unbeatable.

Turkish Get-Up

  • This “weird” exercise might look like an awkward dance move, but it’s amazing for stability, core strength, and mobility.
  • Take it slow and use a manageable weight—you’ll quickly realize how every muscle has to work together.


Mistakes to Avoid (From Someone Who’s Seen Them All)

  • Neglecting Technique: Swinging a kettlebell like a random bell at church? No thanks. Proper form is everything. Keep your back straight, core tight, and movements explosive from the hips.
  • Skipping the Warm-Up: Starting cold? Big mistake. A few minutes of mobility exercises and dynamic stretches can save you from stiffness or injury.
  • Overtraining: If you’re constantly fatigued, sore, and not progressing, you might be overdoing it. It’s better to crush three sessions a week than to slog through six half-hearted ones.
  • Junk Food Diets: I’ve seen it happen: people train hard but sabotage progress with unhealthy eating habits. If you’re scarfing down burgers and fries post-workout, don’t expect miracles.


How to Add Kettlebells to Your Routine Without Overcomplicating Things

Already into running, swimming, or cycling?

I was too—clocking miles and feeling unstoppable.

Then I tried kettlebells and realized my legs weren’t as strong as I thought.

Game changer.

Start Small: Two Days a Week Is Plenty

You don’t need to overhaul your entire routine.

Trust me, I’ve been there—trying to squeeze in every workout under the sun.

Instead, pick two days a week for kettlebell sessions.

Example:

  • Monday: Kettlebell strength and cardio circuit (swings, goblet squats, and push presses).
  • Wednesday: Your usual run or swim.
  • Friday: Another kettlebell session, maybe focusing on core and explosive moves like Turkish get-ups.

It’s simple, effective, and keeps you from burning out.

Plus, it feels great to switch things up.

Replace Cardio Days if You’re Feeling Bold

Here’s a confession: I swapped my “easy jogs” with kettlebell circuits, and the results were wild.

My endurance shot up within weeks.

If you’re ready to take it up a notch, try replacing lighter cardio days with kettlebell circuits.

15-Minute Kettlebell Finisher:

  • 100 swings (break into sets of 20).
  • 5-10 Turkish get-ups (alternate sides).

This quick routine will boost both endurance and core strength.

Kettlebells for Your Favorite Sports

Tailor your kettlebell workouts to complement your main activity:

  • For Runners: Add goblet squats and lunges to strengthen your legs and prevent injuries. Bonus: You’ll feel less like a noodle on hill climbs.
  • For Swimmers: Focus on exercises like halos and kettlebell rows to build shoulder strength and stability.
  • For Cyclists: Deadlifts and swings are your new best friends for powering through tough climbs


Lose Weight with Kettlebells: Yes, It’s That Good

So far, we’ve talked about muscles, strength, and energy—but what about weight loss?

When people tell me they’re stuck trying to lose weight, my first thought is always:

Have you tried kettlebells?

I’ve seen it happen—friends who couldn’t stick to running or endless gym machines suddenly get hooked on this cannonball with a handle. 

And the results? 

Let’s just say they had to buy new jeans.

Why Kettlebells Work Like Magic

The beauty of kettlebells is that they don’t just target one thing—they hit everything.

You’re building strength, blasting calories, and getting your heart rate up all at once.

There’s even this thing called the “afterburn effect” (fancy name: EPOC), which means you’ll keep burning calories even after you’re done. 

It’s like your body keeps working overtime—without you lifting another finger.

And let’s not forget the fun factor.

It’s hard to get bored when you’re swinging, squatting, and pressing

It feels more like playing than working out, which is probably why it sticks.

The Real-World Results I’ve Seen

Here’s a quick story: a buddy of mine was always complaining about how cardio was boring and wasn’t helping him drop pounds. 

I convinced him to give kettlebells a shot.

Within a few weeks, he was down a belt size. 

He said he felt stronger, faster, and—his words, not mine—“less like a potato.”

That’s the kind of transformation kettlebells can bring.

Another friend of mine used kettlebells after her second kid. 

With just two 20-minute sessions a week, she started seeing results in less than a month. 

She said, “I don’t even miss the treadmill anymore.”


Quick Workouts for Weight Loss

If you’re short on time (who isn’t?), try this:

  • 15 kettlebell swings
  • 10 goblet squats
  • 8 clean and presses (4 per side)

Repeat for 3-5 rounds, depending on how ambitious you feel. It’s fast, sweaty, and works your entire body.

Or, if you’re looking for something different, focus on intensity instead of duration:

  • Perform 20 kettlebell swings in under 60 seconds, rest briefly, and repeat for as many sets as possible in 10 minutes.

It’s all about maximizing effort in the time you have!


Conclusion

It all depends on your dedication, effort, and lifestyle.

With three kettlebell sessions a week, a balanced diet, and proper rest, you’ll start seeing improvements in 2-4 weeks (more energy and a responsive body).

By 6-8 weeks, you’ll notice physical changes, like better muscle tone.

And after 12 weeks?

You might catch yourself smiling in the mirror, wondering why you didn’t start sooner.

Kettlebells aren’t magic, but they’re close.

They’re dynamic, effective, and—most importantly—fun.

Put in the effort, and there’s no limit to what you can achieve.

Now it’s your turn—grab that kettlebell and start your countdown to results!


Frequently Asked Questions (FAQs)

What’s the best starting weight for beginners?

For women, a good starting range is 8-12 kg (18-26 lbs). For men, 12-16 kg (26-35 lbs) works well. If you’re unsure, start lighter to focus on technique, then progress as you gain confidence.

Do I have to ditch traditional weights?

Not at all. Kettlebells are a fantastic addition, not a replacement. They bring variety and engage your muscles differently, but you can absolutely combine them with barbells and dumbbells.

How many times a week should I train with kettlebells?

Three well-structured sessions per week are enough to see noticeable results. If you’re feeling ambitious, four to five sessions can work—just make sure to allow for proper recovery.

Can I use kettlebells if I have back pain?

It depends on the cause of your back pain. If it’s a serious issue, consult a doctor or physical therapist first. That said, kettlebell training can help strengthen your core and improve posture, which might reduce back discomfort—provided you use proper form.

Are kettlebells better for cardio or strength?

Kettlebells are the perfect mix of both! Whether you’re swinging for power or working through circuits, they build strength while giving your heart a serious workout. It’s the best of both worlds.

Recommended