Categories
Legs STRENGTH BUILDING AND MUSCLE MASS

Why do my knees shake uncontrollably during shrimp squats?

So.

If you’re also there, with one leg pulled behind like you’re about to propose to the floor, and suddenly your knees start trembling like they’re trying to communicate with the afterlife…

Welcome to the club.

It’s not a glitch in your body. It’s the shrimp squat itself that’s cursed.

Or rather, challenging. Extreme. Almost unfair.

And no, it doesn’t mean you’re weak, unbalanced, or that you should give up on your dream of steel legs and ninja-level balance.

It just means you’re human.

And you’re attempting one of the most brutal (and underrated) squat variations ever invented on this planet.

But don’t worry, I’m about to explain exactly what’s going on when your knee starts partying like it’s at a rave during the shrimp squat.


What is a shrimp squat really (and why does it humiliate you so badly)?

Picture doing a squat on one leg.

So far, so good. Already tough.

Now picture taking the other leg, bending it backward, and holding it with your hand.

If that sounds like some kind of extreme yoga or Balinese dance pose, you’re getting the vibe.

The shrimp squat is a lethal cocktail of:

  • unilateral strength
  • micro-precise balance
  • hip flexibility
  • neuromuscular control
  • ankle stability
  • and a solid dose of courage

Sounds simple until you actually try it.

Then your body starts sounding the alarm like a nuclear control panel: “Instability! Collapse! Earthquake in the left knee!”

And you get it right away:

There’s no cheating here.

No shortcuts.

If you lack control, power, and coordination… the knees will short-circuit.


Why do your knees shake so much?

Let me tell you right away: the shaking isn’t a sign of weakness.

It’s a signal.

A very visible way for your body to say, “Hey, I’m trying to activate a bunch of small muscles and coordinate the movement, but this stuff is way too advanced for me right now!”

Here are the three main reasons for that earthquake-like trembling:

1. Nervous system overload

The shrimp squat is one of those exercises that momentarily crash your brain-computer. You’re managing:

  • balance
  • tension
  • controlled descending movement
  • constant core activation

The brain has to talk to the muscles in real-time and say, “Activate now, no not like that, harder there, less here!”

The result?

Trembling, because the brain-muscle connection starts buffering.

2. Confused proprioceptors

Proprioception is your body’s ability to know where it is in space. Like your internal GPS.

But when you do a shrimp squat, that GPS goes haywire.

Because you’re in a bizarre position, and your body isn’t used to handling such off-balance forces, angles, and levers. So the poor knee tries to compensate for the chaos with little jolts and tremors.

3. Weak stabilizer muscles

You could have massive quads, rock-hard glutes, and a 200 kg deadlift…

But if you haven’t trained your stabilizer muscles like the gluteus medius, deep core, or the small but heroic vastus medialis oblique (VMO)…

Your knee will behave like a scared puppy during its first thunderstorm.

Shaking is its way of saying, “I’m doing my best, but I need to get stronger!”


Spoiler: your ankles are partly to blame

Yep. Those dancing kneecaps aren’t always your legs’ fault.

Sometimes it’s your ankle sabotaging you.

If it’s not mobile or strong enough, the load shifts where it shouldn’t.

And the knee ends up doing a job that isn’t its own.

It’s like in a soccer team: if the goalkeeper starts playing defender, midfielder, and striker… something’s gonna break.

So you need:

  • ankle mobility
  • active foot contact
  • engaged arch of the foot

All things that keep your shrimp squat from turning into a comedy sketch.


Does it hurt? Should I stop?

Absolutely not, unless you feel real joint pain.

Trembling from effort or neuromuscular instability isn’t dangerous.

It’s a signal.

And if you listen closely, it shows you where you’re lacking. Where to work. Where to improve.

But sharp pain (like stabs, collapsing sensations, or knee clicks) is a different story. That’s when you need to stop, regress, and figure out what’s wrong.


How to improve without looking like a melting popsicle

Here are a few tricks to build stability and strength without looking like a lamp post in an earthquake:

  • Assisted shrimp squats: use a door, a chair, a pole. Even the bathroom wall if needed.
  • Elevated version: instead of going all the way down, start from a step. Lower it gradually.
  • Slow eccentrics: descend in 5–8 seconds, then come back up with help from the other leg.
  • Isometrics: stop halfway down and hold. If it shakes, you’re doing it right.
  • Targeted work on gluteus medius and core: side plank, clamshells, bird dog, Pallof press. Hate them? Perfect, they’re essential.


Even your head shakes a little — and that’s okay

This one’s tough.

But it has to be said.

Sometimes, knee trembling isn’t just physical.

It’s a kind of anticipatory muscle anxiety.

Your body doesn’t fully trust you yet.

Because it knows you might fall.

Or hurt yourself.

Or maybe you’ve never “programmed” that neuromuscular sequence before.

That’s when the trembling becomes a defense mechanism.

I’ve noticed that when I’m distracted or unsure, I shake more.

But when I visualize the movement, focus on every micro-phase, and really trust myself… the body responds with much more stability.

It’s not just strength. It’s neuromuscular trust.

And sadly, you can’t train that on machines.

Only through movement experience.


“But my knees also shake during regular squats… is that normal?”
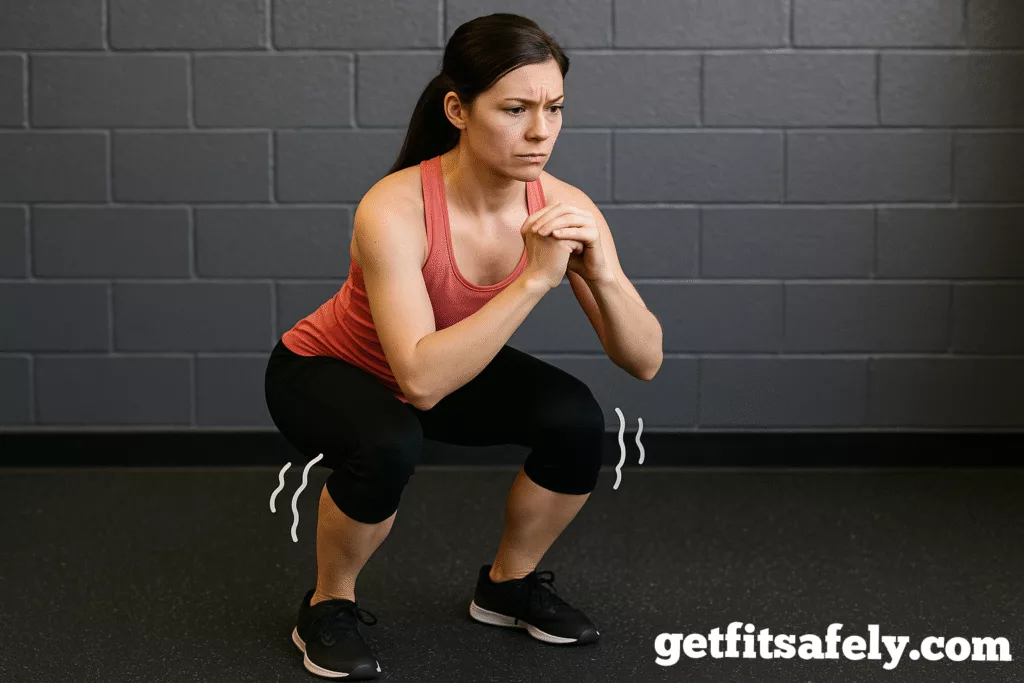
Woman-holding-bodyweight-squat-position-with-knees-shaking-on-gym-floor

Absolutely yes.

In fact, if your knees already shake during regular squats — especially after some heavy sets — the shrimp squat will just amplify that tremor like a megaphone.

Why?

Because squat tremors — even with a barbell or bodyweight — often show up when:

  • you’ve done high-rep sets
  • you’ve accumulated neuromuscular fatigue
  • or you’re working close to your technical max

In short, when your nervous system is tired, stabilizer muscles can’t keep everything “tight and aligned” anymore.

And that fatigue… shows up exactly like it does in the shrimp squat: with little shakes, especially at the bottom, when you’re most vulnerable.

And remember, in regular squats you can still compensate with both legs.

But the shrimp squat isolates you on a single leg, with terrible mechanical leverage

So the shaking becomes as obvious as a flashing siren.

I always say: if you tremble after 4 loaded squat sets, it’s normal.

But if you’re already shaking during warm-up with just your bodyweight… your body’s asking you to strengthen something before loading again.

It’s not a judgment. It’s an opportunity.

To build solid foundations and become a tank — not just a lifting machine.


Watch out for the surface you train on

This sounds like a tiny detail, but it can change everything.

Doing shrimp squats on a slick floor, slippery surface, or with too-soft shoes is like trying to write on wet paper:

You might have perfect handwriting, but it still turns out messy.

My advice?

Use stable shoes or, even better, go barefoot on a rubber surface.

Avoid yoga mats that are too squishy.

And if you want to push further, try a few reps on a balance board for a bigger neurological challenge — but only once you’ve built decent control.

I always do them on hard wood or thin tatami mats: the difference is massive compared to when I used to train in running shoes on a yoga mat.


Do you really need shrimp squats? Or not?

Uncomfortable question, I know.

Because now they’re everywhere: influencers, coaches, mobility challenges.

But here’s the truth — they’re not mandatory.

Are they useful?

Absolutely.

But only if they fit your goals.

Want to become a bodyweight machine?

Calisthenics or parkour athlete?

Trail runner or martial artist?

Then yes, they’re gold.

But if your goal is just hypertrophy or building leg strength in a more traditional way… there are tons of less frustrating, equally effective alternatives.

I use them because I like the challenge.

I like the fact that you can’t fake it: either you’ve got control, or you shake.

It’s a lesson that goes beyond training.

But if they freak you out, hurt you, or stall your progress, there’s no shame in shelving them and building strength another way.


RELATED:》》》Why Do Pistol Squats? 9 Compelling Reasons!


Conclusion

Want the truth?

The trembling is your teacher.

It tells you exactly where to work, what to strengthen, and when you’re ready to level up.

It’s the opposite of the comfort zone.

But it’s also where real transformation happens.

The body learns.

The brain adapts.

The knees stop dancing… and start dominating.

So keep going.

One tremble today,
Total control tomorrow.

Recommended
Categories
Legs STRENGTH BUILDING AND MUSCLE MASS

Why do my knees crack loudly whenever I do slow bodyweight squats?

Leg Day.

The playlist is on fire, the mirror is staring back at you.

You get in position—feet wide, core tight, chest up.

You descend slowly into a textbook squat, like a true disciple of time under tension.

And then…
CRACK.

A sharp, deep sound.

The first time, you pause.
The second, you laugh it off.
The third, you start wondering if your knees are about to retire.

But the truth is, this happens to tons of people.
And no, you’re not broken.

Actually, your body is just talking to you.
In a very noisy language.


What’s actually happening when the knee goes “crack” during a squat?

blank

Let’s break down the anatomy like we’re in the locker room.

Your knee is a synovial joint: two bones (femur and tibia), a meniscus between them, ligaments, tendons, and a whole lot of lube fluid around.

That dry “crack” or “pop” can come from three main mechanisms:

  • Cavitation:
    When you bend your knee, internal pressure changes.
    That can cause gas bubbles in the synovial fluid to pop.
    It’s like opening a bottle of sparkling water.
  • Tendon movement:
    Your quad tendon or patellar tendon can slide over small bony ridges or “curbs.”
    When it jumps across, it can click.
    The tighter it is, the louder it sounds.
  • Misaligned patella in the femoral groove:
    The kneecap should glide “in its trench” during bending.
    But if the muscles guiding it (especially VMO and TFL) aren’t synced, it veers slightly.
    And boom, creak.

All of this is normal—within limits.
It becomes clinical only when pain or dysfunction kicks in.


Why do I only (or mostly) hear it during slow squats?

Great question.

The thing is, when you move slowly, your body has more time to react to every micro-movement, every bit of friction, every change in muscle tension.

If you drop down fast, you might not even notice.

But if you move slowly, you feel everything:

  • The load increases gradually on your joints.
  • Tendons have more time to “snap on and off” the tricky spots.
  • If there’s any small deviation in the kneecap’s path, it pops up immediately—like a slightly deflated tire you only notice on a sharp turn.

That’s exactly how it happened to me: slow, controlled training, and every time I passed the critical point… click.

The sound was loud.
But painless.

And my physical therapist?

She told me:
“It’s not the sound that worries me. It’s the pain. If there’s no pain, there’s no damage.”


Should I worry? Like, am I grinding down my knees?

Generally speaking: no.

If there’s no pain, swelling, stiffness, or instability, the sound is not a sign of joint damage.

Healthy joints can crack.

Especially if:

  • You train often
  • You’ve had minor injuries in the past
  • You’ve got some muscle imbalances still uncorrected
  • You’re sedentary most of the day and then launch into workouts like a ninja off the couch

What’s not normal is:

  • Like we mentioned earlier, noise paired with sharp pain
  • A “click” followed by swelling or warmth
  • The feeling that something pops out of place
  • The sense of being stuck at certain angles

If that sounds familiar, it might be worth checking in with a physical therapist.


What can you do to reduce (or avoid) the noise?

Avoid-knee-noise-squat

You might not be able to make it disappear completely.

But you can reduce its intensity and improve your knee health with some smart strategies.

Here’s what worked for me and many others:

  • Serious warm-up.
    Just 5–10 minutes of mobility work for hips, ankles, and knees.
    Add foam rolling on quads and IT band, and glute activation.
  • Movement control.
    Record your squats.
    Are your knees tracking outward? Or collapsing inward like a house of cards?
    Are your heels grounded? Or doing a tightrope act?
  • Stabilizer work.
    Exercises like step-ups, Bulgarian split squats, lateral lunges, and glute bridges help strengthen everything around the knee.
  • Stretching and mobility.
    Sometimes it’s not weakness, but tightness.
    Try stretching your hip flexors, quads, hamstrings, and calves.
  • Proper footwear.
    Training barefoot or with stable shoes can improve foot control and knee biomechanics.
  • Ease the paranoia.
    If every “pop” sends you into a spiral, you’ll alter your natural movement pattern.
    Train mindfully—but not obsessively.


But what if I actually like that sound? Like squat ASMR?

Hey, you’re not weird.

Some people find that sound satisfying.

Like cracking your knuckles or feeling your spine “release” during a twist.

That crack makes you feel alive. Present.
It’s the sound of your body moving.

But don’t confuse it with a sign of success—or worse, something to chase.

The point isn’t the noise.
It’s the control.

Every time you do a slow squat, you’re gifting yourself something rare:
motor awareness.

The sound is just a side effect of moving with attention.

It’s not a flaw.
It’s data.

A clue about how your body moves.

You decide what to do with it.
You can ignore it.
Or use it to find ways to improve.

I always choose the second.


What role do age and joint wear play?

As the years go by, your body changes—and knees are no exception.

It’s not like you turn 30 or 40 and crumble like a mummy, but yes, cartilage can become thinner, less hydrated, less “spongy.”

The noise may increase, even without pain.

It’s not necessarily arthritis.
Often, it’s a natural adaptation to time passing.

But that means you can’t afford to skip recovery anymore:

  • Sleep at least 7 hours
  • Never skip your cooldown
  • Eat antioxidant-rich foods (berries, omega-3s, colorful veggies)

You can’t escape age.
But you can face it with a solid warm-up and two active glutes.


What happens if I completely ignore the issue?

You pretend it’s not there.
Keep training like nothing’s wrong.

At first, it’s fine.
Then one day, your knee feels a bit stiff in the morning.

Then stairs start to bug you.

Then you stop going below parallel because “you don’t really need to, right?”

And boom—you’ve built yourself a long-term biomechanical issue.

If there’s a red flag—constant noise, post-workout discomfort, a sense of instability—deal with it now.

Prevention costs less than an MRI.
And way less than quitting training.


Noisy squats at the gym vs. at home

Funny but true: many people hear more knee noise at home than at the gym.

It’s not your imagination.

At home, there’s:

  • Total silence
  • Hard floors or sound-amplifying surfaces
  • Zero background distractions

At the gym, between clanging weights, loud music, and people grunting, everything sounds more “normal.”

The context affects how much you notice the sound—not how much your body makes it.

Moral of the story? No anxiety.

Your house isn’t ruining you.
It’s just… more honest.


When is it worth getting an MRI or a proper check-up?

You can’t figure out everything on YouTube or from osteopath reels.

Sometimes, you need to take your eyes off the screen and get a real, clinical look.

Here’s when a medical assessment is a must:

  • The noise changes suddenly
  • There’s pinpoint pain, like a mini dagger stab
  • The knee looks swollen, warm, or “full”
  • You feel mechanical blockage (like: “I can’t fully extend my leg”)
  • You’ve got a history of unresolved trauma or sprains

In those cases, an MRI can give you clarity.

Not out of paranoia—but so you can train with peace of mind.

Here are some of the conditions that might come up (relax: it doesn’t mean you have them):

  • Patellofemoral chondropathy (cartilage under the kneecap wears down or inflames)
  • Meniscal tear (often with blockage or mechanical catching)
  • Patellar tendinopathy (pain in the front of the knee, common in jumpers and squatters)
  • Inflamed synovial plica (a natural fold in the knee that can get irritated)
  • Early arthritis (not just for over-60s: past injuries can bring it on early)
  • Joint effusion (excess fluid from stress or repeated microtrauma)

None of these are a life sentence.

But knowing what’s going on inside helps you make better choices, avoid worse problems, and—most importantly—keep moving without fear.

Training without awareness might feel bold.

But training with awareness? That’s power.


But can the knee crack even without weight?

Yes.

In fact, it often happens when there’s no external load.

Why?
Because when doing bodyweight squats, you move with more freedom and more range of motion.

There’s no barbell forcing you to stay “on track.”

It’s just you, gravity, and your body moving how it wants.

And in that setting, any little friction or biomechanical misalignment can pop up.

Many people hear the crack right at the start of the descent or around full flexion.

So no, load isn’t necessary to create noise.

In fact, sometimes the freer your body is, the louder it gets.

And no, you don’t need to slap 100 kg on your back to “fix it.”


Is there a way to stop the creaking—even if it’s harmless?

Honest question.

Maybe it doesn’t hurt, but you don’t like it.
Or it distracts you.
Or people look at you like you’re about to explode.

Here are some practical strategies to reduce (or eliminate) the noise:

  • Work on ankle and hip mobility.
    If these joints are stiff, your knee has to compensate.
    And compensation often means rustles, clicks, and other fun sounds.
  • Improve knee alignment during descent.
    Use a mirror or video to check if your kneecap follows the second toe line.
    If it drifts too far inward (dynamic valgus), noise is more likely.
  • Try changing your stance angle.
    Sometimes just turning your feet out a bit or opening your hips changes the internal dynamics.
  • Strengthen your vastus medialis oblique (VMO).
    That inner quad portion stabilizes the kneecap.
    Controlled step-ups or wall isometric squats can help.
  • Avoid ultra-slow movements if they bug you.
    Some bodies prefer fluid motion over excessive slowing.
    Doesn’t mean rushing squats—but don’t crawl down in 8 seconds either.

Spoiler: you won’t always be able to eliminate it completely.

But you can reduce how often and how loud it is.
And that’s already a win.


When it’s actually a concern: here’s what the research says (you can Google it too)

Let’s be real: not all noise means damage.

But there are documented cases where sound is a warning sign.

A study in The American Journal of Sports Medicine (Wilk et al., 2010) showed that painful crepitus in young people is linked to patellofemoral dysfunctions.

The Mayo Clinic notes that joint noises accompanied by pain, swelling, or instability may indicate:

  • Patellofemoral pain syndrome
  • Meniscal tears
  • Early arthritis
  • Inflamed synovial plica

Even Physiopedia emphasizes that benign crepitus differs from pathological noise by the presence of symptoms and consistency over time.

If every time you train:

  • The noise gets louder
  • You feel pinpoint pain
  • There’s heat or visible swelling

…then it’s time for a check-up.

An ortho exam, ultrasound, or MRI gives you a map—so you’re not training in the dark.


RELATED:》》》 Why Do My Shoulders Pop and Crack During Lateral Raises but Not Hurt?


Conclusion

In the end, the real question isn’t “Why do my knees crack?”

It’s:
“Am I doing everything I can to help them work well?”

If the answer is yes—if you train mindfully, respect recovery, work on mobility, and listen to your body—that sound is just the background music of your evolution.

No fear.
No panic.

Just an acoustic reminder that you’re moving your body.

Got creaky joints too?
Tell me in the comments!

Recommended
Categories
Shoulders STRENGTH BUILDING AND MUSCLE MASS

I Did 20 Military Presses a Day for a Week — But I Went Full Hypertrophy Mode

Spoiler: I didn’t wreck my shoulders. But I did discover a ton of useful stuff no one tells you.

I’ll admit it.

As soon as I read the article on Tom’s Guide by Jennifer Rizzuto – the one where she shares her challenge:

20 military presses a day for a week – I had two immediate reactions.

First: “Cool. I wanna try that too.”

Second (right after): “Yeah, but I can’t do it half-assed. I need to go full hypertrophy psycho.”

Because when you’ve been training shoulders for years, obsessed with hypertrophy and with a toxic love for the overhead press, you can’t just grab two dumbbells and say you did a challenge.

So I decided: 7 days, 20 military presses a day… but with serious weight, proper form, variations, time under tension, and a solid dose of bodybuilder-nerd insanity.

PS: I used dumbbells, not a barbell — just so we’re on the same page.
(Though I did throw in a curl bar on Day 4 just to spice things up.)

Here’s how it went.

blank

Day 1 – Classic military press, but done properly

Simple start: standing, moderate dumbbells, narrow grip, elbows under wrists.

No jerking, no cheating, no spine turning into a Roman arch.

I set a slow pace:

  • 3 seconds up
  • 1 second hold at the top
  • 4 seconds down

The result? After 10 reps it felt like I ran a marathon on my bare shoulders.

Forget “warm-up.”

I was quickly reminded that a properly executed military press demands full concentration, total control, and way more core activation than you’d expect.


Day 2 – Seated press: where lies go to die

Day two, change of scenery.

I sit on a bench with a vertical backrest. Feet planted. Zero help.

The seated press is brutal: no momentum, no cheating, just shoulders vs. gravity.

And the truth is, when you’re seated, you find out fast if your deltoids actually exist or if you’ve just been compensating with everything else.

After 2 sets of 10, it felt like someone had filled my shoulders with concrete.


Day 3 – Arnold press: the judgmental variation

Day three. I wanted some variety and a little Hollywood-style pump.

I went for the Arnold press.

Start with dumbbells in front of the face, palms facing me, and rotate as I press until palms face forward.

Sounds simple?

Try it after two days of heavy pressing.

You engage all heads of the deltoid, extend the time under tension, and activate stabilizers you didn’t know existed.

I felt puffier, more mobile, and even a little bit like Arnold (minus the Austrian accent).


Day 4 – Curl bar: the deception

Day four. I thought: “Let’s try a 35 kg curl bar, just to change the grip.”

Mistake.

The curl bar has an angled grip that feels comfy but wrecks your pressing path.

Your forearms scream, your elbows go diagonal, and the stability is pure drunken Jenga.

I made it to 20 reps, but not with dignity.

My core was toast.

My shoulders confused.

The pump? Meh.

Moral of the story: variety is fine.

But not every variation is your friend.


Day 5 – Superset: military + lateral raises = fire

Fifth day: time for combos.

I did 10 military presses followed by 10 lateral raises with no rest.

Simple on paper, devastating in reality.

Lateral raises after pressing are like espresso after grappa: you won’t forget them.

That’s when you really feel the side delts scream for mercy.

The effect?

Delts felt like they were going to explode, and my heart was like, “Wait… is this the end or just the beginning?”


Day 6 – Controlled push press + slow eccentrics

Day six, changed the approach:

  • 10 light push presses with a bit of leg drive
  • 10 strict military presses with slow eccentrics

I wanted to see if adding some explosiveness could unlock new fibers. It worked.

Push presses let you use heavier loads and push higher, but be careful: if you don’t control the descent, you’re in for pain.

Following up with slow eccentrics is like pouring salt on a fresh wound.

Painful, but effective.


Day 7 – Z-press: the final boss

Last day.

The challenge deserved an epic finale.

I went full “Shaolin monk mode” with the Z-press: seated on the floor, legs straight, back upright, dumbbells overhead with zero support.

Sounds simple?

It’s a demon exercise.

Every rep is an act of faith and core stability.

Everything must be under control: no momentum, no leaning, you can’t even cough or you’ll tip over.

I made it to 15 reps, had to stop, and finished the last 5 breathing like I was climbing Everest.


Final result: did it work?

Yes.

I’m not just talking about a temporary pump.

I mean real awareness.

  • My shoulders felt stronger and more stable
  • My press form improved
  • I reconnected with muscles I hadn’t felt in a while
  • I figured out which variations really fire me up

And I made peace with the fact that military press alone won’t work miracles… but if you use it right, it changes everything.

What happens to the rest of your body when you do military press every day?

Quick side note: even if the goal was to hit shoulders, the rest of the body wasn’t just hanging out.

  • The core was under constant stress, especially on standing days and unstable variations
  • The lower back learned to stay in line
  • The triceps got steady indirect volume
  • Even the legs (on push press days) had to help create a solid base

Moral of the story?

Military press is a shoulder move, but it recruits the whole postural orchestra.

Mistakes to avoid if you want to try it too

Feeling inspired? Good. But avoid these traps or you’ll end up like an “ego-lifting crusader”:

  • Don’t start with heavy weights just to impress your dog watching you train
  • Avoid doing it standing every time if you’ve got lower back issues or poor scapular mobility
  • Don’t repeat the exact same scheme daily: mix it up, or boredom and plateau will show up together
  • Don’t sacrifice form just to hit 20 reps at all costs. Better to do 12 good ones than 20 sloppy ones

How sustainable is it long-term?

Week’s over, but here’s the real question: can you keep going?

Honest answer: not like this.

Doing 20 presses every day works as a short-term experiment or a shock to your training.

But long-term you need:

  • Periodization
  • Recovery
  • Stimulus variation

In short, it’s a great training block, but not a full program.

Want to use it occasionally to re-ignite your shoulders? Awesome.

Want to do it forever? Nope. Balanced approach is better.


RELATED:》》》 Should I Focus More on Eccentrics for Shoulder Hypertrophy or Stick to Explosives?


So, should you try it too?

Yes. But not like a lunatic.

Doing 20 military presses a day won’t work magic on its own.

You need to be smart about it.

Change angles.

Play with time under tension.

Tweak load, speed, and rest.

The difference between doing an exercise and training a muscle is all in the details.

This challenge teaches you exactly that.

PS: Where did the idea come from?

This experiment was inspired by an article on Tom’s Guide by Jennifer Rizzuto.

You can find the original by Googling:
“I did 20 military presses every day for a week — here’s what happened…”

I just made it a little more gym-geek friendly. 😎

Recommended
Categories
Shoulders STRENGTH BUILDING AND MUSCLE MASS

Why Do My Shoulders Feel Weaker When I Train Them After Arms?

You know that feeling when you walk into the gym all pumped up, ready to crush your shoulder workout, and then… bam!

Your arms feel like they’re made of jelly.

Yeah, I’ve been there too.

You picture yourself crushing the military press like a warrior, but instead, your shoulders are shaking as if you’re trying to lift a piano.

And the frustration builds up—you almost feel like giving up and heading home.

But what’s really going on?

Is it just fatigue, or is there something deeper at play?

Let’s find out why training shoulders after arms often feels like an impossible mission.


Your Shoulders Are Already Working (Even If You Don’t Notice It)

blank

Let’s start from the beginning: your shoulders don’t just act up for no reason.

There’s a very specific explanation behind that feeling of weakness after training your arms.

When you do barbell curls, tricep pushdowns, or those brutal skull crushers, you’re not just isolating your arms.

In reality, your front delts (the front part of your shoulders) are silently working to stabilize the movement.

Yes, you heard that right.

Your shoulders are doing the dirty work, like those colleagues who handle everything behind the scenes while others take the credit.

Every curl rep, every tricep extension, every row… your shoulders are there, active, working to keep everything under control.

And when it’s time to move on to the military press or lateral raises, they’re already half cooked.

It’s like asking a marathon runner to sprint after 42 km.


Fatigue Doesn’t Just Disappear: It Builds Up and Lingers

Cartoon-Guy-Struggling-With-Tiny-Dumbbells

Here’s a key concept: muscle fatigue doesn’t just vanish like magic.

It accumulates.

When you go from curls to presses, the fatigue you built up in the previous sets sticks around, silently but surely, like an invisible weight holding you back.

Imagine filling a bucket with water: each set of curls, each pushdown adds a bit of weight.

When you get to shoulders, the bucket is already almost full.

And it doesn’t matter how much you focus or grit your teeth; that load is there.

Even weights you normally lift with ease suddenly feel heavier.

And it’s not about willpower or “not pushing hard enough.”

It’s pure and simple physiology.


Energy Distribution: There’s Not Enough Fuel in the Tank

Muscular-man-with-glowing-energy

Here’s another often-overlooked aspect: muscle energy isn’t infinite.

When you blast through curls and French presses, you’re burning a good portion of the fuel your muscles have available.

And unfortunately, your shoulders show up to the party when the plate is already half empty.

It’s like going to a buffet at the end of the night—the best stuff is already gone.

What’s left isn’t enough to fill you up.

So, it’s not that you’re “weak” or “out of shape.”

You’re just using your resources in an order that disadvantages smaller, more delicate muscles like the deltoids.


Why Do Triceps Fatigue Shoulders During Presses?

One aspect that often goes unnoticed is the involvement of the triceps during shoulder pressing exercises.

When you perform a shoulder press or military press, the triceps aren’t just spectators; they’re co-stars in the movement.

If you’ve wrecked them with overhead extensions, pushdowns, or dips, their ability to assist in the press is severely reduced.

It’s like trying to lift a weight with an assistant whose arms are already tired—the efficiency drops dramatically.

That’s why many athletes prefer to separate shoulder and tricep workouts on different days to ensure maximum explosive strength for both muscle groups.


It’s Not Always Bad to Train Shoulders After Arms

Despite all this, training shoulders after arms isn’t necessarily a mistake.

In fact, it could have some advantages if managed correctly.

  • More Control and Perfect Form:
    When your shoulders are already a bit fatigued, you’re forced to use lighter weights and focus more on technique.
    This can help you work more precisely, reducing the risk of incorrect compensations.
  • Metabolic Training:
    The cumulative fatigue stimulates more blood flow to the muscles, promoting “the pump” and hypertrophy.
    If you’re looking for that burning sensation and muscle congestion, this is the way to go.
  • Muscular Endurance:
    Working with tired shoulders can improve your ability to maintain strength even when under stress.
    A very useful quality not just in the gym, but in any sport requiring explosiveness even at the end of performance.


And If Your Shoulders Are Naturally Weak?

Not everyone starts from the same level of strength.

Some people, due to genetics or postural habits, naturally have weaker shoulders.

Maybe you’ve always struggled to push weights overhead, or lateral raises feel like an epic challenge even with a few pounds.


How to Strengthen Your Shoulders If They Are Your Weak Point

Here are the most effective strategies if you feel your shoulders lag behind the rest of your body:

  • Targeted Isolation Exercises: Lateral raises, face pulls, light and well-controlled front raises.
  • Scapular Stability: Scapular push-ups, Y-T-W with bands to improve scapular control.
  • Gradual Progression: Slowly increase loads while maintaining perfect form.
  • Compound Movements: Arnold press, push press, and landmine press for more explosiveness.


Practical Strategies to Avoid That Weak Feeling After Arms

If the problem is that your shoulders feel drained after training them in combo with arms, then you can optimize like this:

  • Reverse the Order of Exercises: Shoulders before arms, when energy is at its peak.
  • Targeted Activation with Bands or Light Dumbbells: Specific warm-up before arms.
  • Limit Tricep Volume: Avoid fully exhausting them if you know you’ll be doing shoulders.
  • Alternate Dumbbells and Barbell: Dumbbells for control, barbell for explosive strength.
  • Watch the Time Under Tension (TUT): Slow down the eccentric phase to maximize effectiveness.


Conclusion

Here’s the point: if your shoulders feel weaker after arms, it’s not because you’ve lost strengthit’s just a matter of timing and strategy.

Just a few small adjustments to the order of exercises, a bit more attention to tricep volume, and you’ll feel the difference.

You don’t have to change everything—just optimize.

Next time you walk into the gym, you’ll know exactly what to do to avoid those drained shoulders and push every single rep to the max.

Recommended
Categories
Shoulders STRENGTH BUILDING AND MUSCLE MASS

What’s the Real Difference Between Upright Rows and Lateral Raises for Delt Mass?

There’s a scene that plays out all too often at the gym.

You, standing in front of the mirror.

Dumbbells in hand.

Sweat dripping.

Trashy playlist in your ears.

And that classic moment of indecision:

Do you pull them up to your chin like you’re gearing up for battle…

…or swing them out to the sides like you’re about to take flight?

Welcome to the great shoulder dilemma: upright row vs. lateral raise.

Two sibling exercises with totally different personalities.

Both will set your delts on fire—but with different intentions (and results).

And trust me, how you choose between them can mean the difference between capped shoulders or chronic frustration.


Quick shoulder anatomy—no boring stuff

Quick-shoulder-anatomy-illustration

Before we start philosophizing like locker-room Socrates, let’s do a quick anatomy crash course.

The deltoid has three heads:

  • Anterior (front) – used to lift forward
  • Lateral (medial) – makes you look as wide as an aircraft carrier
  • Posterior – everyone ignores it, but it’s crucial for balance

When we talk about visible mass—the kind that makes you look broad even in a hoodie—the real star is the lateral head.

And that’s where these two exercises go head-to-head.


Upright row: the risky all-rounder

Upright-rows-barbell-exercise-shoulder-and-trap-development-gym-background

The upright row is one of those moves that seems easy… until your shoulder starts clicking like a rusty door.

You grab a barbell (or two dumbbells) and pull them up toward your chin with elbows flared out.

Simple? Seems like it.

But under that innocent gesture hides a lethal combo: humeral abduction with internal rotation.

Translation: your shoulder’s in a sketchy position, especially if:

  • Your shoulders are rolled forward
  • You never warm up your rotators
  • Your chest is tighter than a safe deposit box

Yes, it hits the lateral delts, but your upper traps jump in to lend a hand.

And that’s a double-edged sword:

  • More muscles involved = more weight = more stimulus
  • But also = less delt isolation

If your goal is aesthetics, isolation is the name of the game.

Plus, the higher you lift, the more likely you are to trigger the dreaded impingement.

That lovely sensation of “something getting jammed in there.”


Lateral raises: the delt surgeon

Lateral-raises-dumbbell-exercise-for-shoulder-width-mirror-view-gym-background

Lateral raises are far less flashy, but infinitely more precise.

You lift dumbbells out to the side—no swinging, no ego lifts, no “lightweight baby” yelling.

Everything targets the lateral head.

It’s the perfect move for sculpting your shoulders like a Swiss watchmaker.

Form is everything:

  • Slight forward lean
  • Thumb tilted slightly downward (like pouring a pitcher)
  • Slow, controlled reps—no TikTok dances

The result?

A clean, constant, focused stimulus.

And even if you’re using tiny weights (like half-liter bottles), the burn is real.

Want to crank it up? Try this:

  • Hold the top position for 2 seconds
  • Lower slowly over 3–4 seconds
  • Do drop sets until you implode


But which one really builds mass?

Good question.

If we’re talking overall shoulder mass and heavy lifting power, the upright row is definitely the more “brute force” choice.

More load, more motor units, more systemic stress.

But…

If your goal is that 3D side delt balloon look that screams “visual mass,”
lateral raises win by a landslide.

It’s like comparing a sledgehammer to a power drill.

The hammer hits everything.

The drill gets deep right where it counts.


What if I told you… you can do both?

Here’s the deal—you don’t have to choose.

It’s not “Team Upright” vs. “Team Lateral Raise.”

Here’s how to program both exercises intelligently:

Day A – Strength & Volume

  • Barbell Upright Row – 4×8
  • Slow Lateral Raises – 3×15

Day B – Pure Isolation

  • Unilateral Cable Lateral Raises – 4×12
  • Partial Dumbbell Upright Rows – 3×10

In a smart routine, using both allows you to:

  • Stimulate more fibers with different intensities
  • Target both aesthetics and strength
  • Localized isolation
  • Prevent imbalances between delts and traps
  • Volume and variety

And most importantly—avoid boredom.


Warning: When upright rows sabotage your gains

Sometimes, the upright row needs to take a backseat—or be ditched entirely:

  • Weak rotator cuff
  • Clicking or pain during the movement
  • Pre-existing inflammation

In those cases, switch to safer versions:

  • Dumbbells instead of a barbell
  • Reduced range (stop below chest)
  • Wider grip

And of course: warm-up like a pro.

Plenty of scapular openers, banded external rotations, and light activations before loading up.


Savage techniques to explode your lateral delts

Want shoulders that look airbag-inflated? Try these combos:

  • Lateral raise + partials: 12 full reps + 10 bottom-half reps
  • Triple drop set: Every time you hit failure, cut the weight in half and keep going
  • Cable-dumbbell superset: single-arm cable + simultaneous dumbbells = sweet death

Lateral raises are never “too light” if you know how to torture the muscle right.


Execution: mistakes from a confused beginner (me)

When I first tried to grow my shoulders, I thought “just move something heavy up and down” was enough.

My upright row looked like an orangutan in REM sleep.

I yanked up to my chin, elbows flaring to the sky like busted Wi-Fi antennas.

My shoulders were squealing by set two—but I figured “that’s how you know it’s working.”

Spoiler: no, that was my acromion begging for mercy.

And lateral raises?

A masterpiece of poor form.

I used my torso like a seesaw.

Rocked back and forth like a drunk sailor on a ferry.

More tribal dance than controlled motion.

Result: 0% isolation, 100% ego, 0.5% growth (and only in my traps).

Things changed when I lowered the weights, slowed down the tempo, and actually felt what the muscle was doing.

My arms stopped flailing and started following intent.

That, my friends, is the real turning point.


Why do these moves matter beyond just muscle gains?

Because they go beyond just building mass.

The upright row teaches scapulohumeral coordination.

It forces you to understand how shoulder and scapula move together—great for contact sports, swimming, or calisthenics.

Lateral raises enhance proprioception.

You have to control the motion in every phase, feel the muscle working.

It’s a mindfulness drill as much as a muscle drill.

They give immediate feedback: if your form sucks, your delts don’t fire.

You learn on the fly, tune in to your body, build awareness.

And let’s be honest: finishing a shoulder workout with a pump that makes you walk like Robocop is just… therapeutic.


Which is safer for shoulders and which can cause issues (and what kind)?

Safety?

It depends, but let’s be real.

Lateral raises, done with light dumbbells and full control, are among the cleanest shoulder exercises.

  • Minimal joint stress
  • Natural range of motion
  • No forced rotations

Upright rows? Riskier, especially if:

  • You pull above shoulder height
  • Use a grip too narrow
  • Have poor shoulder mobility

The biggest danger?

Subacromial impingement—the supraspinatus tendon gets pinched between two bones like a lemon in a press.

The problem isn’t the move itself, but the reckless execution—ridiculous weights and zero warm-up.

So:

  • Healthy shoulders + good mobility = upright row okay
  • Cranky shoulders = lateral raises all the way

Smart alternatives if one of the two bothers you

If upright rows hurt just by looking at them:

  • Rope face pulls – awesome for rear delts and upper back
  • Low cable lateral raises – arm behind the body, better isolation and natural path
  • Landmine lateral raise – shorter lever, less joint stress

If classic lateral raises bore you or feel too easy:

  • Cable Y-raises – similar, but with a better angle
  • Incline dumbbell lateral raises – lying on an incline bench, deeper stretch
  • Resistance band raises – constant tension, great for that end-of-set pump

The goal isn’t “force the move no matter what.”

It’s about finding what stimulates your body best.


Conclusion

If an exercise hurts… it’s not “weak shoulders.”

It’s a signal.

Change the variation.

Lower the weight.

Study the technique.

Shoulders are one of the most complex and vulnerable joints.

Treat them right, and they’ll reward you with aesthetics, strength, and function.

Neglect them, and you’ll be stuck on the spin bike doing planks for months.

So next time you wonder, “upright row or lateral raise?”…

The real answer is:

“How, when, and why am I doing them?”

Recommended
Categories
Shoulders STRENGTH BUILDING AND MUSCLE MASS

Should I Focus More on Eccentrics for Shoulder Hypertrophy or Stick to Explosives?

Building wide, round, and prominent shoulders isn’t a weekend project.

It’s a war made of lateral raises, military presses, and—when the existential doubt kicks in—strategic decisions like this one:

Should I slow down and control the eccentric, or go berserk with explosive power?

Some days, you feel like a Viking god, ready to hurl barbells at the ceiling.

Other days, you’re lifting 12-pound dumbbells in slow motion, like sculpting the Mona Lisa with every rep.

But which approach actually builds bigger shoulders?

Let me walk you through my journey—filled with experiments, mistakes, and some hellish DOMS I still remember.


Eccentrics: the slow burn that really builds

Eccentrics-slow-burn-for-muscle-growth-dumbbell-training

Eccentrics are the controlled lowering phase of a movement.

So, for example, in an overhead dumbbell press, the eccentric is when you slowly lower the weights back to your shoulders.

This type of contraction stretches the muscle under tension, causing small, controlled damage to the fibers.

Why do we care?

Because this kind of “muscle damage” is one of the three fundamental pillars of hypertrophy, along with mechanical tension and metabolic stress.

Here’s the key: the more you control the eccentric phase (think 3–5 seconds), the more continuous tension you generate, and the more you stimulate the satellite cells responsible for repair and growth.

During my most productive training phases, I prioritized isolation movements with slow eccentrics:

  • Lateral raises with 3–4 second descents
  • Reverse pec deck with prolonged time under tension
  • Dumbbell press where I slow down every inch

The results aren’t instant, but they stack up.

In the long run, eccentrics build.

They don’t show off. They build mass.


Explosives: power, recruitment, and your nervous system on fire

Explosive-training-power-muscle-recruitment-barbell-overhead-press-gym-setting

Now let’s move to the adrenaline side of things.

Explosive exercises focus on quickly recruiting fast-twitch muscle fibersthe ones responsible for power, max strength and (spoiler) also for growth.

We’re talking push presses, kettlebell swings, and even explosive variations of the shoulder press.

What’s the benefit?

They recruit high-threshold motor units.

That means they activate the hardest-to-reach muscle fibers—the same ones with the most hypertrophic potential.

When performed properly, these exercises also improve intra- and intermuscular coordination, making complex movements more efficient.

However… there’s a catch.

By definition, explosive moves reduce time under tension.

So yes, you activate a lot of fibers—but not for long.

That’s why they need to be placed strategically in your workout. They’re not enough on their own.

I often use them at the start of a session as “neural ignition,” or in strength blocks with low reps (4–6 reps).


Explosive + Eccentric

Many people make the mistake of thinking they have to choose.

But the truth is, real strength lies in knowing how to combine them effectively.

Want to maximize the stimulus?

Here’s a practical structure for a complete shoulder session:

Phase 1 – Explosive activation

  • Push Press 4×6 (explode on the push, minimal control on the way down)
  • Inclined dumbbell swings (focus on speed, 3×8)

Phase 2 – Targeted hypertrophy with slow eccentrics

  • Lateral raises 3×12 with 3-second descents
  • Seated dumbbell press 3×10 with 4-second descents and 1-second isometric hold
  • Reverse pec deck 3×15 (tempo 2-1-3)

Phase 3 – Final stretch and pump (optional but lethal)

  • Cable laterals from behind the body, 3×20 nonstop, no pause at the top

This way, you hit everything: explosive strength, neural recruitment, mechanical tension, muscle damage, and metabolic pump.

A perfect five out of five.


Warning: it’s not just about technique—it’s about recovery and programming

Training both explosive and heavy eccentrics in the same week can lead to significant cumulative fatigue.

So watch out:

  • If you’re in a calorie deficit, limit the explosives and focus your energy on low-impact neural techniques.
  • If you’re bulking, use both, but program recovery wisely: 48–72 hours between two intense shoulder sessions.
  • If your delts feel “dead” or overly fatigued, you’re likely messing up the sequence or frequency.


What loads should you use for eccentrics and explosives? Real percentages and sensations

Let’s talk weight.

For eccentric execution, moderate loads are often most effective.

We’re talking about 65–75% of your 1RM.

  • Not too light, or the muscle won’t get enough stimulus.
  • Not too heavy, or you won’t be able to control the eccentric phase for 3–5 seconds without wobbling like a newborn with dumbbells.

For explosive work, the load should allow you to accelerate the movement.

  • That usually means working between 30–60% of your 1RM to maximize speed and power.

For example:

  • Push press with 50% of your military press max = boom.
  • Slow dumbbell press with 70% of your max and 4-second descent = killer.

The point isn’t just the number—it’s how you move with that weight.

If you explode with control or brake with precision, the load is right.


One fully explosive session and one fully eccentric session? Absolutely doable!

Yes, you can totally dedicate one full day to explosive training and another to slow eccentrics.

In fact, it’s a smart approach, especially for those training 3–5 times a week.

On explosive days, you train your central nervous system, improve coordination, and activate fast-twitch fibers.

On eccentric days, you break down muscle tissue to stimulate repair and growth.

Exercises that benefit the most from this split?

Explosive day:

  • Push press
  • Kettlebell snatch
  • Dumbbell jump squat
  • Medicine ball throws (against wall or inclined bench)

Eccentric day:

  • Slow descent lateral raises
  • Dumbbell shoulder press with bottom pause
  • Rear delt machine with 3–4 second negative phase
  • Cable front raises with controlled tempo


Weekly template (Tested on me – real results)

Day Focus Details Notes
Monday Explosive Push press, jump squat, med ball throws Activation and power
Wednesday Eccentric Slow lateral raises, rear delt machine Mechanical tension and muscle damage
Friday Mixed Circuit: 1 explosive + 1 eccentric per group Pump and metabolic stress

With this plan:

  • Your shoulders always get enough recovery between different stimuli
  • You improve both aesthetics and strength
  • After 4 weeks I noticed: +1.5 cm shoulder circumference and big gains in stability and control


Does this also apply to bodyweight exercises? Absolutely

Bodyweight training can be perfect for eccentric work—you just have to change how you perform the movement.

Examples:

  • Eccentric pike push-up: lower for 5 seconds, then push back up with leg help
  • Negative handstand push-ups: only control the descent
  • Parallel bar dips: hold at the top, descend slowly over 6 seconds

For explosive work:

  • Clap push-ups
  • Plyometric box or step jumps
  • Fast transitions between planche and pike

Training bodyweight with time control is one of the most cost-effective and efficient ways to get results.


How many different ways to train the eccentric phase? More than you think

Here are the main effective (and tested) methods:

  • Slow eccentric (3–6 sec)
  • Isometric eccentric (with pauses during the descent)
  • Pure negatives: assisted concentric, slow solo descent
  • Eccentric overload: more weight on the way down only (e.g., with a spotter)
  • 1½ reps: one full rep + a slow half rep (e.g., dumbbell press)
  • Drop sets with progressive slowing
  • Rest-pause with only eccentric finishers
  • Irregular tempos (e.g., 5-1-2)

These approaches should be cycled—not all used at once, or you’ll fry yourself.


And what about TUT? We need to talk about it

TUT = Time Under Tension, aka how long the muscle stays under stress during a set.

That’s why it’s closely tied to eccentrics: the slower you go, the more TUT increases.

In general, for hypertrophy, a TUT between 30 and 60 seconds per set is ideal.

  • Sets that are too fast = insufficient stimulus
  • Sets that are too long = metabolic fatigue and loss of effective tension

So yes, you should consider it, but it’s not an exact science.

The key is not to just stroke your ego, but to use technique to feel the muscle work within the right timeframe.


Eccentric training does way more than pump up your muscles

Beyond the benefits of mechanical tension, controlled muscle damage, and increased protein synthesis, there are several underrated effects that make eccentric training even more valuable.

1. Improves mind-muscle connection
During a slow descent, you’re forced to feel every inch of the contraction.
This makes you actually engage the target muscle, reducing compensations (like using your traps instead of your side delts).
Over time, this builds motor awareness that makes every exercise more effective—even the “boring” ones.

2. Strengthens tendons and boosts joint resilience
Studies on elite athletes and rehab patients show that eccentric training can reinforce collagen in tendons, making them tougher.
For long-time lifters, this is gold: fewer injuries, more consistency, better gains.

3. Optimizes active stretch phases
During eccentrics, the muscle lengthens under load, creating a stretch reflex.
Over time, this improves functional mobility—not contortionist flexibility, but real mobility under load.

4. Helps motor learning in new movements
When learning a new exercise (like an Arnold press or a solid face pull), focusing on the eccentric helps you stabilize and learn faster.
It’s like slowing down a video—you see more and make fewer mistakes.

5. Can stimulate growth even with light weights
Yes, you can grow using light weights, as long as you do a slow and controlled eccentric.
This is super useful:

  • During recovery phases
  • While traveling with limited gear
  • When trying to reduce joint stress


Disadvantages of the eccentric phase? Let’s clear things up

Yes, there are a few.

Here are the main ones:

  • Greater tendon stress—especially if using heavy loads
  • More intense DOMS—if overused, it can hinder the next session
  • Requires more control—fatigued or inexperienced lifters may lose form


And the concentric phase?

People often treat it like an afterthought—just the way back up. Big mistake.

The concentric phase is the active heart of the movement: the moment when the muscle contracts and generates force to overcome the load.

It’s the push, the lift, the intentional movement.

Here’s a key concept: intentionality.

Even if the weight doesn’t move fast, you should try to push it as if you were launching it through the roof.

That stimulates max fast-twitch fiber recruitment—even with moderate loads.

For hypertrophy, the ideal balance is:

  • Controlled eccentric: 3–5 seconds, to create prolonged tension
  • Deliberate concentric: 1–2 seconds, to activate more fibers and push with force

There are also fast eccentrics, useful in plyometric or ballistic exercises, but not ideal for pure hypertrophy.

Some athletes do get great results with quicker eccentrics, but that’s usually in performance or power sports—not aesthetics-focused programs.


What do serious studies say about all this?

Several studies confirm that the eccentric phase is crucial for enhancing muscle hypertrophy and strength, primarily due to its unique mechanical tension and subcellular adaptations.

Two significant studies illustrate this effect:

Study 1: Kojic, Mandic, and Duric (2025)

This research examined the effects of eccentric tempo variations during squats on the quadriceps femoris muscle.

  • Participants trained with either a fast eccentric (1s) or slow eccentric (4s) tempo for 7 weeks.
  • Results showed that the slow eccentric group achieved significantly greater hypertrophy, especially in the vastus lateralis, and higher strength gains (ES = 1.60 vs. 0.99, p < 0.05).
  • These findings suggest that tempo manipulation in the eccentric phase can optimize muscle growth and strength.

Study 2: Hedayatpour and Falla (2015), BioMed Research International

This study focused on the physiological and neural adaptations induced by eccentric exercise.

  • Eccentric contractions were found to produce greater mechanical tension and subcellular damage compared to concentric or isometric actions.
  • This led to:
    • Increased protein synthesis and muscle hypertrophy
    • Enhanced neural activity, including better cortical adaptations and motor unit behavior
    • Improved muscle strength and function with a lower metabolic cost


RELATED:》》》 Are My Genetics Limiting My Side Delt Growth or Am I Training Inefficiently?


Conclusion

There are no saints in training.

Only methods that work—as long as you adapt them to yourself.

Want huge, symmetrical, well-built shoulders?

Then alternate.

Use explosive work to wake up your nervous system, boost power, and activate every last fiber.

Then slow it down, take control, and let the eccentrics do their dirty work.

There’s no glory without a little burn, and no growth without a few extra seconds under load.

Recommended
Categories
Shoulders STRENGTH BUILDING AND MUSCLE MASS

How Can I Prevent Shoulder Fatigue From Killing My Pull Day Performance?

I swear, there are days I walk into the gym with fire in my eyes.

Pull day.

My time to shine.

Back nice and tight, playlist blasting, hands on the barbell.

And yet, by the second set…

My shoulders start rebelling.

A sharp twinge, followed by an early fatigue that feels like they’ve run a marathon—
while I’m just trying to feel my lats.

I don’t know about you, but it really pisses me off.


Why Do Shoulders Get Tired Before the Back Even Joins the Party?

Man-struggling-with-lat-pulldown-exercise

The shoulder is the most mobile joint in the human body.

And like any versatile structure, it pays the price in stability.

During pulling exercises—from rows to pull-ups—
shoulders don’t push, they guide, stabilize, control.

The problem?

They’re often already under stress before the workout even begins:

  • You trained heavy push movements the day before (chest, front delts)
  • You spend your days hunched at a desk
  • You sleep poorly, recover worse, and still hit the gym

Result: the stabilizing muscles (like the rear delts and rotator cuff)
crash too soon.


Pre-Workout Matters More Than You Think

Man-doing-pre-workout-with-stick

Warm-ups aren’t just a formality.

They’re a message to your nervous system.

If you half-heartedly do two pull-ups with no load,
you’re basically saying “Eh, we’ll give it a shot.”

Want to pull hard without frying your shoulders? Start like this:

  • Face pulls with a 2-second pause
  • Scapular pull-ups to feel the scapular engagement
  • Band T and Y raises for the rear delts
  • Scapular mobility drills with a stick or band

Just 10 minutes. But they’ll change your entire session.

Your shoulders wake up, target muscles get prepped.
And finally, you pull with your back—not your neck.


Too Much Push, Too Little Rest: The Overlap Problem in Splits

Okay, here we get into the delicate world of weekly programming.

If your split looks like this:

  • Monday: chest and shoulders
  • Tuesday: back

…you’re in trouble.

Your poor front delts didn’t get a chance to recover.
And your rear delts can’t handle all the stabilization work.

Practical advice?

Leave at least 48 hours between push and pull days,
or adjust shoulder volume—especially if you notice recurring fatigue.

Think in terms of quality, not just quantity.


Know the Signs: Normal Fatigue or Red Flag?

Let’s be honest:

A little muscle burn?

Totally normal.

But sharp pains, lateral aches, popping sensations, or weakness? No thanks.

If your shoulders hurt during exercises or continue bothering you at rest,
you’re not progressing—you’re heading toward chronic inflammation.

Rotator cuff tendinopathies don’t appear overnight.

They build over time, with a pile-up of small errors.

Ignoring them is like pressing your finger into a crack on your windshield
and hoping it won’t spread.

Spoiler: it will.


Form Is Everything (Yes, Even If You’ve Been Lifting for Years)

Shoulder fatigue is often not your shoulder’s fault.

It’s a form issue.

Take barbell rows, for example.
How many of you pull toward your chest, with elbows tucked,
working more biceps and front delts than lats?

Too many.

Instead, try this:

  • Pull with elbows wide, toward your belly button
  • Keep your scapula retracted and depressed
  • Pause for a second in the contraction

This way, you take the tension off the shoulders
and put it right where it belongs—on your back and lats.


Muscle Imbalances: The Silent Culprit

Muscle-Imbalances

One reason shoulders give out early is that the posterior side is too weak compared to the front.

Front delts at level 10, rear delts at 3.

Guess which side takes the overload?

Practical fix:

  • Reverse flyes with a pause
  • Slow face pulls with external rotation
  • Prone dumbbell rows on an incline bench

Just two sessions a week can rebalance everything.

And after a month, you’ll feel the difference.


RELATED;》》》 I’ve noticed my left shoulder is visibly smaller—should I train it more often than the right?


Don’t Neglect Grip Work If You Want to Help Your Shoulders Too

Yes, grip.

If it’s too weak, your shoulders “rush in” to support the load.

And the more weight you use, the more your shoulders suffer.

A strong grip unloads tension from the arms and shoulders.

So:

  • Train with fat bars or towels
  • Add farmer’s walks and static holds
  • Alternate grips: overhand, neutral, underhand

Training grip is like reinforcing the base of a tower—
if it’s solid underneath, everything else stands tall.


Smart Stretching: Not Just Flexibility, Real Prevention

Here’s the thing:

Most people think stretching is a kind of slow dance at the end of a workout.

But proper stretching releases dominant muscles
that block good scapular posture.

  • Chest Stretch:
    • Stand next to a wall, place your arm at a 90° angle, and gently turn your body away.
    • For a deeper stretch, extend your arm fully and repeat.
  • Front Deltoid Stretch:
    • Clasp your hands behind your back, straighten your arms, and gently lift them.
    • Keep your chest open and shoulders pulled back.
  • Upper Traps Stretch:
    • Tilt your head to one side, bringing your ear toward your shoulder.
    • Use your hand for a gentle pull, feeling the stretch in your neck and upper traps.

This helps you open your chest, free your scapula,
and release chronic shoulder tension.


When Changing Exercises Is the Right Move (It’s Not Giving Up)

If a certain exercise irritates your shoulders every time,

even with good form and warm-up… just stop.

Not all exercises suit everyone.

Try safer alternatives:

  • Chest-supported rows: remove lumbar and scapular stress
  • Neutral-grip lat pulldown: more natural, less shoulder strain
  • Low-cable rows with a pause
  • Controlled TRX rows

It’s not a step backward.

It’s a smart move toward better, longer progress.


Training Shoulders After Chest: Suicidal Move or Strategic Mistake?

Let me say it upfront: I wrote a whole article on this.

So if you want the full deep-dive on physiology, recovery times, and solutions,
read that one next.

But for now, let’s be clear:
training shoulders (especially the front delts) the day after chest
is a recipe for early fatigue.

These two muscle groups share a ton of work—
and not just during bench press:

  • Horizontal pressing? Front delts are already in the game.
  • Overhead press the next day? You’re slamming them again without mercy.

Then pull day comes around… and your shoulders are fried.

It’s not about toughness. It’s about strategy.

What can you do?

  • If you must separate chest and shoulder days,
    focus your shoulder day on lateral and rear delts, avoiding heavy pressing.
  • Or alternate with low-volume days to give shoulders a break.
  • Even better: train chest and shoulders on the same day,
    then give them 48–72 hours of rest before serious pulling.

Remember: fatigue builds up neurally too, not just muscularly.
And if you hit pull day already neurologically drained…
good luck feeling those lats.


Muscle Fatigue and Deficiencies: What If It’s Not Just Your Training?

Muscle-fatigue-and-deficiencies-beyond-training

Let’s be real:

Not everything is solved with better form and planning.

If your body’s running low on essential micronutrients,
you could do the best warm-ups on Earth… and still feel drained, unstable, sluggish.

That weird, early, unexplainable muscle fatigue—even with solid rest—
can have biochemical roots.

And no, I won’t just say “eat more protein and drink water.”

It’s not about what to eat more of,
but what your cells have been missing for a while.

Here are a few deficiencies that directly impact neuromuscular function and endurance:

  • Magnesium: without it, nerve signals to muscles get scrambled.
    It’s like texting on 5% battery. Cramping, stiffness, and early fatigue are your red flags.
  • Vitamin D: key for strength and inflammation control.
    If you’re indoors 24/7 or wear sunscreen even to check the mail… you might be low.
  • Iron: vital for oxygen transport. Even slight dips make you feel winded in longer sets.
    It’s not mental weakness—it’s cellular chemistry.
  • Electrolytes (sodium, potassium, calcium):
    imbalances mess with nerve signaling and muscle contraction.
  • B vitamins: your energy “mechanics.”
    If they’re low, your muscles won’t recover or activate properly.

The solution isn’t to shotgun random supplements.

It’s to listen to your body, note symptoms, and—if needed—
get a targeted blood panel.

Sometimes, your plan isn’t the issue.
You’re just trying to sprint with half a tank.


Conclusion

If you’ve made it this far, one thing’s clear:

Early shoulder fatigue isn’t inevitable.

It’s a symptom.
A signal.
A little alarm bell saying, “Hey, something’s off here.”

And that “something” could be:

  • A rushed warm-up
  • A poorly designed weekly split
  • Sloppy lifting technique
  • Or even a missing micronutrient

The good news? You can fix it all.

And when your shoulders finally do their job—just enough, not too much—
your back kicks into high gear.

That’s when the real work starts.

The kind of work that builds.
That grows.

Recommended
Categories
Shoulders STRENGTH BUILDING AND MUSCLE MASS

Are My Genetics Limiting My Side Delt Growth or Am I Training Inefficiently?

There was a time I’d look in the mirror and think, “Okay, arms look decent, some veins showing, chest’s not bad…”

Then I’d turn to the side.

And that’s when the illusion crumbled.

The shoulder… disappeared.

No roundness, no width.

I’d see people with wide, boulder shoulders, looking jacked even in pajamas.

Maybe it sounds familiar. There’s always that friend who did three dumbbell presses in high school and has had cannonball delts ever since.

I wasn’t that guy.
And if you’re reading this, maybe you aren’t either.

For us, broad shoulders are earned with sweat.

For years I asked myself:
“Is it genetics, or am I doing something wrong in the gym?”

Answer: a bit of both—but mostly I was doing it wrong.

Genetics plays a role, sure.

Some people have wide clavicles and muscles that grow just by looking at weights.

But we often use genetics as an excuse.
I did.

“My shoulders are narrow.”
“My delt doesn’t grow.”
“My traps do all the work.”

Meanwhile, I kept pressing heavier and heavier overhead… thinking more weight = more gains.

Spoiler: nope.


If your shoulders are flat, overhead presses won’t save you

Overhead-press-not-enough-for-shoulder-growth

This tiny muscle, squeezed between the front and rear delts, is a real pain in the ass.

It only activates when it feels like it.

Whenever it can, it delegates the job to traps, triceps, or even abs—anything to avoid working.

And if you don’t force it to do its damn job, it’ll never grow.

Here’s where I turned things around:
I stopped chasing the perfect exercise and started perfecting execution.

Lateral raises with 20 kg per arm are useless if you look like a panicking penguin.

Now I use light weights—6 to 10 kg max.

I sit down, lean slightly forward, and go surgical with technique:

  • Elbows slightly bent
  • Wrists locked
  • Controlled movement
  • Slow raise to shoulder height
  • One-second pause
  • Even slower descent

Every single rep should burn.

If you’re not feeling fire in the middle of your shoulder after 8–10 reps, you’re not hitting the right spot.

It doesn’t matter if you’re lifting a dumbbell or a water bottle: form is king.


The right exercise isn’t enough: frequency matters

It's-not-just-the-right-exercise-it's-the-frequency

Training shoulders once a week is delt suicide.

If your delts are lazy, hitting them once a week won’t cut it.

I started hitting them three times per week.
Not always with heavy lifts—often, the opposite.

Here’s a sample lateral delt-focused week:

Day 1 – “Technique” session:

  • Slow lateral raises 4×12–15
  • 45° raises with light dumbbells 3×15
  • Superset with bands and isometric pauses

Day 3 – “Volume” session:

  • Standing lateral raises with drop sets 4×12+12+12
  • Incline bench raises 3×15
  • 90° face pulls 3×20

Day 5 – “Explosive” session:

  • Lateral raises with medium weights 4×10 (tempo 1-0-2)
  • Seated dumbbell front press 3×10
  • Slow-tempo band raises 3×25

Three different stimuli, three angles, three strategies.
And most importantly: no boredom.


How to Actually Make Your Side Delts Work (Without Traps and Triceps Stealing the Show)

Lateral-raises-done-right

Whenever shoulders come up, you always hear “feel the muscle working” like it’s the ultimate secret.

And maybe you’re thinking:
“Yeah, yeah, I’ve heard this a million times… but I still feel my traps and triceps, not my side delts!”

Perfect. Let’s break it down into clear, practical tricks.

Forget influencer fluff.

Here’s what actually worked for me to get those damn delts to activate during lateral raises:

1. Lift with your elbow, not your hand

The most common (and sneakiest) mistake is trying to “lift the dumbbell.”

Wrong.

Your mind should command your elbow:
“Go up and out—like you’re busting through an invisible door with your elbow.”

The dumbbell just follows. It’s not the star here.

Picture pouring water from a jug—with your elbow leading the pour.

That one change flips everything.

2. Thumb down—but don’t airplane it

Yes, the classic “pour the wine” tip works.

But don’t overdo it.

If you internally rotate too much, you’ll just wreck your rotator cuff.

The trick is a slight thumb-down angle—not an exaggerated twist.

Also, lean slightly forward with a neutral torso.
That helps target the side delts way better.

3. Trap-proof with a sneaky setup

Traps are like that coworker who tries to do everyone’s job.

As soon as they sense shoulder work, they jump in.

Here’s how to block them:

  • Before starting, pull your shoulders down and imagine jamming your elbows into your back pockets
  • Hold that “resting tension” during the entire raise

Basically, you’re pre-activating a depressive force (sounds bad, but it’s a technical win).

Or, try seated raises on a 45° incline bench with chest support—traps can’t rise much in that setup.

4. Use an isometric pause halfway up

Try this in your next set:

  • Raise your arm to halfway (parallel to floor)
  • Freeze for 2 seconds
  • Continue slowly to the top
  • Lower over 3–4 seconds

This stops “parasite muscles” and keeps the side delt under tension.

It works great at the end of a set when your form is about to collapse.

5. Change tools: bands, cables, machines

Don’t just use dumbbells.

  • Cables = continuous tension
  • Bands = max resistance where delts are strongest
  • Machines = help isolate and improve movement efficiency

Even if you’re a free-weight purist, rotating tools saves your workouts.

6. Learn to “warm up” the side delt first

Yeah, we all warm up.

But if your traps are already lit from presses and your side delts are cold, you’ve already lost.

Try this mini warm-up protocol before real sets:

  • 2 slow banded lateral raise sets, 20 reps
  • 1 set of 15 reps with straight arm, no weight
  • 1 isometric set with light weight, 10 seconds at mid height

By the time you hit the real work, your delts are primed and ready to go.


Other common mistakes that waste months of progress

  • Using torso momentum: your core works, your delt naps
  • Always standing: try seated, inclined, even lying down to change the focus
  • Not eating enough: no calorie surplus, no growth—period
  • Skipping sleep: muscles grow in bed, not in the gym


Do delts respond better to high reps?

Surprise: yes… but it depends

Side delts are small, but tough.

They’re involved in most daily arm movements—carrying bags, reaching overhead, even opening your car trunk.

So they’re used to frequent work.

That means higher reps can work well—12–20 per set—with surgical mind-muscle focus.

But… here’s the catch.

If you’re a beginner, starting only with high reps can teach bad form.

It’s better to combine both phases:

  • Technical phase (8–12 reps): learn movement, build neuromuscular base
  • Metabolic phase (15–20 reps): build endurance and size

Advanced lifters? Go hard on high reps consistently.

Throw in pauses, rest-pause, drop sets too.

The trick: don’t count reps—count time under tension.

Do 15 reps in 20 seconds?

That’s cardio.

Do them in 40–50 seconds?

That’s growth.


So… are overhead presses essential?

Million-dollar question.

Honest answer: no—but they’re still very useful.

Compound lifts like overhead presses aren’t mandatory for wide delts

But they’re great for:

  • Building general strength
  • Strengthening the rotator cuff
  • Improving scapular stability
  • Hitting the front (and some side) delts

Just don’t rely on them for lateral width.

Why? Because side delts only get secondary activation.

You’ll just grow your front delts (already overactive from benching) and worsen shoulder imbalance.

Here’s a breakdown of common overhead press variations and how to do them right:

Barbell overhead press

  • Feet shoulder-width apart
  • Glutes and core tight, neutral spine
  • Push bar straight overhead—not forward
  • Elbows under bar, not flared
  • No leg drive—pure shoulder press

Push press

  • Same setup, but add slight leg drive (half squat)
  • Explosive timing: legs and arms together
  • Control the descent—don’t drop it on your chest

Seated dumbbell front press

  • Sit or stand with straight back and tight core
  • Start with dumbbells at shoulder height, elbows slightly forward
  • Controlled press upward—don’t clank them at the top
  • Slow descent—protect the joints

Standing military press

  • Bar in front of the collarbone
  • Feet together or close, tight core for balance
  • No excessive back arch—if you feel your lower back, you’re off
  • Vertical movement, slight chin tuck at start to avoid the bar

Arnold press

  • Start with palms facing your chest, elbows in front
  • Rotate wrists as you press up until palms face forward
  • Reverse the motion on the way down
  • Great for hitting all three delt heads in one move

Landmine press

  • Unilateral: hold the barbell end with one hand
  • Slight angled stance
  • Diagonal push along the landmine path
  • Awesome for shoulder mobility issues


How to know if you’re not genetically built for big shoulders (and what to do)

Let’s be real: not everyone has 90s bodybuilder genetics.

But here are signs your structure makes shoulder growth tougher:

  • Short clavicles: naturally narrow shoulders, less leverage
  • Flat delts: no shoulder-arm distinction even at rest
  • Low delt insertions: muscle looks “pulled down” not high and round
  • Dominant other muscles: chest or traps take over
  • Can’t isolate side delts: even after a hard workout, traps are what you feel

Bad news? Not really.
Just more awareness.

If you see yourself here, it doesn’t mean you can’t build great shoulders.

But you’ll need to:

  • Train them more frequently than other groups
  • Use a wider variety of angles
  • Apply pauses, isometrics, and advanced techniques
  • Dial in nutrition obsessively (even +5% calories helps)
  • Accept that your growth will be slower—but more sustainable

And maybe stop comparing yourself to Greek statue dudes after six months of gym and two bowls of rice.

You’re your own benchmark.

Your journey is your evolution.


Conclusion

You’re not cursed.

You’re just trying to convince a stubborn muscle with the wrong tools.

The side delt wants precision, frequency, variety, and patience.

Give it what it wants, and it will respond.

Maybe you won’t get bodybuilder-wide, but you’ll definitely see and feel the difference.

In your posture.
In your clothes.
In the way people look at you.

And most of all, in that ridiculously satisfying feeling that you earned every extra millimeter.

Recommended
Categories
Shoulders STRENGTH BUILDING AND MUSCLE MASS

How much time does it take to see results in shoulder size with dumbbells at home?

Ok, let’s be real: you stood in front of the mirror with those two dumbbells you bought on a wave of Amazon-fueled optimism and asked yourself:

“Can these actually make my shoulders grow?”

Spoiler: yes, but it’s not magic.

It takes effort, consistency, and a bit of stubbornness.

And I’ve been there.

There were times when the gym felt like a distant dream and all I had was a wrinkled yoga mat, two adjustable dumbbells, and a strong desire not to look like a baguette in a tank top.

So the mission began: build legit shoulders, using nothing but dumbbells, inside the four walls of my home.


Muscle growth is not Amazon Prime

Muscle-growth-progress-bodybuilder-flexing-gray-background

We’re used to wanting everything instantly.

Click → order → delivered in 24 hours.

But muscle doesn’t work like that.

Muscle growth takes time.

It needs stimulus, rest, nutrition, and — most of all — consistency.

With a solid plan and matching diet, you can start seeing changes in your shoulders after around 6–8 weeks.

And I mean visible changes, like:

  • T-shirts pulling slightly at the seams
  • Fuller deltoids, even at rest
  • New shadows that aren’t just flattering bathroom lighting

For more noticeable results, it takes 3–6 months of focused training.

And after a year, you could seriously transform your physique — even without touching a single gym machine.


Who are you (muscle-wise)?

To know how fast you’ll see results, you need to know your current level:

Absolute beginner: you’re a sponge. Your muscles absorb any stimulus. Even one good week can improve your posture.

Disorganized intermediate: you’ve been training, but without a consistent plan. Good news: you’ve got room to grow, but it’s time to do things right.

Advanced: you already have size, definition, and an athletic past. You’ll still progress, but it’ll take precise planning and hard work.


Why dumbbells are underrated (and super effective)

Why-dumbbells-are-underrated-and-effective-for-shoulder-training

Some people snub dumbbells.
“You can’t grow without machines…”
Totally false.

Dumbbells are an incredible tool for shoulder training because:

  • They don’t lock you into a fixed path
  • They activate stabilizer muscles
  • They allow for natural, fluid, free movement

They’re basically the Swiss Army knife of functional training.

And when it comes to shoulders, that joint freedom is gold.

You can hit all heads of the deltoid:

  • Front deltoid: front raises, military press
  • Side deltoid: classic lateral raises, angled variations
  • Rear deltoid: reverse fly, bent-over rows, “Y raises”

Plus, you’ve got endless variations:

  • One-arm versions
  • Seated
  • Supersets
  • Isometric pauses


Intensity beats weight (especially at home)

It’s not the gym that makes the difference — it’s how you train.

Only have two 8 kg dumbbells?

No problem.

But you need to make them work.

Here’s how:

  • Slow down reps: 3 seconds up, 3 seconds down
  • Isometric holds: pause at the top for 1–2 seconds
  • Train to technical failure: keep going until form breaks
  • Supersets and trisets: lateral raises → front raises → reverse fly, no rest

Your muscle doesn’t know if it’s lifting 50 kg in a gym or 6 kg at home.
It only knows if you’re making it suffer the right way.


How many times a week should you train shoulders at home?

Once a week?

Not enough.

Aim to hit them 2–3 times a week, varying intensity and volume.

A sample weekly structure:

  • Day 1: strength and pressing focus (overhead press, Arnold press)
  • Day 2: isolation on middle and rear heads (raises, reverse fly)
  • Day 3: high-volume metabolic circuit (minimal rest, max pump)

Reminder: if your delts are still sore, don’t rush to hit them again.
Recovery is when they actually grow.


And nutrition? Yes, that matters too

Nutrition-matters-diverse-protein-sources-for-muscle-growth

You can’t build anything without materials.

For shoulders, that means protein, calories, and micronutrients.

Guidelines:

  • 1.6–2.2 g of protein per kg of body weight
  • Slight calorie surplus if you want growth
  • Hydration and sleep treated like magical supplements

And no, just eating “a bit better” won’t cut it.

If you want shoulders bursting through your shirts, you need to eat like an athlete.


The mental side: the emotional rollercoaster of mirror checks

One day you look in the mirror and think:
“I look like a Marvel superhero!”

The next day, you feel like you’ve lost all size.

Totally normal.

It’s a journey with ups and downs, but every workout is another brick in the wall.

Take photos.

Even if you feel silly.

They matter.

Because in six months, looking back, you’ll see how far you’ve actually come.


Common mistakes in at-home shoulder training

I see these all the time — and yes, I’ve made them too:

  1. Random, uncontrolled raises
    Windmill style. You’re training chaos, not delts.
  2. Only doing “comfortable” movements
    No isometrics, no tempo work, no variety. Way too soft.
  3. Ignoring rear delts
    They make you look bigger from every angle. Skip them and you’ll look flat.
  4. Only training shoulders… and nothing else
    For wide, powerful shoulders, also train traps, chest, and back. It’s the visual illusion that counts!


Recommended dumbbell-only routine (with zero excuses)

We’ve already covered how to structure your shoulder training at home, aiming for 2–3 sessions per week with varying intensity and volume.

Now, let’s dive into a dedicated dumbbell-only routine—ideal for small spaces but big on gains.

Two training days, designed to maximize effort and real shoulder growth, even if you’re just starting out.

Day A – Push & Volume (more strength and roundness)

Arnold Press – 4 sets of 10 reps
Sit or stand, dumbbells at face level, palms facing you.
Press up and rotate wrists so palms face forward at the top.
Lower slowly.

Alternating Front Raises – 3 sets of 12 (per arm)
Raise one arm at a time with a slight bend in the elbow.
Pause at eye level for a couple of seconds, then lower slowly.
No swinging — stay still, only your arm moves.

Classic Lateral Raises – 3 sets of 15
Arms slightly bent, lift out to the sides to form a “T” with your body.
Don’t lift too high or jerk up.
Slow, controlled movement — no help from legs or torso.

Push Press – 3 sets of 8 reps
Overhead press with a slight leg push.
Explosive up, slow down.
Great for making light weights feel heavy.

Day B – Isolation & Control (more definition and precision)

Reverse Fly on bench or bent over – 4 sets of 12
Use an incline bench or bend at the hips with a straight back.
Dumbbells under chest, open arms wide like flying.
Feel it in your rear delts, not your neck.

Slow Lateral Raises – 3 sets of 10
Same as classic laterals, but go up in 3 seconds, down in 3 seconds.
Light weight = serious burn.

Y Raise on the floor – 3 sets of 15
Lie face down on a mat, raise arms into a Y shape.
Thumbs toward the ceiling, lift slightly.
Small movement, big impact on rear delts.

Final Superset (3 exercises back-to-back, 2 rounds)

  • 10 front raises
  • 10 lateral raises
  • 10 reverse fly

Do all without rest. Then repeat.
It’s the ultimate shoulder finisher!

Bonus Burnout (optional – once a week)

If there’s still gas in the tank, this mini circuit will take your shoulders to meltdown.

Perfect as a finisher or a bonus session.

1. 21-Rep Lateral Raises (7 low + 7 mid + 7 full)
One exercise, three phases:

  • 7 reps from 0° to ~45° (low raises)
  • 7 reps from 45° to 90° (mid raises)
  • 7 full reps

No rest between segments.
Arms slightly bent, controlled movement.
It burns — and that’s the point.

2. Plank with alternating front raises – 3 sets of 10 per side

  • Plank position on hands
  • Raise one dumbbell forward to shoulder height
  • Lower and switch sides
  • Core tight, no hip wobbles
  • Start without weights if needed

3. Tabata with light dumbbells – 4 minutes (8 rounds)
Choose one exercise: lateral raises, front raises, overhead press, or rotations
Timer: 20 sec work, 10 sec rest — 8 rounds
Sounds short, but by round 4 you’ll be watching the clock like it’s NASA countdown

Tip:
Don’t go heavy — the goal is endurance with perfect form.


Are shoulders hard to grow? Oh yes — here’s why

Shoulders are like those charming but moody friends:
treat them gently, they ignore you;
push too hard, and they ghost you (with pain and tendinitis).

They’re one of the trickiest muscle groups to develop.

Not because they “don’t grow,” but because they demand precision, control, and variety.

Why many people struggle:

  • They’re small muscles split into three heads, so they need multiple angles
  • They’re already worked in tons of compound lifts (bench, pull-ups, push-ups…), so they’re often fatigued
  • Imbalance risk: overtrain the front delts, forget the rear, and progress stalls
  • Super sensitive to technical errors — mess up a raise by 10°, and you’re training traps, not delts


How much shoulder mass can you gain in 6 months with dumbbells at home?

Great question.

Here’s a rough table showing realistic expectations for beginners training at home with dumbbells — based on age, gender, body weight, and build.

Note: this is lean mass (not just delts, but visible size in the shoulder area), assuming consistent training, progressive overload, and solid nutrition.

Numbers are approximate and vary based on genetics, training quality, and recovery.


Profile 1 month 3 months 6 months
Male, 20–35, normal weight, average build +100–200g +400–600g +800g – 1.2kg
Male, 35–50, slightly overweight, strong build +80–150g +300–500g +700g – 1kg
Female, 20–40, normal weight, slender build +50–100g +200–350g +400g – 700g
Male, 18–25, underweight, total beginner +120–250g +500–800g +1kg – 1.4kg
50+ (male or female), active but new to training +50–100g +250–400g +500g – 800g

Other factors that impact results:

  • Muscle insertion genetics (some have naturally “wide” shoulders)
  • Sleep and stress (the more you rest well, the more you grow)
  • Diet quality (no food = no growth)
  • Technique: proper form on raises makes a huge difference
  • Smart progression: not just heavier weights, but also more time under tension


So… how long does it really take to build shoulders with home dumbbells?

  • 6–8 weeks: first changes, new sensations, maybe someone says “been working out?”
  • 3–4 months: rounder, stronger, more visible shoulders — even under a hoodie
  • 6+ months: real transformation, noticeable results

The secret?

  • Train consistently
  • Eat properly
  • Don’t quit when results are slow


Can you really train forever with just dumbbells?

Let’s be honest: at some point, does it still make sense to train only at home, or is it better to hit the gym?

At first, home workouts are amazing.

Convenient, cheap, flexible.

But after a few months — say 4 to 6 months of consistent work — a legit question arises:
“Ok, I’m making progress… but can I keep this up forever?”

The answer: it depends on your goals.

If you want to tone up, stay fit, maybe build a bit of mass — you can absolutely keep training at home for years.

Just stay creative, increase difficulty over time, and manage nutrition and recovery.

But if your goal is to maximize muscle growth and performance…

…at some point, the gym becomes hard to ignore.

Why?

  • More weights and exercise variations available
  • Better isolation with machines
  • You can break past dumbbell limits (even good ones have ceilings)
  • New stimuli help bust plateaus

It’s not about “better or worse,” but “how much more do you want to grow?”

And let’s be real:
Going to the gym can be a mental boost — a change of scenery, a fresh challenge, a push out of your comfort zone.

But if you don’t want to or can’t go? Don’t feel “less than.”

There are amazing athletes training in garages whose shirts tremble when they move.

The key is being honest with yourself:
“Am I still improving? Am I having fun? Am I giving my best with what I’ve got?”

If yes — keep going.

If not — maybe it’s time for a new environment.

Recommended
Categories
Shoulders STRENGTH BUILDING AND MUSCLE MASS

Why Don’t I Feel Overhead Dumbbell Presses in My Delts as Much as Barbell Press?

Let’s keep it simple.

You stand in front of the mirror.

You grab the dumbbells.

You set your position.

You press them overhead.

And… nothing.

Your deltoids don’t seem to want to cooperate.

Then you pick up the barbell.

You press.

And your shoulders start working immediately as they should.

What’s going on?

Why do you feel your delts less with dumbbells?

Let’s explore together.


Dumbbells and Barbells: Not Two Sides of the Same Coin

Dumbbells-and-Barbells

Part one: Dumbbells and barbells are NOT interchangeable, as I once thought.

It’s not like choosing between Coke and Pepsi.

It’s more like choosing between riding a bike or driving a dirt bike: you move either way, but the experience is radically different.

When Lifting a Barbell Overhead

When you lift a barbell overhead:

  • Your hands are locked in place.
  • The movement is rigid, guided.
  • Your body “locks in” into a super-stable setup, like a concrete bollard in the sidewalk.

With Dumbbells Instead?

With dumbbells, it’s total chaos.

Each arm is free to go wherever it wants.

You need control, you need stability, you need every secondary muscle to step in and keep things in order.

And guess what?

When your body has to stabilize, it siphons energy away from the main muscle you wanted to train — in this case, the beloved deltoids.


The Real Culprits: Stabilizer Muscles

Stabilizer-Muscles-Shoulder-Illustration

Here’s the plot twist you didn’t expect while cursing the dumbbells.

When you do an overhead press with dumbbells, it’s not just about “push up and that’s it.”

It becomes a full-blown battle for motor control.

Why?

Because each arm is independent.

And when your limbs aren’t locked together (as they are with a barbell), your body automatically activates a series of stabilizer muscles — muscles that don’t directly generate force for the lift but work to keep joints and segments aligned.

Here’s who jumps in:

  • Rotator cuff: This group of four muscles (supraspinatus, infraspinatus, teres minor, subscapularis) stabilizes the humeral head in the shoulder socket.
    They’re like the ropes holding a sail steady in a storm.
    With dumbbells, every tiny sideways or rotational shift forces the cuff to grind without rest.
  • Serratus anterior: It connects the ribs to the scapula and prevents the shoulder blade from “winging” out during the press.
    Often overlooked, this muscle is crucial for scapulohumeral rhythm — how the scapula and humerus move smoothly together.
  • Middle and lower trapezius: They control scapular rotation and stabilization downward and inward, anchoring the shoulder blade as you press overhead.
    If they don’t work well, the scapula “shrugs” up and the deltoid loses its leverage.
  • Deep core (transverse abdominis, multifidus, pelvic floor): Yes, it sounds like Pilates, but when you’re under two 30-kg dumbbells… if your core gives out, you fold like a coat hanger.

But with the Barbell? A Whole Different Story

When you use a barbell, your hands are fixed at the same distance.

This external constraint automatically stabilizes the system.

The shoulder has less freedom (and less need) for its own stabilization because the barbell acts like a mechanical guide.

It reduces unwanted degrees of freedom.

In practice:

  • The rotator cuff works less.
  • The scapula is forced into an efficient path.
  • The core still works, but not like a Cirque du Soleil acrobat.

And above all:

The anterior and lateral deltoids can focus on the one thing they were meant to do: lift the weight.


The False Friend: Range of Motion

Dumbbell-press-exercise-showing-increased-range-of-motion

Another hidden issue: the movement path.

Theoretically, with dumbbells you can increase ROM — go deeper on the descent, press higher on the ascent…

But in practice?

Hardly anyone does it correctly.

Most of us (myself included, at least once a week) tend to:

  • Bring the dumbbells too close at the top, almost like clinking glasses in a toast.
  • Lose tension in the deltoid and transfer load to the triceps.

With the barbell instead:

  • The ROM feels more natural.
  • The load stays on the delts throughout the press.

Moral of the story:

With dumbbells, you risk wasting half of your training potential because of a sloppy lock-out.


Nervous System: The Invisible Puppeteer

Nervous-system-concept-brain-lifting-weights

Now, let’s get a bit technical, but trust me, it’ll help.

The true director of our strength isn’t the muscle alone — it’s the central nervous system.

When you press a barbell overhead:

  • Your nervous system knows what to expect.
  • The movement is stable, predictable.
  • You get full activation of the target muscles.

When you switch to dumbbells:

  • Every inch feels like a question.
    “Is my left arm collapsing? Is my right rotating? Where’s the load going?”

Your nervous system goes into defense mode.

Less efficiency.

More hand-brake engagement.

Less explosion in the deltoids.


So? Should You Ditch Dumbbells?

No. Quite the opposite.

Dumbbells are gold for your long-term development:

  • They teach you control.
  • They strengthen every stabilizer.
  • They correct left-right imbalances.
  • They make your shoulder joints as solid as a vault.

Sure, they might not give you that instant “pump” you feel with a barbell…

But they build foundations that prevent injuries and make you stronger across the board.


How to Properly Perform the Overhead Dumbbell Press

If you really want to feel your deltoids working without bleeding energy everywhere, nail these fundamentals:

  • Stable setup: Feet slightly wider than hip-width, knees soft (not locked), glutes engaged, core braced like a rock. You must become one with the ground.
  • Start position: Dumbbells at shoulder height, elbows under wrists, forearms vertical like Roman columns.
  • Press path: Imagine pushing the ceiling away from you, not just moving straight up. Movement should be powerful yet controlled, like launching a giant arrow.
  • No clinking at the top: Keep a slight gap between the dumbbells at full lock-out, as if you’re trying to press two invisible walls apart.
  • Controlled descent: Lower without tipping forward or letting elbows flare like spaghetti. Control every inch, like a precision landing on Mars.
  • Neutral head, eyes forward: Don’t stare at the dumbbells — look ahead as if locking eyes with an opponent.

Every detail you dial in makes you feel more deltoid and less instability.


How to Feel the Delts More During Dumbbell Presses

  • Never let the dumbbells touch at the top. Maintain shoulder-width spacing.
  • Think “push outward,” as if you’re trying to expand the world.
  • Control your tempo: press hard, lower slowly in slow-motion style.
  • Keep elbows slightly flared, not glued to your torso.
  • Pre-activate delts with light lateral raises before the main set.
  • Feet planted, glutes engaged, core braced. You must be a statue.

Small tweaks = way sharper deltoid engagement.


Mistakes I Made (and Was Called Out On!)

Let me tell you how it really went, warts and all.

Early on, I thought I was a mini-Thor doing dumbbell presses.

In reality, I was more like a drunk trying to lift two wine barrels.

My Errors

  • I clinked the dumbbells at the top like a bar toast.
    Result? Lost tension, triceps in overdrive, delts retired early.
  • I hyperextended my back as if doing a yoga backbend.
    Thought I was pressing more, but I was just overstressing my lower spine.
    I got corrected by squeezing my glutes and keeping my chest “high but not peeled.”
  • I rushed the descent.
    “Press hard, lower like you’re late,” I thought.
    In reality, the slow descent is crucial for maintaining controlled tension on the delts.
  • I let my elbows flare too wide.
    Like I wanted to take flight as a runaway kite.
    In truth, you need elbows neither too wide nor glued to the torso.

With patience, miles of practice, and a few “educational insults” from seasoned friends, I fixed it all.

Now, every overhead press lands right where it should — in the heart of the deltoid.


Other Equally Effective Exercises to Overhead Dumbbell and Barbell Press

If you want variety without losing effectiveness (or if you have joint issues that make the traditional overhead tough), here are solid alternatives:

  • Arnold Press:
    A wider take on the dumbbell press that hits the front delts even harder and forces you to control the full ROM.
    Start with palms facing you, then rotate as you press.
  • Push Press (barbell or dumbbells):
    Uses a slight leg drive.
    Lets you overload the deltoids more without overstressing the rotator cuff.
    Preferred by weightlifters for moving massive loads.
  • Seated Dumbbell Press:
    Eliminates many “escape routes” in the lower body.
    Relies purely on delts and core.
    Ideal if you struggle with lumbar hyperlordosis or want better isolation.
  • Landmine Press:
    An angled press with one end of the barbell anchored to the floor.
    A more natural shoulder path that reduces rotator cuff stress.
    A godsend if overhead aggravates your shoulders.
  • Z Press:
    Hardcore, sitting on the floor with legs extended.
    No stability options — you’ll know in three seconds if your core is solid.
    Brutal (in a good way) deltoid load.


RELATED:》》》 Are Overhead Presses Overrated for Shoulder Growth or Just Misused?


Conclusion

It’s not a war between barbell and dumbbells.

It’s a strategy.

Every tool has its moment.

Every technique has its purpose.

If you want football-shoulder delts, lift the barbell without fear.

If you want resilient, balanced shoulders ready for anything, use dumbbells smartly.

True growth comes to those who know how to alternate.

And you?

Do you prefer pressing with a barbell or with dumbbells?

Let me know in the comments, I’m curious what works best for you!

Recommended