Categories
Advanced Workouts BODYWEIGHT EXERCISES YOGA & PILATES

Why Do My Wrists Hurt in Downward Dog but Feel Fine During Push-Ups?


There’s a mystery that has haunted yogis and gym-goers for generations.

A question that seems simple, yet causes deep discomfort during practice:

Why do my wrists hurt in downward dog, but not during push-ups?

I admit it — I felt dumb about it too, the first few times.

I do pike push-ups, planche leans, close-grip push-ups… no problem at all.

Then I get into what they call an “active resting” yoga pose… and my wrists feel like they’re baking in the oven.

How to actually do Downward Dog properly (without wrecking your wrists)

The correct form isn’t an Instagram-perfect photo, but a functional alignment that spreads the load evenly.

Here’s what really matters:

  • Hands slightly wider than shoulder-width, fingers spread wide, weight distributed across the whole hand (especially thumb and index)
  • Legs engaged, even if the knees stay bent: the goal isn’t to touch your heels to the floor, but to push your hips up and back
  • Arms extended but not locked: keep a micro-bend in your elbows and push away from the ground to engage your shoulders
  • Neck relaxed, in line with your spine, without tucking or craning forward
  • Core slightly engaged, to avoid dumping all the load into the lower back

Think of it like forming an “elastic inverted V,” not a rigid one — and focus more on lengthening your spine than dropping your heels.

Done this way, downward dog stops being your enemy…
…and starts feeling like a truly restorative position.

It’s all about levers and angles (and load distribution too)

During push-ups, the position is clear:

  • Wrists under the shoulders
  • Arms vertical
  • Load shared between hands, shoulders, core, and legs

The wrist angle is around 90 degrees, but the whole body helps keep alignment.

Plus, you’re moving.
You lower and lift, use your chest, triceps, and front delts.

The wrists are working, sure — but they’re not alone in the fight.

Now… change the scene.

Downward dog.

Suddenly the arms are no longer vertical, but angled forward.

Your hips are pushed up, weight shifts toward your hands, and the wrist angle goes past 90 degrees.

The leverage shifts.

And gravity hits differently.

The load focuses on hyperextended wrists, without the dynamic support you get during push-ups.

The paradox of the static pose: you seem still, but you’re fighting

Push-ups involve motion.

You’ve got a cycle of contraction and release.

But in downward dog, you’re just… there.

Breathing.

Stretching.

Meanwhile, the wrist is pinned into an awkward, extended position, under sustained load.

It’s like holding a 20-pound dumbbell with your arm straight for 30 seconds: no movement needed to feel strain or pain.

Here’s where the sneaky part comes in: passive joint compression.

Wrist flexion under load, held too long without active muscular support, stresses tendons and ligaments — especially the flexor retinaculum and the carpal tunnel.

The role of the fingers: when you stop “gripping” the ground

Another mistake I made for years:

In push-ups, you subconsciously press your fingers into the floor.

You create active tension and micro-grip.

In downward dog, though, they teach you to “spread” your hands flat.

Palm fully open.

Fingers stretched.

But that way, you lose one of the wrist’s main protective mechanisms: active hand muscle contraction.

Without that micro-grip, all the load dumps straight into the joint.

And if you’re hypermobile, or have looser ligaments than average, the pain gets even worse.

Hyperextended elbows: another hidden culprit

When you relax into the pose and let go, you tend to lock your elbows.

They look straight — but they’re actually hyperextended.

This causes the load to bypass even distribution through the arms… and land more directly on the wrists.

Push-ups, on the other hand, often include a natural micro-bend that protects the joint.

What if this isn’t a yoga problem, but a strength problem?

Let me be blunt:

You might have muscle imbalances in your wrist extensors.

The ones nobody trains.

You do curls, triceps, bench… but when’s the last time you trained your wrist extensors specifically?

Exactly.

So in push-ups, you get by using strong muscles like pecs and delts…

…but in downward dog, you’re exposed.

That pose is challenging because it acts like a functional test: you can’t cheat.

Okay, now what? How do I stop hating downward dog forever?

Here’s what you can do (spoiler: it’s NOT quitting yoga).

📌 1. Prep your wrists like you would shoulders or knees

  • Wrist circles
  • Dynamic stretching for flexors and extensors
  • Gradual loading in quadruped position

📌 2. Change how you “use” your hands

  • Actively press all fingers into the mat
  • Slightly push with your fingertips
  • Shift weight between thumb and index

📌 3. Adapt the pose to your actual mobility

  • Slightly bending your knees helps shift weight from wrists to feet
  • If you don’t have hamstring or ankle flexibility yet, don’t force the “yoga poster” form

📌 4. Use smart props

  • Yoga blocks under hands
  • Roll the front edge of your mat to lift the palms and reduce wrist extension

📌 5. Strengthen neglected muscles

  • Reverse wrist curls
  • Farmer carries with slightly extended wrists
  • Pronation/supination with light dumbbells

📌 6. Maintain micro-bend in your elbows

  • Don’t lock your arms
  • Engage your triceps
  • Push away from the floor like doing a vertical push-up

Don’t ignore more serious red flags

If the pain is sharp, localized, or comes with numb fingers, you could be dealing with:

  • Median nerve irritation
  • Flexor or extensor tendinopathy
  • Early carpal tunnel syndrome

In these cases, it’s best to see a physical therapist — especially if the discomfort continues even after adjusting your form.

Other helpful exercises to add to your routine

💪 Wall walks in quadruped
From all-fours, slightly push your hands forward and then return.
Helps your wrists get used to load in a controlled way.

💪 Incline planks (on elevated surfaces)
Reduces wrist pressure and builds isometric endurance gradually.

💪 Push-ups on handles
Trains the movement while keeping the wrist neutral.
Great for those who feel discomfort during the lowering phase.

💪 Wrist push-ups on knuckles
Only if you already have good mobility and control.

Yoga and weightlifting aren’t enemies — they’re mirrors

Downward dog isn’t a “mistake” for lifters.

It’s a mirror reflecting your joint weaknesses.

It reveals things the gym sometimes hides beneath muscle.

Don’t avoid it.

Use it to discover where you can truly grow.

And if needed, modify it.

Customize it.

Every pose can adapt to you — you don’t need to force yourself into some ideal shape.

When Downward Dog is harder than it looks

Even though it’s often called a “rest pose,” downward dog isn’t restful for everyone.

It’s more challenging than it seems — especially when:

  • You have tight posterior chains, and your body shifts weight forward, overloading the wrists
  • You lack scapular control, and your shoulders collapse inward instead of pushing outward
  • You’re tired, and you lose the active structure of the pose, dumping everything into your joints
  • You’re strong but not mobile (or vice versa), making it hard to balance tension and openness

It’s a “simple” pose that actually demands more awareness than most people think.

It’s not just about holding it — you need to build it actively, breath after breath.

In conclusion: pain is a signal, not a sentence

It’s not that your body isn’t made for yoga.

It’s just trying to tell you something.

And if you listen, you can become stronger, more mobile, and more aware.

Wrists are small, but incredibly important.

Treating them with respect can be the difference between effective training and constant frustration.

Recommended
Categories
Advanced Workouts BODYWEIGHT EXERCISES

Why do I always feel more worked in my joints than my muscles during straight-arm skills?

That Annoying “Weird” Pain We All Know Too Well.

You’ve just finished a front lever session.

Your lats? Barely tickled.

Your core? Meh.

But your elbows? Your shoulders?

They feel like they’ve just walked out of a bar fight between circus acrobats and steroid-loaded powerlifters.

It’s that kind of discomfort that doesn’t feel muscular.

It’s more “internal.”

Deeper.

The kind of feeling that makes you think: “I must be doing something wrong… but I have no idea what.”

And if it helps, we’ve all been there.

Even the people doing planches while sipping espresso.


Straight arms aren’t about isolation — they’re about surviving leverage

When you train skills like the front lever, planche, back lever, maltese, or even just a static support on the bars…

You’re not working in a friendly environment.

You’re putting your joints in a biomechanically awkward position, under insane loads, and asking them to “hold” isometrically.

Put simply?

The lever destroys you.

Because the longer the arm, the farther the weight shifts from the joint.

And that creates a lovely torque that lands straight on your joints.

And if you’re not properly activating the muscles that are supposed to resist that force?

Good luck to your tendons and joint capsules.


Your muscles should do the work — but if you can’t feel them, they probably aren’t

That’s the whole problem.

In theory, during a front lever, you should feel fire and fury in your lats, lower scapula area, and core.

In practice?

If all you feel is elbows, shoulders, and maybe even your wrists…

Then it’s not your muscles holding you up.

You’re relying on passive structures.

Like:

  • Tricep and bicep tendons
  • Shoulder capsule
  • Ligaments
  • Articular cartilage (if things go really wrong)

This often happens when:

  • You don’t have good scapular awareness yet
  • You lock your arms without “activating” the muscles around them
  • You’re forcing a skill your body isn’t ready for

And this isn’t about “being strong.”

It’s about being biomechanically ready.

Having control.

Being able to activate the right muscles, the right way, at the right time.


The anatomical backstory (for those who really want to understand)

During a front lever, you’re asking your shoulders to stay extended, your scapulae to stay depressed and retracted, and your elbows not to snap.

All while your center of gravity desperately wants to fall.

If your scapulae aren’t active, or if your nervous system can’t effectively recruit your lats, long head of the triceps, and deep core in that context…

Guess who takes all the load?

The tissues that shouldn’t.

It’s like trying to hang a chandelier from the ceiling using tape instead of hooks.

It might work for a second.

Then everything crashes.


The most common mistake: thinking straight arm = locked arm

A lot of people — myself included in the beginning — make the mistake of “locking up.”

They straighten the arm, clamp the elbow, freeze the joint.

And think: “Now I’m more stable.”

Huge mistake.

Because when you lock the arm passively, you’re taking the muscles out of the game.

It’s like turning off the engine and letting your car coast downhill in neutral.

That’s why we have the concept of active straight-arm strength.

It means yes, the arm is extended…

But it’s the muscle keeping it extended. Not passive locking.

And that makes all the difference.


How to stop feeling just joint pain: practical tips from someone who’s been there

Here’s what radically changed my approach (and saved my elbows):

  • Serious progressions, no rush. Don’t skip steps. Start with tuck, then advanced tuck, then straddle. Each stage teaches you something different.
  • Specific scapular work. Learn to feel retraction and depression. Do it isometrically, in mobility drills, in hollow body, everywhere.
  • Eliminate passivity. When you’re in position, push, pull, activate. Think of moving away from your support point. Never just “hang there.”
  • Controlled eccentrics. Want real strength? Then learn to lower slowly from a hard position. That’s where true muscular connections are built.
  • Thoracic and shoulder mobility. If your upper back or chest is stiff, you’re limiting activation. Open up, stretch, breathe. That’s training too.


Don’t confuse pain with progress

For way too long, I thought that if something hurt, it meant I was growing.

Like: “If it hurts, it means I’m pushing hard!”

But nope.

If every time you do straight-arm work your joints are screaming, you’re not building strength.

You’re building trauma tolerance.

And guess what? That won’t last.

The body breaks before it gets strong.


Watch out for invisible loads: how heavy is your body really in a lever?

Many underestimate the fact that during a skill like the front lever or planche, you’re not just “holding” your weight.

You’re multiplying the perceived load.

In a full planche, for example, the force your shoulders must resist can reach 2x your body weight, depending on lever, angle, and your structure.

And that’s not all: the farther your center of gravity goes, the worse the lever arm becomes.

Translation: even if you weigh 70 kg, the joint load can feel like 130–140 kg of actual effort on your shoulders and elbows.

That’s why people who train “by feel” alone often end up overloading without realizing it.

The solution?

Learn to estimate internal mechanical load, not just external weight.

Set smart volume rules, with real rest and deload weeks built into your plan.


If you’re mobile but unstable, pain still shows up

A common mistake is thinking mobility fixes everything.

Sure, good thoracic and scapular mobility is crucial.

But if you lack active stability — the kind that lets you hold a position under load — you’re still in trouble.

Here’s a practical example:

Maybe you can raise your arms overhead like a ballerina.

But if you can’t hold them there with force, under tension, it means nothing.

You need neuromuscular control.

Not just flexibility.

That’s why you should also train with exercises that demand end-range active resistance, like:

  • Y-holds on an incline bench
  • Planche lean regressions with locked scapulae
  • Slow, controlled eccentrics

Mobility + stability = joint-friendly strength.

Just mobility = silent pain incoming.


Wrong breathing can sabotage your internal tension

One of the most overlooked details in straight-arm training is how you breathe while holding position.

Most people make this mistake: They hold their breath.

They trap air inside to “brace” the position, thinking they’ll be stronger.

But holding your breath creates disorganized internal pressure:

  • Your core stiffens passively
  • Deep muscles don’t activate properly
  • Tension ends up dumping where it shouldn’t

The result?

Muscles disconnect, and joints take the hit.

Better to use active diaphragmatic breathing:

Light inhale before lifting,
Slow exhale while holding,
Maintain core tension without clenching everything.

A tiny detail — but it can save your entire set.


Isometric skills and neural fatigue: the role of your central nervous system

When you hold a straight-arm position, the first thing to tire isn’t the muscle.

It’s your brain.

Or more accurately, your central nervous system.

Training isometric skills under tension requires massive, continuous neural output.

There’s no momentum.

No concentric or eccentric phase to “offload.”

Just nonstop effort.

That’s why even if your body feels okay, after 2–3 attempts you crash.

You’re not weak.

You’re neurologically spent.

The solution?

  • Give your CNS time to recover (3–4 real minutes of rest)
  • Don’t overdo frequency (3x a week is enough)
  • Alternate straight-arm skills with more dynamic or pump-focused work

That way, you avoid burnout and improve quality, not just quantity.


Real strength is built when you can repeat the move without breaking down

Straight-arm skills are mesmerizing.

They’re athletic, pure, elegant.

But they require patience, control, intelligent tension.

They’re not an ego contest.

They’re a challenge in biomechanical precision.

If you train your joints, you stall.

If you train your muscles the right way, you grow.

And trust me — the feeling of a clean front lever, where your lats scream and your elbows feel happy, is priceless.


Start from there. Don’t force it. But don’t avoid it either.

Feel where you’re failing.

Slow down.

Correct.

Activate.

Then get back out there.

Because your body, if you listen, knows what to do.

And your elbows, eventually, will stop hating you.

Recommended
Categories
Advanced Workouts BODYWEIGHT EXERCISES

Why do deep push-up handles mess up my wrist alignment even with neutral grip?

There are moments when you’re convinced you’re doing everything right

You’ve got the cool handles.

Not those two wobbly planks, but the tall, serious ones from an underground calisthenics gym.

Neutral grip, straight posture, wrists aligned like the sacred anatomy books say.

You go down slowly.

You go down well.

Chest close to the floor, full control.

And right there… something feels off.

The wrist starts getting fussy.

Not real pain, but not exactly a “clean” feeling either.

A slight misalignment, a suspicious tension.

And you start thinking:
“Wasn’t this supposed to be the safest grip?”

That’s when the serious questions begin.

Because sometimes it’s not the tool that fails you.

It’s how your body reacts when you force it to follow rigid rules.


The trap of the neutral grip: on paper it’s perfect, in reality… it depends

We’ve all fallen for it.

The neutral grip seems like the Holy Grail of biomechanics.

The hands aren’t bent.

No stress on the carpal bones.

The force flows straight through the forearm.

Theoretically, it’s the most natural and protective position for the wrists.

But here’s the issue:
Neutral doesn’t mean adaptable.

When you grab fixed handles, you lock the movement.

The hands can’t rotate.

The shoulders can’t adjust the angle.

The elbows are forced into a rigid, pre-set line.

It’s like trying to dance tango with your skates glued to the floor.

The body wants to flow.

It wants to make micro-adjustments.

Especially when you go deep and the joints enter more sensitive ranges.

If it can’t… it compensates.

And the first joint to pay the price?

The poor wrist.


When the shoulders are locked, the wrists rebel

In a normal vertical push, the body distributes the load between wrists, elbows, shoulders, and scapulae.

Everyone works together.

Like a well-trained team.

But when the shoulders are locked (for example on tall fixed handles), or just not mobile enough, the body has to improvise.

And guess who steps up?

Exactly.

The wrist.

The load no longer goes through the scapulohumeral structure.

It falls onto a joint designed for fine rotations, not for “saving the push-up.”

Result?

  • Sudden radial or ulnar deviations
  • Micro-twisting trauma
  • That classic post-workout line:
    “Why does my wrist hurt even though I used a neutral grip?”


Going deep doesn’t always mean training better

I know.

You want to show you’re “beyond standard push-ups.”

That your chest deserves the stimulation of a full range.

And you’re right — but only if everything else can handle that range.

Because the deeper you go, the more you involve delicate structures:

  • The shoulder doesn’t just flex: it rotates, adapts, changes angle
  • The scapulae must move freely
  • The elbows must follow a non-linear path

And if the handles are fixed?

Goodbye freedom.

Instead of adapting the tool to your body, you adapt your body to the tool.

It’s like trying to stretch inside a medieval suit of armor.


When the neutral grip really works (and when it’s an ergonomic illusion)

I’m not here to demonize handles.

In some contexts, they’re great.

For example:

  • If you don’t go too deep
  • If your shoulders are mobile
  • If your scapula moves like a Swiss watch
  • If you use low handles with a slightly adjustable angle

But all it takes is one dysfunction (tight scapulae, locked chest, anterior pelvic tilt)
…and that beautiful “neutral” setup becomes a wrist trap.

Remember:
It’s not the grip that’s neutral.
It’s your body that has to be.


How I solved it (without throwing the handles out the window)

I’ve been through it too.

At first, I thought it was just weakness.

Then I thought it was “bad posture.”

Then I saw a physical therapist and…
Spoiler: it was the handles.

Or rather: how I was using them wrong.

Here’s what I changed:

  • I tried rotating parallettes: game-changer. They follow your movement instead of trapping you.
  • I switched to push-ups on rings: instability, yes, but full joint freedom.
  • I reduced range at first: worked on mobility before going deeper.
  • More serious wrist warm-up: two circles aren’t enough. You need real prep.
  • I did scapular mobility work: if scapulae are blocked, everything else collapses.

And most of all…
I learned to listen to my body.

If I started “forcing” the line on the way down… I stopped.

Even if it meant skipping that perfect Instagram shot.


Is it worth strengthening the wrists? Yes… but it’s not a magic wand

Let’s be clear:

If deep push-ups mess up your wrists, it doesn’t automatically mean your wrists are weak.

The problem is that your body isn’t always ready to handle certain angles and loads in those positions.

But if you want to avoid recurring pain, inflammation, and loss of control…
some wrist-specific work is totally worth it.

Nothing extreme.

Just simple exercises, done well and consistently.

Here are the most effective ones (tested on my own skin):

  • Walk-out on fists and return to palm support
    Start on your knees.
    Fists on the floor, walk forward on open hands (push-up plank), then back on fists.
    Builds transition strength and control under instability.
  • Wrist extensions and flexions with light dumbbells (1–3 kg)
    Sit down, rest your forearm on your thigh or a table, wrist hanging off.
    Move the weight slowly up and down using only your wrist.
    Do both extension and flexion. Slow sets. High quality.
  • Wrist push-ups on a soft mat (simplified version)
    Hands turned with fingers facing backward.
    On your knees, lower down slowly to load the back of your hand.
    Then come back up.
    Don’t force it. A few degrees are enough.
    Stimulates safe extension.
  • Light resistance band, radial and ulnar deviation
    Attach a band to a low base, hold it with your arm straight in front of you.
    Move your wrist inward (ulna) or outward (radius), slowly.
    All under control. Stop if you feel snapping or discomfort.

The best part?
You can use these exercises as pre-workout activation.

Two or three light sets, without going to failure.

Or on recovery days, as part of a mobility routine.

Training the wrists doesn’t mean bulking them up,
it means helping them survive everything you throw on top of them.

And if you train often on parallettes, handles, or in calisthenics…
it’s cheap insurance that saves you from a lot of trouble.


Watch your grip: width and position matter as much as the angle

We often obsess over the neutral angle of handles but ignore grip width.

If your grip is too wide, your shoulders go into forced abduction.

Too narrow? Elbows flare out and you stress the triceps and… guess what?

Again, the wrists.

The ideal width isn’t the same for everyone.

It depends on your structure:

  • Wider clavicles require a wider grip
  • Shorter humeri prefer a narrower grip
  • Limited thoracic mobility? Better a moderate grip with a slight inward angle

Bottom line: test different widths and see where you feel a stable push without weird tension in the wrists or shoulders.

You don’t always need a new tool.

Sometimes, just moving your grip 2 cm makes all the difference.


Do handles change which muscles are involved? Depends on the grip (and how deep you go)

People often think handles are just to “save the wrists.”

But in reality…
they also change movement biomechanics and muscle activation.

When you do classic push-ups with flat hands on the floor:

  • The pec major works more horizontally
  • The triceps engage mostly at the final lockout
  • The front deltoid helps at the start and in stability
  • Scapulae move more freely, but deep extension is limited by the floor

Now… with tall handles:

  • You increase the range of motion → pecs stretch more
  • The triceps stay active longer due to a deeper push phase
  • The front delts take on more load, especially at the bottom
  • The core has to work harder to keep your body aligned and prevent hip sag

But here’s the key: muscle activation really changes based on hand position.

Here’s a quick guide to common push-up grips and which muscles take over:

🔹 Neutral grip (palms facing each other, like with parallettes)

  • More natural for shoulders and elbows (if done right)
  • Emphasizes triceps and sternocostal pec fibers
  • Slightly reduces front deltoid work compared to pronated grip

🔹 Pronated grip (flat hands, fingers forward)

  • Standard floor push-up
  • Great balance between pecs and triceps
  • More front delt involvement, slight serratus activation

🔹 Outward-rotated grip (fingers slightly angled out)

  • Encourages thoracic opening
  • Emphasizes clavicular pec fibers
  • More shoulder stress if mobility is limited

🔹 Close grip (hands together, diamond or parallel)

  • Maximum triceps activation
  • Less outer pec involvement
  • Core works overtime to keep balance

🔹 Wide grip (wider than shoulders)

  • More horizontal push
  • Maximum load on outer pec and front deltoid
  • More elbow flare = potentially more stress


The surface factor: mat, floor, or hard rubber changes everything

Almost nobody thinks about this, but the surface you use under your handles alters the forces on your wrists.

If you place your handles on:

  • A soft mat: they may tilt slightly under load, destabilizing you
  • A slippery surface: you tense up to avoid sliding, and the wrist stiffens
  • A sloped floor: even a few degrees changes joint distribution

The solution?

  • Use a stable, perfectly flat surface
  • If using mats, make sure they’re thin and high-density
  • Avoid handles placed on soft tatami or cushioned carpets: they feel cozy but “steal” your support

An unstable base amplifies every alignment error.

And the deeper you go, the worse it gets.


The rebound effect: why “bouncing” can make wrist pain worse

When doing deep push-ups with tall handles, it’s very common to use chest and tricep elasticity to “bounce” out of the bottom.

That little rebound gives you a feeling of explosive strength.

The problem?
That rebound doesn’t always start from the chest.

Often it’s a passive tension reflex coming from wrists that are already maximally compressed.

You’re not pushing — you’re “spring-loading” your joints.

And if you repeat that every rep?

The wrist no longer works in stable isometry.

It works in compression and constant micro-twisting.

Perfect recipe for inflammation.

So train to control the ascent without rebound.

Start with a slow, deliberate contraction.

Learn to tell the difference between a muscular push… and a joint bailout.


The thumb test: a little trick to check if you’re loading wrong

Want a practical trick to check if your wrist is off-axis, even when everything looks fine?

Watch your thumb during the descent.

If the thumb starts to lift or “slide back” compared to the fingers…
…you’re probably loading too much toward the pinky.

Classic sign of ulnar deviation.

And the wrist is compensating for an imbalanced move.

Solution?

During descent, actively press the thumb into the handle.

As if you were “squeezing” it slightly.

This tiny move promotes a more symmetrical force distribution
and reduces micro-joint shifts that often go unnoticed… until it’s too late.


Conclusion

Handles aren’t the enemy.

Depth isn’t the problem.

The real culprit is the illusion of control.

We think the neutral grip is a biomechanical shortcut.

In reality, it’s a tool that only works if the rest of the body is in sync.

If the shoulders aren’t mobile, if the elbows don’t know where to go,
if the scapulae move like glued sticks…
…the wrists become the victims.

So here’s the simple message:

Don’t play the deep push-up hero if you don’t have the mobility to support it.

Focus on movement quality.

Give your body room to breathe.

Try different surfaces, different angles, and don’t get stuck on textbook “rules.”

Because your body isn’t a textbook.

It’s an ecosystem.

And your wrists will thank you.

Recommended
Categories
Advanced Workouts BODYWEIGHT EXERCISES

How can I tell if I’m arching too much during a back lever attempt?

Ok, let’s talk about it

The back lever is one of those exercises that makes you look like a zen ninja floating in midair.

You see it on Instagram, think “awesome,” give it a try… and realize you’re not a ninja.

You’re a banana.

Literally.

Because the most common issue when attempting a back lever is excessive back arching.

An arch that looks more like a yoga pose than a calisthenics routine.

And the worst part (so to speak) is that many people don’t even realize it’s happening.

So… how do you know if you’re arching too much?

And more importantly, why does it happen?

Let’s dive in—without arching the back.


It looks straight… but it’s a mess: the betrayal of perception

Man-performing-back-lever-on-gymnastic-rings-with-straight-body-hold-in-gym

I know it, I’ve been there too.

You hang, tense everything, clench your teeth, glutes, and hope…

…and in your head, you’re flying like an Olympic athlete.

Then you watch the video.

😬

A human harp. A banana with shoulder blades.

Proprioception—your awareness of your body in space—is unreliable in these static, inverted positions.

Especially if you’re holding your breath and focusing on not dying.

The solution? Record yourself. Always.

Every single attempt. Even the ugly ones. Especially the ugly ones.

And watch closely:

  • Is your pelvis lower than your shoulders?
  • Does your lower back visibly curve downward?
  • Do your ribs look like they’re gasping for air?

If you look more like a hammock than a straight line… there’s your answer.

And no, it’s not just an aesthetic issue. It’s a structural red flag.


Why you’re arching (spoiler: it’s not all your fault)

Your body is clever. Too clever, sometimes.

When something can’t handle the load, it finds another way. Even if that way is a biomechanical disaster.

In the back lever, you’re demanding a lot from:

  • Core (deep abs, obliques, transverse abdominis)
  • Shoulders in extension
  • Glutes and posterior chain

If the abs aren’t doing their job, who steps in?

Exactly: the lower back.

It stretches, it flattens out, and takes on all the load that should be distributed.

That’s called compensation, and it does it even when you don’t ask.

Add to that:

  • Hip flexors that are too tight
  • Glutes sleeping like hibernating pandas
  • Poor awareness of neutral pelvis position

…and that’s why you look like a human boomerang.

Arching is easier than staying tight. But just because it’s easier doesn’t mean it’s right.


“But I can hold it longer this way…” – The trap of false stability

Sound familiar?

Good.

You tried to “hold” the position even though you knew it wasn’t perfect.

And yes, with that arch, you hold longer.

You feel stable.

Solid. Safe.

Too bad that stability is an illusion.

Training back levers with an excessive arch means reinforcing a mistake.

You’re not building strength in the correct position.

You’re just teaching your body how to survive crooked.

The day you try a more advanced version—straddle, full lever—your foundation will betray you.

And you might even get hurt.

Spoiler: your lower back doesn’t like being messed with.


How to fix it without losing your mind

Woman-performing-tuck-back-lever-on-monkey-bars-in-outdoor-calisthenics-park

I get it, going backward isn’t sexy.

But it’s the only way to actually move forward.

Here’s what worked for me, and for many others who were tired of looking like a flying banana:

  • Perfect tuck back lever
    Don’t rush out of it.
    Active glutes, tight core, depressed scapulae, posterior pelvic tilt.
    Sounds easy. It’s not.
  • Use resistance bands—smartly
    Not to relax, but to experience a proper position with less load.
    If you get too comfy in the band, you’re not working—you’re rocking yourself to sleep.
  • Train the straight line… on the ground
    Hollow body hold, superman hold, posterior tilt plank, static stick positions.
    If you can’t keep a line on the floor, you won’t keep it in midair.
  • Video, video, and more video
    Not just “watched once.”
    Watch it again. Compare it with others.
    Ask for feedback. Brutal feedback. Like you’re your own worst coach.
  • Point your toes. Always.
    No, it’s not just a detail.
    When you point your toes, your whole body tightens: calves, hamstrings, glutes, core.
    Small move, huge impact.

And then, speaking from experience… slow down.

Don’t chase aesthetic progress at the cost of technical progress.

Because you know what’s truly satisfying?

When you look back at the video and say:
“Finally, it’s STRAIGHT.”


And now put your pride aside

Let’s have a real talk.

If you’re trying the back lever just to post it on Instagram, you risk getting hurt for a virtual clap.

Is it worth it?

Training properly takes humility.

Going back.

Reviewing everything. Accepting that your position sucked.

And starting over.

But that’s where real strength is built.

The kind that doesn’t bail after 5 seconds.

The kind that makes you grow—not just as an athlete, but as a person who respects their body.

And you know what?

When you finally nail it—that clean back lever, stiff as a board…

…you don’t even need to post it.

You keep it for yourself.

Because it’s yours.

You earned it.


What you need before you start working on the back lever

Okay, I don’t want to be a buzzkill… but if you can’t hold a plank for 30 seconds without shaking like a raw noodle, maybe it’s better to postpone the back lever.

To tackle it with some dignity (and safety), you need a few basic prerequisites.

And no, you don’t need to be a Russian gymnast. But you can’t be a desk sloth either.

Here’s what you should already have under control:

  • Scapular control
    Being able to retract (pull toward the spine) and depress (pull downward) your shoulder blades is crucial to protect your shoulders during the entire movement.
  • Posterior pelvic tilt plank
    Not the usual saggy plank: here you push your pelvis forward and squeeze your glutes to train the spine to stay neutral and stable.
  • Hollow body hold (20–30 sec)
    On the floor, back glued to the ground, tight core, arms and legs lifted and straight. Essential for building the “line” of the back lever.
  • Tuck planche or advanced frog stand (15–20 sec)
    These exercises teach you to support bodyweight through pushing, improving shoulder and upper body strength.
  • Controlled skin the cat
    Moving from a vertical hang to full rotation behind the back on rings or bar. Great for mobilizing and strengthening shoulders in extension.
  • Shoulder extension mobility
    If you can’t bring your arms behind your body without lifting your shoulders, you’re at risk of over-arching and joint stress.


The most common (and sneaky) beginner mistakes that slow everything down

Okay, we’ve all been there.

That phase where you feel strong, motivated, fired up… and then you stall for weeks because you’re doing things that seem right, but are actually sabotaging you.

Here’s a list of frequent mistakes I see (and have made myself), not just technical errors, but mindset traps when training the back lever:

1. Training “by feel” without knowing what to feel

Many people just hang and try to “feel” the back lever, but have no idea what they should be feeling.

If you’re feeling everything in your arms and shoulders, and nothing in your core or glutes, you’re basically collapsing on yourself.

The body needs to work as a tight chain, not like a puppet with dangling legs.

2. Not resting between attempts

The back lever isn’t a metabolic exercise. It’s neuromuscular.

You need recovery. You need to breathe. You need focus.

Doing 5 attempts in a row “because I’m hyped today” only worsens your form and reinforces bad habits.

Rest for at least 60–90 seconds between each hold, even if it feels too long. Trust me.

3. Underestimating leg and foot tension

Legs are the most ignored part.

Many keep their torso tight but let their feet go floppy, knees bend, or ankles wiggle.

The body follows the ends.

If you let your legs go, everything falls apart.

Tighten your quads, point your toes, squeeze your thighs. Always. Even in the tuck.

4. Not knowing what to look for in videos

Everyone says “record yourself!” But few know what to actually watch.

It’s not enough to see if you’re “straight.”

Look for:

  • Are shoulders aligned with hips?
  • Is your pelvis sagging below the line?
  • Is there shaking only in the arms (good) or also in the lower back (bad)?
  • Are you entering/exiting the hold with control or jerky motion?

Watch the details, not just the Instagram-worthy freeze-frame.

5. Switching progressions every week

The “today I’ll try straddle, tomorrow back to tuck, next week full lever” syndrome.

You need consistency. A progression should be trained for weeks, not days.

It’s better to hold a clean 10-second tuck back lever for 4 weeks than play ping-pong between random shapes.

6. Copying others’ workouts without adapting them

What works for your buddy with broad shoulders and short limbs might not work for you with long arms and a heavy pelvis.

You need a personalized plan.

And if you do copy something from Instagram, copy from people who explain the why, not just the what.

7. Skipping specific joint warm-up

Another classic beginner mistake: hanging cold.

The back lever is high-risk for the shoulders, especially in extension.

You need band rotations, active mobility, scapular prep before any serious attempt.

Five minutes of activation is worth hours of clean progression.

And can save you months of discomfort.

In short?

Being a beginner isn’t the problem.

Getting stuck because of the same mistakes is.

If you can avoid even just two or three of these traps, you’ll speed up progress, improve your form, and enjoy the process.


Roadmap: how to achieve a perfect back lever (without going insane)

Here’s a real roadmap.

No 30-day miracles.

No “unlock your back lever in 2 weeks” YouTube titles.

This is real work.

Here’s a realistic 4 to 6-month plan for those starting with a solid base but no back lever experience.

Month 1–2: Foundation phase

  • Extended planks with posterior pelvic tilt
    Build basic stability and awareness of neutral pelvis.
    Also train core endurance.
  • Hollow body hold + rocks
    Alternate static holds and forward/backward rocking to reinforce the body line and strengthen the abdominal wall.
  • Superman hold + shoulder dislocates
    Superman strengthens the back (lower back, glutes, lats); dislocates improve dynamic shoulder mobility using a stick or band.
  • German hang with support
    Hanging position with arms behind the back and body relaxed.
    Prepares joints to tolerate the shoulder extension required.
  • Skin the cat with scapular control
    Same movement as before, now focused on scapular movement quality at each stage.

Month 3–4: Transition phase

  • Tuck back lever (bar or rings)
    First true attempt at the movement.
    Knees to chest, tight back, squeezed glutes.
    Start with short holds and increase gradually.
  • Negatives from skin the cat into tuck
    Start from the “hanging behind” position and slowly lower into tuck back lever, controlling each phase.
    Strengthens the whole front side.
  • Assisted tuck hold with band
    Use a band to unload some weight.
    Helps you feel and hold proper position longer without compensations.
  • Advanced tuck (when ready)
    Move knees further past hips, lengthening the lever.
    A major step forward in load and difficulty.

Month 5–6: Consolidation phase

  • Advanced tuck and straddle hold
    Longer lever, more difficulty.
    Keep scapulae depressed, pelvis tilted, back tight.
    Start with 3–5 seconds and build up.
  • Isometric holds with lighter bands
    Use thinner bands to reduce support.
    Forces you to maintain full tension without “hanging” passively.
  • Intermediate shapes (half straddle, open tuck)
    Transitional forms between tuck and full.
    Let you progress gradually while keeping a manageable, solid shape.
  • Advanced hollow holds
    Add overhead arms, slower rocks, or weights.
    Strengthens the most critical part of the lever: staying “flat” under tension.

Timeframe? Depends on you.

But with 3–4 dedicated sessions per week, you can build a solid and safe back lever in 6 months.

Maybe not perfect—but better a real, controlled shape than a fake arched lever used as a cover photo.


Is the front lever easier at the beginning? What’s the difference?

Common question. Tough answer: it depends on your body.

The front lever is that other suspended beauty where you’re face up, hanging like a horizontal human ruler.

Key differences:

  • The back lever requires more passive and active shoulder mobility, plus motor control and core stability.
  • The front lever is a strength beast.
    You have to pull back with lats, scapulae, and arms while keeping the entire body tight like an iron bar.

If you already have strong pulling strength and solid lats, the front lever might feel more familiar.

But beware: it’s harder to maintain clean form because the load hits the body’s center more heavily.

The back lever, on the other hand, is often more approachable at first, but demands more joint mobility and postural awareness.

Choose based on where you feel more ready—
—but ideally, train both.

One teaches control.

The other gives power.


RELATED》》》 How Long to Expect Before You Can Execute the Front Lever


Conclusion

If you feel like you’re holding it, but your video shows a circus arch…

…know you’re not alone.

It’s one of the most common mistakes.

But also one of the most fixable, if you stop and face it.

The back lever is not an exercise for your feed.

It’s a journey into control, precision, and awareness.

And every time you fix a detail, you build a stronger version of yourself.

So watch that video.

Be honest.

If there’s a banana… break it.

Then squeeze your glutes, brace your core, point your toes…

And fly straight.

Even if it’s only for three seconds right now.

Three real seconds are better than ten cartoon ones.

Recommended
Categories
Advanced Workouts BODYWEIGHT EXERCISES

Why do I get insane quad cramps when doing slow pistol squats

No cramps with lunges.

No cramps with classic squats.

Not even with Bulgarian split squats.

But the moment you try a slow, controlled pistol squat… you drop like a sack of potatoes.

Not because you’re weak.

But because your quad turns into a steel cable twisting in on itself.

So let’s get to the point:

Why do you cramp during slow pistol squats but not with other leg exercises?

Here’s the no-BS breakdown.


A cramp is an emergency response, not a body malfunction

When your quad cramps, it’s not because it’s gone rogue.

It’s because it’s trying to protect you from damage.

And the star of the show is the rectus femoris — the only quad muscle that crosses both the hip and the knee.

During pistol squats, especially slow ones, this muscle has to:

  • Stretch to the max as you flex the hip and knee at the same time
  • Contract from a stretched position
  • Stabilize the hip, thigh, and knee… all on one leg

This creates extreme passive tension under load.

The brain sees this as a threat.

And says:

“Shut it down! This muscle is maxed out, under stress, and we’re unstable.”

The result?

A protective spasm.

Which you feel as a cramp.

It’s not dehydration.

It’s your nervous system slamming the brakes.


Why does it only happen when you go slow?

Why-do-things-change-when-you-move-slowly?

You can do explosive pistol squats just fine.

But the moment you slow down, the leg short-circuits.

Why?

Because more time under tension = more neurological stress.

And if your stabilizers aren’t ready, the quad takes the full load.

In fast movements, inertia helps.

In slow ones, it’s just you and your muscles. Period.

And if the rectus femoris is already tired, unsupported by the glutes or hamstrings, it freaks out.

The cramp isn’t the squat’s fault.

It’s the combo of slowness and muscular imbalance.


When Your Quads Do Everything

Here’s the uncomfortable truth:

If you’re quad-dominant, slow pistol squats are your final exam.

Lazy glutes.

Showy hamstrings that don’t actually help.

A core that only exists for ab selfies.

So the quad has to do it all:

  • Knee extension
  • Hip control
  • Lateral stability
  • Braking the descent

All on its own.


How to eliminate quad cramps in pistol squats

This isn’t about “getting used to it” or “stretching more.”

It’s about strategy.

Here’s what to actually do:

  • Don’t drop to full depth right away: use a bench or plates to stop before the danger zone
  • Use assistance: TRX, rings, stick, wall — anything to reduce tension
  • Activate glutes first: hip thrusts, glute bridges — anything to wake them up
  • Train hamstrings separately: Romanian deadlifts, slow step-ups, sliders
  • Strengthen stabilizers: obliques, deep core, calves, glute medius
  • Controlled mobility: not just flexibility, but active control
  • Assisted eccentrics: go down slow with help, come up with both legs
  • Breathe!: holding your breath makes cramps easier to trigger
  • Do slow split squats before pistols: start with well-controlled Bulgarians


Your foot might be the real culprit (even if it doesn’t seem like it)

In a pistol squat, your only point of contact is your foot.

If it’s not active, the load shifts to the compensators.

Guess who compensates?

The quad.

Especially if you lift your heel slightly to avoid falling back.

That overloads the front of your thigh even more.

Try this:

  • Do pistols barefoot
  • Engage the foot arch
  • Distribute weight between heel, big toe, and pinky
  • Engage ankle and glute together

Sounds like small stuff?

Try it and feel the difference.


If your warm-up sucks, it’s on you

Proper-warm-up-to-get-ready-for-a-pistol-squat

If you jump into pistol squats after 10 jumping jacks, don’t be surprised if you cramp.

Here’s a proper warm-up to get ready:

  • 10 high step-ups per leg
  • 10 slow Bulgarian split squats with pause at the bottom
  • 20 seconds of isometric lunge with glute squeeze
  • 10 banded kickbacks per leg
  • 2 assisted slow pistols per leg to halfway

This isn’t stretching.

It’s functional activation.

So you hit the pistol squat already “tuned in.”


Do I really need to do slow pistol squats or can I skip them?

Good question: no, they’re not mandatory.

But if you master them, you gain:

  • Off-the-charts joint control
  • Single-leg stability that boosts all your other lifts
  • Functional strength that carries over to sports and daily life
  • Muscle awareness that transfers across your whole lower body

But if they train your frustration more than your quads, you can sub them out for similar, more manageable moves:

  • Slow Bulgarian split squats
  • Skater squats with support
  • Controlled step-downs from a box
  • Rear-foot elevated tempo squats

Then return to pistols gradually, with a better-prepped body.


When’s the best time to do them: beginning, middle, or end of workout?

Doing them cold at the start is a terrible idea — especially if you cramp easily.

Your nervous system’s still in pajamas.

Add them after a solid activation and pre-fatigue phase, when:

  • Your myofascial chains are “warm”
  • Your nervous system is already engaged
  • Your glutes, core, and stabilizers are awake

Ideal?

After your main compound lifts, but before accessory work.

That way you have focus — and blood in your muscles.


What role does breathing play, and how can it save you from cramps

Most people don’t notice this, but they hold their breath at the worst point in the descent.

This causes:

  • Increased internal pressure
  • Poorer core control
  • More overall tension = higher cramp risk

The fix?

Learn to coordinate your breath with the movement:

  • Inhale during the start of the descent
  • Keep a light abdominal brace
  • Exhale slowly on the way up

This helps release excess tension and better distribute the load.


How to tell if the cramp is just nervous system or actual injury risk

If the cramp:

  • Goes away in a few seconds
  • Leaves no lingering pain
  • Doesn’t show up at rest or during other movements

… it’s almost definitely a nervous system response — not damage.

But if:

  • The muscle still hurts hours later
  • You get sharp pain even without moving
  • You feel tightness during basic movements

… you may have reached a dangerous tension threshold.

In that case, get checked by a physical therapist.


How long does it take to stop cramping?

It all depends on how deep the neuromuscular imbalance goes — and how aware you are of your movement.

But in most cases — if it’s not a medical issue — you’ll see real change in 3 to 4 weeks of targeted work.

Here’s what “targeted work” means:

Glute work
At least 2 glute-specific exercises per session (e.g., hip thrusts, glute bridges, slow step-ups, banded kickbacks)
Focus on real contraction, not heavy weight

Core activation
Not passive crunches or planks — but dynamic, anti-rotational moves (e.g., dead bugs, Pallof presses, planks with reaching)
Just 6–10 minutes can fire up your center and improve pistol stability

Controlled mobility
No random stretching — use movements that teach your body how to move precisely in its range: ankle rocks, hip CARs, foot-focused squat isometrics
Do these before pistols, not after

Progressive technique
Start with simpler versions (box pistols, TRX, counterbalance)
The goal is never to hit the cramp point — just to get closer with more control
Every 4–5 days, push a little further

If you train 2–3 times per week consistently:

  • In the first week, the cramp hits less violently
  • By week two, it shows up later, maybe after 3–4 reps
  • Within a month, you might finish 3–4 slow pistol squats with no sharp pain — just honest effort

It won’t happen overnight.

You can’t just “keep trying till it works.”

But it will happen.

With smart progression, active muscles, solid technique, and distributed tension, the cramp stops being a roadblock.


RELATED:》》》 Why do my knees crack loudly whenever I do slow bodyweight squats?


Conclusion

If you cramp during slow pistol squats, it’s not because you suck.
It’s because your body is warning you.

It’s saying:
“We’re not stable here.”
“Some muscles aren’t doing their job.”
“You’re asking too much from one area.”

The solution?
Don’t avoid it.
Understand it.
Prepare better.

And when you fix balance, activation, and control, the cramp disappears.

Been there? Still there?
Drop a comment below and tell me how you’re fixing it.

Recommended
Categories
Advanced Workouts BODYWEIGHT EXERCISES

How come my abs are sore for three days after trying dragon flags for the first time?

You just had the brilliant idea of trying out one of the most ruthless core exercises ever invented in modern fitness history.

Dragon flags are no joke.

They’re a physical insult cleverly disguised as a “cool” Instagram move.

And the pain you’re feeling?

It’s just your body’s way of saying:
“Never do that again… or do it better.”


It’s not just an ab exercise. It’s a declaration of war on your core.

Are-Dragon-Flags-Really-Worth-It-For-Core-Strength

You know crunches?

Okay.

Now forget them.

Dragon flags are a whole different planet.

This isn’t about “activating your abs.”

This is about survival.

When you do a dragon flag, you’re asking your body to stay completely rigid as you raise and lower it slowly, with only your shoulder blades touching the bench.

Every single muscle in your trunk has to engage to stop your spine from collapsing under gravity.

It’s not just your rectus abdominis (the “six-pack” one) doing the work.

You’re calling in:

  • The transverse abdominis (deep core muscle that literally keeps you standing)
  • The obliques (for rotation and side stabilization)
  • The hip flexors (that burn when you lift your legs too fast)
  • The quadratus lumborum and spinal erectors (that scream in agony when control fails)
  • Even the lats, glutes, and quads

Yes, even the quads.

Because your body, in that moment, is a single rigid lever.

And if one part gives out…
everything collapses.


That pain after three days? It’s called DOMS. But it’s DOMS with claws.

Feel that deep soreness under your rib cage?

That tightness every time you cough, laugh, or bend over to tie your shoes?

It’s Delayed Onset Muscle Soreness.

The famous post-workout pain.

Only this time, in dragon flags, it’s caused by the brutal eccentric phase you forced your body through.

Every time you lowered your legs slowly while keeping them straight, your muscles lengthened under load.

That’s the toughest eccentric contraction there is.

And guess what?

That’s what causes the most micro-tears in muscle fibers.

So yes:

  • If you’re not used to deep eccentric work
  • If you never train your core in anti-extension
  • If you did 3-4 dragon flags without any kind of prep…

…it’s normal for the pain to last two, three, or even four days.

It’s not a red flag.

It’s your body adapting to something completely new.


The little muscles that usually sleep… are now screaming

Want to know a secret?

In most “ab exercises,” the deep muscles barely clock in.

The transverse abdominis, for example, is essential for spinal stability…
but during traditional crunches, it’s basically asleep.

In dragon flags, it gets thrown to the front line like an untrained soldier.

Same for the quadratus lumborum, internal obliques, and deep spinal stabilizers.

And when you hit them for the first time with a dynamic, eccentric, unstable load…
they’re not happy.

They punish you with a diffuse postural pain you can’t even pinpoint.


There’s also a neural factor: your brain wasn’t ready

How-Neural-Factors-Actually-Trigger-Muscle-Contraction

Training isn’t just “muscles contracting.”

It’s also your brain learning how to control those muscles precisely.

Dragon flags are a neuromuscular coordination overdose.

Your motor cortex, which is usually pretty chill during standard ab work, is now under pressure.

It has to:

  • Activate the right muscles
  • Inhibit the wrong ones
  • Coordinate the descent
  • Maintain control

And it has to do all that while you’re upside down, trying not to snap in half.

This neural hyperactivation leads to more muscle fiber recruitment.

Which, in turn, creates more microstructural damage.

And so… more DOMS.

Your body is learning.

The hard way.


If it hurts this bad, should I be worried?

No, unless you went way overboard beyond all human logic.

If the pain:

  • Isn’t in one specific spot
  • Doesn’t get worse over time
  • Doesn’t involve the spine in a sharp, acute way
  • Has no swelling, bruising, or strange stiffness

…then relax.

You’re just paying the price for asking too much, too fast.

But if you feel sharp back pain, stabs in your lower spine, or a sudden “tearing” sensation…
take a break and maybe get checked out.

You’re not weaker for pausing.

You’re just smarter.


What can I do to recover faster?

Here’s a little anti-DOMS toolkit:

  • Light movement: walk, gentle stretching, move your abs in a controlled way
  • Heat: hot water bottle, warm showers, or self-heating patches
  • Magnesium and Omega-3s: can help reduce muscle inflammation
  • Sleep: it’s when your body repairs, so sleep well
  • Hydration: better blood flow means more oxygen and nutrients where needed
  • Avoid anti-inflammatories if you can: they slow down muscle adaptation


Was it worth it? Absolutely. But you have to do it right.

Dragon flags, when done properly and progressively, are one of the most effective exercises for building a truly functional core.

Not only do they sculpt your abs (with the right diet), but they teach you to:

  • Control your body in space
  • Create usable tension for squats, deadlifts, and bench press
  • Protect your back during dynamic movement
  • Coordinate muscle groups that rarely work together

It’s not just aesthetics.

It’s biomechanics.

And it’s a skill.

One that can improve your entire way of moving and training.


How do you do a dragon flag… without wrecking your spine?

Doing a proper dragon flag isn’t just about throwing your legs in the air and hoping for the best.

It’s about building active tension from your neck to your ankles.

Here are the key steps to do it right:

  • Lie on a flat bench and grip the edge firmly behind your head
  • Keep your shoulder blades glued to the bench and use only them as your base
  • Bring your knees to your chest, then extend your legs straight up like a candle
  • Now begin the descent: lower slowly, keeping your body straight like a ruler and your pelvis tilted posteriorly (no arching!)
  • Lower until you feel effort but can still maintain control
  • Don’t collapse: resist the drop with active tension and either rise back up or return to fetal position
  • Only repeat as long as you can maintain form and control

💡 A good starting goal is to descend to a 45-degree angle and hold the rigid body line for 3–5 seconds.

Can’t do it yet?

Start with simpler versions:

  • Tuck dragon flag (knees bent)
  • Controlled negatives
  • Eccentrics with band support or feet on the wall


Classic mistakes that ruin everything (and make you hate dragon flags)

If you felt like a snapped toothpick… there’s a reason.

Here are the most common mistakes I see (and yes, I’ve made them too):

  • Arching your back: lose the pelvic tilt, lose ab tension, welcome lower back pain
  • Collapsing on the way down: the descent must be controlled, not a sack-of-potatoes drop
  • Thinking it’s “just for abs”: it’s actually a full-body move. If you don’t squeeze your glutes, quads, and even your lats, you’ll never stay rigid
  • Using momentum to start: if you throw your legs up, you’re just cheating yourself. It starts with tension, not swing
  • Doing too many reps: 2–3 good ones are enough to feel it. If you’re doing 10, the last 7 were probably an acrobatic cramp
  • Ignoring your breathing: learn to breathe into your belly under tension without losing tightness

Solution?
Record your attempts.
Watch them.
And be ruthless with form, angles, tension, and descent.


Can people with back pain do dragon flags?

Fair question.

And the answer isn’t a hard yes or no.

It depends on the type of back pain and where you are in your recovery journey.

If you have:

  • Active lumbar herniations
  • Acute disc issues
  • Vertebral instability
  • Ongoing pain during extension movements

…then no, it’s not the time for dragon flags.

This move puts massive tension on the lower back, especially during the descent phase.

But if you’re:

  • In the advanced stage of postural recovery
  • Strengthening your deep core
  • Already doing anti-extension work pain-free (like planks, dead bugs, controlled ab wheels)

…then you can start a gradual path, using regressed and controlled variations under supervision.

Start with exercises like:

  • Anti-extension core work on a fitball
  • Hollow holds
  • Reverse crunches

Then try a tuck dragon flag while keeping your lower back protected at all times.


Conclusion

Don’t do it randomly.

Don’t do it just for the Instagram likes.

And never do it without prep, control, and progression.

Start with:

  • Advanced planks
  • Hollow body holds
  • Controlled negatives with support
  • Tuck dragon flags

Then, step by step, build your strength.

No rush.

No ego.

When the pain fades and you finally manage a clean, controlled dragon flag without trembling…
It’ll be one of the most satisfying moments of your gym life.

And you won’t just “do abs” anymore.
You’ll dominate them.

Recommended
Categories
Advanced Workouts BODYWEIGHT EXERCISES

Can being upside down during handstand push-ups make you nauseous or dizzy?

Alright, let’s get straight to the point: Yes, being upside down can make you feel like a rag doll.

Nausea, dizziness, that weird feeling that your brain is doing backflips inside your skull… all on the menu, baby.

If you’ve ever thrown yourself into a handstand push-up and suddenly felt like your stomach wanted to escape through your ears, you’re not weird.

You’re human. And honestly, pretty brave.

But let’s take a look at why this happens.

And whether there’s anything you can do to stop feeling like you’re training on the Enterprise during a space storm.


The famous “rush” of blood to the brain

Back-view-athletic-man-doing-handstand

When you go into inversionmeaning your feet go up and your head goes downsomething very simple and very intense happens: the blood shifts.

Since gravity doesn’t take a day off, the blood pools in your head.

Eyes, temples, nose, jaw—everything swells up slightly, like someone’s inflating your face with a bike pump.

This can cause:

  • A feeling of pressure behind the eyes
  • Pulsing in the temples
  • Sudden headaches
  • That classic “full head” sensation that makes you feel floaty

It’s all normal, at least at first.

But it can become unpleasant if your body isn’t used to handling it yet.


The vestibular system: when balance goes haywire

blank

Inside your ears are tiny organs called semicircular canals, filled with fluid and sensitive cells.

They’re your internal compass, your built-in level.

When you flip upside down suddenly, that fluid sloshes around chaotically.

And your brain, poor thing, gets flooded with mixed signals.

“Are we falling?”
“No, wait, we’re standing still?”
“Why is the ceiling under our feet?”

This sensory overload can cause:

  • Light dizziness
  • Disorientation
  • A vague sense of unease that creeps up like car sickness

The funny part is, you didn’t do anything wrong.

It’s just your brain temporarily losing GPS signal.


Not the best time to solve equations

There’s also a myth we should bust: “When the blood flows to your brain, you think better.”

Uhm… kinda.

In theory, more blood flow means more oxygen.

But in practice, the brain doesn’t love sudden shifts.

Excessive flow can cause confusion, light-headedness, and that cotton-stuffed-head sensation.

Not to mention the fact that breathing properly in that position is harder.

Your diaphragm has to work against gravity.

Your internal organs push against your lungs.

And you might be holding your breath without realizing it, muscles tense, heart racing.

Result?

You’ve mixed the perfect cocktail to throw your nervous system into chaos.


When does it happen more often?

Not everyone reacts the same.

Some feel like superheroes after ten seconds.

Others feel like they’ve just spun on a carnival ride after three breaths.

Most common situations where you might feel dizzy:

  • You’re a beginner with inversions
  • You have sinus issues or blood pressure problems
  • You’ve eaten too much (or too little)
  • You had an extra coffee and your heart’s racing
  • You didn’t sleep well or you’re dehydrated
  • You’re sensitive to motion (car/plane sickness)

For example, when I started doing handstands, I felt nauseous every single time.

Then I realized that working out on an empty stomach with music blasting maybe wasn’t the best idea.


Is it dangerous?

In most cases, no.

It’s just uncomfortable.

Your body is trying to adapt.

It only becomes a problem if you ignore warning signs, like:

  • Dizziness even after you’re upright again
  • Blurry vision or feeling like you might faint
  • Long-lasting headaches or nausea that won’t go away

In those cases, stop.

Drink something.

Breathe.

And for once, listen to your body.


What does science actually say about feeling dizzy upside down?

blank

If you’re wondering whether this “inversion discomfort” is all in your head or if something’s really off in your body… well, science says you’re not imagining it.

A study published in Clinical Methods confirms that what we call “dizziness” can have many causes, and it’s not always easy to tell them apart without digging into the context.

For example:

  • Positional vertigo (like what you might feel during or right after a handstand) is linked to abnormal stimulation of the vestibular system, especially when the head changes direction relative to gravity.
  • True imbalance happens when the brain struggles to integrate visual, auditory, and proprioceptive signals—something that’s very likely during upside-down exercises if you’re not trained or have neck tension.
  • Lightheadedness, that vague feeling of floating, is often tied to hyperventilation—very common in high-intensity workouts, especially if you hold your breath while pushing.

One of the most interesting findings is that many people can’t clearly describe the feeling, but they react very specifically during simulation tests.

For instance, during guided hyperventilation (fast breathing while lying down), subjects with chronic dizziness often recreated exactly “that weird feeling” they also get during handstands.

This suggests that sometimes it’s not just the physical position, but also breathing and the nervous system’s response that trigger the symptoms.

In short: 🧠 It’s not just your head flipping.

Your entire brain-body system needs to learn how to adjust.

That’s why gradual exposure, breath control, and monitoring body signals are key.

Science basically confirms something simple: if you get dizzy upside down, it’s normal.

But you can train through it.

For the clinical deep-dive: 🔬 Clinical Methods – Chapter 212: Dizziness (NCBI)


What can you do to stop feeling like a spinning astronaut?

The good news is: you can get used to it.

Here’s what helped me over time (and might help you too):

  • Start from zero, no rush: Begin with wall holds, then negatives, then pike push-ups, and only after that move to full handstands
  • Control your breathing: Never hold your breath! Inhale through the nose, exhale slowly through the mouth
  • Don’t stay upside down too long at first: 5–10 seconds is plenty. Then rest. Then try again
  • Drink beforehand, not after: A dehydrated body is more prone to fatigue and fainting
  • Avoid inversions on an empty stomach or right after eating a big meal
  • If you have chronic dizziness or blood pressure issues, ask a doctor before defying gravity

And here’s a friendly tip: use a mirror or record yourself.

Seeing if you’re tense, stiff, or bent out of shape helps you fix things without just guessing.


The benefits, despite everything

The amazing thing is, once you get past the nausea and the initial discomfort… handstand push-ups become one of the most complete bodyweight exercises out there.

They give you:

  • Shoulder and core strength
  • Joint stability
  • Ninja-level motor control
  • Self-confidence that follows you outside the gym

And you know what the secret is?

Progression.

Every time you hold it one second longer, breathe better, or fall on your face a little less… you’re moving forward.

One centimeter at a time.

Even if at first you feel like you just got off the Tilt-A-Whirl.


RELATED:》》》 How Much Time Do Beginners Need to Achieve a Handstand?


Conclusion

So in short?

Yes, it’s normal to feel off at first.

No, it doesn’t mean you’re doing it all wrong.

And yes, you can improve if you listen to your body and take it one step at a time.

Being upside down is kind of like changing your life perspective: it throws you off, challenges you… but then opens up a whole new world.

And when you finally nail those handstand push-ups without nausea, fear, or flailing… you realize it’s not just physical strength.

It’s a mental win.

Recommended
Categories
Advanced Workouts BODYWEIGHT EXERCISES

Is It Possible to Combine Calisthenics and Weight Lifting in a Single Workout?

There’s something magical about alternating a powerful movement like a heavy squat with the lightness and control of a pistol squat.

It’s like giving your body two different languages to express strength and precision.

In this article, I’ll guide you through the secrets of a workout that combines the best of calisthenics and weight lifting.

Whether you want to explode with power or refine your muscle control, you’ll find all the answers here, plus some extra tips to get started right away.


History and Origins: From Gymnastic Bodyweight Training to Modern Power Racks

From-warrior-strength-to-modern-weightlifting

Sometimes, to understand how we got to today’s training methods, we need to look back at the past.

Bodyweight exercises were essential for Greek wrestlers and Roman soldiers.

Push-ups, squats, and pull-ups weren’t just workouts; they were tools for survival.

I can picture them preparing for battle with moves that were simple yet full of purpose.

Then came weight lifting.

With the first public gyms, barbells and dumbbells brought a whole new level of precision.

The first time I loaded a barbell for a squat, I thought I had it all under control.

Spoiler alert: the barbell had different plans!

I quickly learned that weight is a strict but fair teacher.

Calisthenics, on the other hand, was a revelation.

Using your own body as a tool confronts you with challenges you never expected.

I remember my first muscle-up—it seemed impossible.

Then, one rep at a time, I started to understand control.

And when I tried the pistol squat… well, let’s just say falling was part of the process.

Today, these two worlds blend perfectly.

Lifting weights gives me raw strength.

Bodyweight exercises improve my control and agility.

Switching from a deadlift to a plyometric push-up is a mix that keeps both the body—and the mind—wide awake.

For me, it’s like having two different mentors: one pushing me to break limits, and one teaching me how to master every movement.

A perfect combo for anyone who wants the most out of every workout.


Why Calisthenics and Weight Lifting Can Be the Perfect Combo

Calisthenics-or-weightlifting-choose

Whenever people ask, “Why should I even combine bodyweight moves and a barbell?” I have at least ten reasons ready.

The first one is simple: balancing absolute strength and functional strength.

Absolute Strength:

You develop it by pushing your limits on exercises like the bench press, squat, and deadlift, where you progressively increase the weight and break mental (and physical) barriers.

Functional Strength:

You build it with movements that use your own body weight and gravity (like pull-ups, push-ups, and dips).

These exercises improve coordination, mobility, and your ability to move through space with agility.

When you unite these two approaches, you get a “super physique” (for lack of a better term) that can handle multiple stimuli: heavy loads, plyometric moves, stability, speed, and even endurance.

All of this with less boredom and, trust me, more fun, because every session becomes a new challenge.


Physical and Mental Benefits of a Combined Workout

One of the most interesting aspects is that training with both calisthenics and weights offers benefits beyond aesthetics.

Stimulating Complete Neuromuscular Response.

The more varied the exercises, the more your brain learns to recruit muscle fibers efficiently.

Result?

A faster “motor learning” phase and tangible progress in a very short time.

Better Proprioception.

Performing bodyweight movements teaches you to “feel” every small angle of motion, while lifting weights forces you to safely handle external loads.

This mix promotes an extraordinary body awareness.

Injury Prevention.

A body that knows how to move in multiple directions, with different angles and loads, becomes more resilient.

I remember that when I did only weight training, I often had minor muscle strains and joint aches.

Since introducing calisthenics, those issues have drastically decreased.

A Boost in Self-Esteem.

Feeling capable of doing 10 pull-ups in a row and then immediately benching a serious amount of weight makes you feel almost… unstoppable!

And the confidence you build in the gym carries over into many other areas of life.

Variety and Fun.

Personally, I get bored if I always do the same things.

With a combined workout, you have a whole palette of exercises available.

Every session can be different, which helps keep motivation high.


How to Start: Step by Step for Beginners

If you’re totally new to this concept, you might wonder where to begin.

Don’t worry, starting is easier than you think.

The key is to build a solid, gradual foundation without overdoing it.

Begin with simple movements and steadily increase intensity and complexity.

Valuate Your Current Level.

  • Are you stronger in weight lifting or in bodyweight exercises?
  • Or maybe you’re a newbie in both areas?
  • That will help you figure out where to focus your initial efforts.

Set Realistic Goals.

  • Do you want to improve muscle mass, definition, or endurance?
  • Each goal requires a different combination of exercises and intensity.
  • For example, if your main goal is muscle mass, you might increase the volume on weight lifting and add basic calisthenics.

Learn Proper Technique.

  • Don’t underestimate form, especially for exercises like squats or deadlifts.
  • The same goes for advanced bodyweight moves like pistol squats or pull-ups—technique is 90% of success (and safety).

Define a Frequency.

  • Two or three sessions a week might be enough for a hybrid workout at first.
  • It’s important to give your muscles time to recover, so don’t pack in too many sessions.


Principles of Programming: Organizing the Week for Best Results

Programming is key if you want steady progress.

Here’s an example of how you could structure a week of training, based on a three-session plan.

Day 1 – Focus: Weight Lifting Strength + Basic Calisthenics

  • Squat with barbell: 4 sets x 5-6 reps
  • Bench press: 4 sets x 5-6 reps
  • Pull-ups: 3 sets x max reps
  • Standard or decline push-ups: 3 sets x 12-15 reps

Day 2 – Focus: Calisthenics Skills + Complementary Weights

  • Skill work (handstand, L-sit, back lever progressions): 15-20 minutes
  • Military press with dumbbells or barbell: 4 sets x 8-10 reps
  • Pistol squats (or advanced bodyweight squats): 3 sets x 6-8 reps per leg
  • Parallel bar dips: 3 sets x max reps

Day 3 – High-Intensity Circuit (Hybrid HIIT)

  • 6 heavy deadlifts
  • 10-12 plyometric push-ups
  • 8 dumbbell lunges (per leg)
  • 6-8 pull-ups
  • Repeat for 4-5 rounds with minimal rest.
  • Clearly, this is just an example.
  • Feel free to modify it based on preferences, experience level, and available time.


Practical Examples of Combined Exercises

To get the most out of a workout that blends calisthenics and weights, sometimes it’s enough to pair two exercises in a superset.

One can use an external load, and the other can be bodyweight.

Super-Set Bench Press + Push-Up

  • Bench press (5-6 reps)
  • Explosive push-ups (10 reps)

Super-Set Squat + Pistol Squat

  • Barbell squat (8 reps)
  • Pistol squat (5 reps per leg)

Super-Set Military Press + Handstand Hold

  • Military press with barbell or dumbbells (6-8 reps)
  • 20-30 seconds of a handstand hold (against the wall if needed)
  • This “shock” method is fantastic for stimulating muscle growth, endurance, and coordination.
  • The difference in stimulus between external load and bodyweight creates very rapid adaptations.


Implementing Calisthenics and Weight Lifting on Alternate Days

If you prefer to alternate calisthenics and weight lifting days, here’s an easy way to organize your workouts and make the most of both approaches.

Monday – Calisthenics (Strength and Skill)

  • Pull-ups: 4 sets x max reps
  • Pistol squat: 3 sets x 6-8 reps per leg
  • Plyometric push-ups: 3 sets x 12 reps
  • L-sit or plank: 3 sets x 20-30 seconds

Wednesday – Weight Lifting (Max Strength)

  • Barbell squat: 4 sets x 5 reps
  • Bench press: 4 sets x 5-6 reps
  • Deadlifts: 3 sets x 6 reps
  • Barbell row: 3 sets x 8 reps

Friday – Calisthenics (Endurance)

  • Bodyweight circuit (4-5 rounds):
    • 10 pull-ups
    • 15 push-ups
    • 20 bodyweight squats
    • 30-second plank

Saturday – Weight Lifting (Volume)

  • Romanian deadlifts: 3 sets x 8 reps
  • Dumbbell lunges: 3 sets x 10 reps per leg
  • Weighted parallel bar dips: 3 sets x max reps
  • Dumbbell curls: 3 sets x 12 reps

Sunday – Complete Rest or Active Recovery

  • You can devote Sunday to a walk, yoga, or stretching to help you recover and get ready for the new week.


Common Mistakes to Avoid

I’ve learned the hard way (literally, with a few minor injuries) that there are mistakes you just shouldn’t make.

When you start combining calisthenics and weight lifting, it’s normal to stumble a bit.

Both approaches require technique and attention, and uniting them can feel complicated at first.

But with some planning and the right mindset, you can avoid the most common pitfalls.

Skipping Recovery

If you train heavy strength and technical skills on the same day, the stress on the body is high.

Make sure to sleep at least 7-8 hours a night and include active rest days, maybe with yoga or light stretching.

Overdoing the Weights

A typical mistake is loading up too much weight right away, risking bad form and injury.

Remember: gradual progression is your best friend.

Always Doing the Same Exercises

Variety is essential.

Change up your push-up, pull-up, dip, and squat variations.

Try new set and rep schemes.

Keep your body and mind on their toes!

Forgetting Mobility

Joint mobility is the “lubricant” of your movements.

Doing regular mobility and stretching exercises will help you push harder when needed, without limitations.


Recovery, Nutrition, and Supplementation

Even though it’s often overlooked (or taken for granted), you can’t truly talk about top-notch training without covering recovery and nutrition.

Balanced Nutrition

Make sure to get quality protein (1.5-2 g per kg of body weight daily), complex carbs (rice, oats, sweet potatoes), and healthy fats (extra virgin olive oil, avocado, nuts).

Fruits and vegetables should always be included for vitamins and minerals.

Constant Hydration

Drinking enough water is critical, especially if you’re mixing heavy lifting and dynamic bodyweight movements in longer sessions.

Useful Supplements

  • Whey or vegan protein: helps you hit your daily protein goal.
  • Creatine: can assist with explosive strength.
  • Essential Amino Acids (EAA) or BCAAs: may help with recovery, although they’re not absolutely necessary.

Massages, Yoga, and Active Rest

If you’re training intensely on multiple fronts, take some time for muscle massages, yoga sessions, or simply walks.

They help relax tension and reduce lactic acid buildup.


Mental Training and Motivation: The Psychological Component

Training in a mixed way also requires a certain mental flexibility.

Learn to Manage Frustration

Maybe you can squat a lot of weight, but you realize you can’t do a perfect pull-up yet.

It’s normal: everyone has their own strengths and weaknesses.

Set Intermediate Goals

If you’re far from a muscle-up, start by aiming for 10 solid pull-ups and 10 perfect dips.

Step by step, you’ll get there.

Celebrate Small Wins

Improving your bench press by 5 pounds or adding one more pull-up is progress.

Don’t wait only for the big milestones: celebrate every single improvement.

Visualization

Before performing a complex exercise (like a heavy squat or an advanced calisthenics move), take a few seconds to imagine the correct execution, as if you’re watching a video of yourself in your mind.

It helps boost performance!


Conclusion

Combining calisthenics and weight lifting in a single session isn’t just possible—it’s a revelation.

It lets you build strength, agility, and control in a harmonious way.

When I first started, I thought it was too complex.

But after just a few workouts, I realized how motivating it was to see progress in both areas.

Every session becomes a new challenge, and once you find this rhythm, there’s no turning back.

Your body and mind will work together like never before.


FAQs

Which one builds more muscle: calisthenics or weight lifting?

Weight lifting is more effective for increasing muscle mass, thanks to progressive overload. Calisthenics, on the other hand, develops relative strength and defined muscles, but it usually takes more time to see significant hypertrophy.

How many times a week should I do a hybrid workout?

If you’re a beginner, 2-3 hybrid sessions per week are enough to see initial progress. Once you gain more experience, you can go up to 4, but make sure to include rest or active recovery days.

Should I do calisthenics before or after lifting weights?

It depends on your main goal. If you want to focus on maximal strength with weights, do them first when you’re fresh. If you want to nail bodyweight skills (like a muscle-up or planche), start with calisthenics. You can also alternate, based on your weekly plan.

How can I avoid injuries in these intense workouts?

Use perfect technique, progress gradually, and warm up thoroughly. Never skip the warm-up phase, and do mobility exercises. Listen to your body: if you feel persistent pain or signs of overtraining, take a break.

How do I include cardio in a mixed program?

You can add HIIT (High Intensity Interval Training) sessions after lifting or calisthenics, or dedicate a day to running, swimming, or biking. If you do a mixed circuit with minimal rest, you’ll already get a decent cardio stimulus.

Do I need to switch to weights if I stop progressing in calisthenics?

Not always. Try adding harder variations, increasing volume, or using resistance like a weighted vest before turning to weights.

Can combining calisthenics and weight lifting help with fat loss?

Yes, the mix of high-intensity calisthenics and strength-focused weight lifting creates an effective combination for burning calories and building muscle, which helps boost your metabolism.

What equipment do I need for a combined calisthenics and weight lifting workout?

For calisthenics, you’ll need minimal equipment like a pull-up bar or parallettes. For weight lifting, basic tools like a barbell, dumbbells, or kettlebells will cover most exercises.

Recommended
Categories
Advanced Workouts BODYWEIGHT EXERCISES

Level 2 Gymnastics Skills: Advance Your Home Routine

I’ve been practicing calisthenics for years, but around 12 months ago, I developed an interest in gymnastics.

I started with the basics and gradually incorporated more advanced techniques, like training with rings.

This article is for anyone who is just starting out and wants to build a strong foundation in gymnastics.

We’ll explore basic floor exercises, beam routines, and some introductory skills on uneven bars and vault techniques.

These are great for practicing both in the gym and at home.

If you’re just beginning your gymnastics journey, this guide will give you a great overview of the basics and a sneak peek into what comes next as you progress to Level 2 gymnastics.


An Overview of Key Competencies and Focus Areas

Apparatus Key Competencies
Floor Improve form, flexibility, and acrobatic skills.
Beam Focus on balance, mounts, jumps, and basic acrobatics.
Uneven Bars Enhance swinging techniques and bar transitions.
Vault Develop proper form and controlled vault execution.
Additional Skills Focus Areas
Form Refine body alignment and posture.
Flexibility Increase flexibility for advanced movements.
Mounts & Jumps Strengthen mounts, jumps, and acrobatic skills.


Level 2 Gymnastics Skills: Specific Competencies for Each Apparatus

Specific-Competencies-for-Level-2-Gymnastics

In Level 2 gymnastics, young athletes begin to refine and expand their skills on four key apparatuses: floor exercises, beam, uneven bars, and vault.

This level is where things get exciting, as athletes transition from basic skills to more complex and technical routines.

Each apparatus offers its own unique challenges and learning opportunities.

I myself had to face many challenges to master some free body exercises, such as the handstand, and even dealt with some minor injuries along the way.

But with perseverance, I eventually mastered various skills.

If you enjoy this type of training, you’ll find it challenging but incredibly rewarding.

Alright, enough talk—let’s dive into what makes Level 2 so special!


1. Floor

Cartwheel:

  • How to Perform:
    • Start standing, bend forward, and place one hand at a time on the ground while your legs lift into the air in a straddle position. Rotate your body smoothly, keeping your legs straight, and finish the cartwheel by standing up.
  • Challenge:
    • The challenge is to maintain consistent body alignment, avoiding bending or swaying sideways. Requires arm strength and leg flexibility.

Handstand (Held for 1 Second):

  • How to Perform:
    • Start standing, take a firm leap, and lift your legs vertically over your head, keeping your arms straight and close to your ears. Hold the position for at least one second before returning to standing.
  • Challenge:
    • Balance and stability are crucial, as well as shoulder and core strength. Controlled entry and exit from the position are key.

Handstand Forward Roll:

  • How to Perform:
    • Starting from a handstand, gently bend your elbows and roll forward, returning to your feet.
  • Challenge: Good control of the handstand and the ability to smoothly transfer weight for a safe landing are necessary.

Backward Roll to Push-up Position:

  • How to Perform:
    • Start standing, bend backward rolling onto your back, and push up until you reach a push-up position.
  • Challenge:
    • Coordinating and controlling your body is crucial. Evenly distribute weight during the roll and use arm strength to reach the final position.

Bridge with Backward Kick:

  • How to Perform:
    • Lying down, lift your pelvis from a bridge, and then kick backward with one leg.
  • Challenge:
    • This exercise requires considerable flexibility of the back and legs, as well as strength and control to maintain the bridge position while performing the kick.

Split Jump with 60° Leg Separation:

    • How to Perform:
      • Perform a jump with a split in the air, achieving at least 60° leg separation.
  • Challenge:
    • This jump requires good body control, along with flexibility, to execute a smooth and harmonious movement.

Leap with 90° Leg Separation:

  • How to Perform:
    • Execute a forward leap with high leg separation.
  • Challenge: In addition to flexibility, this movement requires precision in timing and control in landing.

180° Heel Turn in Passé Position:

  • How to Perform:
    • Execute a complete turn on one foot, keeping the other in passé position.
  • Challenge: The turn requires balance, precision, and body control, especially in maintaining the position of the raised foot during the turn.


2. Beam

Jump to Front Support:

  • How to Perform:
    • Approach the beam and make a small jump, landing in a front support position. Your hands should be firmly placed on the beam while your legs remain suspended.
  • Challenge:
    • Coordinating the jump and hand placement requires timing and precision, as well as body control during the landing.

30° Arabesque:

  • How to Perform:
    • From a standing position, lift one leg behind you, keeping it straight, until reaching a 30-degree angle. Your torso remains upright, and the opposite arm to the lifted leg extends forward for balance.
  • Challenge: Maintaining balance and correct posture while holding one leg lifted is the main challenge.

Pivot Turn:

  • How to Perform:
    • Start in a standing position on the beam. Lift one foot and place it in passé (bent knee with the foot near the opposite knee) or near the ankle. On the other foot, perform a full 360-degree turn, keeping your body straight and the lifted foot stable.
  • Challenge:
    • This exercise requires exceptional body control and intense concentration. Maintaining balance on a narrow surface like the beam while turning on one foot is a significant challenge. The ability to perform the movement smoothly and precisely is crucial.

Stretch Jump:

  • How to Perform:
    • From a standing position, execute a vertical jump on the beam, extending both legs and arms. Land with control on the beam.
  • Challenge:
    • The landing must be executed cleanly and precisely, maintaining balance throughout the entire jump.

Toe Walking:

  • How to Perform:
    • Walk along the beam placing one toe in front of the other, keeping your arms spread for balance.
  • Challenge:
    • The exercise requires precise body control and constant balance, ideal for improving posture and confidence on the beam.

Slide or Step Walk Backward:

  • How to Perform:
    • In the slide, advance along the beam with smooth and controlled steps, keeping your body aligned and balanced. In the step backward, move backward with small and measured steps, always maintaining perfect body control.
  • Challenge:
    • The main challenge in these movements is to maintain excellent posture and balance, especially considering the narrowness of the beam.

Lateral Leg Lift:

  • How to Perform:
    • Standing on the beam, lift one leg to the side, keeping it straight, without losing balance.
  • Challenge:
    • This movement requires strength in the supporting leg and control in the lifted leg, improving coordination and stability.

Split Jump:

  • How to Perform:
    • Execute a vertical jump on the beam, spreading your legs in the air to form a split.
  • Challenge:
    • Flexibility is important, but success with this jump also hinges on effective technique and accurate beam landings.

Basic Dismount:

  • How to Perform:
    • Conclude your routine with a simple jump off the beam or a backward roll to dismount safely.
  • Challenge:
    • This exercise teaches how to end the routine with control and safety, essential for a good score in competitions.


3. Uneven Bars

Glide Swing:

  • How to Perform:
    • Start from a suspended position with your arms extended. Swing back and forth, keeping your body straight and legs together.
  • Challenge:
    • Maintaining the body in a rigid position and controlling the oscillatory movement requires strength and coordination.

Pullover:

  • How to Perform:
    • From a suspended position, use your arms to pull yourself up until your legs are over the lower bar, then rotate your body to sit on the bar.
  • Challenge:
    • The challenge lies in using the core and arm strength to lift the body over the bar smoothly.

Cast:

  • How to Perform:
    • While seated on the lower bar, push away with your hands and lift your body into a horizontal position before returning to the starting position.
  • Challenge:
    • Shoulder and core strength are crucial for lifting and maintaining the body horizontally.

Back Hip Circle:

  • How to Perform:
    • From the swinging motion, push your hips forward and rotate around the lower bar, maintaining contact with it through your hips, then return to the starting position.
  • Challenge:
    • Requires good movement control and the ability to maintain tension throughout the body.

Underswing Dismount:

  • How to Perform:
    • From the swing, push away from the lower bar and perform a backward jump to land on your feet.
  • Challenge:
    • Calculating the right moment to push and the necessary force for a safe landing is the most difficult part.

Leg Cut Forward/Backward:

  • How to Perform:
    • From a seated position on the lower bar, lift one leg and pass it over the bar, alternating between bringing it forward and backward. Maintain control and balance while performing the movement.
  • Challenge:
    • This exercise helps develop coordination and fluidity in movements, as well as improving the ability to maintain balance in different positions.

Squat-on and Slide:

  • How to Perform:
    • From a suspended position, do a small squat and sit on the lower bar. While seated, slide gently along the bar, keeping your arms extended.
  • Challenge:
    • The challenge is to maintain control of your body and arms during the slide, avoiding falling or losing balance.


4. Vault

Handstand on a Mat Stack and Flat Back Fall:

  • How to Perform:
    • Approach the runway and make a jump, placing your hands on the ground on a stack of mats, then push with your hands to lift your legs into the air until you reach a handstand position. Maintain the handstand for a moment before letting yourself fall flat back onto another mat placed behind you.
  • Challenge:
    • The main challenge is coordinating the run and the jump with the correct hand placement. Core and shoulder strength are essential for lifting the legs into a handstand and maintaining body control. The falling phase requires attention to ensure a safe and controlled landing.

Straight Jump onto Mat Stack:

  • How to Perform:
    • Begin with a running start toward a stack of mats. With a powerful and coordinated movement, leap vertically off the springboard, aiming to land squarely on top of the mats. The key is to use the momentum from the run to maximize the height of the jump.
  • Challenge:
    • Harnessing the power from the run and converting it into a high, controlled jump is crucial. The gymnast must focus on executing the jump with a straight body line in the air and landing stably on the mats. Proper landing technique, with feet shoulder-width apart and knees slightly bent, is essential to absorb the impact.

Squat onto Mat Stack:

  • How to Perform:
    • Similar to the straight jump, this exercise starts with a run-up. The gymnast jumps onto the stack of mats but, instead of landing upright, transitions into a squat position upon landing. The transition from the jump to the squat must be smooth and controlled, requiring the gymnast to adjust their body mid-air.
  • Challenge:
    • This exercise tests the gymnast’s ability to transition smoothly from the jump to the squat position, requiring precise body control during a dynamic movement. Proper landing technique is essential to execute the squat with correct form and prevent injury. Additionally, it enhances leg strength and improves the gymnast’s ability to perform complex movements that demand coordination.


What Additional Skills and Techniques Should Level 2 Gymnasts Focus On?

In gymnastics, Level 2 marks a transitional phase where gymnasts begin to focus not only on developing basic skills but also on perfecting form. 

This stage shifts attention to skills that require greater flexibility.

In addition to consolidating skills learned at Level 1, more advanced acrobatics like somersaults and cartwheels, and more complex dance elements, are introduced at Level 2.


1. Form

Improving form is a key area of focus in Level 2.

Here are some tips on how to do it:

  • Perfecting Posture:
    • Posture is essential in every aspect of gymnastics. Practice maintaining a straight back, relaxed shoulders, and an active core. Good posture is crucial for both the safety and aesthetics of the performance.
  • The fluidity of Movements:
    • Work on smooth transitions between movements. This not only makes your routine more elegant but also helps prevent injuries.
    • Try linking different elements in continuous sequences, focusing on smoothness and naturalness.
  • Precision of Positions:
    • Each movement and position should be executed with utmost precision. Practice perfecting every detail, from the tips of your toes to the position of your hands.
    • Repeat the same movements multiple times to build muscle memory and precision.
  • Overall Harmony of the Routine:
    • Your routine should appear as a cohesive and harmonious ensemble of movements. Pay attention not only to the main elements but also to transitions and smaller details.
    • Watch recordings of your practices to identify areas for improvement and ensure you have a balanced and harmonious routine.


2. Flexibility

As a Level 2 gymnast, your goal, in addition to improving form, is to enhance flexibility.

This is crucial for executing advanced movements with elegance and fluidity.

Here’s how you can work on it more specifically:

  • Comprehensive Stretching Routine: Develop a daily stretching routine of about 15-20 minutes. Begin with a general warm-up, then move on to a series of stretching exercises targeting different muscle groups. This should be integrated into both the start and end of training sessions.
  • Complementary Practices for Flexibility: Incorporate yoga or Pilates into your training schedule. These practices not only enhance flexibility but also core strength and body awareness.
  • Joint Mobility Enhancements: Include exercises specifically designed to increase the range of motion in joints. Incorporating movements like ankle rotations, hip circumductions, and shoulder rotations helps maintain joint health and flexibility.


3. Mounts, Jumps, and Acrobatic Skills

More Complex Mounts:

  • At this level, mounts require a combination of jumping and agility. Examples can include a jump with a twist or a leap followed by an acrobatic element.
  • Training should focus on the precision of the jump, body control during flight, and a safe, stable landing on the apparatus.

Additional Jumps:

  • Besides split jumps, Level 2 gymnasts can work on jumps such as tuck jumps and Half Turns, Forward Jumps, and One-Footed Jumps, which help develop control and power.
  • Training should focus on improving elevation, body control in the air, and precision in landing.
  • Complementary exercises can include trampoline jumps, squat jumps, and agility work to improve jump reactivity and power.


Tuck Jumps:

  • Description: Pulling both knees to the chest while in the air.
  • Benefits: Improves jump power and the ability to execute compact movements. It’s also useful for developing coordination and spatial awareness.

Half Turns:

  • Description: During a jump, the gymnast performs a 180-degree rotation before landing.
  • Benefits: This jump helps develop timing sense and body control in the air, introducing the basics for more complex rotations.

Forward Jump:

  • Description: A jump executed by pushing forward from the floor.
  • Benefits: Improves leg strength and the ability to land in a controlled manner, essential for more advanced movements.

One-Footed Jumps:

  • Description: Jumps executed by alternating landing on one foot at a time.
  • Benefits: These jumps improve balance and stability, as well as strengthen each leg individually.

Trampoline Jumps:

  • Description: Using a trampoline, gymnasts perform various types of jumps, including those with rotations or tucks.
  • Benefits: They help develop jump power and air control. The trampoline also allows for practicing more complex landings with a lower risk of injury.

Squat Jump:

  • Description: Starting from a squat position, the gymnast performs an explosive jump, landing back in a squat position.
  • Benefits: Improves explosive leg strength and reactivity. It’s an excellent exercise for increasing jump power and the ability to absorb impact on landing.

Agility Work:

  • Description: Includes exercises like running with direction changes, lateral jumps, and other movements requiring quickness and agility.
  • Benefits: These exercises improve speed, agility, and coordination, all key elements for gymnastics, especially in preparation for complex and fast-paced routines


Acrobatic Skills:

  • Advanced Handstand Development: Focus on advanced aspects of the handstand, such as prolonged holding, controlled entry and exit, and improving body alignment to prepare for more advanced movements.
  • Refining the Cartwheel: Work on the fluidity and precision of the cartwheel, aiming for a more controlled and less segmented movement.
  • Introduction to Round-Off: If not already covered, this is a good skill to introduce, as the round-off is a step towards more complex acrobatics. Focus on the correct technique, including the landing phase.
  • Back Flexibility and Bridge Work: Exercises like bridges and backbends not only improve back flexibility but also prepare gymnasts for acrobatic movements that require a flexible back.
  • Strength Exercises for Acrobatics: Introduce specific exercises to build the strength needed to support more advanced acrobatic movements, such as back handsprings and somersaults.
Round-Off:

  • Execution: The round-off begins with a short run-up. The gymnast performs a forward leap, placing one hand at a time on the ground (as in a cartwheel) but, unlike the cartwheel, the legs are joined in the air while the body turns 180 degrees. The movement ends with landing on both feet simultaneously, almost as if concluding a back jump.
  • Key Points: Correct hand placement, coordinating the rotation, and landing with the legs together are essential for an effective round-off.

Bridges:

    • Execution: Start lying on your back with knees bent and feet planted on the ground, close to your seat. Place your hands on the ground near your ears with your fingers pointed towards your shoulders. Push with your hands and feet to lift your hips and arch your back, forming a bridge. Hold the position for a few seconds before returning to the starting position.
    • Key Points: It’s important to maintain an even weight distribution between hands and feet, and push through the shoulders for a better chest opening.

Backbends:

    • Execution: Start standing with feet slightly apart. Slowly bend your knees while leaning your head and back backward, reaching the floor with your hands. Continue bending back to form a bridge or to a comfortable level. To return, bend your knees and use your core and leg muscles to stand up straight again.
    • Key Points: Maintain a smooth and controlled movement, use core muscles to support the back, and ensure to warm up adequately before performing this exercise.


Advanced Dance Elements:

  • Incorporating dance movements such as pirouettes, chaînés (series of rapid turns), and ballet steps to add grace and fluidity to routines.
  • Working on musicality, expressiveness, and coordination by seamlessly integrating these dance movements with acrobatic elements.


In artistic gymnastics, integrating elements like pirouettes, chaînés, and ballet steps, commonly found in ballet, adds grace and fluidity to routines.

This integration is particularly beneficial for female gymnasts, enhancing their routines with an artistic touch that becomes increasingly important at higher levels.

Pirouettes

  • Execution: A pirouette is a complete turn on one foot. The gymnast starts in a stable position, raises one foot positions it in passé (the foot near the knee of the other leg), and then rotates using the strength of the supporting foot. The body must remain upright and centered during the rotation.
  • Benefits: Improves balance, coordination, and body control. This skill also helps develop fluidity in movements.

Chaînés (Series of Rapid Turns)

  • Execution: Chaînés are a series of rapid turns, performed one after the other. The gymnast moves forward, with arms in an open position, and legs alternating rapidly between an extended and bent position as the body turns.
  • Benefits: Develop agility, control, and coordination. They are also useful for building endurance and improving the sense of rhythm.

Ballet Steps

  • Execution: Ballet steps can range from simple basic movements to more complex steps. For Level 2 gymnasts, basic steps like arabesques, attitudes, or balancés can be introduced.
  • Benefits: These steps help develop grace, posture, and expressiveness in movement, as well as improve leg flexibility and strength.


How much training is required for Level 2 gymnasts?


3-5 Hours per Week:

  • On average, you should aim to dedicate between 3 and 5 hours per week to training. This time should be evenly distributed across different days to avoid overloading and ensure adequate recovery.

Balance Between Learning and Practice:

  • During each training session, balance your time between learning new skills and practicing those you already know. Make sure to allocate time to both technique and overall physical conditioning.


Final Thoughts

Try floor exercises in your living room.

Practice balance on a narrow strip of floor, like a beam.

Use home gym equipment to mimic bar and vault moves.

There’s a lot you can achieve in your own space.

Personally, I’ve found that adding gymnastics to my home routine has made a huge difference.

It’s easier, more convenient, and I’ve noticed steady progress.

Recommended
Categories
Advanced Workouts BODYWEIGHT EXERCISES

Calisthenics Progression Guide: Mastering Skills and Gradual Advancement

Starting with the basics, anyone can kick off their calisthenics journey.

But let’s be real, as you level up, things get serious.

It’s all about pushing your physical limits, blending strength, agility, and coordination in some seriously cool ways.

This guide will walk you through calisthenics step by step, introducing more complex skills as you advance in this awesome discipline.


From Beginner to Pro: Introduction to Calisthenics

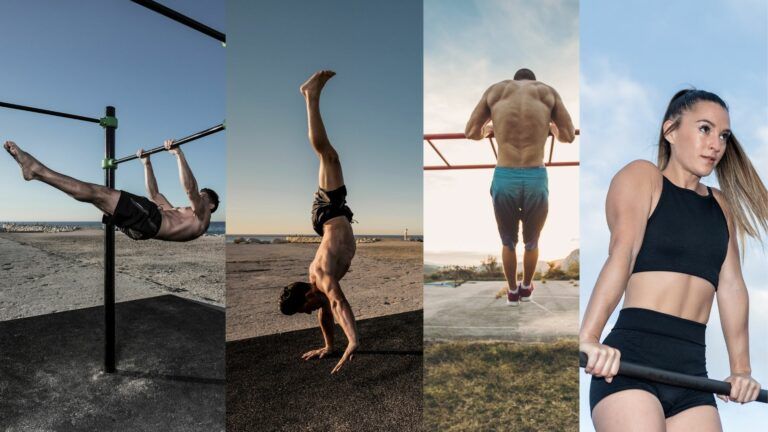
As you dive deeper into calisthenics, the exercises become exponentially more challenging.

Take the first one-arm pull-up, for example—it’s a true test of your strength and technique.

Pull-Up-Exercise

Moves like the muscle-up aren’t just about brute strength; they demand precise muscle coordination and control.

Every athlete, no matter their level, hits plateaus or gets overwhelmed by tricky techniques.

But pushing through these obstacles?

That’s where the real satisfaction and growth happen.

Personally, I’ve hit my fair share of plateaus, and trust me, breaking through them feels incredible.

Besides the one-arm pull-up, there are other movements that really test your strength, endurance, and technique.

The Planche, where you suspend your body using just your hands, requires incredible core strength and total control.

Planche-Exercise

The Front Lever, holding your body horizontally with support only from your hands, tests both arm and core strength equally.

Front-Lever-Exercise

And then there’s the one-arm handstand, demanding exceptional strength along with extreme balance and coordination.

These are just a few examples, but trust me, every step forward in calisthenics brings new challenges and peaks to conquer.

Handstand-Exercise


The Benefits of an Advanced Calisthenics Workout Routine

Benefits-Advanced-Calisthenics-Exercises

Advanced calisthenics exercises are like the VIP section of bodyweight training.

Sure, the general benefits of calisthenics are well-known, but diving into advanced routines?

That’s where you unlock some seriously targeted advantages.

Selective Muscle Strengthening: Imagine nailing moves like the planche, front lever, or human flag. These exercises hit specific muscle groups that basic routines often overlook, sculpting a more defined and powerful physique.

Extended Muscle Endurance:

Advanced calisthenics pushes your muscles to last longer, making these exercises perfect for boosting your stamina and resilience.

Balance and Proprioception: Perfecting a handstand push-up or a one-arm pull-up isn’t just for show; it seriously enhances your balance and body awareness in space.

Dynamic Flexibility: The complex movements challenge your joints and tendons, pushing your flexibility to new, dynamic levels beyond what static stretches offer.

Inter-Muscular Coordination: These exercises demand perfect harmony between different muscle groups, refining your overall body coordination and making your movements more fluid and efficient.

Posture Improvement: Advanced calisthenics helps correct muscle imbalances and heightens your postural awareness, leading to a better, more confident stance.

Mental Strengthening: The difficulty and complexity of these exercises require unwavering determination, focus, and mental toughness, fortifying both your body and mind.

Honestly, the mental gains are just as impressive as the physical ones.

It’s like training your brain while sculpting your body!


Utilizing Calisthenics for Muscle Mass Development

Calisthenics isn’t just about reps—it’s about progression.

But how does a progression system actually help in building muscle?

Progressions in calisthenics focus on ramping up the intensity and complexity of an exercise rather than just adding more reps.

For instance, once you’ve mastered a set number of standard push-ups, you don’t just crank up the repetitions.

Instead, you move to a more advanced variation like the archer push-up or the one-arm push-up.

This approach keeps your body guessing, creating a constant stimulus for muscle growth.

Each progression level introduces a new challenge, requiring more muscle activation and fiber recruitment.

Your body responds by adapting and growing stronger.

This increasing muscle resistance, combined with proper technique, ensures every muscle fiber is engaged, maximizing gains in mass and strength.

Plus, working through progressions builds a solid foundation, reducing the risk of injuries and ensuring balanced muscle growth.

It’s a smarter way to train, not just harder.

Trust me, your muscles will thank you!


Calisthenics Summary
In calisthenics, progressions aren’t just a way to make exercises harder—they’re your roadmap to balanced and safe growth.
Skipping progressions and jumping into advanced moves?

That’s a fast track to injuries.

But by following a structured progression, you gradually strengthen not just the major muscles but also the smaller, often overlooked ones, ensuring even and harmonious growth.
Think of it as building a house—you need a strong foundation before you can add the fancy stuff on top.


Combining Calisthenics with Other Training Methods

Advanced calisthenics is already a powerhouse, but you can amp up its effectiveness by mixing in weights and cardio.

Weight Lifting:

Calisthenics builds relative strength and sharpens motor skills.

Adding weight lifting can help you gain extra strength and muscle mass that bodyweight exercises alone might miss.

Incorporating barbells and dumbbells bridges any gaps in muscle strength, balancing functional and raw power.

Cardio:

Calisthenics naturally gives you a great cardio workout.

But adding specific cardio sessions like running, cycling, swimming, or jump rope can take your endurance and aerobic capacity to the next level.

This not only supports more intense calisthenics sessions but also aids in recovery and helps keep body fat in check.

Personally, I love adding a quick jump rope session after my calisthenics workout—it’s a game changer for my stamina!


Useful Tools and Accessories

Parallettes:

These small elevated supports are perfect for exercises like L-sits, handstands, and varied push-ups.

They provide greater elevation, allowing for a wider range of motion and targeting specific muscle groups.

Gymnastics Rings:

Flexible and dynamic, rings enable a wide range of exercises, from basic pull-ups to advanced moves like ring muscle-ups or planches.

The instability of the rings adds an extra layer of difficulty, enhancing core strength and overall stability.

Resistance Bands:

These elastic bands are highly versatile and can be used to add resistance or assistance in various exercises.

For example, they can help with pull-ups or make push-ups more challenging.

Pull-Up Bars:

Essential for calisthenics practitioners, pull-up bars are perfect for exercises like pull-ups, chin-ups, and muscle-ups.

There are wall-mounted, ceiling-mounted, or free-standing options based on your needs and available space.

Stability Bars:

Excellent for balance exercises and strengthening stabilizer muscles.

Used with movements like squats or lunges, they can significantly intensify your training.

Having the right tools can make your workout more effective and fun.

Don’t hesitate to invest in quality equipment!


Types of Progressions

Within Calisthenics, progressions are not just a simple list of exercises to perform sequentially.

They represent a strategic pathway outlined to develop specific skills and competencies.

These generally fall into the following categories:

Strength Progressions:

These focus on muscle strengthening and endurance.

A classic example involves push-ups.

A beginner might start with knee push-ups, which reduce the amount of body weight to lift.

Once mastered, they can progress to standard push-ups and subsequently advance to more challenging variations like one-arm push-ups.

Balance Progressions:

Balance is crucial in Calisthenics, especially in exercises that require supporting the body in unusual positions.

A typical example is the handstand or vertical position.

Athletes might begin by using a wall for support and gradually reduce dependency on it, working toward a fully independent handstand.

Flexibility Progressions:

While Calisthenics is often associated with strength and balance, flexibility plays a crucial role in many advanced techniques.

These progressions could start with basic stretching and evolve into specific exercises aimed at achieving goals such as a full split, contributing to a greater range of motion and injury prevention.

Integrating these progressions ensures a well-rounded approach to your training.


Fundamental Exercises and Their Progressions

Calisthenics, like any sports discipline, has some foundational exercises that, once mastered, open the door to more advanced and technically demanding variations.

Here’s an overview of basic movements and their progressions:

Push-ups:

This exercise, targeting the chest, shoulders, and triceps, offers multiple variations for all levels.

You start with knee push-ups, ideal for beginners.

Once you gain confidence, you move on to standard push-ups.

Diamond push-ups then challenge triceps and core strength.

Finally, for the daring, one-arm push-ups are a true test of balance and strength.

Pull-ups:

Primarily targeting the back and biceps.

You begin with assisted pull-ups, using bands or a specialized machine.

Next, you transition to standard pull-ups, lifting your entire body weight.

Chin-ups put greater emphasis on the biceps.

Finally, muscle-ups combine a pull-up and a push-up, requiring significant strength and coordination.

Squats:

Essential for strengthening the legs and glutes.

Standard squats are the foundation, focusing on proper technique and posture.

Bulgarian split squats introduce an element of instability, working one leg at a time.

Pistol squats, on the other hand, combine strength, balance, and flexibility in a complex single movement.

Dips:

Excellent for triceps, chest, and front deltoids.

Bench dips are a good starting point, allowing you to adjust the difficulty by varying leg extension.

Subsequently, parallel bar dips require greater core strength.

Finally, ring dips are the advanced version, with a particular focus on instability and muscle control.

Mastering these fundamentals is key to progressing in calisthenics.

Each step builds on the previous one, creating a solid foundation for more advanced moves.


Planks are More Than Just a Basic Exercise for Beginners

The plank might look simple, but it’s a powerful move for strengthening your core and improving your posture.

Plus, it lays a solid foundation for more advanced exercises.

Don’t think of planks as just a beginner’s exercise.

With various modifications and progressions, planks can challenge even advanced athletes.

Beyond the traditional front plank, you can try side planks, planks with limb lifts, and many other variations.

What makes planks so effective is their ability to engage a wide range of muscles simultaneously, giving you a thorough and comprehensive workout.

Planks not only build core strength but also improve muscle endurance, stability, and coordination.

By regularly incorporating planks and their variations into your calisthenics routine, you’ll create a strong base for further progressions.

This will boost your overall strength and enhance your athletic performance.

I remember the first time I tried a side plank—it was a struggle, but sticking with it made a huge difference in my stability.


Complete Guide to Advanced Calisthenics Exercises


CHEST – Push-Up Variations:

Exercise Description
One-arm push-up Push-up with one hand behind your back
Pseudo planche push-ups Hands near hips, shifting weight forward
Archer push-ups One arm extends, the other does the push-up
Decline one-arm push-up Feet elevated, one-arm push-up
Typewriter push-ups Lower body, move side to side at the bottom
Diamond planche push-ups Hands form a diamond, shift weight forward

BACK – Pull-up Variations:

Exercise Description
One-arm pull-up Pull-up with one arm
Archer pull-ups One arm pulls, the other stays extended
Muscle-ups Explosive pull-up transitioning to a dip
L-sit pull-ups Pull-up with legs in an “L” shape
Wide-grip pull-ups Pull-up with hands wider than shoulders
Commando pull-ups Pull-up facing perpendicular to the bar

SHOULDERS – Handstand & Planche Variations:

Exercise Description
Handstand push-ups Push-ups in a handstand position
Piked push-ups Push-up with hips piked, feet on the ground
90-degree push-ups Handstand to planche push-up
Tuck planche push-ups Push-ups in a tuck planche position
Tuck planche Beginner planche with legs tucked
Advanced tuck planche Flat back, legs tucked
Straddle planche Legs wide, body parallel to the ground
Full planche Body parallel, legs together and straight

QUADRICEPS, GLUTES & HAMSTRINGS – Squat Variations:

Exercise Description
Pistol squats Single-leg squat, one leg extended forward
Jumping pistol squats Dynamic pistol squat with a jump
Skater squats (curtsy squats) Single-leg squat, non-supporting leg diagonally behind
Elevated pistol squats Pistol squat with non-supporting foot elevated behind
Deep step-ups Step-ups to a higher elevation
Sissy squats Quad-dominant squat with heels lifting off the ground
Advanced shrimp squats Single-leg squat with the non-supporting leg behind

CALVES:

Exercise Description
One-leg calf raises Single-leg exercise to target calf muscles
Tuck jumps Explosive plyometric exercise
Depth jumps Plyometric exercise for power and explosiveness

TRICEPS – Dip Variations:

Exercise Description
Impossible Dips Challenging dip emphasizing triceps and shoulders
Deep ring dips Dips on rings for a deeper range of motion
One-arm dips Dip using only one arm
Korean dips Dips with body in front of the bars

BICEPS – Curl Variations (Using Bars or Rings):

Exercise Description
Bodyweight bicep curls (on rings) Curls using bodyweight with rings
Pelican curls (full arm extension on rings) Intense bicep and forearm workout using rings
One-arm bodyweight bicep curl (using a bar) Single-arm curl using a bar

FOREARMS AND GRIP:

Exercise Description
One arm dead hangs Strengthen grip and forearm by hanging from a bar
Fat bar pull-ups Enhance grip strength using a thicker bar
Finger pull-ups Advanced pull-ups using fewer fingers
False grip training (on bar or rings) Strengthen grip and wrist for moves like muscle-ups

HIP FLEXORS AND LOWER CORE:

Exercise Description
Hanging Leg Raises (with extended legs) Raise legs while hanging from a bar
Windshield Wipers Core exercise rotating legs side to side
Skin the Cats Full-body movement for shoulder mobility, core, and hip flexors

ABS/CORE (Lever Variations, Flag Variations):

Exercise Description
Front Lever Raises Transition from hanging to front lever position
Front Lever Holds Static hold with body parallel to the ground
Back Lever Holds Static hold with body facing downwards
Dragon Flags Advanced core exercise
V-sits Static hold targeting abs and hip flexors
L-sit to Planche Transition from L-sit to planche
Human Flag Static hold with body vertical on a pole
Straddle Flag Variation of human flag with legs spread apart

GLUTES AND HAMSTRINGS – Bridge Variations:

Exercise Description
Bridge Push-ups Bridge with a pushing motion
One-leg Bridges Bridge emphasizing one side at a time
Elevated Bridges Bridge with feet on an elevated surface

LOWER BACK – Back Extensions & Variations:

Exercise Description
Superman Holds Isometric exercise mimicking Superman’s flying position
Reverse Hyperextensions Lower back and glutes exercise using an elevated surface
Arch Body Holds Isometric hold for the entire posterior chain

MOBILITY AND FLEXIBILITY – Advanced Stretching:

Exercise Description
Pancake Stretch Targets adductors, hamstrings, and lower back
Front Splits Deep stretch for hamstrings and hip flexors
Middle Splits Deep stretch for inner thigh muscles
Bridge Stretch with Rotation Enhances thoracic mobility and stretches the anterior chain


A Step-by-Step Guide to Calisthenics Progressions

Here are some progression exercises for each of the advanced movements I mentioned in the previous section:

One-arm push-up Progression:

Exercise Sets x Reps/Duration Est. Time
Standard push-ups 3×12-15 8-12 months
Wide push-ups 3×10-12
Diamond push-ups 3×8-10
Archer push-ups 3×5-8/arm
Assisted one-arm push-ups 3×5/arm

Pseudo planche push-ups Progression:

Exercise Sets x Reps/Duration Est. Time
Standard push-ups 3×12-15 5-8 months
Diamond push-ups 3×10-12
Planche leans 3×20-30s
Feet-elevated pseudo-planche push-ups 3×8-10

Archer push-ups Progression:

Exercise Sets x Reps/Duration Est. Time
Standard push-ups 3×12-15 3-5 months
Wide push-ups 3×10-12
Side-to-side push-ups 3×8-10

Decline one-arm push-up Progression:

Exercise Sets x Reps/Duration Est. Time
Decline push-ups 3×12-15 10-14 months
Decline diamond push-ups 3×8-10
Decline archer push-ups 3×5-8/arm
Assisted decline one-arm push-ups 3×5/arm

Typewriter push-ups Progression:

Exercise Sets x Reps/Duration Est. Time
Standard push-ups 3×12-15 4-6 mo.
Wide push-ups 3×10-12
Side-to-side push-ups 3×8-10

Diamond planche push-ups Progression:

Exercise Sets x Reps/Duration Est. Time
Diamond push-ups 3×12-15 6-9 mo.
Planche leans 3×20-30s
Pseudo planche push-ups 3×8-10
Feet-elevated pseudo-planche push-ups 3×6-8

One-arm pull-up Progression:

Exercise Sets x Reps/Duration Est. Time
Standard pull-ups 3×8-12 12-18 mo.
Assisted one-arm static holds 3×10-20s/arm
Negative one-arm pull-ups 3×3-5/arm
Assisted one-arm pull-ups 3×3-5/arm

Archer pull-ups Progression:

Exercise Sets x Reps/Duration Est. Time
Standard pull-ups 3×8-12 6-9 mo.
Side-to-side pull-ups 3×5-8
Wide pull-ups 3×5-8

Muscle-ups Progression:

Exercise Sets x Reps/Duration Est. Time
Standard pull-ups 3×8-12 9-12 mo.
Deep dips 3×8-12
Explosive pull-ups 3×5-8
Assisted muscle-ups 3×3-5

L-sit pull-ups Progression:

Exercise Sets x Reps/Duration Est. Time
Knee raise pull-ups 3×8-10 5-7 mo.
L-sit holds (floor or bars) 3×15-30s
Half L-sit pull-ups 3×6-8

Wide-grip pull-ups Progression:

Exercise Sets x Reps/Duration Est. Time
Standard pull-ups 3×8-12 4-6 mo.
Wide grip hangs 3×20-30s

Commando pull-ups Progression:

Exercise Sets x Reps/Duration Est. Time
Standard pull-ups 3×8-12 5-7 mo.
Alternating grip pull-ups 3×6-8
Side-to-side pull-ups 3×6-8

Handstand push-ups Progression:

Exercise Sets x Reps/Duration Est. Time
Piked push-ups 3×8-12 6-9 mo.
Wall-assisted handstand hold 3×20-40s
Wall-assisted handstand push-ups 3×4-8
Free-standing handstand push-ups 3×3-6

Piked push-ups Progression:

Exercise Sets x Reps/Duration Est. Time
Standard push-ups 3×12-15 3-5 mo.
Decline push-ups 3×8-12
Elevated piked push-ups 3×6-10

90-degree push-ups Progression:

Exercise Sets x Reps/Duration Est. Time
Piked push-ups 3×8-12 9-12 mo.
Handstand push-ups 3×4-8
90-degree handstand hold 3×10-20s

Tuck planche push-ups Progression:

Exercise Sets x Reps/Duration Est. Time
Frog stand 3×20-40s 7-9 mo.
Tuck planche hold 3×10-20s
Tuck planche push-ups 3×3-6

Tuck planche Progression:

Exercise Sets x Reps/Duration Est. Time
Frog stand 3×20-40s 6-8 mo.
Tuck planche hold 3×10-20s

Advanced tuck planche Progression:

Exercise Sets x Reps/Duration Est. Time
Tuck planche 3×20-30s 8-12 mo.
Advanced tuck planche hold 3×10-20s

Straddle planche Progression:

Exercise Sets x Reps/Duration Est. Time
Advanced tuck planche 3×20-30s 12-18 mo.
Straddle planche hold 3×8-15s

Full planche Progression:

Exercise Sets x Reps/Duration Est. Time
Straddle planche 3×10-20s 18-24+ mo.
Full planche hold 3×5-10s

Pistol Squats Progression:

Exercise Sets x Reps/Duration Est. Time
Bodyweight squats 3×15-20 1-2 mo.
Assisted pistol squats (using a pole or wall) 3×8-12
Box pistol squats (to a bench or chair) 3×8-12
Pistol squats 3×5-10

Jumping Pistol Squats Progression:

Exercise Sets x Reps/Duration Est. Time
Pistol squats 3×5-10 3-6 mo.
Box jumps 3×8-12
Jumping pistol squats 3×5-8

Skater Squats (Curtsy Squats) Progression:

Exercise Sets x Reps/Duration Est. Time
Lunges 3×10-15 each leg 2-4 mo.
Bulgarian split squats 3×8-12 each leg
Skater squats 3×8-12 each leg

Elevated Pistol Squats Progression:

Exercise Sets x Reps/Duration Est. Time
Pistol squats 3×5-10 3-6 mo.
Elevated bodyweight squats 3×8-12
Elevated pistol squats 3×5-8

Deep Step-Ups Progression:

Exercise Sets x Reps/Duration Est. Time
Step-ups (knee height) 3×10-15 each leg 2-4 mo.
Deep step-ups (hip height) 3×8-12 each leg

Sissy Squats Progression 

Exercise Sets x Reps/Duration Est. Time
Bodyweight squats with heel raise 3×10-15 2-3 mo.
Assisted sissy squats (using a pole) 3×8-12
Sissy squats 3×5-10

Advanced Shrimp Squats Progression:

Exercise Sets x Reps/Duration Est. Time
Shrimp squats (knee touch) 3×8-12 each leg 3-6 mo.
Advanced shrimp squats (knee to floor) 3×5-8 each leg

One-leg Calf Raises Progression:

Exercise Sets x Reps/Duration Est. Time
Double leg calf raises (flat ground) 3×20-30 1-2 mo.
Double leg calf raises (on the elevated surface) 3×15-25
One-leg calf raises (flat ground) 3×10-20
One-leg calf raises (on an elevated surface) 3×10-15

Tuck Jumps Progression:

Exercise Sets x Reps/Duration Est. Time
Bodyweight squats 3×15-20 1-2 mo.
Jump squats 3×10-15
High knees (dynamic) 3×20-30 seconds
Tuck jumps 3×8-12

Depth Jumps Progression:

Exercise Sets x Reps/Duration Est. Time
Box jumps (medium height) 3×8-12 2-4 mo.
Box jumps (higher height) 3×6-10
Controlled depth drops (stepping off a box and landing softly) 3×6-10
Depth jumps (jumping immediately upon landing) 3×5-8

Impossible Dips Progression:

Exercise Sets x Reps Est. Time
Parallel bar dips 3×8-12 1-2 mo.
Straight bar dips 3×6-10
Archer dips (on parallel bars) 3×5-8
Impossible dips (using assistance) 3×3-6
Impossible dips 3×3-5

Deep Ring Dips Progression:

Exercise Sets x Reps Est. Time
Parallel bar dips 3×8-12 1-2 mo.
Ring dips with stable rings 3×6-10
Ring dips with slight turning out at the top 3×6-8
Deep ring dips (using assistance if needed) 3×4-6

One-arm Dips Progression:

Exercise Sets x Reps Est. Time
Parallel bar dips 3×10-15 1-2 mo.
Weighted dips 3×6-10
Assisted one-arm dips (using a band or light support) 3×4-6
One-arm dips 3×2-4

Korean Dips Progression:

Exercise Sets x Reps Est. Time
Parallel bar dips 3×8-12 1-2 mo.
Straight bar dips (with chest facing the bar) 3×6-10
Korean dips with feet touching the ground 3×5-8
Korean dips (full range without feet support) 3×4-6

Bodyweight Bicep Curls (on rings) Progression:

Exercise Sets x Reps Est. Time
Australian pull-ups 3×8-12 1-2 mo.
Close-grip Australian pull-ups 3×6-10
Bicep curls using TRX or low bar 3×6-8
Bodyweight bicep curls (on rings) 3×5-8

Pelican Curls (full arm extension on rings) Progression:

Exercise Sets x Reps Est. Time
Ring push-ups 3×8-12 1-2 mo.
Skater push-ups on rings 3×6-10
Negative pelican curls 3×3-5 (slow descent)
Pelican curls (full arm extension) 3×3-5

One-arm Bodyweight Bicep Curl (using a bar) Progression:

Exercise Sets x Reps Est. Time
Bodyweight bicep curls (two arms on a bar) 3×8-10 1-2 mo.
Assisted one-arm bicep curls (using the off-hand as little as possible) 3×5-8 per arm
One-arm bodyweight bicep curl negatives 3×3-5 per arm
One-arm bodyweight bicep curl 2×3-4 per arm

One-arm Dead Hangs Progression:

Exercise Sets x Time Est. Time
Two-arm dead hangs 3×30-45 seconds 1 mo.
Assisted one-arm dead hangs (using a band or off-hand) 3×20-30 seconds per arm 1-2 mo.
One-arm dead hangs 3×10-20 seconds per arm

Fat Bar Pull-ups Progression:

Exercise Sets x Reps Est. Time
Standard pull-ups 3×8-12 1-2 mo.
Pull-ups holding a towel (to increase grip difficulty) 3×6-8
Fat bar pull-ups 3×5-8

Finger Pull-ups Progression:

Exercise Sets x Reps Est. Time
Standard pull-ups 3×8-12 1-2 mo.
Pull-ups with fewer fingers (e.g., 4 fingers) 3×6-8 1 mo.
Pull-ups with even fewer fingers (e.g., 3 fingers) 3×5-7 1 mo.
Finger pull-ups (using only 2 fingers) 3×3-5

False Grip Training (on bar or rings) Progression:

Exercise Sets x Time/Reps Est. Time
Standard pull-ups 3×8-12 1 mo.
False grip hangs 3×20-30 seconds 1 mo.
False grip pull-ups 3×5-8 1-2 mo.
Advanced movements using false grip (e.g., muscle-ups) Progress as appropriate Varies

Hanging Leg Raises (with extended legs) Progressions:

Exercise Prog. Sets x Reps Est. Time
Knee Raises (hanging) Init. 3×10-15 1-2 mo.
L-sit Holds (hanging) Int. 3×10-20 seconds 1-2 mo.
Hanging Leg Raises (legs bent at 90°) Adv. 3×8-12 1-2 mo.
Hanging Leg Raises (with extended legs) Mast. 3×8-12

Windshield Wipers Progressions:

Exercise Prog. Sets x Reps Est. Time
Leg side swings (hanging) Init. 3×8-12 per side 1-2 mo.
Half Windshield Wipers (legs at 90°) Int. 3×8-12 2-3 mo.
Windshield Wipers Mast. 3×6-10

Skin the Cats Progressions:

Exercise Prog. Sets x Reps Est. Time
Tuck Front Lever Raises Init. 3×5-8 2-3 mo.
Tuck Back Lever Raises Int. 3×5-8 2-3 mo.
Skin the Cats Mast. 3×3-6

Front Lever Raises Progressions:

Exercise Prog. Sets x Reps Est. Time
Tuck Front Lever Raises Init. 3×5-8 2-3 mo.
Adv. Tuck Front Lever Raises Int. 3×5-8 2-3 mo.
Straddle Front Lever Raises Adv. 3×3-6 3-4 mo.
Front Lever Raises Mast. 3×3-6


Front Lever Holds Progressions:

Exercise Prog. Sets x Time Est. Time
Tuck Front Lever Holds Init. 3×10-20 seconds 2-3 mo.
Advanced Tuck Front Lever Holds Int. 3×15-25 seconds 2-3 mo.
Straddle Front Lever Holds Adv. 3×10-20 seconds 3-4 mo.
Front Lever Holds Mast. 3×5-15 seconds

Back Lever Holds Progressions:

Exercise Prog. Sets x Time Est. Time
Tuck Back Lever Holds Init. 3×10-20 seconds 2-3 mo.
Advanced Tuck Back Lever Holds Int. 3×15-25 seconds 2-3 mo.
Straddle Back Lever Holds Adv. 3×10-20 seconds 3-4 mo.
Back Lever Holds Mast. 3×5-15 seconds

Dragon Flags Progressions:

Exercise Prog. Sets x Reps Est. Time
Leg Raises (on the floor) Init. 3×8-12 1-2 mo.
Bent-leg Dragon Flags Int. 3×5-8 2-3 mo.
Dragon Flags Mast. 3×3-6

V-sits Progressions:

Exercise Prog. Sets x Time Est. Time
L-sits Init. 3×10-20 seconds 2-3 mo.
Tuck V-sits Int. 3×10-20 seconds 2-3 mo.
V-sits Mast. 3×5-15 seconds

L-sit to Planche Progressions:

Exercise Prog. Sets x Reps Est. Time
L-sits Init. 3×10-20 seconds 2-3 mo.
Tuck Planche Int. 3×10-20 seconds 2-3 mo.
L-sit to Planche Mast. 3×5-8

Human Flag Progressions:

Exercise Prog. Sets x Time Est. Time
Flagpole holds (vertical position) Init. 3×10-20 seconds 3-4 mo.
Straddle Human Flag Int. 3×5-10 seconds 4-6 mo.
Human Flag Mast. 3×3-8 seconds

Straddle Flag Progressions:

Exercise Prog. Sets x Time Est. Time
Side Planks Init. 3×20-40 seconds 1-2 mo.
Elevated Side Planks Int. 3×20-40 seconds 1-2 mo.
Straddle Flag Mast. 3×3-8 seconds

Bridge Push-Ups Progressions:

Exercise Prog. Sets x Reps Est. Time
Glute Bridges Init. 3×10-15 1-2 mo.
Half Bridge Push-Ups (with support) Int. 3×5-10 2-3 mo.
Bridge Push-Ups Mast. 3×5-10

One-leg Bridges Progressions:

Exercise Prog. Sets x Reps Est. Time
Glute Bridges Init. 3×10-15 1-2 mo.
Bridge Hold (with two legs) Int. 3×10-20 seconds 2-3 mo.
One-leg Bridges Mast. 3×5-10 per leg

Elevated Bridges Progressions:

Exercise Prog. Sets x Reps Est. Time
Glute Bridges Init. 3×10-15 1-2 mo.
Bridge Push-Ups Int. 3×5-10 2-3 mo.
Elevated Bridges Mast. 3×5-10

Superman Holds Progressions:

Exercise Prog. Sets x Time Est. Time
Prone Cobra Pose Init. 3×20-30 seconds 1-2 mo.
Prone Back Extension (hands-on temples) Int. 3×10-15 2-3 mo.
Superman Holds Mast. 3×20-40 seconds

Reverse Hyperextensions Progressions:

Exercise Prog. Sets x Reps Est. Time
Leg Lifts (lying face down) Init. 3×10-15 1-2 mo.
Elevated Leg Lifts (using a bench) Int. 3×8-12 2-3 mo.
Reverse hypers. Mast. 3×10-15

Arch Body Holds Progressions:

Exercise Prog. Sets x Time Est. Time
Arch Body Rocks Init. 3×10-15 1-2 mo.
Extended Arch Body Hold (arms & legs elevated slightly) Int. 3×15-30 seconds 2-3 mo.
Arch Body Holds Mast. 3×20-50 seconds


Conclusion

Every progression and challenge overcome represents a step forward in both physical strength and mental discipline—something I’ve grown to appreciate more with each workout.

The art of body movement is a continuous journey of discovery, adaptation, and growth.

What I’ve realized is that it’s not only about building strength but also becoming more attuned to how my body moves and understanding its true capabilities.

No matter where you start or where you’re going, the real beauty of calisthenics lies in the journey itself.

Each new challenge offers valuable insights, and for me, it’s the lessons in patience, persistence, and self-control that leave the biggest impact.

FAQs

Does proper breathing improve performance in progressions?

Breathing is a crucial element for improving performance in calisthenics progressions. During the execution of complex and advanced movements, the body requires more oxygen to fuel the muscles and provide energy.

Can I quickly move on to more advanced exercises if I feel strong?

Even if you feel strong, increasing the difficulty too quickly can lead to overtraining or injuries. It’s essential to give your body time to adapt.

How important is mobility in calisthenics?

Mobility is crucial. Focusing solely on strength without developing good mobility can lead to a limited range of motion and potential muscle imbalances.

Can I combine calisthenics with other forms of training?

Absolutely. Incorporating calisthenics with other training methods, like weightlifting or cardio, can provide a well-rounded fitness routine and optimize results.

Recommended