Categories
BODYWEIGHT EXERCISES Training Insights

Is it bad if one tricep grows faster than the other from bodyweight dips?

You train consistently.

You control your form, respect the angles, stick to proper tempo.

You’ve learned to actually feel your triceps working—no mindless pushing.

And yet… something feels off.

You catch your reflection and realize one arm looks fuller, stronger, more defined.

The other one?

Still playing catch-up.

No, it’s not a genetic glitch.

It’s a common neuromuscular imbalance.

Even in movements that look symmetrical, the body finds sneaky shortcuts.

This article breaks down why it happens, how to spot it, and most importantly, how to fix it.


We’re all asymmetrical (even if we like to pretend we’re not)

We're-built-unevenly-by-nature

You have a dominant arm.

Everyone does.

It’s the one you write with, open doors with, throw pillows with when looking for the remote.

That arm just has more coordination, more control, and – spoiler alert – usually more strength.

The problem?

When you’re doing an exercise that seems balanced, like bodyweight dips, that arm tends to do the dirty work.

You’re not splitting the effort 50/50, even if it feels like you are.

It’s more like 60/40, or worse.

The dominant arm takes charge, while the other watches from behind like a clueless intern.

The result:

  • One triceps grows
  • The other takes a vacation


But aren’t dips supposed to be a “balanced” exercise?

In theory, yes.

In practice… it depends.

Your body is great at compensating.

Maybe you dip slightly lower on one side.

Maybe your left shoulder has more mobility than your right.

Or maybe, when you’re tired, your torso rotates just a bit.

These are barely visible to the naked eye, but they add up when you repeat them hundreds of times each week.

Even if you film yourself with your phone, you might not catch it at first.

But your mirror, or worse, your tight t-shirt, will.


When Biomechanics Shift the Load (Without Your Permission)

Every compound movement – and dips are one – involves multiple muscles:

  • triceps
  • front delts
  • pecs
  • scapular stabilizers

If one of them slacks, another picks up the load.

Here’s where your dominant arm steps in.

It compensates, pushes, adjusts, stabilizes.

Without even being asked.

But it does so at the cost of muscular balance.

And that’s where asymmetry is born: not from a single rep, but from chronically repeating a tiny mistake.


What happens if you ignore the problem?

A little asymmetry is totally normal.

But if you let it go on unnoticed, it can become annoying.

Here’s what might happen:

  • Visible differences between your triceps
  • Elbow pain or discomfort, especially on the weaker side
  • Loss of strength in bilateral pushing movements (bench, military press)
  • Compensatory overload on shoulders, scapulae, even lower back

And trust me: doing push-ups or overhead presses with one triceps more developed is like pushing a shopping cart with one stuck wheel.

You’ll still move forward… just not in a straight line.


How do you fix it? (without trashing your entire workout)

You don’t need to stop doing dips.

Actually, dips are awesome.

They torch the long head of the triceps (the one that pops on the beach) and add real size to your arm.

But if you want to fix unbalanced growth, here’s what you can do:

🔸 Slow it down
Perform dips with controlled tempo: 3 seconds down, 1 second pause, 2 seconds up.

🔸 Go unilateral
Add movements like single-arm overhead extensions or single-handle pushdowns.

🔸 Film your dips
A simple side or front view can reveal everything: tilts, rotations, weight distribution.

🔸 Start with the weaker side
Begin with the “smaller” arm and let the other only match its reps.

🔸 Activate, stretch, awaken
You might have tight shoulders, lazy scapulae, or inactive secondary muscles.


Should I train the weak side more? Or just better?

Million-dollar question.

Short answer: don’t overdo it. Be strategic.

Doubling the reps on the weaker side may seem logical, but often just causes fatigue or inflammation.

Instead, try this:

  • Focus on quality muscle activation on the weaker side
  • Keep volume similar on both sides, but always begin with the lagging one
  • Be patient: correcting asymmetry takes weeks, not days


It’s not weakness, it’s disconnection (and it can be reactivated)

Sometimes the “smaller” triceps isn’t actually weaker.

It’s just less neurologically active.

Your brain doesn’t “switch it on” well, maybe because it’s trusted the other arm for years.

This often happens when you have:

  • tight scapulae
  • neck tension
  • limited elbow rotation

All of these slow down neural signals, trigger compensations, and weaken the “neural highway” to the lazy side.

The good news?

You can rewire it.

But it takes focus. It takes repetition. It takes mindfulness.

During dips, lock your attention on the weaker side.

Visualize that triceps firing.

If needed, touch it between sets.

Talk to it. Engage it.

Want something concrete?

Here are 3 killer activations to do before dips:

🔥 Light single-arm band presses
🔥 Overhead triceps stretch holds
🔥 Slow, voluntary contractions without weight


When asymmetry comes from an old injury (and you don’t even know it)

Sometimes, the cause of asymmetry isn’t new.

It could be a shoulder sprain from years ago.

An inflamed elbow you shrugged off. Or just months spent using a mouse with the same arm.

The result?

Joint stiffness.

Reduced activation.

And a triceps that gets fewer signals even if it does the same exercises.

In these cases, you can:

  • Perform an active range-of-motion test (arm overhead, arm behind back)
  • Check for visible compensations (uneven shoulders, unstable scapulae)
  • Consult a physical therapist for a quick assessment, even online


What if the solution is… changing your grip?

Insider tip: hand position changes everything.

Hands turned too far forward recruit more pecs.

Hands slightly angled inward (neutral grip with thumbs up) activate the triceps more symmetrically.

You can also try ring dips – they force your body to stabilize and don’t allow unconscious favoritism between sides.

Sure, they’re harder.

But that’s exactly why… they train control, not just brute strength.

If your problem comes from always performing the same unbalanced pattern, changing your grip might reset the muscular chain.


How much does aesthetics really matter here?

I get it.

You noticed the asymmetry in the mirror.

And it probably annoyed you.

But let’s take a step back.

Your body is a work in progress.

Not a finished product to judge at 5:32 PM today.

A bigger triceps doesn’t mean you’re screwing up.

It means you’re training hard enough to notice the details.

And noticing the details is exactly what separates a mindful athlete from a beginner copying random Instagram routines.

Yes, work on the asymmetry.

But don’t let it steal the joy of training.


RELATED:》》Are Dips Superior to Push-ups?


Conclusion

Perfect symmetry?

A stage myth.

But functional balance?

That’s what really counts.

A bigger triceps won’t ruin your gains.

But ignoring an unbalanced motor pattern can slow you down, stall you, or hurt you.

Listen to your body.

Ask smart questions.

Slow down when needed. Isolate when it matters.

Then go back to your beloved dips with more control, more precision, more power.

Recommended
Categories
Advanced Workouts BODYWEIGHT EXERCISES

How come my abs are sore for three days after trying dragon flags for the first time?

You just had the brilliant idea of trying out one of the most ruthless core exercises ever invented in modern fitness history.

Dragon flags are no joke.

They’re a physical insult cleverly disguised as a “cool” Instagram move.

And the pain you’re feeling?

It’s just your body’s way of saying:
“Never do that again… or do it better.”


It’s not just an ab exercise. It’s a declaration of war on your core.

Are-Dragon-Flags-Really-Worth-It-For-Core-Strength

You know crunches?

Okay.

Now forget them.

Dragon flags are a whole different planet.

This isn’t about “activating your abs.”

This is about survival.

When you do a dragon flag, you’re asking your body to stay completely rigid as you raise and lower it slowly, with only your shoulder blades touching the bench.

Every single muscle in your trunk has to engage to stop your spine from collapsing under gravity.

It’s not just your rectus abdominis (the “six-pack” one) doing the work.

You’re calling in:

  • The transverse abdominis (deep core muscle that literally keeps you standing)
  • The obliques (for rotation and side stabilization)
  • The hip flexors (that burn when you lift your legs too fast)
  • The quadratus lumborum and spinal erectors (that scream in agony when control fails)
  • Even the lats, glutes, and quads

Yes, even the quads.

Because your body, in that moment, is a single rigid lever.

And if one part gives out…
everything collapses.


That pain after three days? It’s called DOMS. But it’s DOMS with claws.

Feel that deep soreness under your rib cage?

That tightness every time you cough, laugh, or bend over to tie your shoes?

It’s Delayed Onset Muscle Soreness.

The famous post-workout pain.

Only this time, in dragon flags, it’s caused by the brutal eccentric phase you forced your body through.

Every time you lowered your legs slowly while keeping them straight, your muscles lengthened under load.

That’s the toughest eccentric contraction there is.

And guess what?

That’s what causes the most micro-tears in muscle fibers.

So yes:

  • If you’re not used to deep eccentric work
  • If you never train your core in anti-extension
  • If you did 3-4 dragon flags without any kind of prep…

…it’s normal for the pain to last two, three, or even four days.

It’s not a red flag.

It’s your body adapting to something completely new.


The little muscles that usually sleep… are now screaming

Want to know a secret?

In most “ab exercises,” the deep muscles barely clock in.

The transverse abdominis, for example, is essential for spinal stability…
but during traditional crunches, it’s basically asleep.

In dragon flags, it gets thrown to the front line like an untrained soldier.

Same for the quadratus lumborum, internal obliques, and deep spinal stabilizers.

And when you hit them for the first time with a dynamic, eccentric, unstable load…
they’re not happy.

They punish you with a diffuse postural pain you can’t even pinpoint.


There’s also a neural factor: your brain wasn’t ready

How-Neural-Factors-Actually-Trigger-Muscle-Contraction

Training isn’t just “muscles contracting.”

It’s also your brain learning how to control those muscles precisely.

Dragon flags are a neuromuscular coordination overdose.

Your motor cortex, which is usually pretty chill during standard ab work, is now under pressure.

It has to:

  • Activate the right muscles
  • Inhibit the wrong ones
  • Coordinate the descent
  • Maintain control

And it has to do all that while you’re upside down, trying not to snap in half.

This neural hyperactivation leads to more muscle fiber recruitment.

Which, in turn, creates more microstructural damage.

And so… more DOMS.

Your body is learning.

The hard way.


If it hurts this bad, should I be worried?

No, unless you went way overboard beyond all human logic.

If the pain:

  • Isn’t in one specific spot
  • Doesn’t get worse over time
  • Doesn’t involve the spine in a sharp, acute way
  • Has no swelling, bruising, or strange stiffness

…then relax.

You’re just paying the price for asking too much, too fast.

But if you feel sharp back pain, stabs in your lower spine, or a sudden “tearing” sensation…
take a break and maybe get checked out.

You’re not weaker for pausing.

You’re just smarter.


What can I do to recover faster?

Here’s a little anti-DOMS toolkit:

  • Light movement: walk, gentle stretching, move your abs in a controlled way
  • Heat: hot water bottle, warm showers, or self-heating patches
  • Magnesium and Omega-3s: can help reduce muscle inflammation
  • Sleep: it’s when your body repairs, so sleep well
  • Hydration: better blood flow means more oxygen and nutrients where needed
  • Avoid anti-inflammatories if you can: they slow down muscle adaptation


Was it worth it? Absolutely. But you have to do it right.

Dragon flags, when done properly and progressively, are one of the most effective exercises for building a truly functional core.

Not only do they sculpt your abs (with the right diet), but they teach you to:

  • Control your body in space
  • Create usable tension for squats, deadlifts, and bench press
  • Protect your back during dynamic movement
  • Coordinate muscle groups that rarely work together

It’s not just aesthetics.

It’s biomechanics.

And it’s a skill.

One that can improve your entire way of moving and training.


How do you do a dragon flag… without wrecking your spine?

Doing a proper dragon flag isn’t just about throwing your legs in the air and hoping for the best.

It’s about building active tension from your neck to your ankles.

Here are the key steps to do it right:

  • Lie on a flat bench and grip the edge firmly behind your head
  • Keep your shoulder blades glued to the bench and use only them as your base
  • Bring your knees to your chest, then extend your legs straight up like a candle
  • Now begin the descent: lower slowly, keeping your body straight like a ruler and your pelvis tilted posteriorly (no arching!)
  • Lower until you feel effort but can still maintain control
  • Don’t collapse: resist the drop with active tension and either rise back up or return to fetal position
  • Only repeat as long as you can maintain form and control

💡 A good starting goal is to descend to a 45-degree angle and hold the rigid body line for 3–5 seconds.

Can’t do it yet?

Start with simpler versions:

  • Tuck dragon flag (knees bent)
  • Controlled negatives
  • Eccentrics with band support or feet on the wall


Classic mistakes that ruin everything (and make you hate dragon flags)

If you felt like a snapped toothpick… there’s a reason.

Here are the most common mistakes I see (and yes, I’ve made them too):

  • Arching your back: lose the pelvic tilt, lose ab tension, welcome lower back pain
  • Collapsing on the way down: the descent must be controlled, not a sack-of-potatoes drop
  • Thinking it’s “just for abs”: it’s actually a full-body move. If you don’t squeeze your glutes, quads, and even your lats, you’ll never stay rigid
  • Using momentum to start: if you throw your legs up, you’re just cheating yourself. It starts with tension, not swing
  • Doing too many reps: 2–3 good ones are enough to feel it. If you’re doing 10, the last 7 were probably an acrobatic cramp
  • Ignoring your breathing: learn to breathe into your belly under tension without losing tightness

Solution?
Record your attempts.
Watch them.
And be ruthless with form, angles, tension, and descent.


Can people with back pain do dragon flags?

Fair question.

And the answer isn’t a hard yes or no.

It depends on the type of back pain and where you are in your recovery journey.

If you have:

  • Active lumbar herniations
  • Acute disc issues
  • Vertebral instability
  • Ongoing pain during extension movements

…then no, it’s not the time for dragon flags.

This move puts massive tension on the lower back, especially during the descent phase.

But if you’re:

  • In the advanced stage of postural recovery
  • Strengthening your deep core
  • Already doing anti-extension work pain-free (like planks, dead bugs, controlled ab wheels)

…then you can start a gradual path, using regressed and controlled variations under supervision.

Start with exercises like:

  • Anti-extension core work on a fitball
  • Hollow holds
  • Reverse crunches

Then try a tuck dragon flag while keeping your lower back protected at all times.


Conclusion

Don’t do it randomly.

Don’t do it just for the Instagram likes.

And never do it without prep, control, and progression.

Start with:

  • Advanced planks
  • Hollow body holds
  • Controlled negatives with support
  • Tuck dragon flags

Then, step by step, build your strength.

No rush.

No ego.

When the pain fades and you finally manage a clean, controlled dragon flag without trembling…
It’ll be one of the most satisfying moments of your gym life.

And you won’t just “do abs” anymore.
You’ll dominate them.

Recommended
Categories
BODYWEIGHT EXERCISES Training Insights

Why does my wrist hurt only during tucked planche attempts but not push-ups?

I swear, the first time I tried a tucked planche on the floor I thought:

“Okay, my right wrist just signed the divorce papers and the left one is packing its bags.”

But then I go do push-ups — deep ones, slow, with good form…
And nothing.

No pain.
No discomfort.
Just a bit of honest fatigue.

So… what gives?

Why does the planche feel like breakdancing on my carpal bones, while push-ups are smooth as butter?

Let me break it down.

And it’s not just technical stuff — I’ll give you solutions you can actually use right away.


Tucked planche is NOT an advanced push-up

blank

The tucked planche is a different beast.

First thing to clarify: the tucked planche is not a “super push-up.”

It’s an entirely different sport.

In push-ups, your bodyweight is decently distributed between hands, arms, core, chest, and even your legs.

If you get tired, you stop.

If your form slips a bit, you push through.

Not in a tucked planche.

There, every centimeter of error gets punished by a sharp spike of pressure directly on your wrist.

The leverage crushes you forward, the center of mass shifts in front of your hands, and you have to hold your body up with zero help from your legs.

So, while push-ups keep you in a “human” position, the tucked planche has you in a precarious balance where even the AC breeze can knock you out.

And guess who pays the highest price?

Your wrists.


The wrist angle in a planche is way more stressful.

The extension angle adds load you don’t feel in push-ups.

Next up: a technical but super relevant point.

In the tucked planche, your wrists are in maximum extension.

What does that mean?

Your forearms push backward while your hands are glued to the floor with fingers pointing forward.

It’s like forcing your wrist into a push position under load — with no pause.

And the issue isn’t so much muscular effort — it’s the passive stress on ligaments and the joint capsule.

That kind of stress doesn’t show up in push-ups, because the angle is way more wrist-friendly.

Basically: push-ups keep you in the “safe zone.”

Planche yanks your wrist into the danger zone and expects it to hold while your whole body leans into it.

It’s like trying to do a backbend with a drinking straw.


Tendons don’t adapt as fast as muscles

This is a time bomb if you don’t respect it

Here’s one of the most underrated reasons.

Even if you’ve been training for years and are strong, your tendons might not be ready for this stress.

Muscles grow and adapt in weeks.

Tendons take months — sometimes years.

Every time you overload too much, too fast, or too often, micro-tears and inflammation build up like compound interest on a bad loan.

That’s why maybe you can hold 10 seconds of planche, but by evening, your wrist feels like you screwed in a wood screw.


Lazy scapulae = risky wrists

If the shoulder gives up, the wrist takes the hit

Let’s get a bit more technical — stay with me.

The tucked planche relies heavily on something called scapular protraction.

That’s when your shoulder blades push forward, kind of like “puffing out” your upper back.

This activation helps:

  • Stabilize the shoulders
  • Take pressure off the wrists
  • Keep the upper body in a compact, rounded position

If you haven’t built up enough strength in active protraction, you’ll eventually collapse forward.

And when the scapulae stop doing their job, where do you think the load goes?
Exactly: your wrists.

Push-ups?

You can do those with sleeping scapulae and no one notices.

Tucked planche?

Zone out for a second and suddenly you’re chatting with your physical therapist.


What’s actually happening when your wrists get inflamed?

A bit of biomechanics to understand the real issue.

When we say “wrist pain,” we often picture a vague annoyance.

But if you’re working on tucked planche and feel a dull, throbbing, or sharp pain, it’s likely:

  • Tendinopathy from overload
  • Inflammation of the synovial sheath

Your wrist is a complex structure made up of:

  • Eight tiny bones (carpals)
  • Ligaments connecting them
  • Tendons that slide through sheaths

In repeated movements with max extension (like in planche), those sheaths can get irritated from friction.

Result?

They get inflamed and fill with fluid, leading to:

  • Localized pain during pressure
  • Swelling (even if mild and persistent)
  • Heat around the joint
  • Trouble loading simple moves like a plank

Most common diagnosis?

Extensor or flexor tenosynovitis — depending on the tendons involved.

In worse cases, you’re looking at anterior carpal impingement — a real medical issue that needs actual rehab.

Moral of the story:

If the pain never goes away — even with active rest — you’re already in chronic inflammation territory.
You need to switch strategies.


Here’s what you can actually do to stop hating your wrists

Train your wrists like you would train your shoulders.

Most people dive into planche work without ever actually training the wrist.

And no, a couple wrist circles before the session don’t count.

You need serious prep:

  • Slow wrist CARs (Controlled Articular Rotations) with tension
  • Dynamic pressure holds on soft surfaces
  • Finger push-ups, even just isometric
  • Well-executed planche leans held for a few seconds

Training wrists is no different from glutes: load them, move them, strengthen them.

Build stability and joint control too

Strength without control is a sports car with flat tires

Your wrist needs to know where it is — even under pressure.

Enter:

  • Figure 8s with light dumbbells
  • Holds on unstable surfaces like a medicine ball
  • Precision and neuromuscular control drills

These are slow, sometimes boring, but crucial to stop the wrist from folding at the first imbalance.

Strengthen your grip — it saves more than you think

A strong grip stabilizes everything.
It helps reduce passive wrist load and boosts forearm engagement.

Include:

  • Farmer’s carries with neutral grip
  • Dead hangs (both pronated and supinated)
  • Towel squeeze holds (wring out a wet towel for 10–15 seconds)

Yeah, it sounds like training for a coal mine movie.
But it works.

Use low parallettes: the floor is not your friend

Parallettes let your wrists stay in a neutral position.

Translation: less inflammation, more sessions, better technique, fewer curse words.

It’s not cheating.
It’s surviving.
And improving.

Manage volume (and ego)

No need to attempt 30 holds in a rage spiral.

Three quality 5–8 second holds with rest and focus are ten times better.

If discomfort increases after the second try, stop.

Better a deload now than 6 weeks off later.

Train scapular control outside of planche too

Scapular push is your armor.

If you let go there, all the pressure hits the wrist.

Train it on “off” days with:

  • Wall protraction holds
  • Elevated scapula leans
  • Banded scap push-ups

Simple drills that help you keep that compact shape without destruction.

Breathe better, unload your wrists

Holding your breath = losing internal tension = more load in the wrong places.

Instead:

  • Inhale in hollow position
  • Brace your core like steel
  • Short, compressed exhale during effort

It’s like sealing your body shut.
And your wrist finally stops being the sole scapegoat.


You’re not fragile — you’re just entering a new world

Wrist pain doesn’t mean you’re weak.

It means you’re trying something exceptional.

Something most people wouldn’t dare attempt.

A movement that demands technique, control, and… joint resilience.

It’s like stepping onto a slackline for the first time.

Your body’s clueless, but your brain tries anyway.

Planche questions everything about you — brutally.

Not to make you quit.
But to teach you to respect every detail.

And guess what?

Your wrists are the first “tough teacher” you’ll meet.


When it’s more than just discomfort: signs of real injury

The line between overuse inflammation and true injury is thin — but crucial to spot.

Here are red flags:

🔴 Sharp pain on contact — like a sudden pinch or zap
🔴 Visible swelling, even at rest
🔴 Pain at rest, not just during activity
🔴 Sudden weakness in grip or wrist extension
🔴 Tingling or numbness in fingers (especially thumb and index)

These could mean:

  • Partial tear of the scapholunate ligament
  • Acute carpal tunnel syndrome
  • Irritation of anterior interosseous nerves

👉 In these cases, stop everything immediately and see a sports ortho or physio.

Training “through” a true injury is the fastest way to ruin months of work.


And if it only hurts on one side? Right yes, left no

One of the weirdest — yet most common — situations.

Pain only shows up on one wrist, always the same one.

The dominant one. Or the “weaker” one. Depends.

You know why?

We often have deeper postural asymmetries than we realize.

Maybe you’re leaning slightly more to the right.

Or your left shoulder can’t protract well, so the right takes all the heat.

Sometimes, just filming yourself in slow motion shows that your load is uneven.

Or your dominant arm is stiffer in wrist extension, so it struggles differently.

👉 What to do?

  • Train planche leans with focus on the “lazy” side
  • Do single-arm isometric holds (semi-planche style)
  • Strengthen both wrists individually — not just together

You don’t need perfect symmetry.
But you do need to spot which side is “paying for both.”


When to stop and when to push through: the useful pain threshold

Now we hit a tricky topic.

In calisthenics, it’s all about grind, consistency, discipline — but… where does adaptive pain end and injury pain begin?

Here’s a rule I’ve used on myself and other athletes:

🟢 Pain disappears within 30 minutes post-workout = likely adaptation
🟡 Pain lingers for hours or reappears the next day at rest = inflammation risk
🔴 Sharp, sudden pain during training, with “rip” or give-out feeling = stop immediately

👉 Yellow zone? Reduce volume or switch surfaces (use parallettes or thicker mats)
👉 Red zone? Mandatory break and see a specialist. No debate.

When in doubt, schedule deload days every 2–3 weeks if planche is part of your routine.


Smart alternatives for “bad wrist” or deload days

Even when your wrists aren’t cooperating, you can still train the planche pattern safely.

Here are three wrist-saving, technique-boosting variations:

🧱 Planche on low or medium parallettes
Wrist stays neutral.
Perfect for working scapular push without the inflammation.

🛞 Wheel rollouts with hollow hold
Not planche, but mimics active protraction and full core tension.
Great for keeping your center strong during recovery.

🧍‍♂️ Wall planche leans with feet supported
You can dial in the load and get used to the pressure without going full weight.
Feels similar — way more manageable.


Other calisthenics moves that wreck your wrists

The tucked planche isn’t the only move that punishes the wrist.

If you’re training other skills in parallel, you might not even notice you’re stacking up load every day.

Here are some wrist-heavy positions:

🔥 Handstand hold (on floor)
Even with a vertical body line, wrist takes direct, full load.
Poor balance = micro-forward shift = more stress.

🔥 Planche lean
Very similar to tucked, just “progressive”
Still max static extension under load

🔥 Pseudo push-ups
Hands lined up with bellybutton or under chest
Mimics planche leverage and overloads wrist front

🔥 L-sit on low parallettes (with wrists bent backward)
Looks light, but with low parallettes or hard floor, creates static wrist stress

🔥 Back lever on bar
Not extension, but forced pronation
If done with narrow or uneven grip, it can cause carpal strain

👉 Watch out for cumulative load:
Even if each move feels harmless on its own, together they can “cook” your wrists in days.


The role of breathing and active tension

This tiny detail changes everything — but barely anyone pays attention.

How are you breathing when you attempt a planche?

And how active is your body tension, really?

Most people hold their breath, brace like hell, and go full apnea.

Result?
Loss of control.

Without breathing, you lose internal pressure, tension breaks, and weights feel heavier.

The wrist — already under stress — gets slammed with more compressive force.

👉 Instead, try short, compressed breathing:

  • Inhale in hollow body
  • Brace the core like steel
  • Exhale briefly during the effort, without collapsing

It’s like zipping up your whole body.
Stay compact, and your wrists stop being the sacrificial lambs of instability.


RELATED :》》》What are the common problems with calisthenics?


Conclusion

If your wrist hurts, it doesn’t mean you should quit.

It means you need a better plan.

Reinforce.
Prepare.
Deload when needed.

Every advanced skill has a phase where you feel completely unready.

That’s exactly where adaptation happens.

So, if it hurts: listen, but don’t give up.

If you feel stuck: regress, but don’t retreat.

If you feel frustrated: know that’s the starting line of real growth.

Keep going.
Your wrists will thank you.

Recommended
Categories
Advanced Workouts BODYWEIGHT EXERCISES

Can being upside down during handstand push-ups make you nauseous or dizzy?

Alright, let’s get straight to the point: Yes, being upside down can make you feel like a rag doll.

Nausea, dizziness, that weird feeling that your brain is doing backflips inside your skull… all on the menu, baby.

If you’ve ever thrown yourself into a handstand push-up and suddenly felt like your stomach wanted to escape through your ears, you’re not weird.

You’re human. And honestly, pretty brave.

But let’s take a look at why this happens.

And whether there’s anything you can do to stop feeling like you’re training on the Enterprise during a space storm.


The famous “rush” of blood to the brain

Back-view-athletic-man-doing-handstand

When you go into inversionmeaning your feet go up and your head goes downsomething very simple and very intense happens: the blood shifts.

Since gravity doesn’t take a day off, the blood pools in your head.

Eyes, temples, nose, jaw—everything swells up slightly, like someone’s inflating your face with a bike pump.

This can cause:

  • A feeling of pressure behind the eyes
  • Pulsing in the temples
  • Sudden headaches
  • That classic “full head” sensation that makes you feel floaty

It’s all normal, at least at first.

But it can become unpleasant if your body isn’t used to handling it yet.


The vestibular system: when balance goes haywire

blank

Inside your ears are tiny organs called semicircular canals, filled with fluid and sensitive cells.

They’re your internal compass, your built-in level.

When you flip upside down suddenly, that fluid sloshes around chaotically.

And your brain, poor thing, gets flooded with mixed signals.

“Are we falling?”
“No, wait, we’re standing still?”
“Why is the ceiling under our feet?”

This sensory overload can cause:

  • Light dizziness
  • Disorientation
  • A vague sense of unease that creeps up like car sickness

The funny part is, you didn’t do anything wrong.

It’s just your brain temporarily losing GPS signal.


Not the best time to solve equations

There’s also a myth we should bust: “When the blood flows to your brain, you think better.”

Uhm… kinda.

In theory, more blood flow means more oxygen.

But in practice, the brain doesn’t love sudden shifts.

Excessive flow can cause confusion, light-headedness, and that cotton-stuffed-head sensation.

Not to mention the fact that breathing properly in that position is harder.

Your diaphragm has to work against gravity.

Your internal organs push against your lungs.

And you might be holding your breath without realizing it, muscles tense, heart racing.

Result?

You’ve mixed the perfect cocktail to throw your nervous system into chaos.


When does it happen more often?

Not everyone reacts the same.

Some feel like superheroes after ten seconds.

Others feel like they’ve just spun on a carnival ride after three breaths.

Most common situations where you might feel dizzy:

  • You’re a beginner with inversions
  • You have sinus issues or blood pressure problems
  • You’ve eaten too much (or too little)
  • You had an extra coffee and your heart’s racing
  • You didn’t sleep well or you’re dehydrated
  • You’re sensitive to motion (car/plane sickness)

For example, when I started doing handstands, I felt nauseous every single time.

Then I realized that working out on an empty stomach with music blasting maybe wasn’t the best idea.


Is it dangerous?

In most cases, no.

It’s just uncomfortable.

Your body is trying to adapt.

It only becomes a problem if you ignore warning signs, like:

  • Dizziness even after you’re upright again
  • Blurry vision or feeling like you might faint
  • Long-lasting headaches or nausea that won’t go away

In those cases, stop.

Drink something.

Breathe.

And for once, listen to your body.


What does science actually say about feeling dizzy upside down?

blank

If you’re wondering whether this “inversion discomfort” is all in your head or if something’s really off in your body… well, science says you’re not imagining it.

A study published in Clinical Methods confirms that what we call “dizziness” can have many causes, and it’s not always easy to tell them apart without digging into the context.

For example:

  • Positional vertigo (like what you might feel during or right after a handstand) is linked to abnormal stimulation of the vestibular system, especially when the head changes direction relative to gravity.
  • True imbalance happens when the brain struggles to integrate visual, auditory, and proprioceptive signals—something that’s very likely during upside-down exercises if you’re not trained or have neck tension.
  • Lightheadedness, that vague feeling of floating, is often tied to hyperventilation—very common in high-intensity workouts, especially if you hold your breath while pushing.

One of the most interesting findings is that many people can’t clearly describe the feeling, but they react very specifically during simulation tests.

For instance, during guided hyperventilation (fast breathing while lying down), subjects with chronic dizziness often recreated exactly “that weird feeling” they also get during handstands.

This suggests that sometimes it’s not just the physical position, but also breathing and the nervous system’s response that trigger the symptoms.

In short: 🧠 It’s not just your head flipping.

Your entire brain-body system needs to learn how to adjust.

That’s why gradual exposure, breath control, and monitoring body signals are key.

Science basically confirms something simple: if you get dizzy upside down, it’s normal.

But you can train through it.

For the clinical deep-dive: 🔬 Clinical Methods – Chapter 212: Dizziness (NCBI)


What can you do to stop feeling like a spinning astronaut?

The good news is: you can get used to it.

Here’s what helped me over time (and might help you too):

  • Start from zero, no rush: Begin with wall holds, then negatives, then pike push-ups, and only after that move to full handstands
  • Control your breathing: Never hold your breath! Inhale through the nose, exhale slowly through the mouth
  • Don’t stay upside down too long at first: 5–10 seconds is plenty. Then rest. Then try again
  • Drink beforehand, not after: A dehydrated body is more prone to fatigue and fainting
  • Avoid inversions on an empty stomach or right after eating a big meal
  • If you have chronic dizziness or blood pressure issues, ask a doctor before defying gravity

And here’s a friendly tip: use a mirror or record yourself.

Seeing if you’re tense, stiff, or bent out of shape helps you fix things without just guessing.


The benefits, despite everything

The amazing thing is, once you get past the nausea and the initial discomfort… handstand push-ups become one of the most complete bodyweight exercises out there.

They give you:

  • Shoulder and core strength
  • Joint stability
  • Ninja-level motor control
  • Self-confidence that follows you outside the gym

And you know what the secret is?

Progression.

Every time you hold it one second longer, breathe better, or fall on your face a little less… you’re moving forward.

One centimeter at a time.

Even if at first you feel like you just got off the Tilt-A-Whirl.


RELATED:》》》 How Much Time Do Beginners Need to Achieve a Handstand?


Conclusion

So in short?

Yes, it’s normal to feel off at first.

No, it doesn’t mean you’re doing it all wrong.

And yes, you can improve if you listen to your body and take it one step at a time.

Being upside down is kind of like changing your life perspective: it throws you off, challenges you… but then opens up a whole new world.

And when you finally nail those handstand push-ups without nausea, fear, or flailing… you realize it’s not just physical strength.

It’s a mental win.

Recommended
Categories
BODYWEIGHT EXERCISES Training Insights

The Hidden Cost of Overdeveloped Biceps in Calisthenics (And How to Fix It)

Yes, it can happen: your biceps take over and start sabotaging your technique.

Everyone talks about the opposite problem.

That in calisthenics, the forearms dominate.

That biceps are always too shy.

That you need to add specific exercises to truly stimulate them.

And you, being a smart and aware athlete, did just that.

Slow chin-ups, curls under a low bar, isometric holds at 90°, ultra-controlled ring curls.

Result?

Your biceps finally explode.

The pump is real. The growth too.

Your sleeves are tight.

But… something feels off.

Your shoulders are stiffer

Your elbows start complaining

Your movements aren’t as smooth as before

You feel strong, but… weird

And the thought hits you:

“What if the biceps are doing too much… and doing it wrong?”


When biceps become the wrong kind of protagonist

blank

In calisthenics, every movement is a system.

If one component starts doing the work of all the others… the system breaks.

And that’s exactly what happens when your biceps become too dominant.

Especially if you train them specifically with:

  • Weighted chin-ups
  • Ring curls to failure
  • Isometric holds at mid-chin-up
  • Bodyweight curls under a bar with straight legs

…they start “stealing” the work from your lats, traps, and rhomboids.

The result?

Disconnected, choppy, robotic movements.

And trust me: it’s not uncommon.

I’ve experienced it myself after pushing too hard with supinated grip work for weeks.

My strength was going up… but the quality of movement was tanking.


Elbows never lie

Every time you flex the elbow under load, you’re stressing the distal biceps tendon.

In calisthenics, where you have:

  • Slow eccentric phases
  • Static holds in mid-position
  • Front levers with bent arms
  • Muscle-ups pulled with just the arms

…that tendon starts begging for mercy.

At first it’s just a minor discomfort.

Then it turns into sharp pain when you hang, grip, or flex.

You think it’s your forearms.

Spoiler: it often isn’t. It’s your biceps doing too much.

(By the way: this is one of the most underrated causes of “disguised tendinopathy” among calisthenics athletes.)


The scapula can’t keep up: when posterior activation collapses

Ever tried to pull into a front lever, feel your arms working… but your body won’t budge?

That’s what happens when your biceps are also trying to do the scapula’s job.

Instead of lowering your shoulders and retracting the scapula, you just flex the elbow.

Result: your biceps are pulling—but you’re not moving an inch.

And it feels like you’re stuck, jammed.

Because you are.

In calisthenics, if the scapula doesn’t lead the movement, you’re done.

Your biceps should be supporting actors—not the director.


How to train your biceps WITHOUT ruining your calisthenics system

The solution isn’t to stop training them.

It’s to train them the right way.

Here’s what actually works (tested on myself and athletes with the same issue):

  • Alternate “bicep days” and “scapula days” (e.g., curls on Monday, scap pulls and Y-raises on Wednesday)
  • Don’t always go to failure: better 2–3 slow, clean sets than 5 messy ones
  • Use tempo contrast: slow sets for biceps, explosive sets for scapular control
  • Do active deloads every 2–3 weeks, with only smooth pulls and no isolation
  • Respect your elbows: stretching, massage ball, real rest breaks

The point is to integrate, not accumulate.

If every move you do is centered around bicep activation, sooner or later your mechanics fall apart.


How to tell if your biceps are sabotaging the rest of your body

Sometimes the problem isn’t obvious.

You feel pain but don’t know where it’s coming from.

Your strength is going up, but your efficiency is going down.

Here are 4 signs your biceps might be too dominant:

  • Your elbow doesn’t fully extend after training, like it’s stuck in semi-flexion
  • During pull-ups, you don’t feel your lats—just forearms screaming and biceps burning
  • You struggle to control the eccentric phase, especially when lowering from a chin-up
  • You’ve lost scapular connection and can’t “initiate” the pull from the scapula anymore

If even one of these sounds familiar, you may be pulling too much with your arms and too little with your back.

And in calisthenics, that’s a red flag.


“Antidote” exercises to bring balance back

You don’t need miracles.

You just need to add 2–3 exercises a week that bring focus back where it’s needed: scapula, rotator cuff, extensors.

Here are some smart (and underrated) picks:

  • Slow scap pull-ups, focusing only on scapular depression
  • Face pulls with rings or bands, to target mid-traps and rotator cuff
  • Wall slides on the floor, a mobility drill that saves your scapular control
  • Front lever raises (partial or tucked), if your technical base is solid
  • Reverse curls with a pronated grip, to unload the biceps and work the brachioradialis

You can add them to your warm-up or cooldown.

No heavy loads needed.


Training non-stop won’t make you stronger (here’s why)

I know, it sounds counterintuitive.

But in calisthenics, knowing when NOT to push is just as important as knowing how to push.

If you’re stacking discomfort, stiffness, and mobility loss…

…your body might be trying to tell you something.

Take an active deload week, where you only do:

  • Hollow holds
  • Scapular work
  • Dead hangs
  • Shoulder mobility
  • Half-ROM slow pull-ups

…to help you regain control and reset your system.

Remember: you don’t lose strength in a week.

But you can lose a lot more if you ignore the warning signs.


RELATED;》》》 Can calisthenics make your forearms too strong compared to your biceps?


Conclusion: strength, yes—but evenly distributed

Building strong arms is great.

Having biceps that pop under your T-shirt is a legit reward.

But if those biceps start making decisions for you… that’s a problem.

In calisthenics, the body has to work as a team.

Every muscle has a role.

When that system works, you become a machine—fluid, powerful, resilient.

When you break it chasing one single detail… you pay the price.

So don’t stop training your biceps.

But remember: they should collaborate, not dominate.

Recommended
Categories
BODYWEIGHT EXERCISES Workout Routines

Can 100 Daily Push-Ups, Sit-Ups, and Squats Transform Your Body?

When I was far away and there were no gyms nearby, I chose to challenge myself with a personal trial.

I decided to tackle 100 push-ups, 100 squats, and 100 sit-ups every day for 40 days, all at home and without equipment.

The goal was to keep my daily motivation high and to break the monotony of solo workouts, despite years of experience.

Even during times of restrictions and being far from any fitness center, my determination pushed me to persevere day after day with consistency and commitment.


40 Days of Effort: Pros and Cons of 100 Daily Push-Ups, Sit-Ups & Squats

Pros-and-Cons-of-100-Daily-Push-Ups-Sit-Ups-&-Squats

During these 40 days, I followed this routine and was able to closely observe both the benefits and limitations of this challenge.

Benefits for All Levels

Increased Endurance:
The body gradually adapts.

Even though progress might seem slow for those with prior experience, everyone notices an improvement in the ability to perform consecutive exercises.

Better Muscle Tone:
Daily training helps make muscles more defined and improves posture.

Enhanced Body Awareness:
A daily routine teaches you to feel every single muscle, making you more attentive to technique and form.

For Beginners

An Adaptable Start:
The beauty of this challenge lies in its adaptability to your level, by breaking the repetitions into smaller sets or starting with simplified variations of the exercises.

Visible Progress:
Even if at first it seems like a tough challenge, over time you will notice an increase in endurance and an easier execution of the exercises.

Consistency and Discipline:
A daily routine teaches the importance of consistency, which is fundamental for any fitness journey.

For the Experienced

Extra Challenge:
For those already accustomed to training, 100 reps might initially seem easy.

However, on days when energy is low or your mood is down, they are by no means guaranteed.

This challenge continues to offer an extra stimulus, keeping motivation high—especially when access to gyms is limited.

Adaptability:
Experienced athletes can integrate more demanding variations, such as using weights or dynamic changes, to avoid plateaus and continue progressing.

Technical Improvement:
For those with a solid base, the challenge becomes an opportunity to perfect technique and refine body awareness.

Disadvantages and Considerations

Repetitiveness:
Performing the same routine every day can lead to a feeling of monotony.

This risk is higher for those with extensive experience, while for beginners it can represent a solid foundation to build upon.

Risk of Injury:
Without proper warm-up and without varying the stimuli, there is a risk of overloading joints and muscles.

It is essential to include a short stretching or warm-up session before starting.

Load Adaptability:
Those with an already high level of training might need to increase the intensity, while beginners must focus on correct form to avoid injuries.


From 100 to 200: The Moment of Change

I followed the original challenge for three weeks, but on the first day of the fourth week I felt the need to intensify my workout.

So I decided to double the repetitions, bringing each exercise to 200 reps, split between the morning and the afternoon.

In the morning I did the first 100 and in the afternoon the other 100, but not in one single set.

For push-ups, for example, I performed 2 sets of 50.

For squats, sometimes 2 sets of 50 or 4 sets of 25.

And for sit-ups, I alternated between 2 sets of 50 or 4 sets of 25.

This choice pushed me to overcome my limits by providing new stimuli to the body without overloading it in a single session.


Only Push-Ups, Squats, and Sit-Ups… or Almost?

When I started adding extra work from the third week onward, the additional 100 push-ups began to bore me.

So, I opted to use a 10‑kg weighted vest.

I broke the repetitions into smaller sets, for example 5 sets of 20 reps, to better manage the load.

For squats, I found a way to add weight using a 20‑kg weight plate, and for sit-ups I modified the exercise to make it more challenging, such as performing them in a decline position or with a weight on my chest.

These modifications made the workout more varied and stimulating, especially for someone like me who has been training for a long time.


Do I Have to Do 100 Reps in a Row?

If I had tried to complete 100 consecutive reps, I probably would have given up within the first few days.

For this reason, I decided to break up my workout into more manageable sets.

For example, you could opt for 10 sets of 10 reps or 4 sets of 20; or, as I did, divide the reps into 2 sets of 50 or 4 sets of 25.

As strength increases, you can increase the repetitions per set and reduce the total number, until one day you might manage 100 consecutive reps.

There is no need to push too hard immediately; the important thing is to gradually build strength.


Progress with Push-UpsProgress-with-Push-Ups

Result: Increased Strength and Endurance

During the first three weeks, since I was already trained, I did not see significant differences.

Then, by introducing the 10‑kg weighted vest for the afternoon reps, the situation changed.

My strength increased.

Weighted push-ups stimulated the chest and arm muscles in a different way.

I noticed better definition and greater endurance.

Result: Improved Coordination and Technique

The change in rhythm forced my body to improve its technique.

The push-ups became more fluid and controlled.

The recovery between sets was faster—a sign of an effective workout.

The exercise taught me the importance of varying stimuli to avoid plateaus.


Progress with Squats

Progress-with-Squats

Result: Toned and Stable Legs

In the morning, performing 2 sets of 50 bodyweight squats for a total of 100 reps helped consolidate my basic form.

In the afternoon, I tackled 4 sets of 25 squats while adding a 20‑kg weight (or weight plate), and my legs reacted immediately.

The strength in my thighs and glutes increased noticeably.

Result: Enhanced Movement Awareness

Adding weight required more balance and concentration.

I learned to manage the load correctly and know well that the weight used here is modest compared to what I lift at the gym.

But I assure you: even 25 well-controlled reps with 20 kg are noticeable!

My body adapted, improving posture and balance during each exercise.

This approach provided me with a solid foundation to tackle even more demanding exercises in the future.


Progress with Sit-Ups

Progress-with-Sit-Ups

Result: A Stronger and More Defined Core

The 100 morning sit-ups initiated a more stable core.

In the afternoon, by making them more challenging (for example, with an “inverse crunch” variation or by holding a weight on the chest), the workout became even more intense.

The result?

A visibly more toned and resilient abdomen.

Result: Improved Muscle Coordination

The variation forced the abdominal muscles to work in a different way.

This led to an improvement in overall balance and coordination.

The core responded well even to a higher load—a sign of a balanced workout.


Accessory Exercises

In addition to 100 push-ups, squats, and sit-ups, I incorporated some complementary exercises to prevent muscle imbalances and strengthen underworked muscle groups.

While push-ups intensely target the chest and shoulders, it’s crucial to also focus on the back to avoid a hunched posture.

For this reason, I added targeted exercises like pull-ups, which engage the back muscles and help balance the chest workout.

Additionally, I included exercises for the biceps—such as chin-ups or band curls—to complete overall muscle development and boost strength.

There’s no need for overly complex movements; simple bodyweight exercises and a few tools are enough to ensure a balanced workout and prevent muscle imbalances.


Muscle Soreness: Experiences and Tips

Muscle soreness began around the fifth day.

For me, the initial pain was a confirmation that my body was working hard.

I modified the exercises by reducing the number of repetitions in some sessions and incorporated targeted stretching.

Active recovery, with light walks and foam rolling, helped me overcome minor injuries.

A beginner might experience intense soreness during the first approach.

It is essential to listen to your body and, if necessary, slow down the pace to avoid injuries.


Don’t Get Bored: Variations for Every Exercise

After one week, the routine could become monotonous.

But for push-ups there are so many variations:

Diamond Push-Ups: This exercise works the triceps and chest intensively.
Place your hands in a diamond shape under your chest, lower your torso while keeping your elbows close, then push upward with force.

Wide Push-Ups: Ideal for widening the chest and effectively engaging the shoulders.
Spread your hands wider than shoulder-width, lower your body in a controlled manner, and then rise while maintaining a stable posture.

Decline Push-Ups: Perfect for stimulating the upper chest and shoulders.
With your feet elevated on a surface, lower your torso toward the floor and then push up.

Clap Push-Ups: An explosive exercise that involves the chest, triceps, and core.
Perform the push-up explosively, lifting your hands off the floor to quickly clap them together before returning to the starting position.

For squats, try:

Pistol Squat: This one-legged variation requires balance and strength.
Lift one leg in front of you, slowly lower your body, and then rise, using support if necessary.

Sumo Squat: With your feet wide apart and toes pointed outward, this squat particularly targets the inner thighs.

Jump Squat: Add explosiveness to the movement by squatting down and then jumping up, landing in a controlled manner.

Bulgarian Squat: With one leg supported on a chair, perform the squat focusing on each side to improve individual strength and stability.

For sit-ups, the variations include:

Bicycle Crunches: This exercise targets the obliques by alternating the movement of the torso and legs for effective lateral work.

Sit-Ups with a Twist: While rising, rotate your torso to engage the entire core, achieving a 360° effect on the abdominal muscles.

Reverse Crunches: Focus on the lower abdomen by lifting your hips toward your chest, keeping the movement slow and controlled.

V-Ups: Starting from a lying position, simultaneously lift your legs and torso to form a “V” for a dynamic, complete core workout.


Make the 100 Reps Lighter: Practical Variations for Push-Ups, Squats, and Sit-Ups

Are traditional push-ups, squats, and sit-ups too challenging?

Here are some practical solutions that can ease the effort without radically changing your workout.

For Push-Ups:
To make the exercise less demanding, try doing them with your knees on the floor.

Alternatively, perform push-ups at an incline by placing your hands on an elevated surface (like a table or bench).

For Squats:
If traditional squats are too tiring, try performing them while lightly leaning against a chair or wall for balance.

Focus on a controlled movement to gradually condition your body.

For Sit-Ups:
When classic sit-ups feel too heavy, switch to slow and controlled crunches to engage the core without overloading it.

These simple and accessible variations allow you to effectively work the major muscle groups without feeling overwhelmed.


Cardio: An Extra Touch or Not Necessary?

If you wonder whether to add cardio to the challenge, the answer depends on your goals.

If your focus is mainly on strength and muscle tone, the 100-rep routine might be enough.

However, if you want to improve cardiovascular endurance or lose weight, incorporating short cardio sessions can provide an extra boost.

You could opt for a light jog, jumping rope, or even a brisk walk.

Naturally, all this should always be accompanied by a balanced diet.

Remember, the key is to balance muscle work with activities that get your heart pumping, without overloading your body.

Experiment and find the right combination that makes you feel energetic and fit!


RELATED:》》》 Can I Tone My Muscles Without Traditional Push-Ups or Squats?


Conclusion

With this article, I hope to have shown you that you do not need to start with extreme workouts.

The 100-rep challenge is an excellent starting point for anyone looking to push themselves.

Remember that my journey was the result of years of training and, when I did this challenge (actually doubled), I was already accustomed to high workloads.

Always adapt the workout to your level, experiment with various alternatives, and listen carefully to your body.

If you have suggestions or questions, feel free to leave them in the comments.

Recommended
Categories
BODYWEIGHT EXERCISES Workout Routines

Is It Possible to Develop Triceps Without Gym Equipment in Small Spaces?

I’ve asked myself this question many times.

When I lived in a tiny apartment, I had to move the coffee table and couch just to lie down on the floor.

I started experimenting with a thousand ways to work out, and I realized that, with a bit of ingenuity, you can develop your triceps without even leaving the house.


Why Specifically the Triceps?

triceps-muscles-during-bench-dips

Triceps are the “engine” of your pushing movements.

Think about when you get up from a chair or push away a heavy door: those muscles in the back of your arm do most of the work.

Anatomically, the triceps brachii is made up of three heads: long, lateral, and medial, which work together to extend the elbow and stabilize the shoulder.

It’s the largest muscle in the arm, and it’s essential for building strength and power.

If you want stronger arms and maybe a more defined look, focusing on the triceps brings tangible benefits.

I myself, when I started wanting to improve my fitness, was fixated only on biceps, until a trainer pointed out that triceps make up almost two-thirds of the arm’s volume.

From that moment on, everything changed.


The Benefits of Bodyweight Training

Outdoor-bodyweight-exercise-triceps-dips-strength-training

When I used to think about working out, I pictured big gyms, machines, equipment, and colorful dumbbells.

But my first real results came with “home calisthenics.”

No equipment, in a very limited space.

All I needed were walls, chairs, and a strong desire to challenge myself.

  • Time Savings: No commuting to the gym or waiting to use a machine.
  • Flexibility: You can train anywhere—living room, bedroom, balcony—as long as you have a tiny bit of space.
  • Complete Workout: Bodyweight exercises generally involve multiple muscle groups, giving you a stronger core as well.
  • Better Proprioception: Getting used to managing your body in space makes movements smoother and more coordinated.


How to Organize Small Spaces

Stability-ball-decline-push-up-core-upper-body-exercise

I’ve personally experienced that even a hallway can become a micro-gym:

  • Sturdy Chair: It’s the only “equipment” I can’t do without. I use it for dips, as support for certain push-ups, even to lean on when I’m stretching.
  • Free Corner on the Floor: You need very little—about the size of a yoga mat. Make sure there aren’t any sharp objects around. I learned that the hard way with a push-up and a table edge!
  • Solid Wall: For standing push-ups and certain stability exercises. Even a sturdy door can work in a pinch, just make sure it won’t budge!


Main Exercises for the Triceps

I’ve written elsewhere about long lists of bodyweight exercises.

Back when I had limited space, I figured out how to make these moves work for me.

The cool thing?

They’re great outside too.

Close-Grip Push-Ups

Close-grip-push-up-triceps-exercise

They’re a variation of the traditional push-up, with your hands closer together under your chest.

Elbows in, meaning elbows close to the body.

This small adjustment puts a lot of load on the triceps.

I remember, the first few times, I’d “fail” after just a few reps because I wasn’t used to the intensity of the exercise.

It’s ideal to start with just a few well-executed push-ups, then gradually increase.

Chair Dips

Chair-dips-exercise-triceps-strength-bodyweight-training

A timeless classic that doesn’t require much room.

All you need is a stable chair and your motivation.

Place your palms on the edge, keep your legs forward (more or less extended depending on your level), and bend your elbows to lower your body.

The “magic” part?

The contraction you feel in the triceps.

To make it easier, bend your knees more.

To make it harder, keep your feet on another support.


Variations and Progressions for Advanced Individuals

If you feel these basic exercises aren’t enough anymore, there are many ways to ramp up the intensity even in tight spaces.

I personally love to vary to avoid boredom and to break through plateaus:

Bodyweight Triceps Extensions

They’re like a French press, but without weights—just your body.

Get into a plank on your forearms, push upward by extending your arms, and keep your body in a straight line.

It works the triceps intensely without stressing the shoulders.

Find a stable spot, and you’re ready to go.

Tiger Push-Ups:

Part push-up, part triceps extension.

Start with a normal push-up, but as you rise, push your hips back toward your heels, keeping your elbows in.

Feel the triceps working throughout their range.

Great for anyone looking for a dynamic challenge without equipment.


Practical Tips for an Effective Workout

Over time, I’ve learned a few tricks to make these exercises more fruitful, even when space is minimal:

  • Aim for Medium-High Reps: If you’re not lifting heavy external weights, you’ll need to do more reps to really fatigue the muscle. Personally, I like sets of 12-15 reps, increasing if I can complete them too easily.
  • Play with Timing: Try lowering slowly (2-3 seconds) and pushing up faster, or hold the bottom position for a moment. This creates constant tension and squeezes the most out of your triceps.
  • Listen to Your Body: If you feel joint pain, reduce your range of motion or stop. Differentiating between “muscular pain from effort” and “joint pain from injury” is crucial to avoid bigger problems.


Common Mistakes to Avoid

  • Elbows Going Out of Control: Letting your elbows flare out—what I call “wandering elbows.” This can happen if you lose focus during narrow push-ups or tricep dips. Keeping them tucked in helps maximize triceps engagement and prevents unnecessary strain on your shoulders.
  • Neglecting the Core: When your trunk isn’t engaged, your hips sag and form suffers. I learned this the hard way: I thought I was doing a good job, but I was just placing undue strain on my lower back.
  • Skipping Warm-Up: Often, those who train at home skip stretching or warming up. But even two minutes of shoulder rotations and wrist movements make a huge difference in preventing injuries.


The Importance of Nutrition and Rest

I always like to point out that training is just one piece of the puzzle.

If you really want to see improvements, you have to pay attention to what you do outside the “home-gym”:

  • Quality Proteins: Eggs, lean meats, legumes, dairy products, or plant-based proteins. Muscles need “building blocks” to repair and grow.
  • Hydration: Drinking enough isn’t optional, especially if you train often and sweat a lot. I always keep a water bottle handy. It helps keep muscles active and reduces fatigue.
  • Adequate Rest: Getting 7-8 hours of sleep a night changed my life. Sleep is when muscles regenerate. If you sleep too little, workout quality suffers.


Example of a Mini Triceps Routine at Home

Maybe you’re wondering how to structure a triceps routine at home.

Here’s an example I tried when I had minimal space and time available:

Monday: 3 sets of chair dips (12-15 reps) + 3 sets of close-grip push-ups (8-10 reps).

Wednesday: 3 sets of diamond push-ups (as many reps as possible with good form) + 2 sets of bodyweight triceps extensions (10-12 reps).

Friday: 3 sets of tiger push-ups (10-12 reps) + 2 sets of chair dips (12-15 reps).

But wait, your workout shouldn’t end with triceps alone!

To make the most out of your home workouts, I’d recommend throwing in some classic push-ups to hit your chest.

And let’s not forget your back—there are tons of great bodyweight moves to strengthen it, even without fancy equipment.

When it comes to shoulders, the same rule applies.

A few well-placed exercises can do wonders.

Now, if you’re serious about working your biceps, do yourself a favor and grab a pull-up bar for your door frame.

Trust me, it’s a game-changer.

You can knock out tons of exercises with it and build some real pulling strength.

And of course, we can’t skip leg day! Squats, lunges, you name it—the sky’s the limit.


Mini Weekly Full-Body Home Workout Plan

Day Focus Exercises
Monday Chest & Triceps Push-Ups (3×15), Chair Dips (3×12), Close-Grip Push-Ups (3×10)
Tuesday Legs Squats (3×20), Lunges (3×15 per leg), Calf Raises (3×20)
Wednesday Rest Active recovery (stretching, walking)
Thursday Back & Biceps Superman (3×20 sec), Chin-Ups (if available) (3×8), Towel Curls (3×12)
Friday Shoulders & Core Pike Push-Ups (3×12), Arm Circles (3×30 sec), Plank (3×30 sec), Russian Twists (3×20)
Saturday Full-Body Burpees (3×10), Mountain Climbers (3×30 sec), Jump Squats (3×12)
Sunday Rest Active recovery (stretching, walking)

Need Help with These Moves? Here’s How to Do Them:

Squats: Stand with feet shoulder-width apart, lower your hips until your thighs are parallel to the floor, and push through your heels to return to standing. Helps develop lower-body power and supports functional movements.

Lunges: Step forward with one leg, lower your hips until both knees form a 90-degree angle, and push back to the starting position. A great way to engage leg muscles and enhance coordination.

Calf Raises: Stand upright, lift your heels off the ground, and slowly lower back down. Supports ankle stability and enhances muscular endurance.

Superman: Lie face down, extend your arms and legs, then lift them off the ground while engaging your lower back. Contributes to better posture and core resilience.

Pike Push-Ups: Get into a downward dog position and lower your head towards the floor, focusing on your shoulders. Helps increase upper-body endurance and control.

Plank: Hold a push-up position with your forearms on the ground, keeping your core tight and back straight. A reliable exercise for core strength and spinal alignment.

Russian Twists: Sit with your feet off the floor, twist your torso from side to side while holding an object or just using your hands. Enhances rotational control and core engagement.

Mountain Climbers: In a plank position, alternate driving your knees toward your chest at a fast pace. A dynamic move that challenges endurance and agility.

Chin-Ups: If you have a sturdy bar available, grip it with your palms facing you and pull yourself up until your chin clears the bar. Develops pulling strength and supports upper-body conditioning.

Towel Curls: Hold a towel with both hands and pull against resistance (like stepping on it or having a partner hold it). Provides an effective way to stimulate arm muscles without equipment.

Arm Circles: Extend your arms to the sides and make small circular motions, gradually increasing the size. Enhances shoulder flexibility and overall joint mobility.

Burpees: Start in a standing position, drop into a squat, kick your legs back into a plank, perform a push-up, then jump back up. Boosts cardiovascular endurance and total-body conditioning.

Jump Squats: Lower into a squat position, then explode upwards into a jump, landing softly with your knees slightly bent. Improves power output and explosive strength.


Got Joint Issues? Here’s What to Do

If your elbows or shoulders aren’t exactly thrilled about push-ups and dips, don’t worry—you’re not alone.

Before jumping in, it’s always smart to check with your doctor or a physical therapist to avoid making things worse.

But hey, that doesn’t mean you have to skip triceps workouts altogether.

There are ways to keep things joint-friendly while still getting in a solid session.

Here are a few tweaks that have worked well for me and others:

  • Close-Grip Push-Ups (Knee Style): Dropping to the knees takes some pressure off the shoulders and makes it easier to focus on keeping those elbows in. It’s still a solid triceps burner, but without the extra strain.
  • Chair Dips (Bend Those Knees): Keeping the knees bent and feet closer to your body is a total game-changer. It lightens the load and helps you control the movement better.
  • Partial Range Diamond Push-Ups: No need to go all the way down if it feels like your joints are yelling at you. Starting with smaller movements helps you build strength without overdoing it.


How to Track Progress

I used to struggle with motivation until I started tracking my progress—it’s a total game-changer.

One thing I do often is take a front and side photo every two weeks, so I can see how my arms and posture change over time.

Also, I keep a journal or use an app where I log how many reps I manage for each exercise.

If one day I can do 12 dip reps and the next week I do 15, I know I’m on the right track.

A few minutes of note-taking after each session make a huge difference in the long run.


Training Frequency and Optimal Recovery

A question I often get asked is: “How many times a week should I train triceps?

There’s no hard-and-fast rule for everyone, but for beginners, starting with 1 to 2 sessions per week is usually a smart move.

For the best results, as you build strength and confidence, you can gradually bump it up to 2 to 3 times a week, depending on your goals and how your body responds.

It’s vital to allow at least a day of recovery between workouts, so your muscles have time to regenerate.

If you train them too often, you risk overfatiguing them and not improving as you’d like.

Rest doesn’t mean total inactivity: you can devote off days to light stretching sessions or workouts targeting other muscle groups.


Boosting Motivation in a Home Environment

Working out at home, especially in a small space, can feel monotonous.

I try to make the atmosphere more stimulating with a playlist that pumps me up or a timer that challenges me to complete a certain number of exercises in a set time.

I also set small periodic goals for myself, like “reach 20 consecutive close-grip push-ups by the end of the month.”

When I achieve them, I reward myself with something simple (a new mat, a fitness T-shirt, or even just a day of total relaxation).


Principles of Progressive Overload

If you want to keep progressing without adding external weights, you have to play with variables.

Increase the number of reps or sets, slow down the negative phase (the descent), or add isometric holds (pause mid-movement for a few seconds).

Small changes make each session more challenging and further stimulate the muscles.

I find it particularly effective to reduce rest times between sets, so even with the same exercises, I feel a greater level of challenge.


Conclusion

My experience has taught me that, to develop the triceps, you don’t need a professional bench or a whole room turned into a gym.

You just need to know how to adapt to your environment, be creative, and, above all, be consistent.

If your goal is to have stronger, more defined arms, you can do it even in a 20-square-meter studio apartment.

What makes the difference is determination, variety in exercises, and attention to details like nutrition and rest.

Training at home in a cramped space even has an advantage: you don’t waste precious time traveling, and you can grab the chance to do a few sets whenever you have a spare moment.

I liked working out in the morning as soon as I woke up or in the evening before dinner, just to relieve stress.

Ultimately, “small space” doesn’t mean “small possibilities.”

If you want amazing triceps, you don’t have to go to the gym: build your own custom routine and enjoy the results that come, one effort at a time.


Frequently Asked Questions (FAQs)

Can I train every day?

Muscles need rest to grow. It’s advisable to alternate a training day with a rest day or devote yourself to different muscle groups.

What if I feel joint pain?

The first thing to do is consult a professional—doctor or physical therapist. You might need to reduce the range of motion or choose less invasive variations, like wall push-ups.

How long does it take to see results?

It depends on your starting level, your nutrition, and your consistency. Some people notice improvements in a few weeks, others take a few months. The important thing is not to get discouraged.

Recommended
Categories
Advanced Workouts BODYWEIGHT EXERCISES

Is It Possible to Combine Calisthenics and Weight Lifting in a Single Workout?

There’s something magical about alternating a powerful movement like a heavy squat with the lightness and control of a pistol squat.

It’s like giving your body two different languages to express strength and precision.

In this article, I’ll guide you through the secrets of a workout that combines the best of calisthenics and weight lifting.

Whether you want to explode with power or refine your muscle control, you’ll find all the answers here, plus some extra tips to get started right away.


History and Origins: From Gymnastic Bodyweight Training to Modern Power Racks

From-warrior-strength-to-modern-weightlifting

Sometimes, to understand how we got to today’s training methods, we need to look back at the past.

Bodyweight exercises were essential for Greek wrestlers and Roman soldiers.

Push-ups, squats, and pull-ups weren’t just workouts; they were tools for survival.

I can picture them preparing for battle with moves that were simple yet full of purpose.

Then came weight lifting.

With the first public gyms, barbells and dumbbells brought a whole new level of precision.

The first time I loaded a barbell for a squat, I thought I had it all under control.

Spoiler alert: the barbell had different plans!

I quickly learned that weight is a strict but fair teacher.

Calisthenics, on the other hand, was a revelation.

Using your own body as a tool confronts you with challenges you never expected.

I remember my first muscle-up—it seemed impossible.

Then, one rep at a time, I started to understand control.

And when I tried the pistol squat… well, let’s just say falling was part of the process.

Today, these two worlds blend perfectly.

Lifting weights gives me raw strength.

Bodyweight exercises improve my control and agility.

Switching from a deadlift to a plyometric push-up is a mix that keeps both the body—and the mind—wide awake.

For me, it’s like having two different mentors: one pushing me to break limits, and one teaching me how to master every movement.

A perfect combo for anyone who wants the most out of every workout.


Why Calisthenics and Weight Lifting Can Be the Perfect Combo

Calisthenics-or-weightlifting-choose

Whenever people ask, “Why should I even combine bodyweight moves and a barbell?” I have at least ten reasons ready.

The first one is simple: balancing absolute strength and functional strength.

Absolute Strength:

You develop it by pushing your limits on exercises like the bench press, squat, and deadlift, where you progressively increase the weight and break mental (and physical) barriers.

Functional Strength:

You build it with movements that use your own body weight and gravity (like pull-ups, push-ups, and dips).

These exercises improve coordination, mobility, and your ability to move through space with agility.

When you unite these two approaches, you get a “super physique” (for lack of a better term) that can handle multiple stimuli: heavy loads, plyometric moves, stability, speed, and even endurance.

All of this with less boredom and, trust me, more fun, because every session becomes a new challenge.


Physical and Mental Benefits of a Combined Workout

One of the most interesting aspects is that training with both calisthenics and weights offers benefits beyond aesthetics.

Stimulating Complete Neuromuscular Response.

The more varied the exercises, the more your brain learns to recruit muscle fibers efficiently.

Result?

A faster “motor learning” phase and tangible progress in a very short time.

Better Proprioception.

Performing bodyweight movements teaches you to “feel” every small angle of motion, while lifting weights forces you to safely handle external loads.

This mix promotes an extraordinary body awareness.

Injury Prevention.

A body that knows how to move in multiple directions, with different angles and loads, becomes more resilient.

I remember that when I did only weight training, I often had minor muscle strains and joint aches.

Since introducing calisthenics, those issues have drastically decreased.

A Boost in Self-Esteem.

Feeling capable of doing 10 pull-ups in a row and then immediately benching a serious amount of weight makes you feel almost… unstoppable!

And the confidence you build in the gym carries over into many other areas of life.

Variety and Fun.

Personally, I get bored if I always do the same things.

With a combined workout, you have a whole palette of exercises available.

Every session can be different, which helps keep motivation high.


How to Start: Step by Step for Beginners

If you’re totally new to this concept, you might wonder where to begin.

Don’t worry, starting is easier than you think.

The key is to build a solid, gradual foundation without overdoing it.

Begin with simple movements and steadily increase intensity and complexity.

Valuate Your Current Level.

  • Are you stronger in weight lifting or in bodyweight exercises?
  • Or maybe you’re a newbie in both areas?
  • That will help you figure out where to focus your initial efforts.

Set Realistic Goals.

  • Do you want to improve muscle mass, definition, or endurance?
  • Each goal requires a different combination of exercises and intensity.
  • For example, if your main goal is muscle mass, you might increase the volume on weight lifting and add basic calisthenics.

Learn Proper Technique.

  • Don’t underestimate form, especially for exercises like squats or deadlifts.
  • The same goes for advanced bodyweight moves like pistol squats or pull-ups—technique is 90% of success (and safety).

Define a Frequency.

  • Two or three sessions a week might be enough for a hybrid workout at first.
  • It’s important to give your muscles time to recover, so don’t pack in too many sessions.


Principles of Programming: Organizing the Week for Best Results

Programming is key if you want steady progress.

Here’s an example of how you could structure a week of training, based on a three-session plan.

Day 1 – Focus: Weight Lifting Strength + Basic Calisthenics

  • Squat with barbell: 4 sets x 5-6 reps
  • Bench press: 4 sets x 5-6 reps
  • Pull-ups: 3 sets x max reps
  • Standard or decline push-ups: 3 sets x 12-15 reps

Day 2 – Focus: Calisthenics Skills + Complementary Weights

  • Skill work (handstand, L-sit, back lever progressions): 15-20 minutes
  • Military press with dumbbells or barbell: 4 sets x 8-10 reps
  • Pistol squats (or advanced bodyweight squats): 3 sets x 6-8 reps per leg
  • Parallel bar dips: 3 sets x max reps

Day 3 – High-Intensity Circuit (Hybrid HIIT)

  • 6 heavy deadlifts
  • 10-12 plyometric push-ups
  • 8 dumbbell lunges (per leg)
  • 6-8 pull-ups
  • Repeat for 4-5 rounds with minimal rest.
  • Clearly, this is just an example.
  • Feel free to modify it based on preferences, experience level, and available time.


Practical Examples of Combined Exercises

To get the most out of a workout that blends calisthenics and weights, sometimes it’s enough to pair two exercises in a superset.

One can use an external load, and the other can be bodyweight.

Super-Set Bench Press + Push-Up

  • Bench press (5-6 reps)
  • Explosive push-ups (10 reps)

Super-Set Squat + Pistol Squat

  • Barbell squat (8 reps)
  • Pistol squat (5 reps per leg)

Super-Set Military Press + Handstand Hold

  • Military press with barbell or dumbbells (6-8 reps)
  • 20-30 seconds of a handstand hold (against the wall if needed)
  • This “shock” method is fantastic for stimulating muscle growth, endurance, and coordination.
  • The difference in stimulus between external load and bodyweight creates very rapid adaptations.


Implementing Calisthenics and Weight Lifting on Alternate Days

If you prefer to alternate calisthenics and weight lifting days, here’s an easy way to organize your workouts and make the most of both approaches.

Monday – Calisthenics (Strength and Skill)

  • Pull-ups: 4 sets x max reps
  • Pistol squat: 3 sets x 6-8 reps per leg
  • Plyometric push-ups: 3 sets x 12 reps
  • L-sit or plank: 3 sets x 20-30 seconds

Wednesday – Weight Lifting (Max Strength)

  • Barbell squat: 4 sets x 5 reps
  • Bench press: 4 sets x 5-6 reps
  • Deadlifts: 3 sets x 6 reps
  • Barbell row: 3 sets x 8 reps

Friday – Calisthenics (Endurance)

  • Bodyweight circuit (4-5 rounds):
    • 10 pull-ups
    • 15 push-ups
    • 20 bodyweight squats
    • 30-second plank

Saturday – Weight Lifting (Volume)

  • Romanian deadlifts: 3 sets x 8 reps
  • Dumbbell lunges: 3 sets x 10 reps per leg
  • Weighted parallel bar dips: 3 sets x max reps
  • Dumbbell curls: 3 sets x 12 reps

Sunday – Complete Rest or Active Recovery

  • You can devote Sunday to a walk, yoga, or stretching to help you recover and get ready for the new week.


Common Mistakes to Avoid

I’ve learned the hard way (literally, with a few minor injuries) that there are mistakes you just shouldn’t make.

When you start combining calisthenics and weight lifting, it’s normal to stumble a bit.

Both approaches require technique and attention, and uniting them can feel complicated at first.

But with some planning and the right mindset, you can avoid the most common pitfalls.

Skipping Recovery

If you train heavy strength and technical skills on the same day, the stress on the body is high.

Make sure to sleep at least 7-8 hours a night and include active rest days, maybe with yoga or light stretching.

Overdoing the Weights

A typical mistake is loading up too much weight right away, risking bad form and injury.

Remember: gradual progression is your best friend.

Always Doing the Same Exercises

Variety is essential.

Change up your push-up, pull-up, dip, and squat variations.

Try new set and rep schemes.

Keep your body and mind on their toes!

Forgetting Mobility

Joint mobility is the “lubricant” of your movements.

Doing regular mobility and stretching exercises will help you push harder when needed, without limitations.


Recovery, Nutrition, and Supplementation

Even though it’s often overlooked (or taken for granted), you can’t truly talk about top-notch training without covering recovery and nutrition.

Balanced Nutrition

Make sure to get quality protein (1.5-2 g per kg of body weight daily), complex carbs (rice, oats, sweet potatoes), and healthy fats (extra virgin olive oil, avocado, nuts).

Fruits and vegetables should always be included for vitamins and minerals.

Constant Hydration

Drinking enough water is critical, especially if you’re mixing heavy lifting and dynamic bodyweight movements in longer sessions.

Useful Supplements

  • Whey or vegan protein: helps you hit your daily protein goal.
  • Creatine: can assist with explosive strength.
  • Essential Amino Acids (EAA) or BCAAs: may help with recovery, although they’re not absolutely necessary.

Massages, Yoga, and Active Rest

If you’re training intensely on multiple fronts, take some time for muscle massages, yoga sessions, or simply walks.

They help relax tension and reduce lactic acid buildup.


Mental Training and Motivation: The Psychological Component

Training in a mixed way also requires a certain mental flexibility.

Learn to Manage Frustration

Maybe you can squat a lot of weight, but you realize you can’t do a perfect pull-up yet.

It’s normal: everyone has their own strengths and weaknesses.

Set Intermediate Goals

If you’re far from a muscle-up, start by aiming for 10 solid pull-ups and 10 perfect dips.

Step by step, you’ll get there.

Celebrate Small Wins

Improving your bench press by 5 pounds or adding one more pull-up is progress.

Don’t wait only for the big milestones: celebrate every single improvement.

Visualization

Before performing a complex exercise (like a heavy squat or an advanced calisthenics move), take a few seconds to imagine the correct execution, as if you’re watching a video of yourself in your mind.

It helps boost performance!


Conclusion

Combining calisthenics and weight lifting in a single session isn’t just possible—it’s a revelation.

It lets you build strength, agility, and control in a harmonious way.

When I first started, I thought it was too complex.

But after just a few workouts, I realized how motivating it was to see progress in both areas.

Every session becomes a new challenge, and once you find this rhythm, there’s no turning back.

Your body and mind will work together like never before.


FAQs

Which one builds more muscle: calisthenics or weight lifting?

Weight lifting is more effective for increasing muscle mass, thanks to progressive overload. Calisthenics, on the other hand, develops relative strength and defined muscles, but it usually takes more time to see significant hypertrophy.

How many times a week should I do a hybrid workout?

If you’re a beginner, 2-3 hybrid sessions per week are enough to see initial progress. Once you gain more experience, you can go up to 4, but make sure to include rest or active recovery days.

Should I do calisthenics before or after lifting weights?

It depends on your main goal. If you want to focus on maximal strength with weights, do them first when you’re fresh. If you want to nail bodyweight skills (like a muscle-up or planche), start with calisthenics. You can also alternate, based on your weekly plan.

How can I avoid injuries in these intense workouts?

Use perfect technique, progress gradually, and warm up thoroughly. Never skip the warm-up phase, and do mobility exercises. Listen to your body: if you feel persistent pain or signs of overtraining, take a break.

How do I include cardio in a mixed program?

You can add HIIT (High Intensity Interval Training) sessions after lifting or calisthenics, or dedicate a day to running, swimming, or biking. If you do a mixed circuit with minimal rest, you’ll already get a decent cardio stimulus.

Do I need to switch to weights if I stop progressing in calisthenics?

Not always. Try adding harder variations, increasing volume, or using resistance like a weighted vest before turning to weights.

Can combining calisthenics and weight lifting help with fat loss?

Yes, the mix of high-intensity calisthenics and strength-focused weight lifting creates an effective combination for burning calories and building muscle, which helps boost your metabolism.

What equipment do I need for a combined calisthenics and weight lifting workout?

For calisthenics, you’ll need minimal equipment like a pull-up bar or parallettes. For weight lifting, basic tools like a barbell, dumbbells, or kettlebells will cover most exercises.

Recommended
Categories
Beginner Workouts BODYWEIGHT EXERCISES

Starting Calisthenics at 30: Too Late or Just the Right Time?

Turning 30 wasn’t a major turning point for me—I’d been training for years by then.

Push-Ups? 

Those were my bread and butter long before I ever touched a weight. 

Pull-ups followed soon after, and I eventually mastered weighted pull-ups. 

There’s something incredibly satisfying about strapping on extra weight and defying gravity—it’s a true test of strength and control.

Eventually, I moved on to a mix of weights and gym routines. 

But even with years of training under my belt, I couldn’t shake the feeling that something was missing.

Could I hold a controlled handstand?

Not really. 

Transition smoothly into a muscle-up? 

Definitely not. 

My body was strong, but I hadn’t mastered it the way calisthenics demanded.

That’s when I decided to refocus on bodyweight training—not just as an accessory to weights but as a core part of my routine.

Calisthenics wasn’t just about building strength. 

It was about control, precision, and moving with purpose.

Let’s dive into why starting calisthenics at 30 (or anytime, really) isn’t just doable—it’s one of the smartest moves you can make.


Shattering the Myth of “Too Old”

Exercise-at-any-age-fitness-dumbbells-running-dancing

Some people believe that after 30, it’s time to lower the bar on physical goals.

I couldn’t disagree more.

Your body at 30 is different, sure.

But different doesn’t mean worse—it means smarter, more strategic, and surprisingly capable.

When I first attempted a wall handstand, I thought, “How hard can this be?”

Turns out, quite hard.

My arms trembled, my core was screaming, and I felt more like I was clinging to the wall for dear life than doing anything remotely impressive.

But here’s the thing: I stuck with it.

Week after week, I practiced, refined my form, and built strength where I didn’t know I needed it.

Eventually, it clicked.

I wasn’t just balancing upside down; I was learning how to truly connect with my body.

And here’s what makes calisthenics even better—it fits into a busy life.

You don’t need a gym or loads of equipment.

Whether it’s a quick session in your living room or squeezing in some push-ups while dinner’s in the oven, you can train anytime, anywhere.

So, if you’re 30 and wondering if it’s too late to take on new challenges, don’t.

Your body is ready, your mind is sharper, and the results might just surprise you.

And the best part?

You can make progress without stepping foot in a gym.

It’s never too late to start, and calisthenics makes it easier than you think.


Why Exercise Is Your Best Ally Against Aging

Let’s be honest, getting older comes with its challenges.

Stiff joints, slower recovery, and that mysterious ache that shows up out of nowhere.

But here’s the good news—exercise is one of the most powerful tools we have to fight back.

1. Preserves Muscle Mass

After 30, your body naturally starts losing muscle mass—a process called sarcopenia.

Studies show that resistance training, including calisthenics, can slow or even reverse this loss.

I’ve seen it firsthand.

A friend of mine in his 40s picked up pull-ups for the first time in years, and not only did his strength improve, but his energy levels skyrocketed too.

The science backs it up—a 2019 review in Frontiers in Physiology showed how regular strength training helps you keep that muscle you worked so hard for.

2. Improves Bone Density

As we age, our bones lose density, increasing the risk of fractures.

Weight-bearing exercises like squats and push-ups stimulate bone growth.

A 2014 study in Osteoporosis International confirms that resistance training improves bone mineral density, even in older adults.

3. Boosts Mobility and Balance

Staying active keeps your joints moving and improves flexibility.

Exercises like lunges and planks not only strengthen your muscles but also enhance balance, reducing the risk of falls—a major concern as you age.

I remember my first attempt at lunges—I wobbled like a toddler learning to walk.

Fast forward a few weeks, and not only was I steadier, but my knees thanked me for it.

A 2020 study in Geriatrics & Gerontology International found a 23% reduction in fall risk with consistent functional exercises.

4. Supports Mental Health

Exercise doesn’t just benefit your body; it’s a mood booster too.

Physical activity increases endorphin levels, combats stress, and can even reduce symptoms of depression.

This one’s personal.

After a long day, a quick calisthenics session always clears my head.

A 2018 meta-analysis in JAMA Psychiatry showed regular exercise lowers the risk of depression by 25%.

No wonder I feel so much better after a few sets of push-ups.

5. Keeps Your Heart Healthy

Aerobic and resistance training keep your cardiovascular system in check.

I used to think heart health was all about running marathons, but strength training plays a huge role too.

A 2019 study in the Journal of the American Heart Association found that combining strength and aerobic training reduced heart disease risk by up to 46%.

Why Start Now?

No matter your age, it’s never too late to reap the benefits.

I’ve seen people in their 50s nail their first pull-up after just a few months of training.

Starting with calisthenics is a great way to build strength, improve mobility, and keep your body functioning well into your later years.

Think of it as a long-term investment in yourself—a healthier, happier, and stronger version of you is waiting.


What Are the Basic Calisthenics Exercises?

When I first started calisthenics, I quickly realized it all comes down to mastering the basics.

These aren’t just simple moves—they’re the foundation for everything more advanced.

Here’s the lineup:

Push-Ups

The ultimate classic. Whether on the floor, against a wall, or on your knees, this one never goes out of style. My first push-ups? Way too fast to count—but hey, progress is progress.

Pull-Ups

If you can nail pull-ups, you’re officially part of the calisthenics club. . I could do a couple poorly, so I used the assisted pull-up machine to refine my technique.

Squats

Bodyweight squats? They’re not as innocent as they look. Your legs and glutes will feel the burn, leaving your knees stronger and more resilient for the long haul.

Planks

Hold still, they said. It’ll be easy, they said. Spoiler: it’s not. But planks are amazing for core strength and teaching you how to embrace the shake.

Dips

Find a chair, a sturdy surface, or even parallel bars. Dips are a great way to turn your triceps into steel (or at least feel like they are).

Leg Raises

These look simple but are a sneaky challenge for your lower abs. My first attempt? Let’s just say gravity won that round.

Start with these, and you’ll have a solid base for calisthenics—and some funny stories to tell along the way. 

Master the basics, and the cooler moves (like handstands and muscle-ups) won’t feel so far away.


Beginner Steps You Won’t Regret

First things first, test the waters.

If you can’t do a full push-up, start with knee push-ups or even wall push-ups.

Pick one progression and stick to it until you feel steady enough to upgrade.

Keep your core engaged like you’re bracing for a punch—yes, that means a rock-solid midsection from the get-go.

Take your time.

And celebrate every small win, like finally touching your toes or cranking out a few extra reps.

No need to sprint to the finish line; this is more like a scenic road trip.

When I began, I could manage a couple of pull-ups, but they weren’t exactly smooth.

So, I added “negative pull-ups” to my routine—jumping up to the bar and slowly lowering myself down to build strength.

It wasn’t the flashiest move, but it made a big difference.

Within a month, my pull-ups felt stronger and more controlled, and I was finally able to add a few extra reps with confidence.


How to Start Calisthenics: A Weekly Beginner Plan

Day Focus Exercises Sets x Reps/Duration
Monday Push (Upper Body) – Wall Push-Ups / Incline Push-Ups
– Plank (hold with proper form)
– Shoulder Taps (in plank position)
2 x 8-10
2 x 10-20 sec
2 x 6 (3 per side)
Tuesday Active Rest – Gentle Walk
– Light Stretching
15-20 min
5-10 min
Wednesday Pull (Upper Body) – Negative Pull-Ups
– Bodyweight Rows
– Scapular Pull-Ups
2 x 3-4
2 x 6-8
2 x 6
Thursday Rest – Total Rest or Gentle Yoga
Friday Core and Legs – Bodyweight Squats
– Glute Bridges
– Dead Bug
2 x 8-10
2 x 8-10
2 x 6 (3 per side)
Saturday Mobility & Recovery – Cat-Cow Stretch
– Deep Squat Hold
– Downward Dog Stretch
2 x 10
2 x 10-15 sec
2 x 20 sec
Sunday Rest or Light Movement – Gentle Walk or Relaxed Cycling 15-20 min


What You Need for Calisthenics at Home

The great thing about calisthenics?

You don’t need a fancy gym.

That’s exactly what got me hooked.

I loved the idea of keeping it simple—just a few basics and you’re ready to go.

  1. Pull-Up Bar
    This one’s a game-changer. I’ve spent more time hanging from a pull-up bar than I care to admit, but it’s worth it. Doorway bars work great—just make sure it’s secure.
  2. Parallettes
    These are my go-to for dips and push-ups. They’re small, portable, and much kinder to my wrists than flat hands on the floor. Plus, they make me feel a little more like a pro (even when I’m not).
  3. Resistance Bands
    I can’t recommend these enough. I used them a ton when I was working on my pull-ups. They’re also great for adding resistance to squats or making stretches more effective.
  4. A Yoga Mat
    Look, I’ve tried planking on a hardwood floor, and I wouldn’t recommend it. A yoga mat? Total game-changer for comfort and stability.


Simple Ways to Switch Up Your Workout

Now, let’s dive into a few calisthenics moves that often fly under the radar but are incredibly effective and worth adding to your routine.

They’re all real, practical, and can level up your training game.

1# Doorway Towel Row

Loop a sturdy towel around a doorknob, ensuring the door is strong and locked.

Or, drape it over the top of a slightly open door, letting both ends hang down, and close the door to secure it.

Grab each end of the towel, lean back, and row your body forward.

It’s a surprisingly tough move for your back and arms, especially if you play with your foot positioning.

2# Elevated Inchworms

Stand on a low step or bench, hinge forward to place your hands on the ground, and inch your hands forward until you reach a plank.

Then inch them back.
Your hamstrings will probably scream at first, but give them time—they’ll adapt.

This also opens up your shoulders and improves stability.

3# Scapular Pull-Ups

Instead of bending your arms, focus on shrugging your shoulders down and back while hanging from a bar.

It strengthens those tricky-to-target muscles around your shoulder blades (the scapular region).

Better shoulder stability = fewer injuries and stronger pull-ups down the road.

4# Archer Push-Ups

Start in a wide push-up position.

As you lower, bend one arm while keeping the other extended, shifting most of your weight to one side.

Alternate sides.

This move builds unilateral strength and improves stability.

5# Wall Walks

Begin in a plank position with your feet against a wall.

Slowly “walk” your feet up the wall while moving your hands closer to the wall until you’re almost in a handstand position.

Then reverse the movement.

This is excellent for building shoulder and core strength while improving body awareness.


What Beginners Should Watch Out For

Starting calisthenics can be exciting, but there are a few key things to keep in mind to stay safe and make real progress:

  • Protect Your Wrists:
    Push-ups, planks, and dips can put stress on your wrists. Start with wrist mobility exercises like circles or gentle stretches on all fours to avoid discomfort.
  • Build Pull-Up Strength Gradually:
    If you can’t do a pull-up yet, focus on scapular pull-ups (shrugging your shoulders while hanging) and negative pull-ups (lowering yourself slowly). This strengthens your back and grip safely.
  • Don’t Skip Warm-Ups:
    Begin each session with dynamic movements like arm swings, bodyweight squats, or light jumping jacks to prepare your joints and muscles.
  • Prioritize Form Over Reps:
    Sloppy push-ups or squats will only lead to bad habits and possible injury. Keep your movements controlled, and stop when your form breaks down.
  • Don’t Overload Yourself: Your body needs time to adapt. Alternate training days with light activities like walking or yoga. Gentle movement aids recovery without overdoing it.


RELATED:>>> What are the common problems with calisthenics?


The Power of Sleep, Recovery, and Small Wins

Man-sleeping-with-dumbbell-on-bed-recovery-fitness

Now, here’s something that doesn’t get enough attention: micro sets.

It’s a simple idea—do small sets of an exercise (like pull-ups) throughout the day, rather than all at once.

At 30 (or 40, or 50), our bodies thrive on consistency rather than all-out intensity 24/7.

Mini workouts can keep your muscles primed without leaving you feeling beat-up.

Also, never underestimate the power of good ol’ rest.

If your body feels like a sack of bricks, take a day off, or focus on gentle stretching.

Better to come back stronger tomorrow than risk an injury today.


How Calisthenics Taught Me to Compete with Myself

One of the biggest lessons I learned after 30 was to stop comparing my progress to everyone else’s.

My friend Dave, for instance, could crank out 15 handstand push-ups with zero drama.

Me?

Let’s just say I took the scenic route to get there.

But that’s the beauty of calisthenics: it’s a personal journey, measured in small milestones.

One day, you’re celebrating a single pull-up.

A month later, you’re tackling sets of five.

Keep your eyes on your own lane.

Your biggest competition is that previous version of you—the one who couldn’t do a proper push-up.


Final Thoughts

Starting calisthenics at 30 is like opening a new chapter in your training story.

Sure, you might run into a few surprises along the way—tight hips, shaky arms, or a move that feels impossible at first. But the rewards?

Absolutely worth it.

Stronger muscles, improved mobility, and a sense of control over your body are just the beginning.

And let’s not forget the thrill of achieving something that once seemed out of reach.

Before you dive in, it’s always a good idea to consult with a fitness expert or your doctor, especially if you’re new to training or have any health concerns.

Proper guidance can ensure you’re starting safely and making the most of your efforts.

Take it one step at a time.

Each rep, each hold, each tiny improvement is a victory.

Calisthenics isn’t just a workout; it’s an adventure.

You’ll challenge your limits, learn to trust your body, and maybe even surprise yourself.


FAQs

Can You Do Calisthenics If You’re Overweight?

Yes! Calisthenics is adaptable for all fitness levels. Start with moves like wall push-ups or supported squats to ease into it. Over time, it strengthens your muscles, improves mobility, and can even aid in weight loss.

How Often Should You Train?

Beginners should aim for 2-3 days a week to allow proper recovery. As you progress, you can train 4-5 times a week, alternating muscle groups to avoid overtraining.

Can You Do Calisthenics at 50 or 60?

Definitely! Calisthenics is perfect for staying strong and mobile at any age. Focus on beginner-friendly exercises like planks, bodyweight squats, and wall push-ups, and gradually build from there.

Recommended
Categories
BODYWEIGHT EXERCISES Training Insights

Why Is Hybrid Calisthenics the New Fitness Trend?

I’ll never forget the day I tried to do a single-arm push-up in my living room, feeling like I was auditioning for a superhero movie.

I wobbled, nearly face-planted on my floor, and my dog gave me one of those “You okay, dude?” looks.

That was the moment I realized: my bodyweight workouts were missing a spark.

Little did I know that spark would come in the form of Hybrid Calisthenics—a playful blend of bodyweight training and external resistance that changed my entire fitness outlook.


My First Steps Into Hybrid Madness

I have to admit, I was once a die-hard purist.

I’d stick to push-ups, pull-ups, and squats, thinking that adding weights was almost like cheating.

But then I started getting restless.

I wanted more challenge, more variety.

I also noticed some muscle imbalances creeping in: my push strength was great, but my pull strength lagged behind.

So, I experimented.

I remember the first time I wrapped a resistance band around my back for push-ups.

My chest felt like it was on fire, but in the best way possible.

It was new, it was exciting, and it made me realize that adding external load to traditional movements isn’t cheating—it’s evolution.


What in the World Is Hybrid Calisthenics (and Why I Swear by It)?

Outdoor-front-lever-exercise-on-railings-for-full-body-strength-and-balance-training

So, what exactly is hybrid calisthenics?

It’s a training method that combines the simplicity of bodyweight exercises with the added challenge of resistance—like weights, bands, or other tools.

But it doesn’t stop there.

It also incorporates elements from yoga, gymnastics, and even martial arts to enhance flexibility, balance, and coordination.

By borrowing skills like handstands, dynamic kicks, and flow-based transitions, it creates a well-rounded approach that strengthens the body while improving agility and control.

This mix not only builds muscle and functional strength but also ensures a more versatile and adaptable way to train.

For me, it’s the ultimate way to keep my body adapting and my mind focused.

It’s the perfect blend of simplicity and innovation—taking bodyweight training and adding just enough resistance to make it fresh, challenging, and ridiculously effective.

What sets hybrid calisthenics apart is its ability to deliver results across the board.

Want to build strength? 

Adding resistance like weights or bands lets you push your muscles beyond their comfort zone, forcing them to adapt and grow stronger.

Looking to pack on muscle?

Hybrid calisthenics shines here too.

By increasing tension and controlling the tempo of each move, you maximize hypertrophy—the fancy term for building muscle.

It’s like turning a simple exercise into a precision tool for sculpting your body.

And let’s not forget functional fitness.

This approach doesn’t just build strength that looks good in the mirror—it gives you the kind of power that carries over into real life.

Picking up groceries, climbing stairs, or even dominating that weekend pick-up game becomes easier when your body moves as one cohesive unit.

The best part? 

It’s endlessly adaptable.

Whether you’re just starting out or looking to break through a plateau, hybrid calisthenics meets you where you are and takes you further than you thought possible.

It’s strength, hypertrophy, and functionality rolled into one—and it keeps things exciting, session after session.

Once you give it a shot, you’ll wonder why you ever stuck to plain old routines.


Why It Works: Backed by Science

I’m no lab-coat-wearing scientist, but I’ve read enough research to know this stuff is legit.

Your muscles adapt when they face new challenges.

It’s called progressive overload: steadily increasing the demands you place on your body.

I’ve found that bodyweight alone can sometimes plateau.

But when I slap on a weighted vest or hold a kettlebell during my squats, I feel my muscles light up in ways they never did before.

I like to think of it as teaching my body new tricks.

The synergy between my own weight and an external force primes my body for growth—both in strength and muscle mass.

Scientists call it neuromuscular adaptation; I just call it, “Finally, my muscles decided to clock in.”


Equipment for Hybrid Calisthenics

One of the best things about hybrid calisthenics is its versatility—you don’t need a fully equipped gym to get started.

That said, having a few key pieces of equipment can take your workouts to the next level and keep things fresh and challenging.

Here’s what I’d recommend:

  1. Pull-Up Bar
    This is the bread and butter of calisthenics. A sturdy pull-up bar opens the door to countless exercises, from pull-ups to hanging leg raises.
  2. Resistance Bands
    These are your secret weapon for adding resistance or assistance to your movements. They’re perfect for everything from banded push-ups to pull-up progressions. Plus, they’re lightweight and portable—ideal for home or travel workouts.
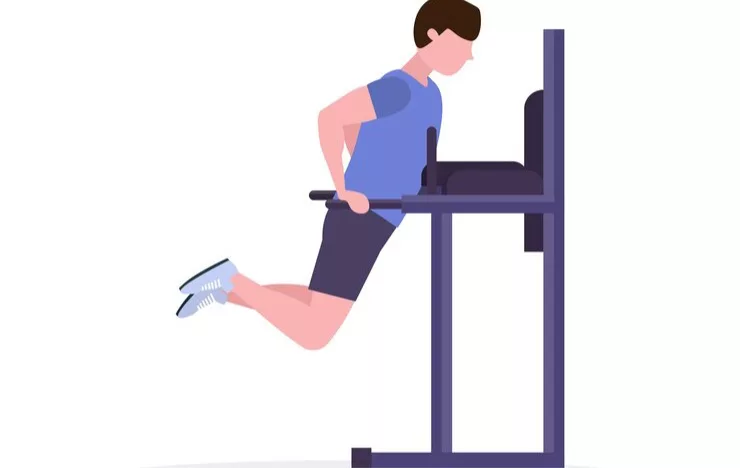
  3. Dip Bars or Parallel Bars
    Whether you’re doing dips, L-sits, or tucked planches, dip bars are a versatile tool that targets your chest, shoulders, triceps, and core.
  4. Weighted Vest or Dip Belt
    If bodyweight exercises start to feel too easy, a weighted vest or dip belt lets you add resistance and push your strength to the next level.
  5. Gymnastic Rings
    For a challenge that works both strength and stability, gymnastic rings are unmatched. Ring push-ups, pull-ups, and dips add an element of balance that will light up your core.
  6. Kettlebells and Dumbbells
    These are excellent for incorporating traditional weight training into your routine. Goblet squats, farmer’s carries, and one-arm rows are just a few examples of what you can do.
  7. Yoga Mat
    A yoga mat is essential for comfort and grip during floor-based exercises, stretches, or mobility work.
  8. Parallettes
    Think of these as mini dip bars. They’re great for push-up variations, handstand progressions, and advanced skills like planches.
  9. Foam Roller and Mobility Tools
    Hybrid calisthenics isn’t just about strength—it’s about keeping your body functional and mobile. Foam rollers and massage balls help with recovery and flexibility.
  10. A Bit of Creativity
    Hybrid calisthenics is all about making the most of what you have. A backpack filled with books, a sturdy chair, or even stairs can become part of your workout.


How Hybrid Calisthenics Builds Total-Body Strengt

Burpees-outdoors-functional-fitness-training

Building strength and mastering movement is where the magic begins.

There’s something about pulling yourself up or pressing your way to glory that feels, well, primal.

But here’s the thing—doing the same routine day after day?

It’s like eating plain rice for every meal. Functional, sure, but not exactly thrilling.

That’s when hybrid calisthenics shook things up for me.

Imagine strapping on a weighted vest for squats or using gymnastic rings to turn ordinary dips into a full-body challenge.

Small tweaks, big impact.

Suddenly, these moves aren’t just effective—they’re spicy.

I remember the first time I strapped on weight for pull-ups.

It wasn’t pretty (hello, noodle arms), but it made me feel unstoppable.

Hybrid calisthenics takes the basics and supercharges them, keeping your muscles guessing and your workouts anything but boring.

Trust me, once you try it, you’ll never go back to plain rice again.

Upper Body Training Beyond the Basics

Man-performing-pull-up-on-gym-bar-indoor-workout

Let’s start with the essentials: pull-ups.

They’re the king of upper body exercises, working your back, biceps, and even your core.

If you’re like me, you probably started with bodyweight pull-ups, grunting your way to three or four reps and calling it a day.

But once you’re nailing six to eight clean reps, it’s time to level up.

Throw on a dip belt, add a plate or two, and suddenly you’ve got weighted pull-ups.

Now, every rep feels like a battle, but your lats will thank you later.

I remember the first time I strapped on extra weight—it was humbling, but the sense of accomplishment was unmatched.

Push-ups are another staple.

Man-performing-push-up-on-bar-functional-fitness-outdoors

Regular push-ups are great, but hybrid calisthenics asks: why stop there?

Add a resistance band around your back, or slap on a weighted vest, and you’ve just upgraded this classic move.

Every press engages not just your chest and triceps but also your core, as it fights to stabilize under the added load.

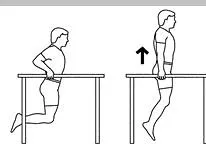
And let’s not forget dips.

These can go from a humble bodyweight exercise to a chest and triceps annihilator.

Add some weight with a belt or hold a dumbbell between your feet, and suddenly every dip feels like you’re carving your upper body from marble.

I used to dread dips, but now they’re a favorite because of how quickly they sculpt strength.

For those craving even more variety, consider combining gym staples with calisthenics flair.

Bench presses are fantastic for building chest strength, but why not mix in ring push-ups for added instability and core engagement?

Hybrid calisthenics isn’t about choosing one over the other—it’s about taking the best of both worlds and making them work together.

Core Training: How to Build a Rock-Solid Midsection

When people think of core training, they often picture endless sit-ups.

Trust me, your core deserves better.

Hanging leg raises are a fantastic starting point.

Man-performing-hanging-leg-raises-on-the-bars-outdoor-workout

They target your abs and hip flexors while building grip strength—a bonus if you’re working on pull-ups.

Once you’ve mastered bodyweight leg raises, try adding a dumbbell between your feet.

It’s brutal but effective.

I distinctly remember the first time I added weight—I thought my abs might riot, but they adapted quickly.

Weighted planks are another hybrid gem.

Take your standard plank, which is already a core killer, and throw a plate on your back.

It’s like turning up the difficulty level on your favorite video game.

The first time I tried this, I underestimated how much my core would shake, but now it’s a staple in my routine.

For rotational strength, weighted Russian twists are a go-to.

Man-performing-weighted-russian-twists-with-kettlebell-gym-workout

Sit on the floor, lean back slightly, and twist from side to side with a plate or dumbbell.

If your obliques aren’t screaming by the end, you’re not doing it right.

And if you have access to gym equipment, anti-rotation cable holds are pure gold.

Attach a cable at belly height, stand sideways, and hold the handle in front of your chest.

The cable will try to twist you, but your core says, “Not today!”

These always leave me feeling like I’ve armored my midsection for anything life throws at me.

Lower Body Training: Turning Legs Into Pillars of Power

Man-doing-Goblet-Squats

Hybrid calisthenics turns leg day into something completely next-level.

Bodyweight squats are great for warming up, but let’s take things up a notch.

Goblet squats are my personal favorite.

Hold a kettlebell close to your chest and sink into a deep squat.

Your quads, glutes, and hamstrings all work overtime, and your core gets a solid workout too.

I love how this move feels both functional and challenging—it’s my go-to when I need to feel powerful.

But if you really want to crank things up and build serious strength, barbell squats are the way to go.

Man-performing-barbell-back-squats-in-gym

Load a barbell on your back, brace your core, and lower yourself until your thighs are at least parallel to the floor.

It’s not just your legs doing the work—your entire body has to stabilize the weight, making it a total-body effort.

For single-leg strength, Bulgarian split squats are the way to go.

Rest one foot on a bench behind you, hold dumbbells in each hand, and lower yourself until your front thigh is parallel to the ground.

It’s humbling, to say the least, but incredibly effective.

I’ll be honest: the first time I tried these, I nearly fell over.

But once I nailed the balance, they became a game-changer.

If you’re working with bodyweight alone, step-ups onto a sturdy box or bench are a fantastic alternative.

For added challenge, hold weights in each hand or hug a kettlebell to your chest.

I’ve found these to be a sneaky way to crush my legs without feeling like I’m overloading them.

And don’t forget the posterior chain.

Hip thrusts, especially with a band or barbell, are a glute builder like no other.

Position your upper back on a bench, place a band above your knees or a barbell across your hips, and thrust upward.

Your glutes will light up like Christmas lights.

Every time I add weight to this move, I’m amazed at how quickly it builds strength and power.

For calves, weighted calf raises are simple but deadly.

Stand on a step, hold a dumbbell in each hand, and raise your heels as high as possible before lowering slowly.

It’s one of those exercises where the burn feels oddly satisfying—like you’re walking out of leg day a little taller.


Making It All Work Together

What I love about hybrid calisthenics is its flexibility.

You’re not stuck choosing between calisthenics or weights—you get to have it all.

One day, you might focus on weighted pull-ups and dips.

The next, it’s bodyweight Bulgarian split squats and goblet squats.

The key is variety.

Keep your muscles guessing, and they’ll keep growing.

And don’t worry if you don’t have access to a gym.

Many of these exercises can be done at home with minimal equipment.

I’ve been doing this for a long time, and I’ve learned that consistency paired with a bit of experimentation is the ultimate recipe for progress.

Push yourself.

Add weight to your favorite calisthenics moves, or throw in some gym classics with a twist.

Your body will thank you for the challenge, and you’ll never look at pull-ups or push-ups the same way again.


My Weekly Split (And Why I’m Osesses  With It)

I’m a huge fan of having a roadmap to keep myself accountable.

But I also like enough wiggle room to do what I want when I want.

That’s why I came up with this flexible weekly split.

Not too rigid, not too chill—just the sweet spot for steady progress.

And yes, I’m about to throw in the sets, reps, and execution details, because I’ve realized how helpful those specifics can be.

Feel free to adjust them based on your own fitness level and how adventurous you’re feeling.


Training Program – Intermediate Level (Monday – Tuesday)

Day Focus Exercises Notes
Monday Upper Body Pull-Ups (4×6-8), Bench Press (4×8-10), Dips (3×8-10), Cable Rows (4×10-12) Add weight to pull-ups, maintain form on presses, focus on scapular retraction.
Tuesday Core & Stability Leg Raises (3×10-12), Weighted Plank (3×30-45s), Russian Twists (3×15/side) Avoid swinging, keep core engaged, use moderate weight for twists.


Wednesday – Friday

Day Focus Exercises Notes
Wednesday Lower Body Goblet Squats (4×10-12), Barbell Squats (4×6-8), Split Squats (3×8-10), Leg Press (4×12-15), Calf Raises (4×12-15) Keep knees aligned, avoid lockout on leg press, pause at top for calves.
Thursday Functional Farmer’s Walk (3×30-40s), Band Holds (3×20-30s/side), Overhead Press (4×8-10), Incline Push-Ups/Press (3×8-12) Focus on core stability, avoid arching during presses.
Friday Full Body Weighted Pull-Ups (4×6-8), Deadlifts (4×6-8), Chest Press (4×10-12), Lat Pulldowns (4×10-12), Ring Push-Ups (3×10-12) Gradually add weight, prioritize form on deadlifts, use controlled movements.


Saturday – Sunday

Day Focus Exercises Notes
Saturday Active Recovery Yoga, Stretching, Mobility Work (20-30 min) Light session to promote recovery and flexibility.
Sunday Rest or Cardio Rest or Light Cardio (20-30 min) Essential for recovery and cardiovascular health.


A Few of My Struggles

I’ll be real with you: I’ve faced plateaus that made me want to toss my workout journal in the trash.

One specific challenge?

My shoulders were lagging.

I’d do overhead presses for weeks with minimal progress.

But once I started adding banded push-ups and paused handstand holds (even if I could only hold them for a few seconds at first), my shoulders woke up.

It felt like my entire upper body had a meeting and decided to cooperate for once.

Hybrid Calisthenics taught me that there’s always a creative way to strengthen a weak link—sometimes you just need to combine what you already do (bodyweight moves) with a new stimulus (bands, weights, or time-under-tension variations).


Beyond the Physical: A Mental Game Upgrade

When you consistently challenge your body with new forms of resistance, something happens up there in your brain.

I used to doubt myself whenever I approached a heavier kettlebell or a new variation of push-up.

But mixing calisthenics with resistance training has this sneaky way of building confidence.

Each time I conquer a new move—like the day I finally managed a weighted pull-up—I feel like I can tackle anything life throws at me.

It’s made me more resilient, more adaptable, and definitely more playful in my approach to fitness.

I’m not just “training to train.”

I’m training to prove to myself that I can keep evolving.


Limitations: Because I Won’t Sugarcoat It

As much as I love this training approach, I feel it’s important to share a word of caution.

You can absolutely overdo it.

When I first started adding weights to my calisthenics moves, I got a bit excited (okay, overly excited).

My shoulders and elbows felt pretty cranky.

So I had to dial back, work on joint stability, and pay attention to form.

Also, if you’re totally new, I’d say master the vanilla versions of each exercise first.

There’s no shame in perfecting a bodyweight squat before you stack a barbell on your back.

Injuries are the worst, and they can derail months of progress.

Slow and steady is the name of this game.


Final Thoughts 

If there’s one takeaway I’d love you to have, it’s that Hybrid Calisthenics isn’t about gimmicks or flashy moves for social media.

It’s about harnessing the best of both worlds: the freedom and functionality of bodyweight training, and the strength-building potential of external resistance.

I wake up every day excited to see how I can tweak a classic move and turn it into a new challenge.

I’m stronger, more flexible, and mentally tougher than I ever was doing only one style of training.

So if you’re on the fence, take the leap.

Start small—a banded push-up here, a light kettlebell squat there—and feel how your body responds.

Trust me, it’s like finally adding some spice to that same old recipe.

Everything just tastes better.

And, if you ever find yourself trying to do single-arm push-ups in your living room, with your dog giving you that same confused stare, take solace in knowing you’re not alone.

We’ve all been there.

But stick with this approach, and you just might find yourself nailing that move—and who knows, maybe your dog will finally look impressed.

Because in the end, it’s about pushing your limits, having fun, and discovering that sweet spot where challenge meets growth.

Recommended