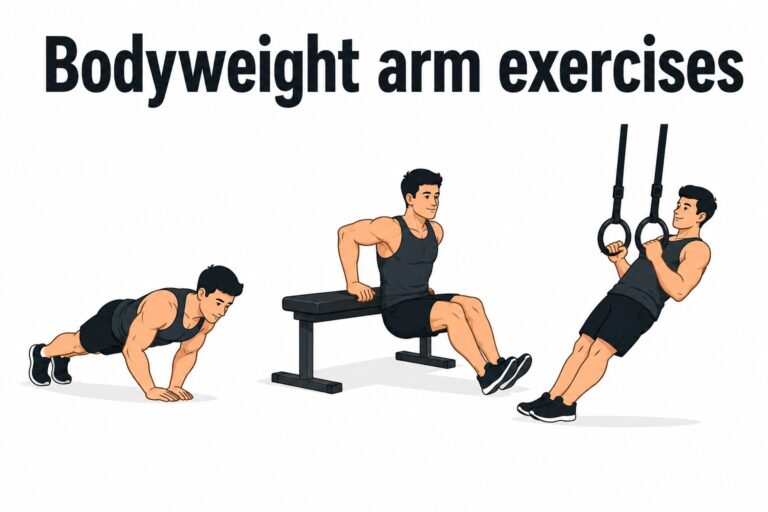
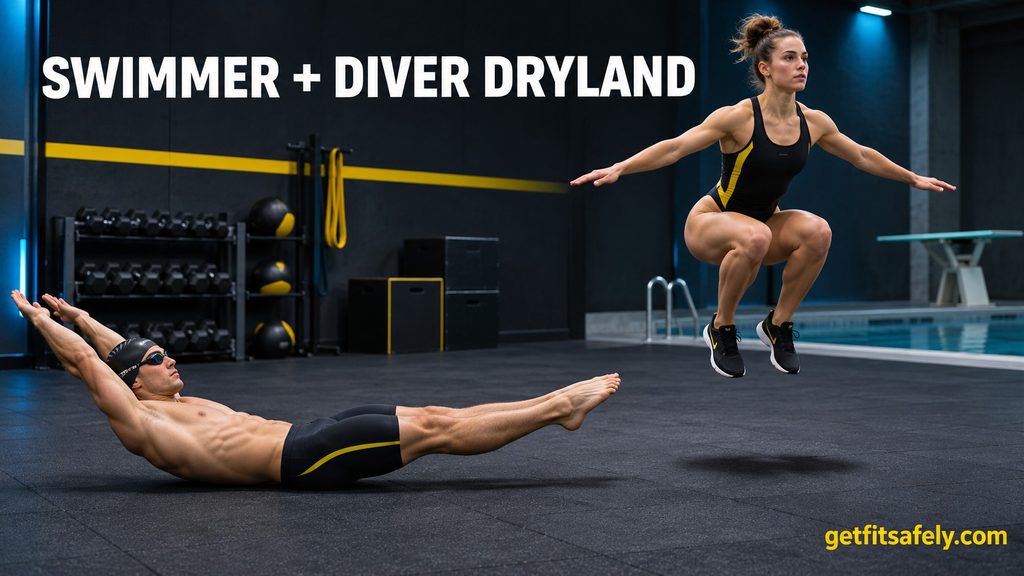
Bodyweight exercises for swimmers and divers can improve strength, balance, and body control, but choosing the right movements matters more than collecting dozens of them.
I enjoy swimming, although I’ve never competed professionally.
One thing that still surprises me is how capable I can feel in the water, then how differently my core has to work when I hold a strict hollow position on the living room floor.
Apparently, gravity has a few opinions about my swimming fitness.
That contrast is exactly why I value dryland training.
These 24 exercises target different needs: 12 for swimmers and 12 for competitive divers, with practical ways to make each one more useful.
 About the author
Luca Fumagalli writes about bodyweight training, strength, and practical ways to build fitness without making training unnecessarily complicated.
He is a recreational swimmer who uses dryland training to improve strength, body control, and movement quality outside the pool.
Research supports combining swimming with strength training rather than relying on pool work alone, although the best approach depends on the athlete, the event, and the training goal.
Read the systematic review.
Swimmers and Divers Need Different Kinds of Strength
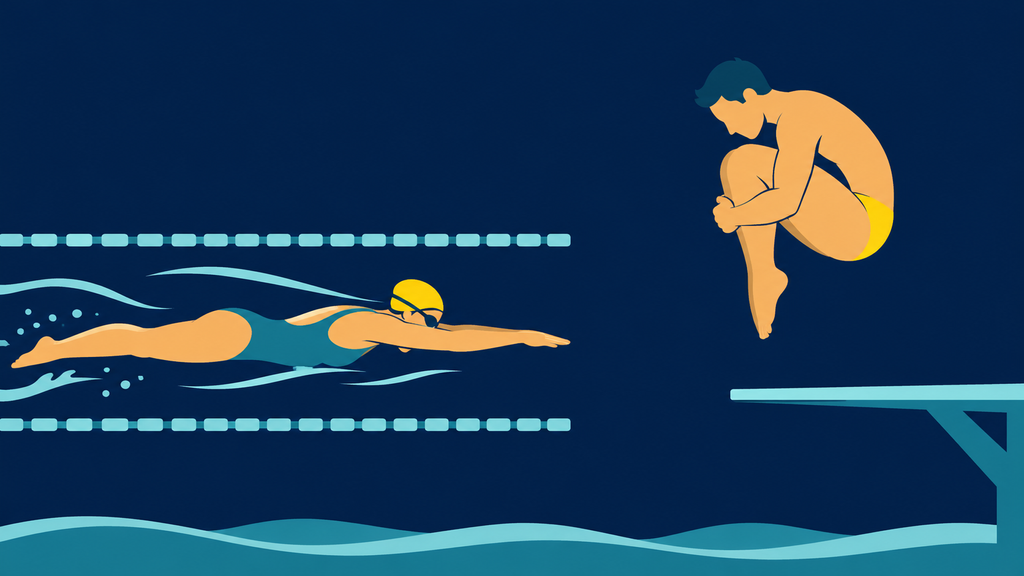
Swimming rewards repeated, coordinated movements.
Your arms pull through water, your legs help maintain propulsion, and your torso must remain controlled while you rotate and breathe.
Competitive diving asks for something different.
A diver needs enough leg power to leave the board, body control to manage rotations, and precise positioning before entering the water.
Both sports benefit from strength training, but I wouldn’t prepare for them identically.
For swimmers, I would emphasize:
- Shoulder control and endurance: Supporting repeated arm movements while helping the shoulder blades stay well positioned.
- Core endurance: Maintaining body alignment throughout longer swims.
- Leg strength: Helping with starts, turns, and kicking capacity.
- Mobility: Moving comfortably through overhead positions.
For divers, the priorities shift toward:
- Explosive strength: Producing force during takeoff.
- Balance: Controlling weight through one leg.
- Body compression: Bringing the legs toward the torso during certain diving positions.
- Landing control: Developing the ability to absorb force during dry-land preparation.
Here’s where exercise selection becomes interesting.
A plank can benefit both athletes, but a swimmer may use it to develop endurance while a diver might prefer a more demanding variation that challenges body positioning.
The exercise is familiar.
The purpose changes.
12 Bodyweight Exercises for Swimmers
I like approaching these exercises as a series of questions.
Can my shoulders support my weight comfortably?
Does my torso remain controlled when one arm moves?
Are my legs equally capable of producing force?
The answers help determine which exercises deserve more attention.
1. Push-Ups — Strength Without Losing Body Alignment
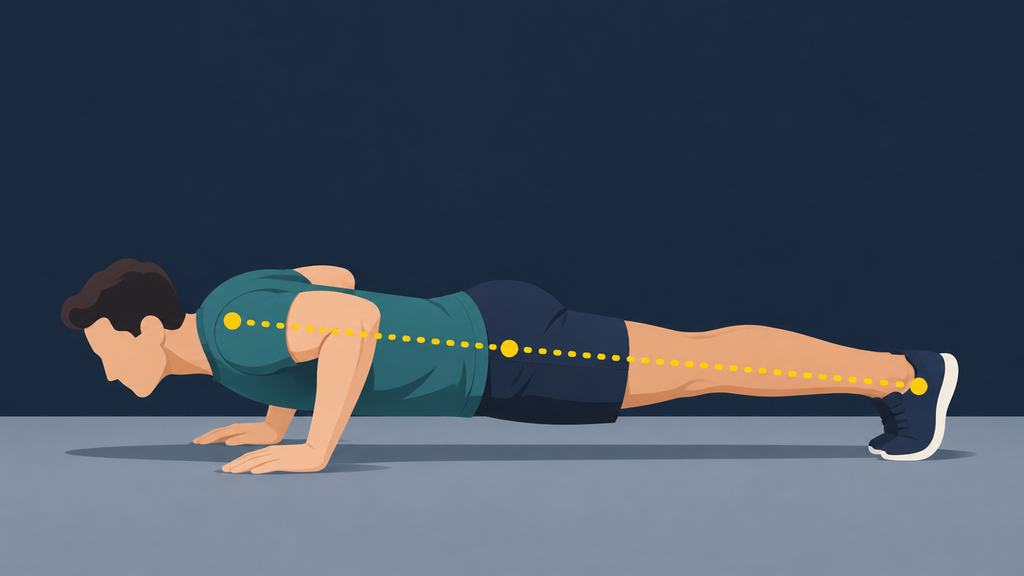
I like push-ups for swimmers because they quickly show whether I can keep my torso organized while my shoulders work.
(If you need an easier or harder version, follow this calisthenics push-up progression.)
Place your hands slightly wider than shoulder-width apart and extend your legs behind you.
Lower your chest toward the floor, keeping your hips aligned with your torso.
Push through your palms to return upright.
Your chest, shoulders, and triceps provide the pressing force.
Here’s something I pay attention to: what happens to my hips during the final repetitions?
When they begin dropping, I’m usually getting more tired than I initially realize.
Instead of squeezing out another five ugly repetitions, I stop while the movement still looks controlled.
Try: 2 sets of 8–12 repetitions.
Useful trick: Elevate your hands on a sturdy bench if maintaining alignment becomes difficult.
2. Forearm Plank — The Position That Exposes Everything
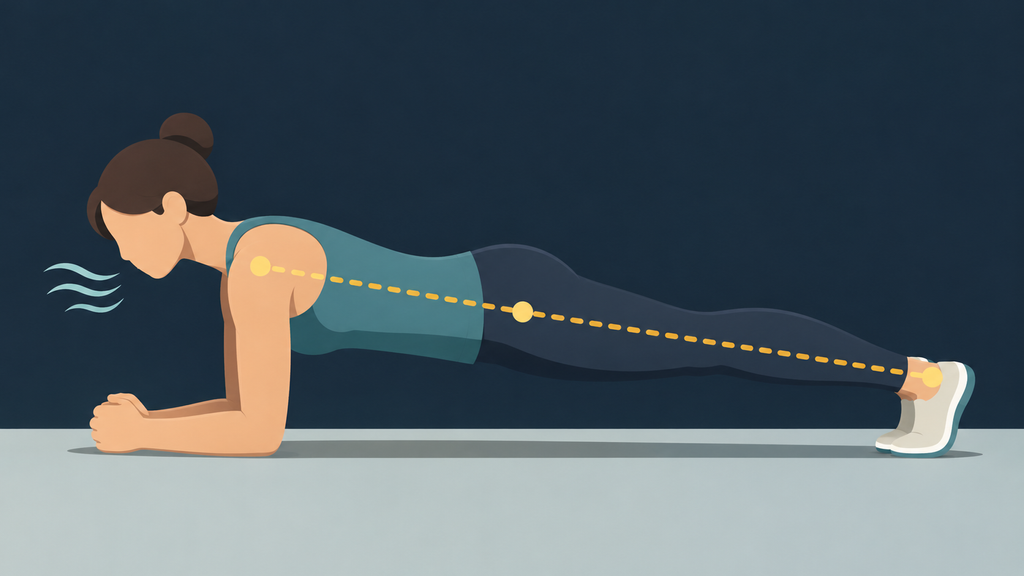
This is one of those exercises that looks simple until I actually try to keep every part of my body quiet.
Rest on your forearms and toes, with your elbows beneath your shoulders.
Keep your body relatively straight and breathe normally.
Your abdominal muscles work to resist unwanted movement through your torso.
A plank looks almost suspiciously easy until the clock reaches 25 seconds.
I sometimes catch myself concentrating so hard on staying straight that I forget to breathe naturally.
That’s a good reminder to relax my face and keep breathing.
Try: 20–40 seconds.
Useful trick: End the hold when your hips begin sagging rather than waiting for complete exhaustion.
3. Side Plank — Control Your Rotation
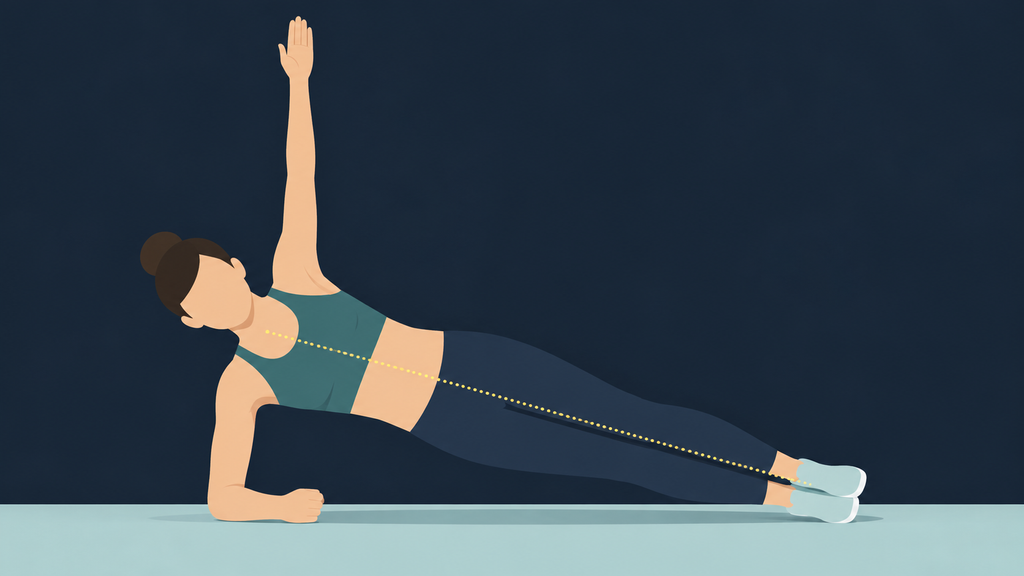
Lie on one side with your elbow beneath your shoulder.
Lift your hips and maintain a straight line through your body.
Your obliques and outer hip muscles help stabilize the position.
During freestyle, your torso rotates while your arms alternate.
Side planks train the ability to resist unwanted sideways movement.
(If you want to build this position gradually, these plank variations can help.)
I notice that one side can feel less stable than the other, even when both seem equally strong during ordinary exercises.
Try: 20 seconds per side.
Easier: Keep your lower knee on the floor.
4. Superman Raises — Strengthen Your Back Without Overdoing It
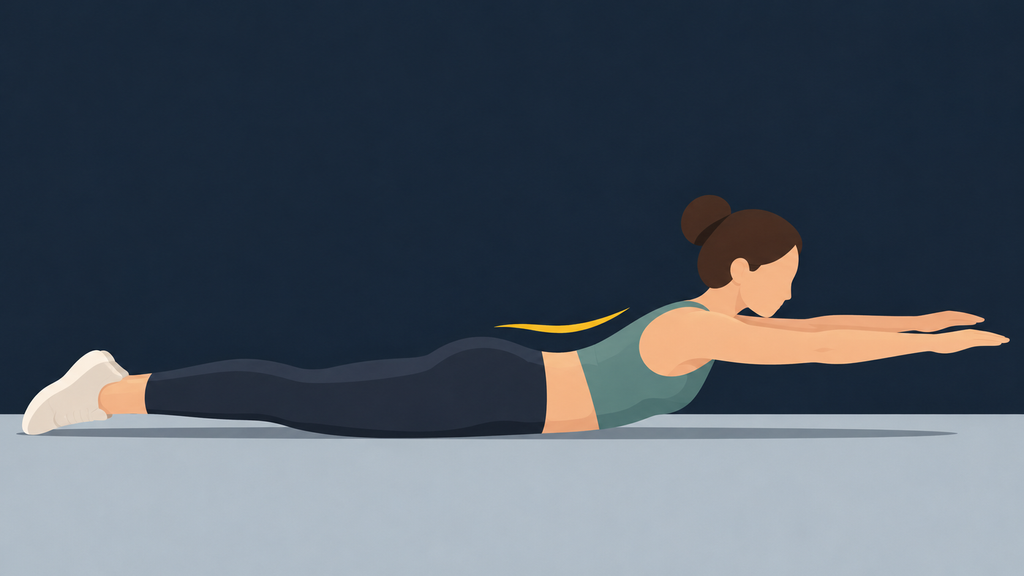
Lie face down with your arms extended forward.
Lift your arms and upper chest slightly, then lower under control.
Your spinal extensor muscles help raise your torso.
I used to think lifting higher automatically meant working harder.
Unfortunately, my lower back didn’t appreciate that interpretation.
A smaller, controlled movement lets me concentrate on the muscles doing the work.
Try: 8–12 repetitions.
Useful trick: Keep your legs on the floor and avoid throwing your head backward.
5. Flutter Kicks — Keep Your Torso Quiet
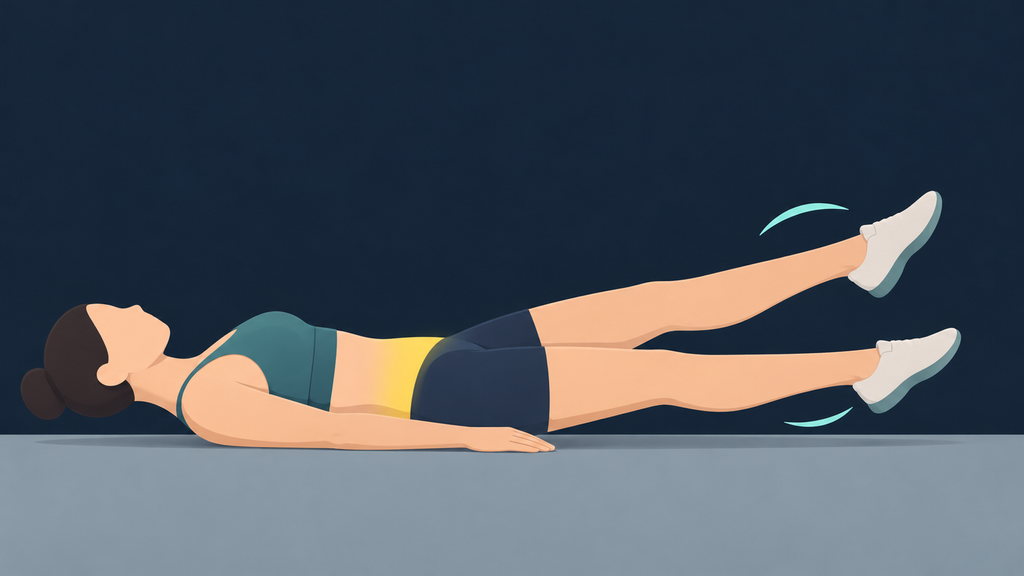
Lie on your back with your legs extended.
Raise them slightly and alternate short up-and-down movements.
Your abdominal muscles stabilize your pelvis while your hip flexors move your legs.
The challenge isn’t simply moving faster.
It’s keeping your lower back from arching excessively as your legs move.
I prefer slowing down when my torso starts shifting around.
Try: 20 seconds.
Easier: Raise your legs higher or bend your knees slightly.
6. Bodyweight Squats — Check How Your Legs Share the Work
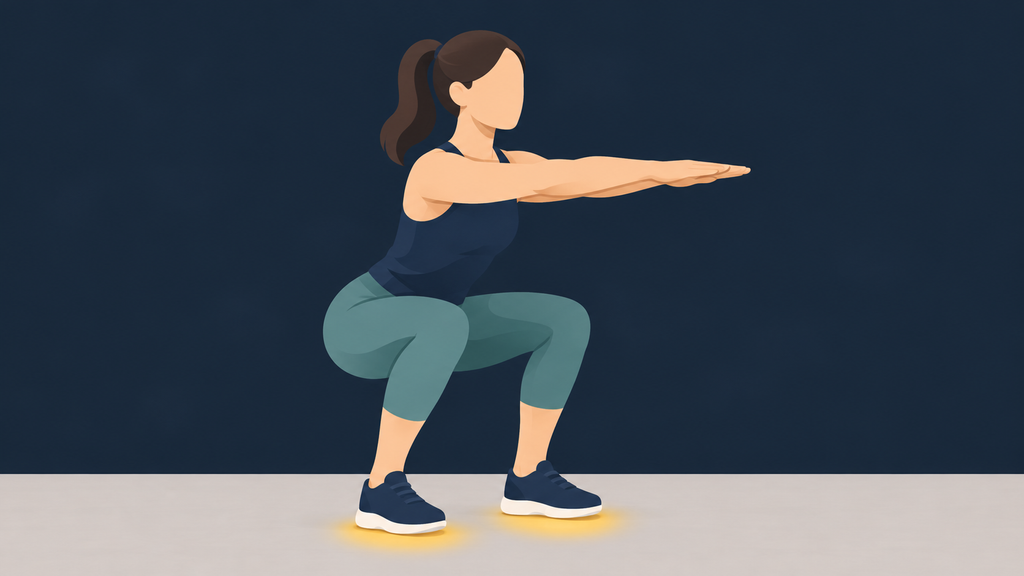
Stand with your feet approximately shoulder-width apart.
Bend your hips and knees as though sitting into a chair, then stand again.
Your quadriceps and glutes produce most of the movement.
During squats, I occasionally notice that I push harder through one foot.
It’s easy to miss when repetitions become fast.
Slowing the descent helps me distribute the effort more evenly.
Try: 12–15 repetitions.
Useful trick: Pause briefly near the bottom without relaxing your legs.
7. Reverse Lunges — Give Each Leg Its Own Job
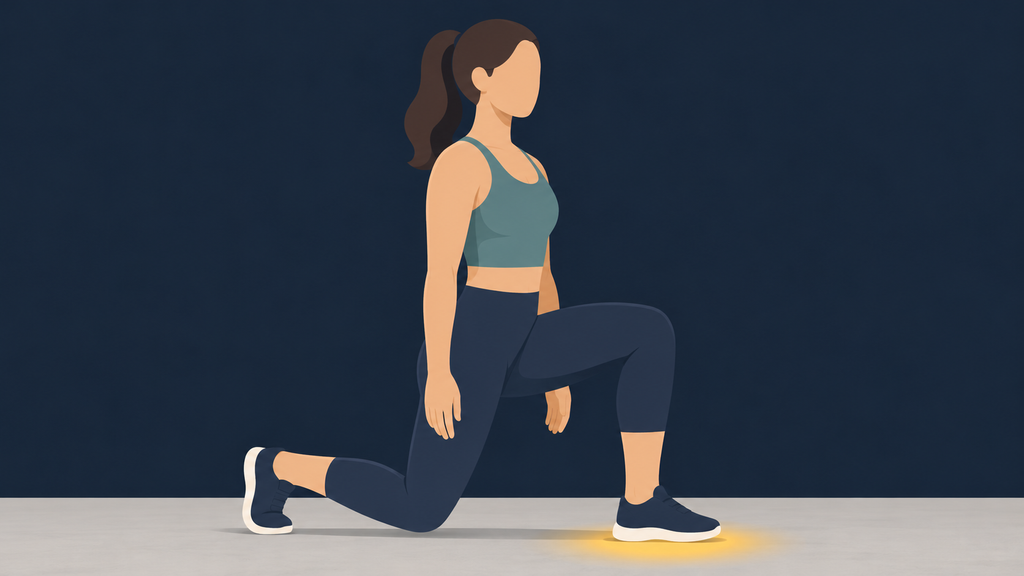
Step backward with one foot and lower both knees.
Push through your front foot to return upright.
Your thighs and glutes provide strength while your hips help maintain balance.
I like reverse lunges because they make differences between my legs difficult to ignore.
One side sometimes feels smooth while the other requires more concentration.
Rather than adding repetitions immediately, I focus on making both movements controlled.
Try: 8 repetitions per leg.
Easier: Hold a wall or railing.
8. Glute Bridges — Strengthen Your Hips
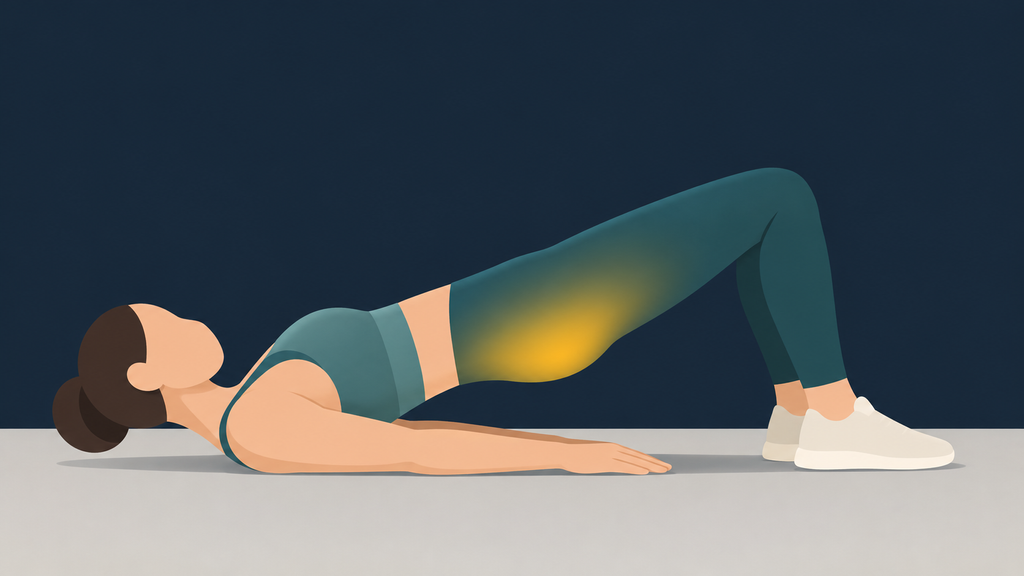
Lie on your back with your knees bent and feet flat.
Press through your feet and lift your hips.
Your glutes provide much of the force, assisted by your hamstrings.
I used to push my hips higher than necessary.
Stopping when my torso and thighs form a comfortable line keeps the movement focused.
Try: 12–15 repetitions.
Harder: Lift one foot while keeping your pelvis level.
9. Wall Slides — Find Your Comfortable Overhead Position
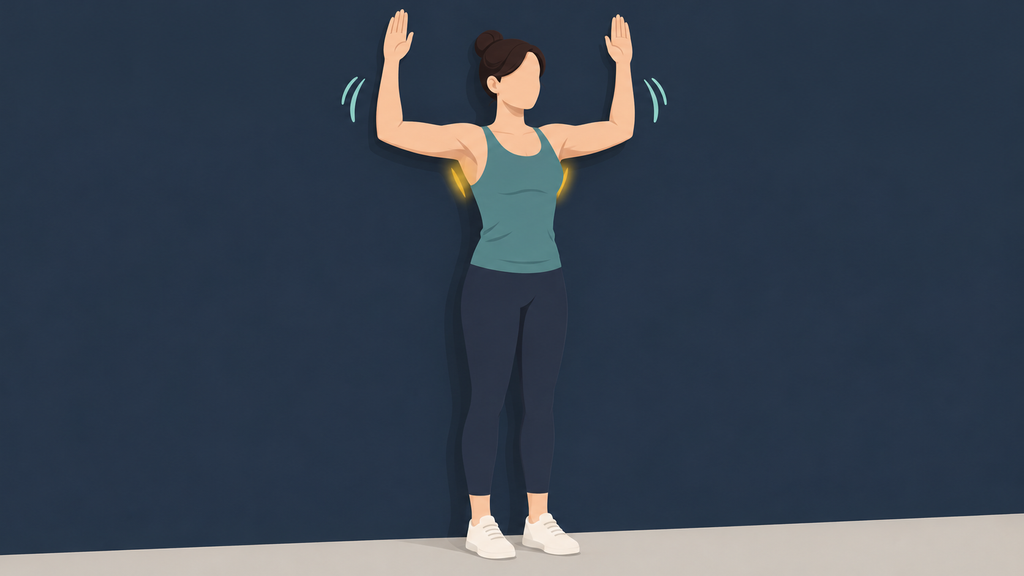
I use wall slides as a quick check-in rather than a test of how far I can force my arms overhead.
Stand with your back near a wall and bend your elbows.
Slowly raise your arms overhead, keeping your ribs from flaring excessively.
Your shoulder muscles guide the movement while your upper back helps position the shoulder blades.
Some days, my arms travel upward easily.
Other days, reaching overhead feels surprisingly restricted.
I resist the temptation to force the movement and instead work within a comfortable range.
Try: 8–10 repetitions.
Useful trick: Keep your lower back relaxed rather than pressing it aggressively against the wall.
10. Prone Y-T-W Raises — Build Better Shoulder Control
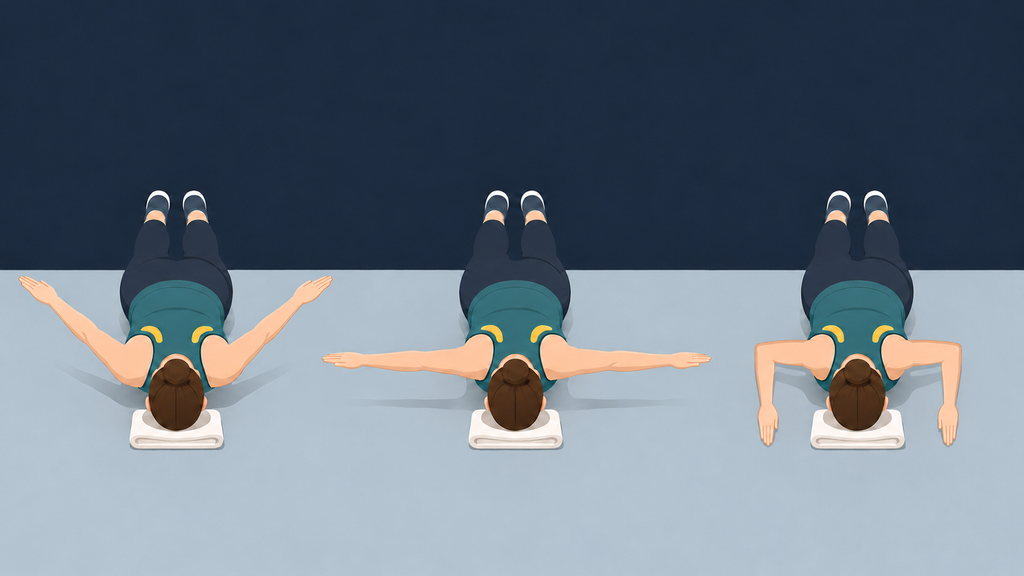
Lie face down on the floor with your forehead resting lightly on a folded towel.
Keep your legs relaxed and your neck neutral.
Move slowly through three arm positions:
- Y: Extend your arms diagonally overhead, like the top half of the letter Y.
- T: Open your arms directly out to the sides.
- W: Bend your elbows and bring them close to your ribs, creating a W shape.
Lift your hands only a few inches from the floor.
Think about gently moving your shoulder blades down and back.
Your upper-back muscles and the muscles around your shoulder blades control the movement.
I keep the range small.
When I try to lift my arms too high, my lower back usually joins the exercise without being invited.
Try: 5–8 repetitions in each position.
Useful trick: Pause for one second at the top of every Y, T, and W position.
Easier: Keep your forehead on a towel and lift only one arm at a time.
11. Dolphin Plank — Challenge Your Shoulders Differently
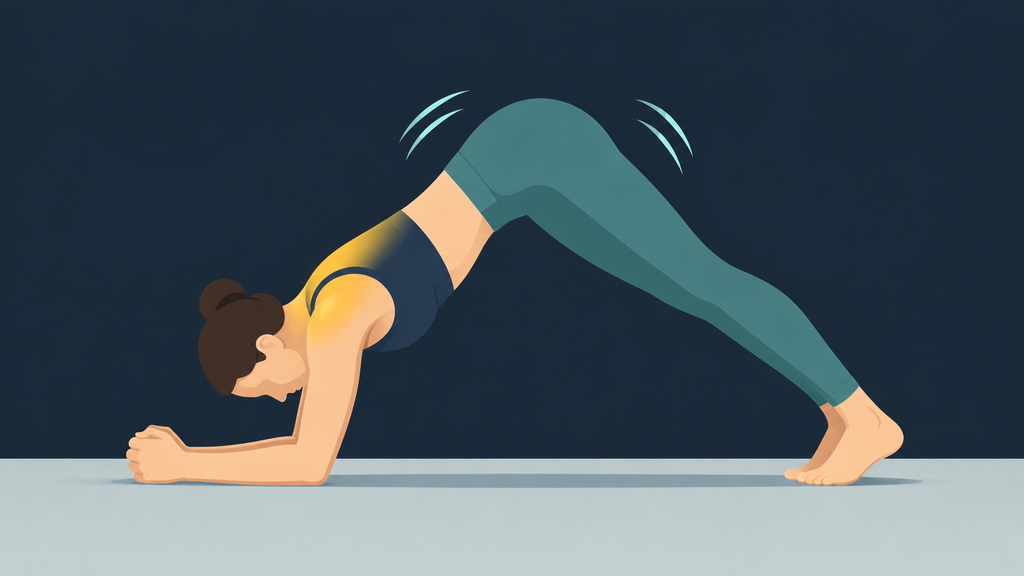
Begin in a forearm plank.
Push through your forearms and raise your hips toward the ceiling.
Return slowly to the starting position.
Your shoulders, abdominal muscles, and upper back control the transition.
I find the lowering portion particularly useful because it requires me to resist simply dropping back into the plank.
Try: 8 repetitions.
Useful trick: Move slowly enough that you can stop halfway through the transition.
12. Hollow Hold — Practice Staying Streamlined
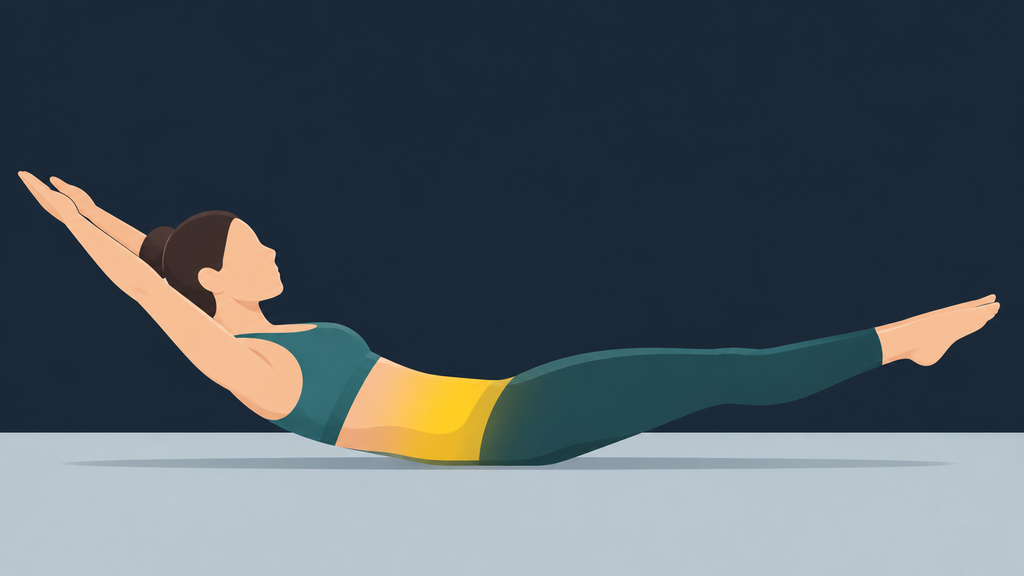
Lie on your back and lift your shoulders slightly.
Raise your legs while keeping your lower back from excessively arching.
Your abdominal muscles work to maintain the position.
Here’s where I sometimes have to negotiate with my ambitions.
Straight legs look better, but bent knees allow me to maintain control for longer.
I choose the version that keeps my torso stable.
Try: 15–25 seconds.
Easier: Bend your knees and keep your arms beside your body.
12 Bodyweight Exercises for Competitive Divers
Diving requires a different relationship with strength.
Generating force is important, but controlling the body before and after that force matters just as much.
I approach these exercises with that distinction in mind.
Explosive movements deserve particular care, especially for athletes who haven’t developed comfortable landing mechanics.
13. Single-Leg Deadlift — Balance Before Power
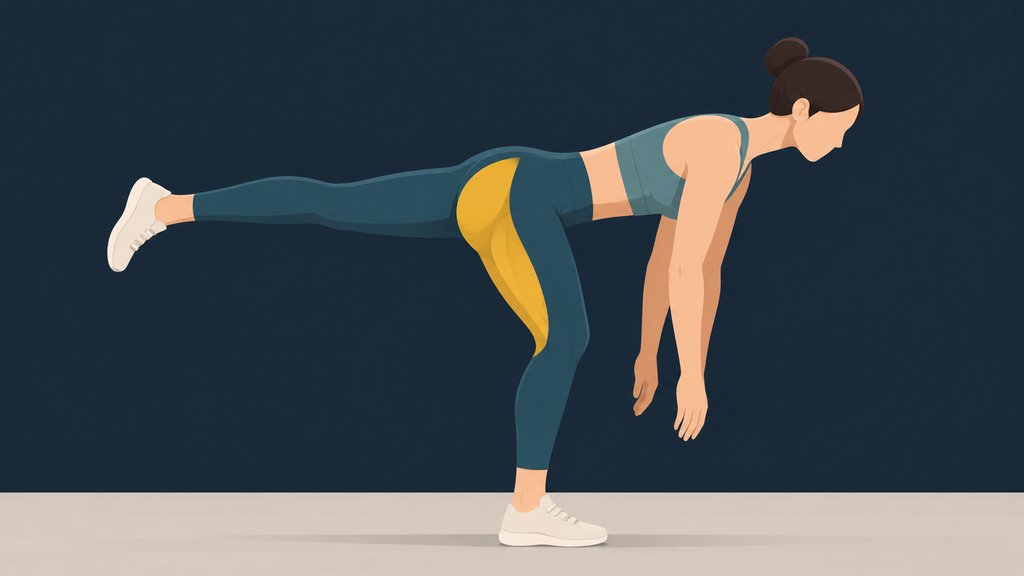
Stand on one leg with your knee slightly bent.
Hinge forward from your hips while extending your free leg behind you.
Return upright without twisting your pelvis.
Your glutes and hamstrings control the movement.
At home, I sometimes perform these beside a chair.
The chair isn’t there because I expect to fall.
It’s there because concentrating on hip control is more useful than spending every repetition trying to recover my balance.
Try: 6–8 repetitions per leg.
Easier: Rest one hand on a stable support.
14. Squat Jumps — Produce Force, Then Control It
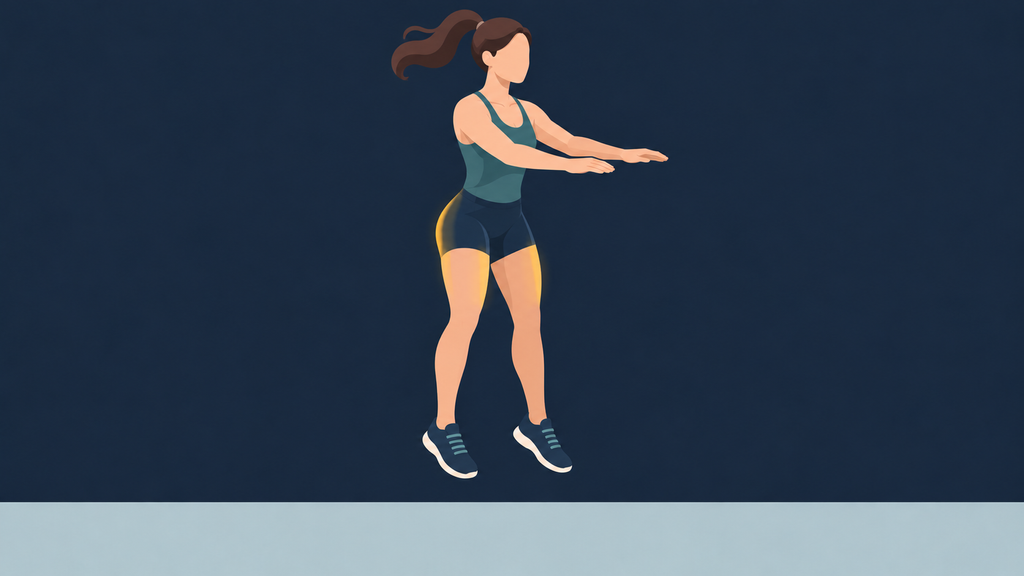
With jumps, I care less about looking explosive and more about whether I can land like I meant to.
Stand with your feet approximately shoulder-width apart.
Lower into a comfortable squat and jump vertically.
Land softly with bent knees.
Your thighs, glutes, and calves generate the jumping force.
I pay more attention to the landing than the height.
A quiet, balanced landing tells me more about control than an extra inch of jumping.
Try: 3–5 repetitions.
Useful trick: Reset completely between jumps instead of bouncing immediately into another.
15. Tuck Jumps — Coordinate Your Legs in the Air
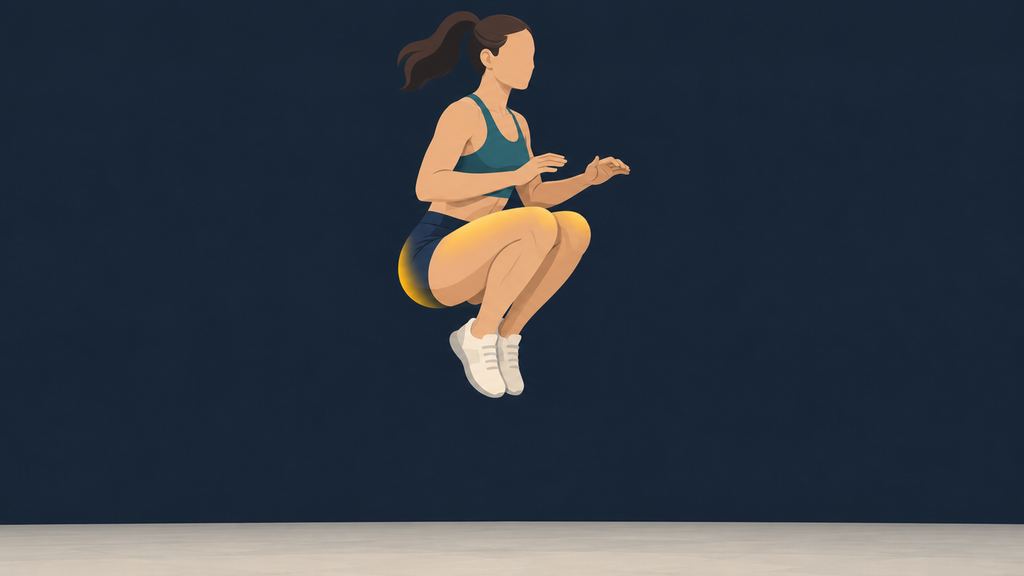
Jump upward and bring your knees toward your chest.
Extend your legs before landing softly.
This develops explosive coordination and challenges rapid changes in body position.
Tuck jumps become tiring quickly.
I prefer ending a set while the movement still feels organized.
Try: 3–5 repetitions.
Avoid: Performing them when your knees or ankles are painful or your landings become uncontrolled.
16. Assisted Pistol Squats — Build Single-Leg Strength
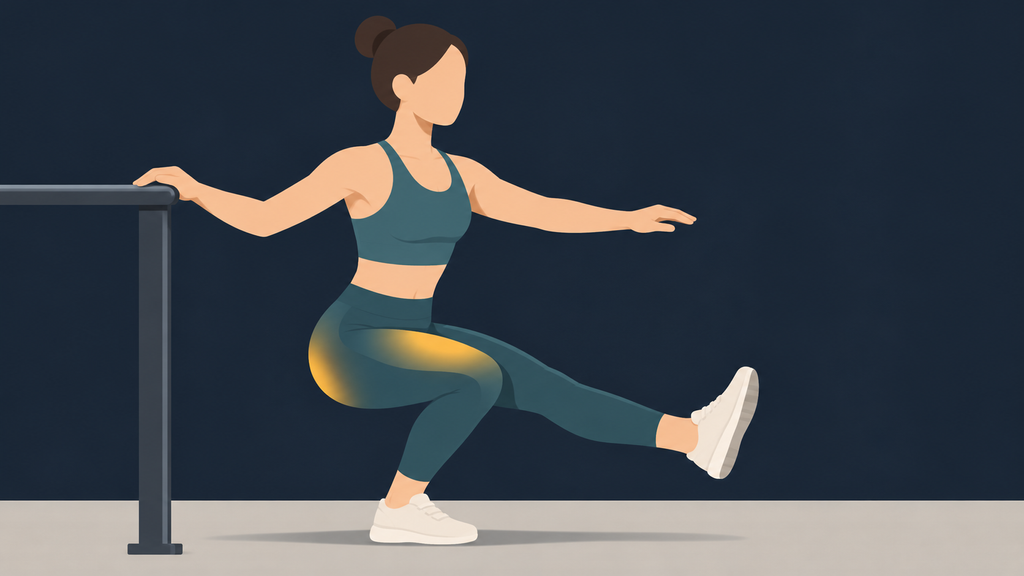
I like having the support nearby because it lets me focus on the working leg instead of turning every repetition into a balance rescue.
Stand on one leg while holding a sturdy support.
Extend your other leg forward and bend your supporting knee.
Lower as far as comfortable before standing again.
Your quadriceps and glutes provide strength while your ankle helps maintain balance.
A full pistol squat looks impressive, but forcing the depth rarely improves the movement.
I prefer using a chair until I can lower myself without collapsing into the bottom position.
Try: 5–6 repetitions per leg.
Easier: Squat onto a high bench.
17. Skater Jumps — Control Sideways Landings
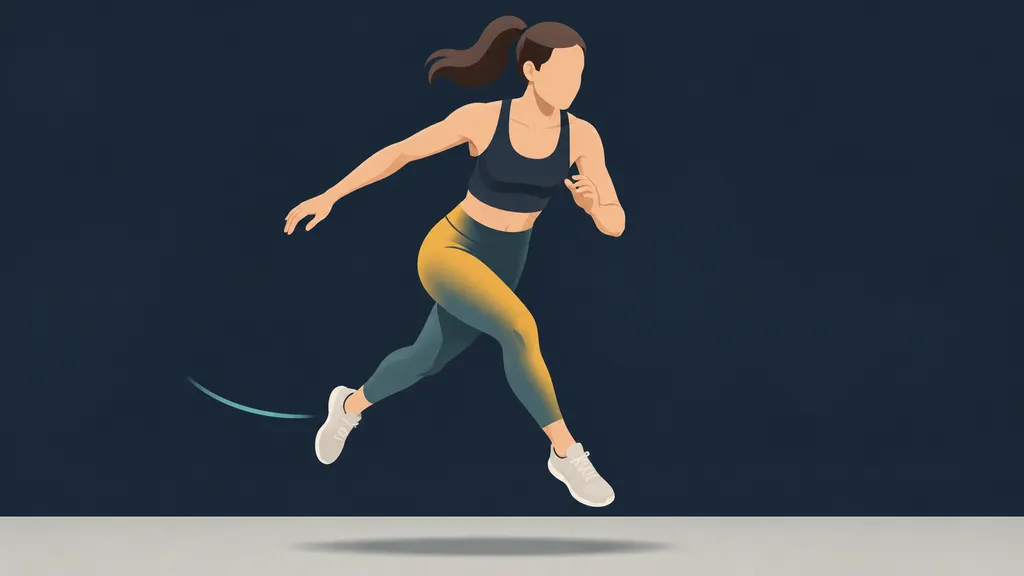
Jump sideways from one foot to the other.
Land with a slightly bent knee and stabilize before returning.
Your glutes, thighs, and calves help generate and absorb force.
I find that shortening the jump distance often improves the exercise immediately.
Suddenly, the landing becomes controlled instead of a desperate search for balance.
Try: 6 jumps per side.
Easier: Step sideways without jumping.
18. Calf Raises — Develop Ankle Strength
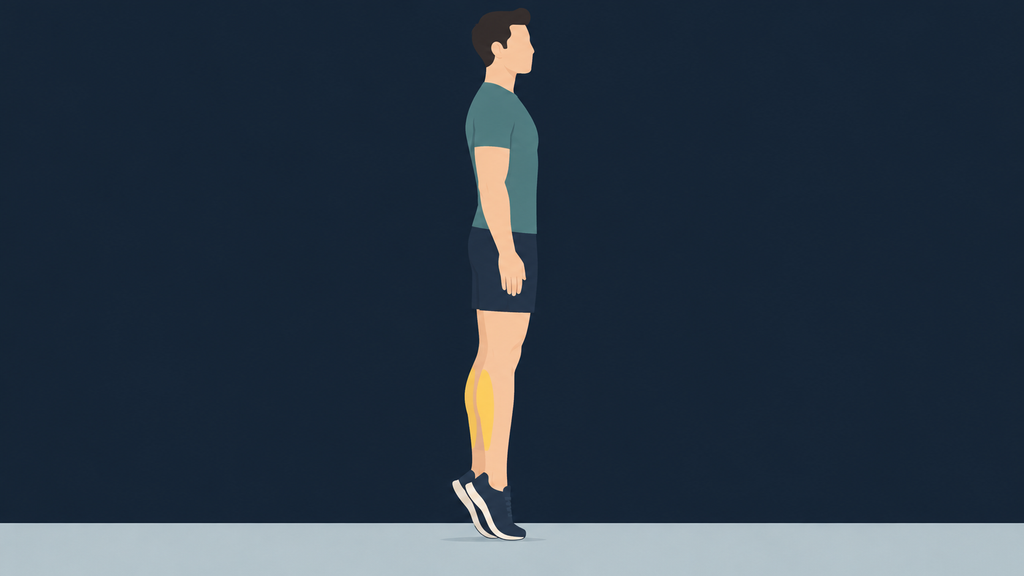
Stand upright and rise onto your toes.
Pause briefly before lowering your heels.
Your calf muscles perform the movement.
I like doing these slowly because bouncing through repetitions makes it difficult to judge how much control I’m actually using.
Try: 15–20 repetitions.
Harder: Perform them on one leg while holding a railing.
19. Tuck-Ups (Seated Knee Tucks) — Build Stronger Body Compression
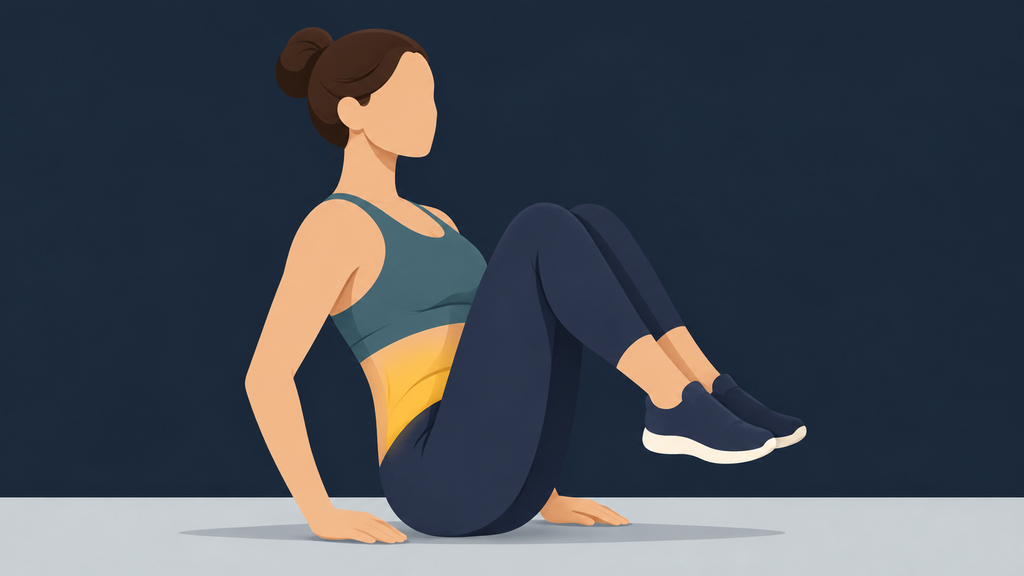
Sit on the floor with your knees bent and your feet slightly in front of you.
Place your hands beside your hips for light support.
Lean your torso back slightly while keeping your chest lifted, then draw your knees toward your chest.
At the same time, bring your chest gently toward your thighs.
Pause briefly in the tucked position, then return under control.
Your abdominal muscles and hip flexors help bring your torso and legs closer together.
For divers, this movement can help develop the body-compression strength used in tucked positions.
I keep the movement smooth.
Trying to pull my knees in as fast as possible usually turns the exercise into a small argument between my lower back and the floor.
Try: 8–10 repetitions.
Useful trick: Exhale gently as your knees come in, then breathe in as you return.
Easier: Keep your hands on the floor throughout the movement and reduce how far you lean backward.
20. L-Sit Progression — Strength for Body Compression
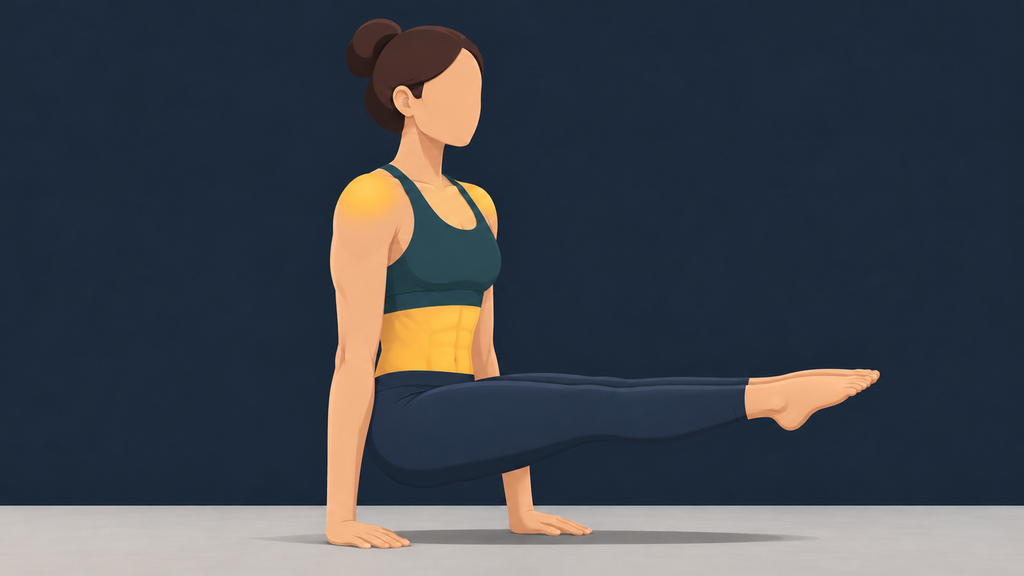
Sit with your legs extended and place your hands beside your hips.
Press downward and attempt to lift your hips slightly.
Your abdominal muscles, hip flexors, shoulders, and arms contribute to the position.
A few seconds can feel surprisingly long when your legs refuse to cooperate.
Try: 5–10-second holds.
Easier: Bend your knees and use stable parallettes.
21. Bear Crawls — Coordinate Opposite Limbs
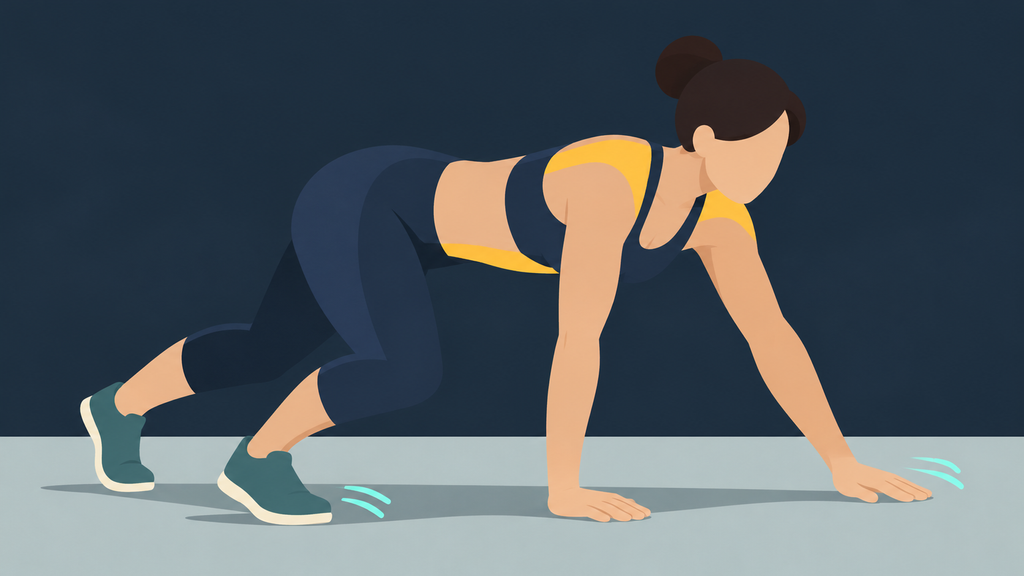
Start on your hands and knees.
Lift your knees slightly and move one hand forward with the opposite foot.
Alternate sides while keeping your hips relatively level.
Your shoulders, abdominal muscles, and legs work together.
In a small room, I take three steps forward and three backward.
There’s little space for wandering around, which actually encourages me to move more carefully.
Try: 20 seconds.
Easier: Practice with your knees touching the floor.
22. Glute Bridge March — Resist Pelvic Rotation
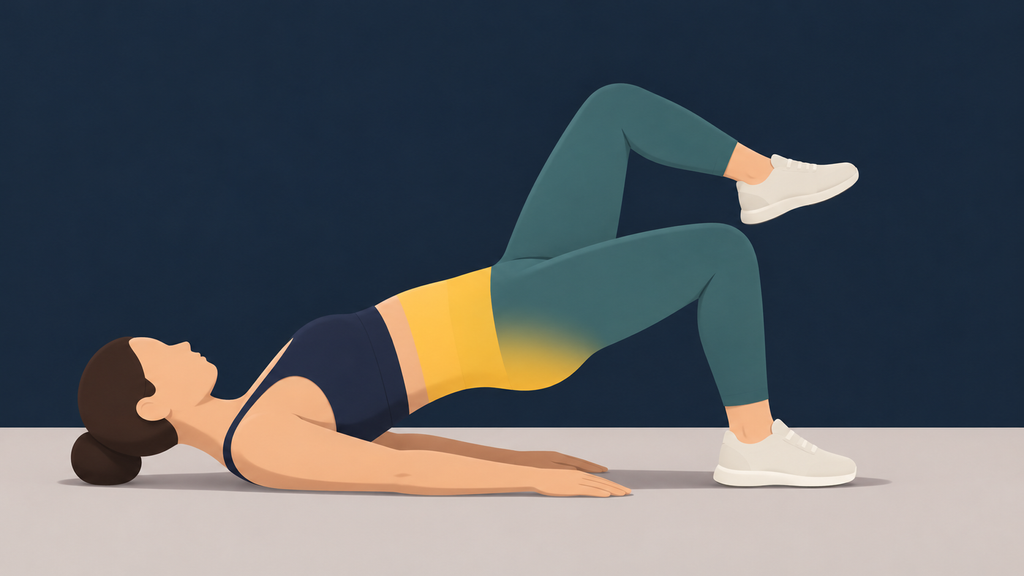
Lie on your back with bent knees.
Lift your hips into a bridge and raise one foot slightly.
Lower it before switching legs.
Your glutes and abdominal muscles work to prevent your pelvis from tipping.
I sometimes notice one hip dropping as soon as a foot leaves the floor.
Reducing the height of the lift usually helps.
Try: 8 repetitions per leg.
Easier: Perform a regular two-legged bridge.
23. Star Plank — Challenge Lateral Stability
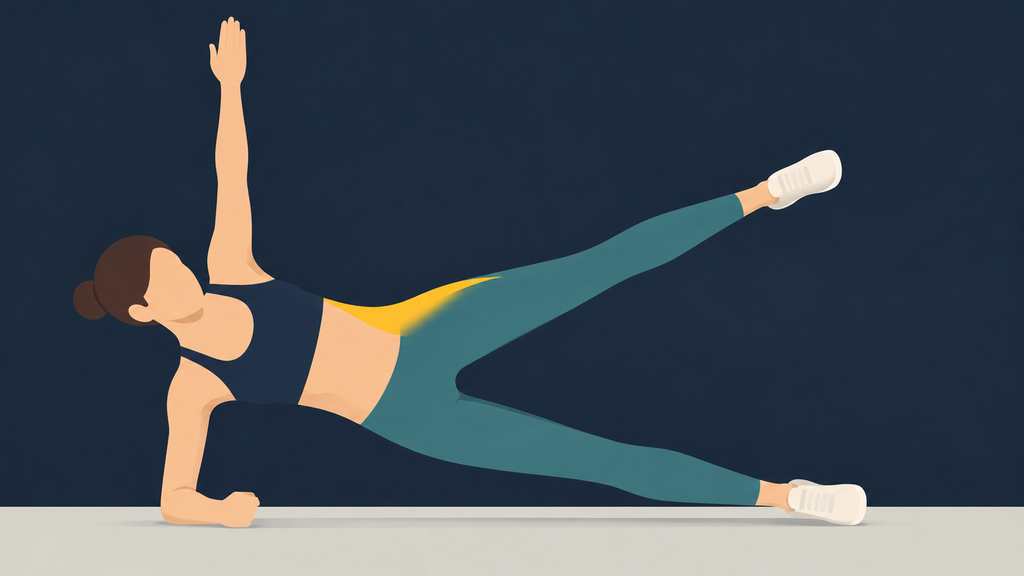
Begin in a side plank with your elbow beneath your shoulder.
Lift your upper leg while keeping your hips elevated.
Your obliques and outer hip muscles stabilize the position.
This variation is considerably harder than it looks.
I prefer raising my leg only a few inches rather than allowing my hips to collapse.
Try: 5–8 leg lifts per side.
Easier: Keep both feet together.
24. Snap-Down to Stick Landing — Practice Controlled Landings
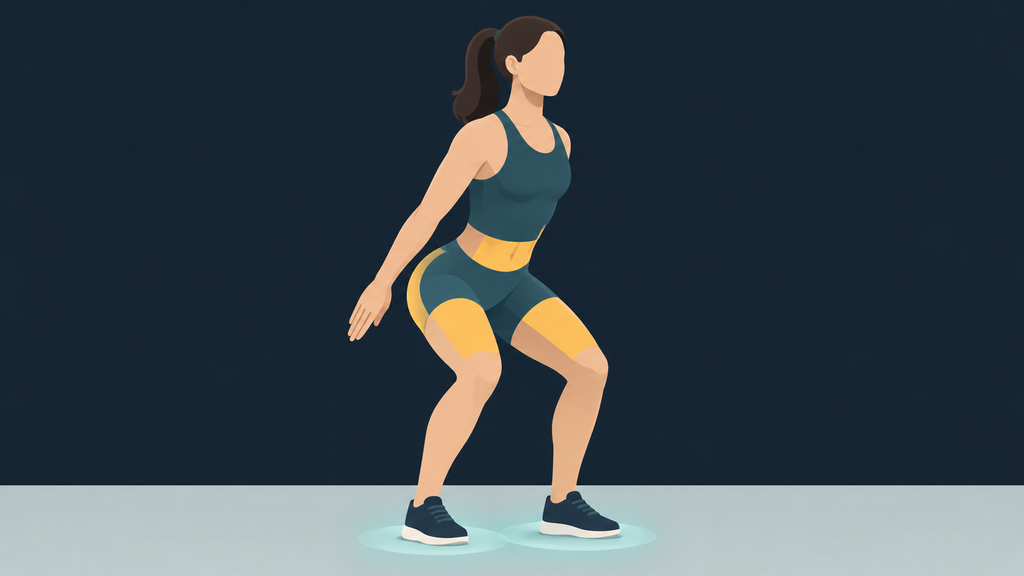
This is the kind of drill that looks almost too simple until I try to freeze without wobbling.
Stand tall with your arms extended overhead and your feet about hip-width apart.
Quickly swing your arms down as you bend your hips and knees.
Drop into a shallow athletic position with your knees slightly bent and your weight balanced through both feet.
Hold completely still for two seconds.
Your thighs, glutes, calves, and abdominal muscles work together to absorb force and keep your body stable.
For divers, the goal is not to make the movement look dramatic.
It is to learn how to move quickly into a strong landing position without your knees collapsing inward or your torso falling forward.
I find the two-second pause more difficult than the snap-down itself.
It makes every small wobble impossible to ignore.
Try: 5–8 repetitions.
Useful trick: Move quietly enough that you barely hear your feet reposition on the floor.
Easier: Start with your hands on your hips and move into the landing position slowly before adding the quick arm swing.
Dryland Training Priorities for Swimmers and Divers
The exercises above develop different qualities that matter in the pool and on the diving board.
I am not a competitive swimmer or diver, but training outside the water has made the differences easier to notice.
Some movements build a more stable body position.
Others improve shoulder control, leg drive, or the ability to land with control.
The table below shows where each movement fits best.
A swimmer with a demanding pool session ahead might benefit from gentle mobility and short activation exercises.
A diver preparing for explosive training should generally perform demanding jumps while fresh.
I learned to be more selective after trying to add jumping exercises at the end of an exhausting leg workout.
My legs could still produce a jump.
Controlling the landing was another story.
That’s when I started treating exercise quality as a better guide than simply finishing every planned repetition.
Final Thoughts
I like having exercises available that let me work on strength and control without needing much equipment.
Some days, a few controlled movements are enough to reveal what deserves attention.
Other days, there’s room for more demanding strength work.
Choosing exercises that support the sport is what makes these 24 bodyweight exercises for swimmers and divers worth including alongside regular training.
Frequently Asked Questions
Are bodyweight exercises enough for swimmers?
Bodyweight training can improve strength, muscular endurance, and stability, particularly for beginners.
Competitive swimmers may also benefit from progressive resistance training using external loads.
Pool training remains essential for developing swimming technique.
Should swimmers perform bodyweight exercises before swimming?
Gentle mobility and short activation exercises can work well before entering the pool.
Demanding strength exercises are often better placed after swimming or in separate sessions, depending on your priorities.
Avoid tiring your shoulders before technically demanding swimming.
Which bodyweight exercises are most useful for divers?
Squat jumps, single-leg deadlifts, tuck-ups, and L-sit progressions develop physical qualities relevant to competitive diving.
Exercise selection should reflect the athlete’s age, experience, technical requirements, and recovery.
Advanced diving skills require qualified supervision.
How often should swimmers and divers use bodyweight training?
Two strength sessions per week can be a reasonable starting point for recreational athletes.
Competitive swimmers and divers should coordinate dry-land training with their coaches.
Training quality and recovery are more important than adding sessions simply to stay busy.