Categories
Beginner Workouts BODYWEIGHT EXERCISES

Starting Calisthenics at 30: Too Late or Just the Right Time?

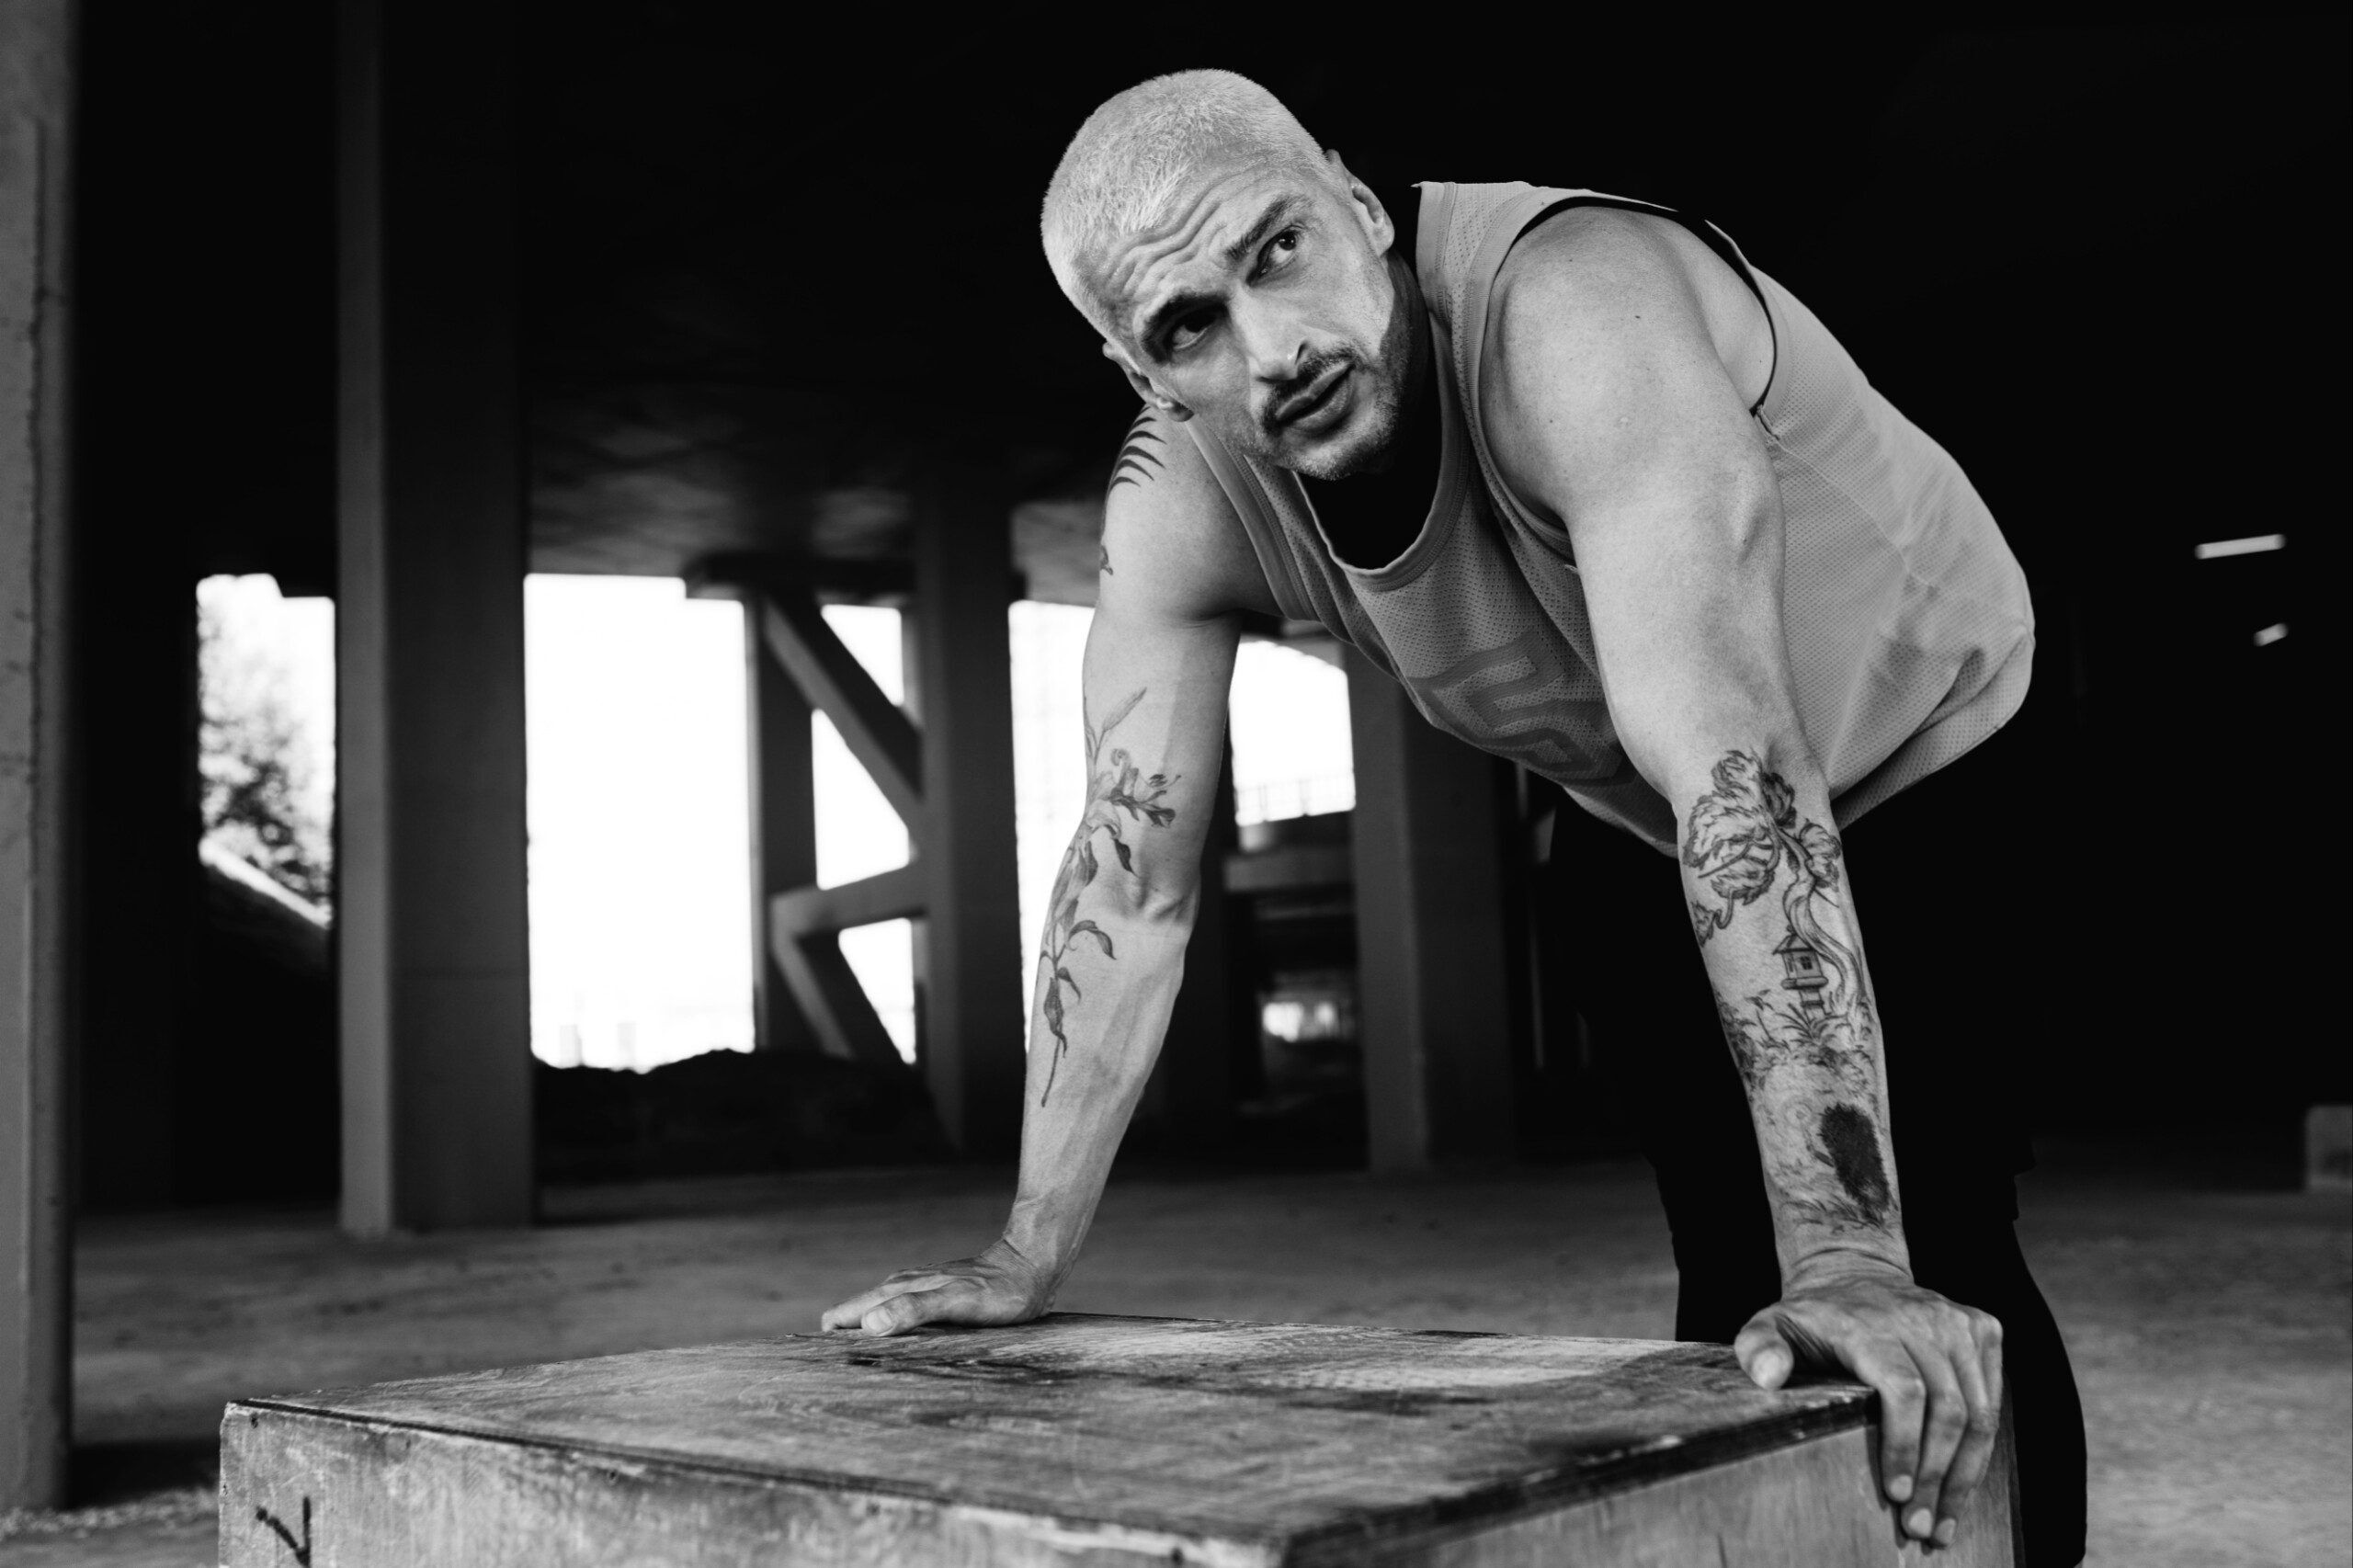
Turning 30 wasn’t a major turning point for me—I’d been training for years by then.

Push-Ups? 

Those were my bread and butter long before I ever touched a weight. 

Pull-ups followed soon after, and I eventually mastered weighted pull-ups. 

There’s something incredibly satisfying about strapping on extra weight and defying gravity—it’s a true test of strength and control.

Eventually, I moved on to a mix of weights and gym routines. 

But even with years of training under my belt, I couldn’t shake the feeling that something was missing.

Could I hold a controlled handstand?

Not really. 

Transition smoothly into a muscle-up? 

Definitely not. 

My body was strong, but I hadn’t mastered it the way calisthenics demanded.

That’s when I decided to refocus on bodyweight training—not just as an accessory to weights but as a core part of my routine.

Calisthenics wasn’t just about building strength. 

It was about control, precision, and moving with purpose.

Let’s dive into why starting calisthenics at 30 (or anytime, really) isn’t just doable—it’s one of the smartest moves you can make.


Shattering the Myth of “Too Old”

Exercise-at-any-age-fitness-dumbbells-running-dancing

Some people believe that after 30, it’s time to lower the bar on physical goals.

I couldn’t disagree more.

Your body at 30 is different, sure.

But different doesn’t mean worse—it means smarter, more strategic, and surprisingly capable.

When I first attempted a wall handstand, I thought, “How hard can this be?”

Turns out, quite hard.

My arms trembled, my core was screaming, and I felt more like I was clinging to the wall for dear life than doing anything remotely impressive.

But here’s the thing: I stuck with it.

Week after week, I practiced, refined my form, and built strength where I didn’t know I needed it.

Eventually, it clicked.

I wasn’t just balancing upside down; I was learning how to truly connect with my body.

And here’s what makes calisthenics even better—it fits into a busy life.

You don’t need a gym or loads of equipment.

Whether it’s a quick session in your living room or squeezing in some push-ups while dinner’s in the oven, you can train anytime, anywhere.

So, if you’re 30 and wondering if it’s too late to take on new challenges, don’t.

Your body is ready, your mind is sharper, and the results might just surprise you.

And the best part?

You can make progress without stepping foot in a gym.

It’s never too late to start, and calisthenics makes it easier than you think.


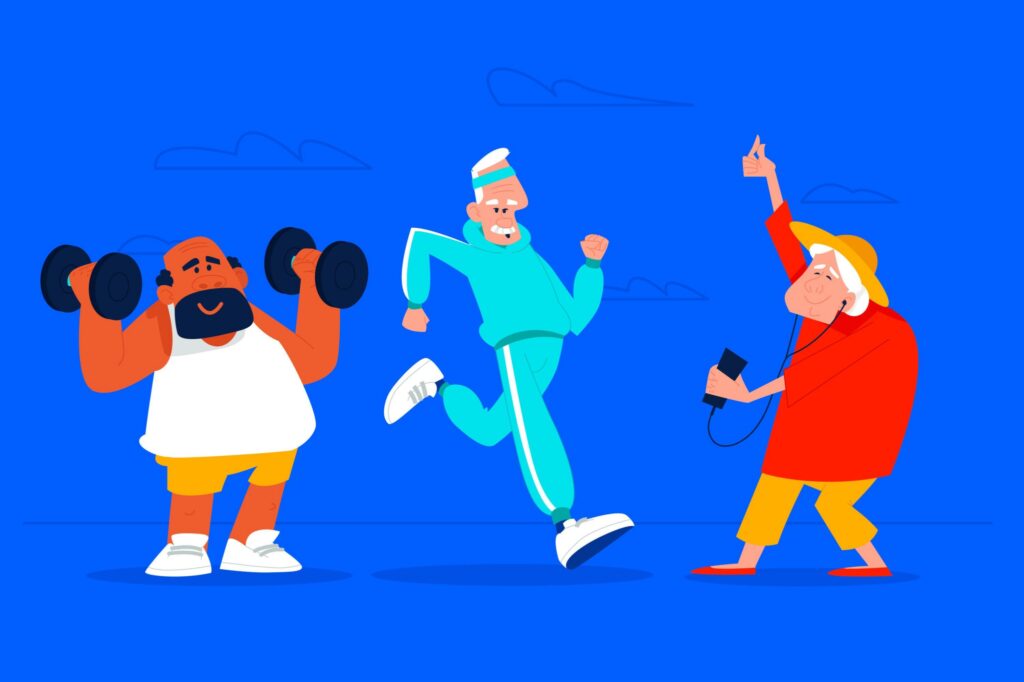
Why Exercise Is Your Best Ally Against Aging

Let’s be honest, getting older comes with its challenges.

Stiff joints, slower recovery, and that mysterious ache that shows up out of nowhere.

But here’s the good news—exercise is one of the most powerful tools we have to fight back.

1. Preserves Muscle Mass

After 30, your body naturally starts losing muscle mass—a process called sarcopenia.

Studies show that resistance training, including calisthenics, can slow or even reverse this loss.

I’ve seen it firsthand.

A friend of mine in his 40s picked up pull-ups for the first time in years, and not only did his strength improve, but his energy levels skyrocketed too.

The science backs it up—a 2019 review in Frontiers in Physiology showed how regular strength training helps you keep that muscle you worked so hard for.

2. Improves Bone Density

As we age, our bones lose density, increasing the risk of fractures.

Weight-bearing exercises like squats and push-ups stimulate bone growth.

A 2014 study in Osteoporosis International confirms that resistance training improves bone mineral density, even in older adults.

3. Boosts Mobility and Balance

Staying active keeps your joints moving and improves flexibility.

Exercises like lunges and planks not only strengthen your muscles but also enhance balance, reducing the risk of falls—a major concern as you age.

I remember my first attempt at lunges—I wobbled like a toddler learning to walk.

Fast forward a few weeks, and not only was I steadier, but my knees thanked me for it.

A 2020 study in Geriatrics & Gerontology International found a 23% reduction in fall risk with consistent functional exercises.

4. Supports Mental Health

Exercise doesn’t just benefit your body; it’s a mood booster too.

Physical activity increases endorphin levels, combats stress, and can even reduce symptoms of depression.

This one’s personal.

After a long day, a quick calisthenics session always clears my head.

A 2018 meta-analysis in JAMA Psychiatry showed regular exercise lowers the risk of depression by 25%.

No wonder I feel so much better after a few sets of push-ups.

5. Keeps Your Heart Healthy

Aerobic and resistance training keep your cardiovascular system in check.

I used to think heart health was all about running marathons, but strength training plays a huge role too.

A 2019 study in the Journal of the American Heart Association found that combining strength and aerobic training reduced heart disease risk by up to 46%.

Why Start Now?

No matter your age, it’s never too late to reap the benefits.

I’ve seen people in their 50s nail their first pull-up after just a few months of training.

Starting with calisthenics is a great way to build strength, improve mobility, and keep your body functioning well into your later years.

Think of it as a long-term investment in yourself—a healthier, happier, and stronger version of you is waiting.


What Are the Basic Calisthenics Exercises?

When I first started calisthenics, I quickly realized it all comes down to mastering the basics.

These aren’t just simple moves—they’re the foundation for everything more advanced.

Here’s the lineup:

Push-Ups

The ultimate classic. Whether on the floor, against a wall, or on your knees, this one never goes out of style. My first push-ups? Way too fast to count—but hey, progress is progress.

Pull-Ups

If you can nail pull-ups, you’re officially part of the calisthenics club. . I could do a couple poorly, so I used the assisted pull-up machine to refine my technique.

Squats

Bodyweight squats? They’re not as innocent as they look. Your legs and glutes will feel the burn, leaving your knees stronger and more resilient for the long haul.

Planks

Hold still, they said. It’ll be easy, they said. Spoiler: it’s not. But planks are amazing for core strength and teaching you how to embrace the shake.

Dips

Find a chair, a sturdy surface, or even parallel bars. Dips are a great way to turn your triceps into steel (or at least feel like they are).

Leg Raises

These look simple but are a sneaky challenge for your lower abs. My first attempt? Let’s just say gravity won that round.

Start with these, and you’ll have a solid base for calisthenics—and some funny stories to tell along the way. 

Master the basics, and the cooler moves (like handstands and muscle-ups) won’t feel so far away.


Beginner Steps You Won’t Regret

First things first, test the waters.

If you can’t do a full push-up, start with knee push-ups or even wall push-ups.

Pick one progression and stick to it until you feel steady enough to upgrade.

Keep your core engaged like you’re bracing for a punch—yes, that means a rock-solid midsection from the get-go.

Take your time.

And celebrate every small win, like finally touching your toes or cranking out a few extra reps.

No need to sprint to the finish line; this is more like a scenic road trip.

When I began, I could manage a couple of pull-ups, but they weren’t exactly smooth.

So, I added “negative pull-ups” to my routine—jumping up to the bar and slowly lowering myself down to build strength.

It wasn’t the flashiest move, but it made a big difference.

Within a month, my pull-ups felt stronger and more controlled, and I was finally able to add a few extra reps with confidence.


How to Start Calisthenics: A Weekly Beginner Plan

Day Focus Exercises Sets x Reps/Duration
Monday Push (Upper Body) – Wall Push-Ups / Incline Push-Ups
– Plank (hold with proper form)
– Shoulder Taps (in plank position)
2 x 8-10
2 x 10-20 sec
2 x 6 (3 per side)
Tuesday Active Rest – Gentle Walk
– Light Stretching
15-20 min
5-10 min
Wednesday Pull (Upper Body) – Negative Pull-Ups
– Bodyweight Rows
– Scapular Pull-Ups
2 x 3-4
2 x 6-8
2 x 6
Thursday Rest – Total Rest or Gentle Yoga
Friday Core and Legs – Bodyweight Squats
– Glute Bridges
– Dead Bug
2 x 8-10
2 x 8-10
2 x 6 (3 per side)
Saturday Mobility & Recovery – Cat-Cow Stretch
– Deep Squat Hold
– Downward Dog Stretch
2 x 10
2 x 10-15 sec
2 x 20 sec
Sunday Rest or Light Movement – Gentle Walk or Relaxed Cycling 15-20 min


What You Need for Calisthenics at Home

The great thing about calisthenics?

You don’t need a fancy gym.

That’s exactly what got me hooked.

I loved the idea of keeping it simple—just a few basics and you’re ready to go.

  1. Pull-Up Bar
    This one’s a game-changer. I’ve spent more time hanging from a pull-up bar than I care to admit, but it’s worth it. Doorway bars work great—just make sure it’s secure.
  2. Parallettes
    These are my go-to for dips and push-ups. They’re small, portable, and much kinder to my wrists than flat hands on the floor. Plus, they make me feel a little more like a pro (even when I’m not).
  3. Resistance Bands
    I can’t recommend these enough. I used them a ton when I was working on my pull-ups. They’re also great for adding resistance to squats or making stretches more effective.
  4. A Yoga Mat
    Look, I’ve tried planking on a hardwood floor, and I wouldn’t recommend it. A yoga mat? Total game-changer for comfort and stability.


Simple Ways to Switch Up Your Workout

Now, let’s dive into a few calisthenics moves that often fly under the radar but are incredibly effective and worth adding to your routine.

They’re all real, practical, and can level up your training game.

1# Doorway Towel Row

Loop a sturdy towel around a doorknob, ensuring the door is strong and locked.

Or, drape it over the top of a slightly open door, letting both ends hang down, and close the door to secure it.

Grab each end of the towel, lean back, and row your body forward.

It’s a surprisingly tough move for your back and arms, especially if you play with your foot positioning.

2# Elevated Inchworms

Stand on a low step or bench, hinge forward to place your hands on the ground, and inch your hands forward until you reach a plank.

Then inch them back.
Your hamstrings will probably scream at first, but give them time—they’ll adapt.

This also opens up your shoulders and improves stability.

3# Scapular Pull-Ups

Instead of bending your arms, focus on shrugging your shoulders down and back while hanging from a bar.

It strengthens those tricky-to-target muscles around your shoulder blades (the scapular region).

Better shoulder stability = fewer injuries and stronger pull-ups down the road.

4# Archer Push-Ups

Start in a wide push-up position.

As you lower, bend one arm while keeping the other extended, shifting most of your weight to one side.

Alternate sides.

This move builds unilateral strength and improves stability.

5# Wall Walks

Begin in a plank position with your feet against a wall.

Slowly “walk” your feet up the wall while moving your hands closer to the wall until you’re almost in a handstand position.

Then reverse the movement.

This is excellent for building shoulder and core strength while improving body awareness.


What Beginners Should Watch Out For

Starting calisthenics can be exciting, but there are a few key things to keep in mind to stay safe and make real progress:

  • Protect Your Wrists:
    Push-ups, planks, and dips can put stress on your wrists. Start with wrist mobility exercises like circles or gentle stretches on all fours to avoid discomfort.
  • Build Pull-Up Strength Gradually:
    If you can’t do a pull-up yet, focus on scapular pull-ups (shrugging your shoulders while hanging) and negative pull-ups (lowering yourself slowly). This strengthens your back and grip safely.
  • Don’t Skip Warm-Ups:
    Begin each session with dynamic movements like arm swings, bodyweight squats, or light jumping jacks to prepare your joints and muscles.
  • Prioritize Form Over Reps:
    Sloppy push-ups or squats will only lead to bad habits and possible injury. Keep your movements controlled, and stop when your form breaks down.
  • Don’t Overload Yourself: Your body needs time to adapt. Alternate training days with light activities like walking or yoga. Gentle movement aids recovery without overdoing it.


RELATED:>>> What are the common problems with calisthenics?


The Power of Sleep, Recovery, and Small Wins

Man-sleeping-with-dumbbell-on-bed-recovery-fitness

Now, here’s something that doesn’t get enough attention: micro sets.

It’s a simple idea—do small sets of an exercise (like pull-ups) throughout the day, rather than all at once.

At 30 (or 40, or 50), our bodies thrive on consistency rather than all-out intensity 24/7.

Mini workouts can keep your muscles primed without leaving you feeling beat-up.

Also, never underestimate the power of good ol’ rest.

If your body feels like a sack of bricks, take a day off, or focus on gentle stretching.

Better to come back stronger tomorrow than risk an injury today.


How Calisthenics Taught Me to Compete with Myself

One of the biggest lessons I learned after 30 was to stop comparing my progress to everyone else’s.

My friend Dave, for instance, could crank out 15 handstand push-ups with zero drama.

Me?

Let’s just say I took the scenic route to get there.

But that’s the beauty of calisthenics: it’s a personal journey, measured in small milestones.

One day, you’re celebrating a single pull-up.

A month later, you’re tackling sets of five.

Keep your eyes on your own lane.

Your biggest competition is that previous version of you—the one who couldn’t do a proper push-up.


Final Thoughts

Starting calisthenics at 30 is like opening a new chapter in your training story.

Sure, you might run into a few surprises along the way—tight hips, shaky arms, or a move that feels impossible at first. But the rewards?

Absolutely worth it.

Stronger muscles, improved mobility, and a sense of control over your body are just the beginning.

And let’s not forget the thrill of achieving something that once seemed out of reach.

Before you dive in, it’s always a good idea to consult with a fitness expert or your doctor, especially if you’re new to training or have any health concerns.

Proper guidance can ensure you’re starting safely and making the most of your efforts.

Take it one step at a time.

Each rep, each hold, each tiny improvement is a victory.

Calisthenics isn’t just a workout; it’s an adventure.

You’ll challenge your limits, learn to trust your body, and maybe even surprise yourself.


FAQs

Can You Do Calisthenics If You’re Overweight?

Yes! Calisthenics is adaptable for all fitness levels. Start with moves like wall push-ups or supported squats to ease into it. Over time, it strengthens your muscles, improves mobility, and can even aid in weight loss.

How Often Should You Train?

Beginners should aim for 2-3 days a week to allow proper recovery. As you progress, you can train 4-5 times a week, alternating muscle groups to avoid overtraining.

Can You Do Calisthenics at 50 or 60?

Definitely! Calisthenics is perfect for staying strong and mobile at any age. Focus on beginner-friendly exercises like planks, bodyweight squats, and wall push-ups, and gradually build from there.

Recommended
Categories
Beginner Workouts BODYWEIGHT EXERCISES

Step-by-Step Push-Up Progression for Calisthenics

As a kid, I could easily crank out ten push-ups without breaking a sweat.

At least, that’s what I thought.

Looking back, my form was all over the place—arched back, elbows flaring out, and a complete lack of control.

I wasn’t doing push-ups; I was doing something that vaguely resembled them.

It wasn’t until years later that I realized the importance of proper technique.

Push-ups aren’t just about pumping out reps—they’re about alignment, stability, and using the right muscles.

That’s why I want to share a progression that focuses on building strength step by step while perfecting your form.

Because when done right, push-ups are one of the best exercises you can do for your upper body.


My Roadmap, One Stage at a Time

When I realized my push-ups were more guesswork than proper technique, I knew a clean slate was in order.

It hit me that I was relying on momentum and bad habits rather than strength and control. 

That meant spending time mastering simpler exercises that built core stability and shoulder strength.

And let me tell you, it wasn’t easy.

Even the most basic push-ups felt like a losing battle without a strong foundation.

But I quickly learned that push-ups aren’t just about your chest or arms.

They’re a full-body movement that demands stability, alignment, and coordination from head to toe.

Your core keeps your body straight, your shoulders provide support, and your legs act as a grounding force.

Skipping this foundational work is like trying to build a skyscraper on quicksand—it just doesn’t hold up.

By focusing on these fundamentals, I was able to build the strength and control needed to progress steadily, without struggling or risking injury.

Sure, it was a slower start, but it laid the groundwork for lasting success.

And that’s the key: mastering the basics sets you up for bigger wins down the line.


Paying Attention to Proper Push-Up Form: Mistakes to Avoid

When it comes to push-ups, form is everything.

It doesn’t matter how many reps you crank out—if your technique is off, you’re only cheating yourself (and risking injury).

Trust me, I’ve learned this the hard way.

Here’s how to keep your form dialed in and avoid the most common mistakes.

Keep Your Body in a Straight Line

Think of your body as a solid plank from head to heels.

One of the biggest mistakes I see (and yes, I’ve been guilty of this too) is letting the hips sag, turning your body into a droopy hammock.

On the flip side, some people lift their hips way too high, making their push-ups look more like a downward dog.

The fix?

Engage your core and glutes to stabilize your body.

Imagine someone is about to balance a glass of water on your back—no spills allowed!

Avoid Flaring Your Elbows

If your elbows are sticking straight out to the sides like chicken wings, we need to talk.

This puts unnecessary strain on your shoulders and takes the focus away from your chest and triceps.

Instead, keep your elbows at about a 45-degree angle from your torso.

It might feel awkward at first, but trust me, it’ll save your shoulders and maximize the effectiveness of each rep.

Go Full Range of Motion

I get it—half reps are tempting when you’re tired.

But if you’re only lowering halfway down, you’re cutting yourself short.

Bring your chest close to the ground (without actually resting on it), then push back up with control.

Remember, five perfect push-ups are far better than 20 sloppy ones.

Don’t Let Your Head Drop

I used to think lowering my head made it look like I was going deeper into my push-up.

Spoiler alert: it doesn’t.

Keep your neck neutral and your eyes slightly forward—not glued to the floor.

This keeps your head aligned with your spine and reduces unnecessary tension in your neck.

No Bouncing Off the Floor

If you’re using momentum to bounce yourself back up, you’re doing it wrong.

Push-ups are all about controlled movement, not shortcuts.

Lower yourself slowly, pause briefly at the bottom, and push back up with intention.

Think strength over speed—it’s a game-changer.

Master Your Breathing

Breathing might sound simple, but it’s a common issue.

Holding your breath or breathing erratically can throw you off your rhythm.

Here’s the golden rule: inhale as you lower, exhale as you push up.

It’s like giving your body a built-in rhythm to follow.

Mistakes in Advanced Variations

When it comes to advanced push-ups, like plyometric or one-arm push-ups, mistakes can multiply.

With plyometric push-ups, make sure you have a solid base before attempting explosive movements.

Landing poorly or overextending can wreak havoc on your joints.

For archer or one-arm push-ups, avoid leaning too heavily on your assisting arm.

The goal is to distribute the weight properly and gradually reduce your reliance on that arm.


1. Wall Push-Up

Wall-push-up-with-hands-placed-on-wall-at-chest-height

I like to call this the “gateway push-up.”

It’s the perfect starting point if you’re new to push-ups or need a gentle reintroduction after some time off.

Stand a couple of feet away from a wall, place your palms against it at chest level, and lean in.

Lower your body toward the wall, keeping your elbows at a natural angle, and then push back to the start.

It’s kind on your wrists, shoulders, and core, making it ideal for absolute beginners or anyone recovering from an injury.

What I love about wall push-ups is how adaptable they are.

As you get stronger, you can step your feet further back, increasing the angle and making the movement more challenging.

And once you’ve mastered that, why not take it up a notch?

Try the one-arm wall push-up.

With one hand behind your back, use the other to control your descent and press back to the start.

It’s a great way to build unilateral strength and prepare your body for advanced push-up variations down the line.

The wall push-up is simple but incredibly versatile, giving you endless room to grow as your strength improves.


2. Plank on the Knees

Plank-position-on-knees

When I first discovered the plank on the knees, it looked almost too easy.

But the moment I tried to hold it steady, I realized how quickly my abs and lower back started to complain.

That’s the magic of this variation: it teaches you to keep your hips up, your belly button drawn in, and your spine long, without placing too much stress on your shoulders.

If you can breathe comfortably here for a good 20 seconds, you’re already setting a rock-solid foundation.


3. Negative Push-Up: The Perfect Starting Point

Struggling with regular push-ups?

Negative push-ups are a game-changer.

Start in a push-up position, lower yourself slowly to the floor, keeping your core tight and back straight.

Once your chest touches down, let your knees drop to help you push back up.

It’s simple, effective, and takes the pressure off while building strength where you need it most.

Stick with it, and you’ll be amazed at how quickly you’ll progress to full push-ups.


4. Knee Push-Up

Push-up-position-on-knees-with-hands-on-floor

From there, it’s a small step to the knee push-up.

Yes, you’re still on your knees, but now your arms and upper body start handling more load.

I like to imagine my torso as a straight board, from my head down to my knees.

I lower my chest, keep my elbows tucked (around 45 degrees, give or take), and push back up in a controlled way.

It might not sound flashy, but staying focused on form here is what prevents injuries and sets you up for success later.


5. Elevated Push-Up

Elevated-Push-Up-with-hands-on-bench

Ready for the next challenge?

Let’s raise the bar—literally. 

Place your hands on a stable bench, couch, or step, with your legs extended behind you in a high plank. 

Because of the angle, your arms will carry more of your body weight compared to the knee push-up, but it’s still more forgiving than the standard variation on the floor. 

This step forces you to maintain a solid plank position while building that upper-body strength. 

It’s the perfect way to push yourself without overwhelming your form or stability. 


6. Classic Push-Up

Classic-push-up-with-hands-shoulder-width-apart

Now We’re Talking!

This is the form most people picture when they hear the word “push-up.”

Place your hands on the ground, slightly wider than your shoulders, and position your body in a rigid plank with your core engaged.

As you lower your chest toward the floor, keep a steady tempo—no rushing.

Then, drive back up, exhaling as you go.

It’s a move that looks simple but demands a harmonious orchestra of muscles working together.

Practice it slowly and focus on quality reps over sheer volume.

Trust me, your body will thank you.


7. Wide-Grip Push-Up

Wide-grip-push-up-with-hands-placed-farther-apart

Shift your hands even wider than the classic.

You’ll really feel your chest working hard, although it might take a bit of strain off the triceps.

Just be careful not to flare your elbows too much.

Keep the movement smooth, and your shoulder joints will stay happy.


8. Diamond Push-Up

Diamond-push-ups-with-hands-forming-a-diamond-shape

Ready to spice things up?

Bring your hands closer, forming a diamond shape with your thumbs and index fingers.

Lower your chest, and you’ll feel the focus shift to your triceps and the inner portion of your chest.

This variation isn’t just a fancy trick—it’s a surefire way to boost arm strength.

But keep your hips in line.

Letting them sag or rise makes the movement easier while cheating your gains.


9. Staggered Push-Up

Staggered-push-up-with-hands-at-different-positions

This variation is like learning to balance two different workloads—it keeps you on your toes, literally.

Place one hand slightly ahead of your shoulder line and the other just below your chest.

Lower your body slowly, feeling how each arm handles a unique share of the effort.

After a few reps, switch hand positions to even things out.

The key is maintaining control and avoiding leaning too heavily to one side.

It’s a brilliant way to build unilateral strength and add variety to your routine.


10. Spiderman Push-Up

Spiderman-push-up-with-knee-moving-toward-elbow

Looking for a sneaky core challenge? The Spiderman push-up delivers.

Start in a standard push-up position, and as you lower your chest, bring one knee up toward your elbow.

Keep your hips square to avoid twisting—it’s all about control.

Push back up, returning your foot to the starting position.

It’s like a mini ab workout tucked into each rep, and once you get the rhythm, it feels surprisingly smooth.

Just don’t be surprised if your first few attempts are a little wobbly—it’s all part of the fun.


11. Pike Push-Up

Pike-push-up-in-inverted-V-position

When my shoulders need extra love, pike push-ups answer the call.

Start by lifting your hips high, forming an inverted “V” shape, almost like a downward dog.

From this position, lower your head toward the floor, focusing the movement on your shoulders and upper back.

The first time I tried it, I underestimated how quickly my arms would start shaking.

But I love how it hammers the deltoids without needing a bunch of fancy equipment.


12. T Push-Up

T-push-up-with-arm-rotated-into-side-plank-position

This variation feels more like a flow than a push-up—it’s push, twist, and reach for the sky.

Start with a standard push-up.

After pressing back up, rotate your torso and lift one arm toward the ceiling, letting your body turn into a side plank.

Hold that “T” shape for a moment to challenge your balance and engage your obliques.

Then, return to the starting position and repeat the movement, rotating to the opposite side on the next rep.

It’s a dynamic exercise that tests your stability and adds a full-body element to your push-up routine.

And yes, it’ll keep you on your toes—literally and figuratively.


13. Sphinx Push-Up

At first glance, the sphinx push-up seems deceptively simple—until your triceps start to burn.

Begin in a forearm plank with your arms parallel and your core engaged.

From there, press through your palms, lifting your upper body until your arms are fully extended.

Lower yourself back down slowly, keeping control to avoid flopping back onto your forearms.

This movement isolates the triceps while also demanding stability from your core.

It’s like a triceps isolation exercise disguised as a push-up.

Each rep reminds me to stay patient and move with control.


14. Hindu Push-Up

I love how this one combines flexibility and strength in one flowing motion.

Start in a high-hip position, forming an inverted “V” with your body.

From there, swoop your chest low toward the ground, transitioning smoothly into an upward dog pose with your back arched and chest lifted.

Then, reverse the movement, gliding back into the starting position.

The first time I tried it, I felt parts of my back and shoulders I didn’t know existed.

It’s all about a smooth glide—like you’re diving under a low fence and then returning gracefully.

A few reps in, you’ll realize just how powerful (and sweaty) this move can get.


15. Pseudo Planche Push-Up

I love how this move hints at the advanced world of planche training.

Start by rotating your hands slightly outward and leaning your shoulders forward so they pass over your wrists.

From this position, lower yourself into a push-up, keeping your core tight and your body straight.

I remember the first time I tried it: my arms wobbled, and my abs felt like they’d had a wake-up call.

But with practice, that forward lean becomes a hallmark of real calisthenics strength.


16. Fingertips Push-Up

Fingertips-push-up-with-weight-supported-on-fingers

This one’s a grip challenge, plain and simple.

Instead of placing your palms flat on the ground, rise onto your fingertips—like a cautious cat testing the waters.

At first, I could barely hold a plank on my fingertips without cramping up.

Now, I treat it like a specialized skill, doing partial reps or static holds until I feel more confident.

It’s humbling, but it does wonders for wrist and forearm strength.


17. Decline Push-Up

Decline-push-up-with-feet-raised-on-step

When you prop your feet on a bench or step, gravity shifts more of the work to your upper chest and shoulders.

Keep your core braced and your body straight to avoid arching your lower back.

This variation is essentially the opposite of the incline push-up, but with an added level of intensity.

Each rep brings a focused burn to your shoulders and upper chest—proof you’re targeting the right muscles.

Keep in mind: the higher the platform, the more intense the challenge.

It’s a simple yet effective way to take your push-up routine to the next level.


The Advanced Stuff: Plyometric and Archer

When you’re ready to turn up the heat, plyometric and archer push-ups are where things get exciting—and a little humbling.

Let’s start with plyometric push-ups.

Plyometric-push-ups-with-explosive-hand-lift

This variation is all about power and explosiveness.

You lower yourself down as in a classic push-up, but instead of pressing up smoothly, you push off the ground so your hands momentarily leave the floor.

The goal is to generate enough force to defy gravity for a split second.

It’s not just your chest and arms working here—your shoulders and triceps are all-in for that explosive lift.

The first time I tried these, my hands barely left the ground, and my landing wasn’t exactly graceful.

But each attempt taught me how to engage my core and control the movement better.

Over time, I started adding more height and even experimenting with clapping mid-air (once I was sure I wouldn’t faceplant!).

Now let’s talk about archer push-ups.

Archer-push-ups-with-one-arm-extended-to-the-side

These are a personal favorite because they feel like a step toward the ultimate one-arm push-up.

Here’s how it works: you extend one arm far out to the side, keeping it straight, while the other arm stays close to your chest.

Lower yourself toward the bent-arm side, shifting most of your weight onto it.

The extended arm doesn’t just sit there—it provides just enough support to keep you balanced.

This movement forces each arm to take turns carrying the load, training unilateral strength and stability.

When I first attempted archer push-ups, my extended arm felt useless, like it wasn’t helping at all.

But as I practiced, I learned to rely on it just enough to maintain control without compromising the intensity on the working arm.

Both of these variations require focus and patience.

They challenge not only your strength but also your coordination and balance.

And while they’re tough, they’re also incredibly rewarding once you get the hang of them.

Plyometric push-ups teach you explosive power, while archer push-ups lay the groundwork for advanced unilateral moves.

If you’re feeling adventurous, give these a shot.


Eyeing the One-Arm Push-Up

One-arm-push-up-with-hand-centered-under-chest

The one-arm push-up is a showstopper.

It’s one of those moves that turns heads, but trust me—it’s not just about raw strength.

It’s also about balance, coordination, and core stability working together in perfect harmony.

If you’re dreaming of nailing your first one-arm push-up, the right one-arm push-up progression is key.

When I first decided to go for it, I had no idea where to start.

I quickly learned that trying to jump straight into a full one-arm push-up was like attempting a backflip without mastering a somersault.

So, I began with negatives.

This meant lowering myself with one arm in a controlled motion, then using my knees or my other hand to help push back up.

It felt clunky at first, but each attempt strengthened my stabilizers and taught me control.

Next, I worked on archer push-ups.

As I mentioned before, these are great for one-arm push-up progression.

They shift most of the weight to one arm.

The other arm helps with stability and offers minimal assistance

Once I felt strong and steady, I moved on to partial one-arm push-ups.

This stage tested everything—strength, form, and patience.

I focused on going halfway down and then gradually increasing my range of motion over time.

After weeks (okay, maybe months), I finally managed my first clean, full-range one-arm push-up.

It was humbling, and yes, it took a lot of shaky attempts, but the sense of accomplishment was worth every drop of sweat.


Putting It All Together: The Best Push-Up Workout

Some days, I like to switch gears and treat my push-up practice as a single, seamless routine.

Rather than repeating each variation back-to-back, I turn it into a circuit that keeps things fresh—and my muscles guessing.

I’ll set a timer for short intervals, say 30 to 45 seconds per exercise, followed by 15 seconds of rest.

Then I rotate through different push-up styles in each round.

It might look like this:

First round, I focus on slow negatives (lowering my chest in a super-controlled way).

When the timer beeps, I take a quick breather, then move to diamond push-ups for a triceps burn.

Next interval, I might throw in a few explosive reps, pushing off the ground with a little pop.

And if I’m feeling really good that day, I’ll challenge myself with a brief set of archer push-ups on each side.

I keep the total session to around 10 or 12 minutes of focused effort.

This helps me train multiple dimensions—strength, power, stability, and control—without rehashing the same exact sequence over and over.

As I wrap up, I’ll spend a minute or two decompressing with shoulder rolls and chest stretches, ensuring I stay limber for the next workout.

No single method is set in stone.

Feel free to shuffle your exercises, shorten or lengthen intervals, or slip a standard push-up set in wherever it makes sense.

The key is variety: by mixing tempos, grips, and intensities, you’ll keep your upper body guessing and growing.

Over time, you’ll notice how each variation feeds into the next, sharpening your technique and boosting your overall strength.

That’s what makes it a true “best” push-up workout in my book—simple, adaptable, and anything but repetitive.


When to Progress to a Harder Push-Up Variation

Figuring out when to step up your push-up game can feel tricky, but it’s all about listening to your body.

If you’re hitting 10-12 reps with perfect form—no sagging hips, no shaky arms—and you’re finishing your sets thinking, “That wasn’t so bad,” it’s time to push for more.

I remember when push-ups started feeling more like a warm-up than a challenge.

That was my cue to try something tougher, and it made all the difference.

Your breathing should stay steady, and your muscles should feel worked but not completely gassed.

When the movement feels smooth and controlled, it’s time to spice things up.

Don’t rush it, but don’t get too comfortable either—progress is waiting!


Wrapping It Up

This roadmap takes you from the basics to the one-arm push-up, showing that true strength comes from dedication and effort

I’m a firm believer that you don’t need fancy equipment to build real strength.

What you do need is consistency, patience, and a willingness to refine your form rather than rush the process.

Each variation is a milestone, and it feels great to celebrate every small victory along the way.

So pick your starting point.

Focus on mastery over flashiness.

And remember, it’s about the journey—one push-up at a time.


FAQs

How often should I practice push-ups?

Aim for 3-4 times a week, allowing your muscles time to recover and grow stronger. Consistency matters more than daily repetition.

Do push-ups only work the chest?

No, push-ups engage multiple muscle groups, including the chest, triceps, shoulders, core, and even your legs for stabilization.

What’s the best way to avoid wrist pain during push-ups?

Use push-up bars or perform push-ups on your fists to reduce wrist strain. Also, ensure your wrists are directly under your shoulders for proper alignment.

Can push-ups replace a chest workout

Push-ups are versatile and effective, but for well-rounded strength, pair them with other chest exercises like bench presses or dips.

Recommended
Categories
Beginner Workouts BODYWEIGHT EXERCISES

22 Gymnastics Exercises for Beginners That You Can Try at Home

I recently began my gymnastics journey and, for now, I’m focusing on basic exercises to stretch my muscles.

Honestly, I’m not sure if I’ll go beyond these basics since I already practice two other types of workouts.

However, the beauty of this discipline is that many foundational exercises can be practiced at home, which is comfortable and convenient.

These movements help you develop coordination, body awareness, muscle strength, and flexibility.

Plus, they foster personal achievement and discipline.

In this article, you’ll find 22 beginner gymnastics exercises you can do at home.

No special equipment needed!


Understanding the Basics of Gymnastics

Before jumping into exercises, it’s crucial to understand the basics of gymnastics.

This sport requires special attention to technique and form to keep workouts effective and safe.

Good technique means less energy wasted and better results avoiding injuries and making steady progress.

From my own experience, focusing on the fundamentals has made all the difference in my practice.


Other Key Elements

  • Strength and Control: You need strong muscles, especially in your core, arms, and legs, to perform moves and maintain control.
  • Flexibility: Being flexible helps you move better, avoid injuries, and boost performance.
  • Balance and Coordination: These are vital for executing complex moves and syncing your body parts.
  • Rhythm and Grace: Gymnastics isn’t just about strength. You also need rhythm and grace to make your moves fluid and elegant.


Setting Up Your Gymnastics Area at Home

  • Safety First: Prioritize safety even without equipment. Ensure your workout area is clear of obstacles and has a flat surface. Regularly check your space to avoid accidents. This simple step has been a lifesaver for me, preventing mishaps and ensuring a safe practice environment.
  • Adequate Space: Find a spacious, obstacle-free area at home. A well-ventilated, flat surface is perfect for your exercises.
  • Respect Your Level: Use exercises that match your skill level. Don’t push yourself too hard too soon. I’ve learned that respecting my current level and not overcommitting has kept my practice safe and enjoyable.
  • Long-Term Investment: Think of your workout routine as an investment in your health. Start with basic exercises and gradually add more challenging ones over time.


1. Balance Beam on the Ground

Exercise-that-significantly-improves-balance-and-coordination

It’s a super simple exercise that mimics the balance beam used in gymnastics.

All you need is some tape and a little space.

Here’s how you can do it:

Step 1: Set Up Your Balance Beam

First, grab a strip of adhesive tape.

Lay it down on the floor in a straight line. This tape will be your balance beam.

Step 2: Walk the Line

Now, start walking slowly along the tape. Take your time with each step.

Focus on staying balanced.

Step 3: Use Your Body

While walking, use your arms and torso to help maintain your balance.

Imagine you’re on a real balance beam.

Why It Works

The Balance Beam is great for strengthening the stabilizing muscles in your feet and ankles.

Plus, it builds the confidence you need for more complex movements.


2. Vertical Jump

Crucial-exercise-for-jumps-in-gymnastics

Amp up your leg strength and explosiveness with the Vertical Jump.

It’s a straightforward exercise that packs a punch, perfect for improving your jumps in gymnastics.

Let’s get into it:

Step 1: Get Ready

Stand with your feet slightly apart. Feel grounded and balanced.

Step 2: Bend and Jump

Bend your knees a bit, then spring up as high as you can.

Step 3: Reach for the Sky

While you’re jumping, raise your arms upwards to get that extra height.

Step 4: Land Softly

When you land, absorb the impact with your knees to protect your joints.

Why It Works

The Vertical Jump is fantastic for building explosive power in your legs, especially in your glutes and core.

It’s essential for those big jumps in vaulting or acrobatic floor routines where you need that extra oomph.


3. Tuck Sit

To build a rock-solid core for those challenging gymnastic moves, the Tuck Sit is your go-to exercise.

It is excellent for increasing trunk strength and stability, essential for exercises on the parallel bars, high bars, and rings.

Here’s how you do it:

Step 1: Get Into Position

Sit on the floor with your legs straight and together in front of you. Make sure you’re comfortable and balanced.

Step 2: Tuck and Extend

Bend your knees towards your chest. At the same time, extend your arms forward.

Step 3: Hold and Focus

Hold this position for a few seconds. Concentrate on contracting your core muscles to maintain stability.

Why It Works

A strong core is essential for controlling your body during complex gymnastic elements.

The Tuck Sit helps you develop that strength and stability, making those high-flying moves much easier.


4. Handstand Against the Wall

The Handstand Against the Wall is fantastic for strengthening your arms, shoulders, and core, while also improving your balance and body awareness.

It’s a great foundational move for achieving free handstands, which are key in gymnastics.

Here’s how to nail it:

Step 1: Get into Plank Position

Start in a plank position with your feet touching the wall. Make sure your hands are firmly on the floor, shoulder-width apart.

Step 2: Walk Up the Wall

Slowly walk your feet up the wall. Keep moving your hands closer to the wall until your body is vertical.

Step 3: Align and Engage

Once you’re in position, maintain a straight line from your hands to your feet. Engage your core to keep your body stable and aligned.

Step 4: Hold the Position

Hold the handstand for as long as you can, focusing on keeping your body straight and your core tight.

Why It Works

This exercise is excellent for building the strength and balance needed for free handstands.

It’s also a great way to improve your body awareness, crucial for more advanced gymnastics moves.


5. Forward Roll

Want to boost your coordination and spatial orientation?

The Forward Roll is your go-to move.

Plus, it strengthens your neck and back muscles and is a great foundation for more advanced acrobatics like somersaults and aerial rotations.

Here’s how you can do it:

Step 1: Start Standing Tall

Begin in a standing position with your arms raised above your head. Feel the stretch and get ready to roll.

Step 2: Squat Down

Lower yourself into a squat. Place your hands on the floor in front of you. Make sure your back is rounded, not flat.

Step 3: Roll Forward

Push with your feet and use your hands to guide your movement. Roll forward over your back and shoulders.

Step 4: Finish the Roll

As you roll, tuck your chin to your chest to protect your neck. Let the momentum carry you through and come back up to a standing position if you can.

Why It Works

The Forward Roll is excellent for improving your coordination and spatial orientation.

It also strengthens the muscles in your neck and back, setting you up for more advanced acrobatic movements.


6. Cartwheel

Cartwheel-enhances-coordination-lateral-strength-and-flexibility

To enhance your coordination and develop lateral strength and flexibility, the cartwheel is perfect.

It’s a foundational move in gymnastics that sets you up for more advanced acrobatics.

Here’s how to nail it:

Step 1: Start Standing Tall

Begin in a standing position with your arms raised above your head. Feel tall and ready to move.

Step 2: Lean Sideways

Lean your body sideways. Place one hand on the floor, then the other, in a fluid motion.

Step 3: Follow with Your Legs

As your hands touch the floor, your legs should follow in a smooth, airborne rotation.

Step 4: Land Gracefully

Complete the rotation by landing first on one foot, then the other. Return to a standing position.

Why It Works

The cartwheel enhances coordination between your upper and lower body, and it builds lateral strength and flexibility.

Regular practice develops a strong foundation in strength, flexibility, balance, and coordination.


7. Leg Swing

Leg swings are an excellent way to warm up and stretch your leg muscles, increasing hip mobility, which is crucial for many gymnastic elements.

Here’s how to do them:

Step 1: Find Your Balance

Start standing, maintaining a good balance on one leg. Focus on keeping your core engaged.

Step 2: Swing Your Leg

Swing the other leg forward and backward. Keep the movement controlled and smooth.

Step 3: Repeat on Both Legs

Switch legs and repeat the exercise to improve flexibility and mobility in both hips.

Why It Works

Leg swings help warm up and stretch your leg muscles while increasing hip mobility.

This is important for gymnastic movements that involve extensive leg use.


8. Bridge

exercise-for-increasing-back-flexibility

To boost your back flexibility and strengthen your core, the Bridge exercise is perfect.

It’s a simple yet powerful move that helps improve your spine’s flexibility while also strengthening your back and core muscles.

This exercise is essential for developing skills in rotations and backward bends.

Here’s how to master it:

Step 1: Get Into Position

Lie on your back with your knees bent and your feet flat on the floor. Make sure your feet are hip-width apart and close to your glutes.

Step 2: Lift Your Hips

Lift your hips upward, creating an arch with your back. Push through your heels and engage your glutes and core to lift your hips as high as you can.

Step 3: Hold the Position

Hold this arched position for a few seconds. Keep your shoulders and feet firmly on the ground.

Step 4: Breathe Steadily

Maintain steady breathing while holding the position. Inhale deeply and exhale slowly, keeping your core engaged and your hips lifted.

Why It Works

The Bridge exercise increases back flexibility and strengthens the muscles of your back and core.

This exercise is crucial for developing skills in rotations and backward bends, which are key elements in gymnastics.


9.  V-Sit

Aiming to build serious core strength?

The V-Sit targets both your abs and back perfectly.

It targets your abdominal and back muscles, crucial for body control and maintaining proper posture in gymnastics.

Here’s how to do it:

Step 1: Sit on the Floor

Assume a seated position on the floor. Keep your back straight and your legs together.

Step 2: Lift Your Legs

Lift your straight legs off the ground. Your body should form a V shape. Extend your arms forward to help maintain balance.

Step 3: Hold the Position

Hold the V-Sit position for a few seconds. Focus on contracting your abdominal and back muscles to keep your body stable.

Why It Works

The V-Sit is great for building strength in your abdominal and back muscles.

This strength is essential for maintaining proper posture and body control in gymnastics, especially during complex movements.


10. Jump to Straddle

Improving your leg agility, strength, and coordination is achievable with the Jump to Straddle.

It’s perfect for enhancing your skills in jumps and mid-air splits in gymnastics.

Here’s how to do it:

Step 1: Start Relaxed

Begin from a relaxed standing position. Feel balanced and ready to jump.

Step 2: Perform the Jump

Jump up and spread your legs laterally in the air. Aim for a wide, controlled split.

Step 3: Land Gently

Land gently, bringing your legs back together and returning to the initial standing position. Focus on maintaining control and fluidity throughout the movement.

Why It Works

The Jump to Straddle enhances leg agility and strength while improving coordination.

This is key for mastering jumps and mid-air splits in artistic and rhythmic gymnastics.


11. Shoulder Stand

Vertical-on-the-shoulders

For a perfect blend of balance and strength training, incorporate the Shoulder Stand.

This exercise intensifies core strength and body control, which is essential for advanced gymnastics moves. Here’s how to perform it:

Step 1: Lie Down

Start by lying on your back with your arms alongside your body. Make sure you’re comfortable and stable.

Step 2: Lift Your Legs and Pelvis

Slowly lift your legs and pelvis, supporting the weight on your shoulders and neck. Your hands can support your back for added stability.

Step 3: Maintain the Position

Keep your legs straight and your body as vertical as possible. Hold the position, focusing on balance and core engagement.

Why It Works

The Shoulder Stand is excellent for developing the stability and strength needed for advanced balance and control elements in gymnastics.

It helps build core strength and enhances body control.


12. Hollow Body Hold

If you aim to build a rock-solid core for gymnastics, the Hollow Body Hold is just what you need.

It’s a fantastic method for enhancing core strength and stability, crucial for performing intricate gymnastic maneuvers.

Here’s how to do it:

Step 1: Lie Down

Start by lying on your back with your arms and legs straight. Make sure you’re on a comfortable surface.

Step 2: Lift Arms and Legs

Lift your arms and legs off the ground. Point your toes and reach forward with your hands. Your body should form a slight curve.

Step 3: Keep Your Lower Back Down

Ensure your lower back stays in contact with the floor. This keeps your core actively engaged and protects your lower back.

Step 4: Hold the Position

Hold the position for a few seconds. Focus on contracting your abdominal muscles and maintaining your form. Keep your body tight and controlled.

Why It Works

The Hollow Body Hold is excellent for building core strength and stability.

It teaches you how to maintain control and body tension, which are key for many gymnastic elements like parallel bars and jumps.


13. Frog Stand

Frog-Stand-exercise

Developing core stability and arm strength is easy with the Frog Stand.

It’s great for improving balance, body awareness, and concentration, which are crucial for more advanced gymnastics moves.

Here’s how to perform the Frog Stand:
Step 1: Start in a Squat Position

Begin in a squat position with your hands placed on the ground in front of you. Keep your fingers spread wide for better grip and stability.

Step 2: Position Your Knees

Gently rest your knees on your arms, just above the elbows. This will help support your weight as you lift off the ground.

Step 3: Lift Your Feet

Push gently off the ground, lifting your feet and balancing your body weight on your hands. Keep your elbows slightly bent to help with balance.

Step 4: Engage Your Core

Focus on core tension to stabilize the position. Tighten your abdominal muscles to help maintain balance.

Step 5: Hold the Position

Try to hold the Frog Stand for a few seconds. Concentrate on weight distribution and balance, keeping your eyes fixed on a point in front of you to help with stability.

Why It Works

The Frog Stand is excellent for improving balance and arm strength.

It also helps develop body awareness and concentration, which are essential for more complex gymnastic exercises like handstands and acrobatic transitions.


14. Lunge to Handstand Against a Wall

Want to take your gymnastics skills to the next level?

The Lunge to Handstand Against a Wall is a great exercise to build strength, balance, and body control.

It’s a crucial step for progressing to more advanced gymnastic exercises.

Here’s how to do it:

Step 1: Start in a Lunge Position

Begin with one foot forward in a lunge position, arms raised above your head. Make sure your front knee is bent and your back leg is straight.

Step 2: Bend Forward

Bend forward from the hips, placing your hands on the floor in front of you. Keep your arms straight and strong.

Step 3: Push with the Back Leg

Push with your back leg to lift your legs off the ground. Gently lean them against the wall to enter the handstand position.

Step 4: Engage Your Core

Keep your core engaged and your arms straight. Push through your shoulders to stabilize the handstand position.

Step 5: Hold the Handstand

Try to hold the handstand against the wall for a few seconds. Focus on maintaining body alignment and control. Keep your legs together and toes pointed.

Why It Works

The Lunge to Handstand Against a Wall is perfect for improving shoulder and core strength, handstand technique, and your ability to enter a handstand with control and fluidity.


15. Backward Roll

Ready to boost your spatial awareness, coordination, and strength?

The Backward Roll is a fundamental gymnastic move that’s both fun and essential for learning more complex acrobatics.

Here’s how to perform it:

Step 1: Start Standing Tall

Begin from a standing position with your arms raised above your head. Feel strong and ready to move.

Step 2: Squat Down

Bend your knees and lower yourself into a squatting position. Start leaning backward, preparing to roll.

Step 3: Round Your Back

As you lean back, round your back and roll onto the ground. Use your hands to guide your head and neck safely during the roll.

Step 4: Use Momentum

Push with your legs to create momentum. Roll backward onto your shoulders, bringing your legs over your head.

Step 5: Return to Standing

Complete the roll by continuing the motion and returning to a standing position. Use your hands and core muscles to help control the movement.

Safety Tip

Perform the Backward Roll on a soft mat to ensure safety, especially when you’re first learning.

This will help protect your neck and back.

Why It Works

The Backward Roll helps develop spatial awareness, coordination, and core and upper body strength.

It’s a foundational skill that prepares you for more advanced gymnastic movements.


16. Straddle Sit

Sitting-in-a-straddle-position

Enhance your hip mobility, leg flexibility, and core strength with the Straddle Sit.

It’s a must for any gymnast’s routine. Here’s how to perform it:

Step 1: Sit on the Floor

Sit on the floor with your legs spread apart as wide as possible in a straddle position. Keep your legs straight and your feet flexed upward.

Step 2: Keep Your Back Straight

Engage your core to support the position and keep your back straight. This helps maximize the stretch and build strength.

Step 3: Position Your Arms

You can extend your arms in front of you or raise them above your head to increase the intensity of the exercise. Keeping your arms extended also helps with balance.

Step 4: Lean Forward

To increase the challenge, lean forward from the hips while maintaining a straight back. This intensifies the stretch in your inner thighs and hamstrings.

Why It Works

The Straddle Sit improves hip mobility, leg flexibility, and strengthens the abdominal and back muscles.

It’s essential for a wide range of movements in gymnastics, such as splits, bridges, and rotations.

Tips for Integration

Incorporate the Straddle Sit into your warm-up and stretching routines.

Regular practice will help develop the necessary flexibility and strength for more complex gymnastic performances.


17. Pike Jump

The Pike Jump, also known as the carp jump, is a fantastic exercise to boost your leg strength, flexibility, and body control

It enhances explosiveness, coordination, and the ability to execute jumps with precision.

Here’s how to perform it:

Step 1: Start Upright

Begin in an upright position with your arms raised above your head. Stand tall and prepare for the jump.

Step 2: Execute the Jump

Jump up, simultaneously raising your legs straight in front of you as high as possible. Aim to form an acute angle between your legs and torso, creating a “V” shape.

Step 3: Keep Arms Parallel

During the jump, keep your arms straight and parallel to your legs. This helps maintain balance and form.

Step 4: Land with Control

Land gently, absorbing the impact with slightly bent knees. Ensure you land with control to avoid injury.

Why It Works

The Pike Jump requires good flexibility in the hamstrings and strong abdominal contraction to lift the legs.

It’s a key component in gymnastics for developing explosiveness, coordination, and body control.

Tips for Improvement

Regularly stretch your hamstrings and strengthen your core to improve your Pike Jump.

Practicing this jump will help you master more complex jumps in artistic and rhythmic gymnastics routines.


18. Split Leap

Split-Jump

Ready to combine elegance, strength, and flexibility in a single move?

The Split Leap, also known as the split jump, is perfect for that.

This dynamic movement showcases full leg extension and grace while in flight. Here’s how to nail it:

Step 1: Gain Momentum

Start with a short run-up to build momentum. A few steps are usually enough to set you up for a powerful jump.

Step 2: Prepare to Leap

From an upright position, slightly bend your knees. Push upward and forward with a strong push from your feet. This initial push is crucial for height and distance.

Step 3: Split in the Air

As you jump, quickly separate your legs, aiming for maximum extension in both directions. Your goal is to form a perfect split in the air.

Step 4: Maintain Elegance

Keep your torso upright and your arms in an elegant position. Often, arms are held parallel to the ground or in a balanced, graceful pose.

Step 5: Land Gracefully

Land first with your front leg, followed by your back leg. Absorb the impact with a slight bend in your knees to maintain control and prevent injury.

Why It Works

The Split Leap is a stunning element in artistic and rhythmic gymnastics.

It showcases leg flexibility, core control, and the athlete’s grace.

Consistent practice improves timing and technique, making this leap a highlight in routines.

Tips for Improvement

Regularly stretch your legs to improve flexibility and strengthen your core to enhance control.

Practicing the leap repeatedly will help you perfect your timing and technique.


19. Arabesque Hold

The Arabesque Hold is a beautiful exercise that exemplifies grace, control, and balance.

It’s a staple in artistic and rhythmic gymnastics, as well as in dance, to enhance leg strength, core stability, and coordination.

Here’s how to perform it:

Step 1: Start Upright

Stand with your feet together and your body upright. Engage your core to maintain stability.

Step 2: Lift One Leg

Slowly lift one leg behind you, keeping it straight. Tilt your torso forward to maintain balance. Ideally, your body and the raised leg should form a straight line.

Step 3: Extend Your Arms

Extend your arms to help maintain balance. You can position them forward, to the sides, or in a more artistic pose, depending on your level of difficulty and style.

Step 4: Maintain the Position

Focus on keeping your core strong and the supporting leg stable. Keep the raised leg straight and elevated as high as possible.

Step 5: Return and Repeat

Slowly return to the starting position. Repeat the exercise with the other leg.

Why It Works

The Arabesque Hold requires and develops excellent body control and stability.

It’s an excellent exercise for refining balance and posture.

The key to a successful arabesque is maintaining control and a straight body line while balancing on one leg.

Practice the Arabesque Hold regularly to enhance your grace, control, and balance.


20. Walking on Toes and Heels

To improve balance and ankle strength, try Walking on Toes and Heels.

Here’s how to do it:

Step 1: Start Upright

Stand with your body upright, engaging your core to maintain stability.

Step 2: Walk on Your Toes

Slowly raise your heels so you are standing on your toes. Keep your body upright and begin to walk forward and backward, maintaining balance.

Step 3: Switch to Heels

After walking on your toes for a while, switch exercises. Lift your toes so you are standing on your heels. Walk forward and backward on your heels, focusing on balance.

Step 4: Repeat the Cycle

Repeat the cycle of walking on your toes and then on your heels. This helps improve your balance and strengthens the muscles around your ankles.

Why It Works

This exercise targets the muscles in your feet and ankles, enhancing balance and stability.

Regular practice can prevent injuries and improve overall coordination.


21. Round-Off:

The Round-Off is an advanced gymnastics movement that begins like a side cartwheel and ends with both legs together, enhancing coordination and agility.

Here’s how to perform it:

Step 1: Gain Momentum

Start with a short run to build momentum. This will help you achieve the necessary height and speed for the Round-Off.

Step 2: Initiate the Movement

From an upright position, slightly bend your knees and push upward and forward with a strong push from your feet, similar to initiating a side cartwheel.

Step 3: Separate Your Legs

While jumping, quickly separate your legs, aiming for maximum extension in both directions. Your body should form a wide “V” shape in the air.

Step 4: Execute the Turn

During the jump, make a 180-degree turn. This requires twisting your body so that at the end of the movement, you land with both legs together, facing the opposite direction from where you started.

Step 5: Land Gracefully

Keep your upper body upright and your arms in an elegant position throughout the execution. Land with both legs together, absorbing the impact with slightly bent knees.

Why It Works

The Round-Off requires coordination and agility to transition smoothly from a side cartwheel to landing with both legs together.

It’s an advanced exercise that challenges more experienced gymnasts and can add flair to gymnastics routines.

Tips for Success

  • Practice: Consistent practice is key to mastering the Round-Off. Start slowly and gradually increase speed and intensity.
  • Focus on Form: Maintain a strong, upright posture and elegant arm position throughout the movement.
  • Safety First: Perform this exercise on a soft mat to ensure safety, especially when you’re first learning.


22. Chin-Up Hang

Exercise-to-develop-grip-and-arm-strength

The Chin-Up Hang is a great way to develop grip and arm strength.

Here’s how to perform it correctly:

Step 1: Find the Right Bar

Locate a horizontal bar or a suspended gymnastics bar at a height that allows you to hang from it with your arms fully extended.

Step 2: Position Yourself

Stand under the bar with your hands slightly wider than your shoulders.

Step 3: Grip the Bar

Grab the bar with a supine grip, meaning your palms should be facing you, and your thumbs should be wrapping around the bar toward you.

Step 4: Lift Your Feet

Lift your feet off the ground so that your body is fully suspended from the bar with your arms flexed. Your body should be hanging straight down.

Step 5: Maintain the Hang

Hold this position for as long as possible, focusing on training your grip and arm strength. Keep your core engaged to maintain stability.

Step 6: Lower Yourself Down

When you’re ready to come down, slowly lower your feet to the ground and gently release your grip from the bar.

Why It Works

The Chin-Up Hang is ideal for increasing grip and arm strength.

It’s a crucial step in progressing to full chin-ups, where you lift yourself above the bar.

Tips for Success

  • Control the Movement: Perform the exercise in a controlled manner to maximize benefits and prevent injuries.
  • Consistency: Regular practice will help build endurance and strength over time.
  • Warm Up: Ensure you warm up your muscles before performing the exercise to reduce the risk of injury.


RELATED:>>> Level 2 Gymnastics Skills: Advance Your Home Routine


Final Thoughts

Having recently started practicing some of these basic exercises myself, I can personally attest to the transformative power of gymnastics.

Every time you tackle a new skill or overcome a challenge, you’re learning valuable lessons about resilience, determination, and courage.

This journey teaches you to fall and get back up, to find balance not only on the mat but also in everyday life.

As you progress, you’ll find that gymnastics sharpens not only your body but also your mind.

You’ll learn the value of patience, the beauty of perseverance, and the importance of concentration.

Begin this journey with a clear goal, but be open to surprises along the way.

Recommended
Categories
Beginner Workouts BODYWEIGHT EXERCISES

Can Sit-ups Alone Chisel Out Your Dream Six-Pack? Explained!

When you’re at the gym, certain exercises are absolute musts.

But sit-ups?

They have their own unique flair.

Each time you crush a sit-up, your abs light up, your body stays tight, and your muscles unite to complete the rep.

But as you get more serious about your fitness goals, you might begin to wonder:

Are sit-ups alone enough to sculpt those dream abs?

Why dedicate so much attention to just one exercise?

Stay tuned, and let’s dissect this together.

You could be in for a revelation!


Understanding Sit-ups

Introduction-to-Sit-Ups

Let me kick things off by talking about the star of the show: the sit-up.

It’s that old-school exercise everyone knows, famous for targeting and toning the abs.

But what’s really going on when you do a sit-up?

First off, a sit-up isn’t just bending and unbending your torso.

Seriously, it’s more than that!

When you perform a sit-up, you’re engaging a bunch of different muscles throughout your core.

Each one plays a crucial role in getting you up and back down.

I remember the first time I tried sit-ups—it felt like my entire core was waking up from a deep sleep!

As you start a sit-up, your abdominal muscles contract to pull your torso toward your knees.

Your hips and lower back muscles jump in to stabilize your body, keeping unwanted movements in check and making sure you’re aligned.

It’s like your body is a well-oiled machine working in harmony.

Ever felt that satisfying connection between muscles?

That’s the magic right there!

When you reach the top, your abs work even harder, maintaining tension before controlling your descent back to the floor.

Feeling that burn?

That’s the sign your muscles are fully engaged!

Knowing how this exercise works can give you a whole new perspective on your workouts.

Understanding which muscles you’re working and how can help you nail each rep more effectively.

Plus, it helps you see how sit-ups fit into a balanced workout routine.

So, while sit-ups might seem simple at first glance, there’s a lot more happening under the hood.


Step-by-Step Execution of Sit-ups

Starting Position: Lie flat on your back with your knees bent and feet planted firmly on the ground.

Place your hands behind your head, cross them over your chest, or rest them at your sides—whatever feels comfy.

I usually prefer having my hands behind my head to feel that extra burn in my abs.

Upward Movement: Begin to lift your upper body, keeping your head and neck relaxed to avoid strain.

Let your abs do the heavy lifting here.

Feel the power in your core!

It’s all about controlled movements, not speed.

Top Position: Keep going until your upper body is fully upright, or your chest is close to your knees.

Imagine you’re reaching for the stars!

Trust me, that stretch feels amazing.

Return to Start: Slowly lower yourself back down to the starting position.

It’s key to move with control on the way down to keep those abs engaged.


Tips to Amp Up Your Sit-Ups

Sit-ups might look straightforward, but using the right technique can make all the difference between a killer workout and unnecessary strain.

Here are some nuggets to help you level up your sit-ups:

Start Strong: Make sure your back is flat against the floor, knees bent, feet grounded.

This sets the stage for a solid rep.

No slouching allowed!

I’ve caught myself slumping before, and it totally kills the effectiveness.

Focus on Your Core: As you lift, concentrate on your abs.

Avoid yanking on your neck or using momentum—that’s cheating and could lead to injuries.

Feel every contraction!

It’s all about mind-muscle connection.

Control Is Key: Don’t rush.

Move slowly and with control both up and down.

This keeps your muscles engaged and gets you better results.

Patience, my friend, pays off!

Trust me, it’s worth the extra few seconds.

Breathe Right: Inhale on the way down, exhale as you lift up.

This helps you keep a steady rhythm and supplies your muscles with oxygen.

Deep breaths, strong reps!

I’ve noticed better performance when I focus on my breathing.

Mix It Up: Avoid hitting a plateau by adding variety.

Change the angle, try weighted sit-ups, or incorporate different core exercises.

Keep things interesting and your muscles guessing!

Diversity in your routine keeps things fun and effective.


Muscles Worked During Sit-Ups

Believe it or not, sit-ups don’t just work your abs—they recruit a whole team of muscles working together.

Let’s break it down:

Rectus Abdominis: This is the front-and-center muscle that gives you the “six-pack” look.

It’s the main mover when you bend your torso during a sit-up.

Absolutely love feeling this muscle engage!

Obliques: Located on the sides of your abdomen, the external and internal obliques help with twisting and side bending.

Even though standard sit-ups don’t involve twisting, these muscles help stabilize your core.

They’re the unsung heroes of your abs.

Hip Flexors (Iliopsoas): These deep muscles connect your spine to your legs.

They assist in flexing the hips and stabilizing the torso during sit-ups.

Sometimes, they can feel a bit tight after a session!

Lower Back and Neck Muscles: While not the main focus, these muscles help keep you aligned and prevent strain.

Give them some love too!

A balanced core is a happy core.


The Limitations of Sit-ups

As awesome as sit-ups are, they’re not the be-all and end-all of ab exercises.

Here are some things to keep in mind:

Focused Muscle Group: Sit-ups primarily target the rectus abdominis.

Other crucial core muscles might not get as much love.

Back Strain Risk: Sit-ups can put pressure on your lower back.

If done improperly or too often, this can lead to discomfort or injury.

Listen to your body!

I’ve learned the hard way that form matters more than reps.

No Guaranteed Six-Pack: Visible abs depend on low body fat percentage, not just targeted exercises.

It’s a team effort!


Spot Reduction: A Myth?

One of the biggest misconceptions out there is that you can lose fat from a specific area by targeting it with exercises.

Hate to break it to you, but that’s not how our bodies work.

Science tells us that fat loss is a whole-body process.

So, while sit-ups strengthen your abs, they won’t specifically burn belly fat.

Time to shift your mindset!

Focus on overall fitness and watch the changes happen.


So, How Do You Actually Get a Six-Pack?

How-to-Get-a-Six-Pack

If you’re aiming for that chiseled look, sit-ups alone won’t cut it.

Here’s the game plan:

Engage the Whole Core: Mix in exercises that hit all your core muscles—think planks, leg raises, Russian twists, and bicycle crunches.

Variety is the spice of fitness!

I love switching things up to keep my workouts exciting.

Dial In Your Diet: Abs are made in the kitchen!

You need to maintain a balanced diet that supports fat loss and muscle growth.

Fuel your body right!

I can’t stress enough how important nutrition is—it’s a game changer.

Cardio is Your Friend: Incorporate cardio like running, cycling, or swimming to burn calories and shed fat.

Get that heart pumping!

Cardio not only burns fat but also boosts your mood.

Strength Training: Don’t forget about full-body workouts.

Exercises like squats and deadlifts burn a ton of calories and build muscle.

Stronger every day!

These moves might not scream “abs,” but they contribute to a leaner physique.

Consistency is King: Stay dedicated, mix up your workouts, and keep challenging yourself.

Rome wasn’t built in a day!

I’ve seen amazing progress by sticking to a routine and pushing my limits.


Nutrition: The Real Abs Maker

You can train like a beast, but if your diet is off, those abs will stay hidden.

Here’s the lowdown:

Caloric Deficit: To lose fat, you need to burn more calories than you consume.

Simple as that.

Eat Clean: Focus on whole, unprocessed foods—lean proteins, veggies, fruits, and healthy fats.

They keep you full and fuel your workouts.

I love experimenting with healthy recipes—it’s fun and tasty!

Timing Matters: Eating the right foods before and after workouts can boost performance and recovery.

Plan your meals like a pro!

Having a solid meal plan has made my workouts so much more effective.

Hydrate: Water is crucial for metabolism and muscle function.

Keep that bottle handy!

Staying hydrated keeps me feeling sharp and ready to tackle any workout.

Remember, there’s no one-size-fits-all diet.

Consider consulting a nutritionist to dial in what works best for you.


Body Fat Percentage and Visible Abs

Here’s the truth: You won’t see your abs until your body fat percentage is low enough.

For most guys, that means getting below 15-10%.

For women, it’s around 20-15%.

But everyone’s different.

Genetics, body type, and fat distribution play a role.

I’ve noticed friends with different body types achieving visible abs at varying fat percentages.

Keep in mind, super low body fat isn’t always sustainable or healthy.

Aim for a balanced approach that promotes overall wellness.

Health over aesthetics, always.


Other Exercises to Rock Your Core

Don’t limit yourself to sit-ups.

Spice up your routine with these effective moves:

Planks: Great for overall core strength and stability.

Try side planks and plank variations to keep things interesting.

Feel the burn in all the right places!

Planks have been a game changer in my core training.

Bicycle Crunches: Targets the rectus abdominis and obliques.

Plus, they get your heart rate up.

I love the dynamic movement—it’s both fun and effective.

Leg Raises: Perfect for hitting those lower abs.

Do them lying down or hanging for an extra challenge.

Feel the stretch and strengthen!

Leg raises have helped me target those stubborn lower abs.

Russian Twists: Awesome for oblique definition.

Add a weight for more intensity.

Twist your way to a tighter core!

Mountain Climbers: A cardio move that also torches your core.

Get moving and feel that burn!

Mountain climbers are my go-to for a quick, intense workout.


Are Sit-ups Better than Crunches?

Sit-Ups vs. Crunches: Which is Better?

Both sit-ups and crunches have their place.

Here’s the scoop:

Sit-Ups: Work multiple muscle groups, including hip flexors.

Great for overall strength but can strain the lower back.

A double-edged sword!

I sometimes prefer crunches to give my back a break.

Crunches: Focus mainly on the rectus abdominis.

Lower risk of back strain and great for isolating the abs.

Targeted and effective!

Crunches have become a staple in my ab routine for this reason.

Choose the one that aligns with your goals and feels good for your body.


RELATED:


An Analysis of the Most Effective Abdominal Exercises

This Men’s Journal article discusses the debate between planks and crunches to achieve the best abs. 

According to studies by the American Council on Exercise:

  • Properly executed standard crunches are the best for abdominal muscle activation. Hands can be positioned as preferred.
  • Bicycle crunches are effective for the external obliques, the muscles responsible for torso rotation.
  • The “captain’s chair,” an apparatus that allows you to suspend yourself from the ground using your forearms, is an excellent workout for the external obliques.
  • Despite planks not showing outstanding results in studies, they remain a useful exercise for training various deep core muscles. Adding movement to static planks can increase their effectiveness.
  • The idea of specifically targeting the “lower abs” is a myth since the rectus abdominis is a single muscle from top to bottom. There is no difference in the activation of different parts of the muscle in the analyzed exercises. (Mensjournal – The best ab exercises)


RELATED :>>> 8 variations of Sit-Ups


Conclusion

You won’t get abs by doing sit-ups alone.

It takes a mix of exercises, good nutrition, and a healthy approach to life.

Stay consistent, have some fun, and know that every drop of sweat is bringing you closer to your goal!

Recommended
Categories
Beginner Workouts BODYWEIGHT EXERCISES

How Proper Breathing Enhances Your Plank Exercise Routine

The plank is one of those go-to moves in the world of body-weight exercises.

Sure, it looks simple—you just hold yourself up, right?

But don’t be fooled; it actually demands serious muscle effort and focused attention.

And here’s something you might be overlooking: breathing.

We all breathe without thinking about it, so it might seem secondary in a strength exercise like the plank.

But what if I told you that proper breathing can seriously amp up your performance?

So, why should you consciously bring breath into your plank routine?

Focusing on your breathing not only boosts your endurance but can totally transform how you perceive your strength and abilities.

In this article, we’ll dive into everything you need to know about how correct breathing enhances the plank exercise.

Personal Experience

I remember when I first started doing planks; I thought it was all about holding on for as long as possible.

But over time, I realized that quality trumps quantity.

Maintaining proper form and engaging the right muscles made all the difference.

I found that by focusing on my breath during the plank, not only could I hold the position longer, but the whole experience transformed.

I stopped fixating on the burning in my muscles or how much time was left.

Instead, I zeroed in on my breath—the flow of air in and out of my lungs.

This awareness brought me into a state of calm and focus I’d never experienced during workouts before.

From that moment on, I incorporated mindful breathing into every exercise, not just the plank.

I noticed significant improvements not only in my strength and endurance but also in my mental state during training.

I felt more calm, centered, and in tune with my body.

Now, I can’t imagine my fitness routine without combining the plank and conscious breathing.

It’s become a fundamental part of my training—a moment of connection between mind and body that sets the tone for the rest of my session.


Introduction to the Plank

What-is-the-Planking-Exercise

The plank is a classic exercise that’s earned a top spot in many fitness routines.

It’s an exercise that engages the entire body, focusing on core strength, endurance, and posture.

It’s a static position where you keep your body tight from head to toe, supported only by your forearms and feet.

You can perform the plank in various ways, each one challenging your body differently and offering specific benefits.

At first, the plank seemed pretty straightforward to me—just hold the position, right?

But it wasn’t until I paid closer attention that I realized it’s more about balance and control than just staying in place.

Focusing on keeping everything aligned and engaging my core properly made the plank a lot more challenging, but also way more rewarding.


Breathing and Physical Exercise

Breath-control-influences-workout rhythm.

Breathing is a fundamental element in physical exercise.

Even though it happens automatically, how we breathe can significantly impact our performance.

Controlled and deep breathing improves blood oxygenation, helping muscles work more efficiently.

It also helps manage energy and maintain focus during training.

Plus, breathing plays a crucial role in controlling your exercise rhythm and managing muscle fatigue.

I used to underestimate the role of breathing.

But once I started paying attention, I noticed how a steady breath could carry me through tough workouts.


Breathing Techniques for Weightlifting, Running, and Yoga

Each discipline has its own breathing techniques to optimize your movements and endurance.

Consider weightlifting: when you lift the weight (the concentric phase), you should exhale; when you lower it (the eccentric phase), you should inhale.

Exhaling during exertion helps contract your core muscles, providing extra support to your spine.

Or take running: many runners use a breathing technique where they inhale every three or four steps.

This helps maintain a steady rhythm and avoid getting winded too quickly.

For flexibility exercises like yoga, breathing can help relax the muscles and achieve greater extension.

In a stretching position, you might exhale deeply, allowing your muscles to relax and stretch further.


Understanding Breathing during the Plank

Breathing during the plank might seem tricky because of the muscle tension the exercise demands.

But it’s precisely here that proper breathing shows its value.

Breathing correctly during the plank helps maintain body stability and sustain necessary muscle tension.

Shallow or irregular breathing can make you lose stability, making the exercise less effective.

In the past, I’d find myself holding my breath during challenging holds, not realizing it was sabotaging my performance.

Learning to breathe properly made the plank feel more manageable and effective.


Breathing Techniques for the Plank

Breathing-Techniques-for-the-Plank

To get the most out of the plank, it’s important to pay attention to your breath.

The goal is to maintain slow, deep, and controlled breathing—even when your muscles start to burn.

Here are some breathing techniques to follow during the plank:

1. Diaphragmatic Breathing

Also known as belly breathing, this technique involves breathing deeply into your diaphragm rather than shallowly into your chest.

When you inhale, your abdomen should expand; when you exhale, it should contract.

This type of breathing helps maintain core stability during the plank.

I didn’t fully appreciate how much diaphragmatic breathing improves control and balance until I tried it myself.

It feels like my breath is fueling my muscles.

2. Rhythmic Breathing:

Try to keep a steady rhythm with your breath.

For example, inhale for a count of four, hold for a count of four, then exhale for a count of four.

Keeping a rhythm can help you stay focused and hold the plank longer.

I like to use rhythmic breathing to distract myself from the discomfort.

Counting the breaths gives me something to focus on besides the burn.

3. Full Breathing:

This combines diaphragmatic breathing with chest breathing, allowing you to use your lung capacity fully.

During inhalation, your abdomen expands first, followed by your chest.

During exhalation, your chest lowers first, followed by your abdomen.

Incorporating full breathing has made a noticeable difference in my endurance.

It’s like giving my body a bigger fuel tank.


Diaphragmatic Breathing: Power and Benefits

Diaphragmatic breathing, or belly breathing, is a fundamental practice for anyone looking to improve their physical exercise.

Here are some key points about this technique:

Optimization of Oxygenation: It allows for full lung utilization, bringing more oxygen into your body compared to shallow chest breathing.

This can improve muscle oxygenation during exercise, boosting endurance and strength.

Enhancement of Core Stability:

This technique directly engages your core muscles, especially the diaphragm.

When the diaphragm contracts, it helps stabilize the core, making exercises like the plank more effective.

Reduction of Stress:

Diaphragmatic breathing can help reduce your body’s stress response, leading to increased focus and endurance during exercise.

This is particularly beneficial in exercises like the plank that require significant mental attention.

On the scientific side, various studies have highlighted the importance of diaphragmatic breathing.

For instance, a study published in 2018 in the *Journal of Physical Therapy Science* demonstrated that diaphragmatic breathing can improve respiratory function, trunk mobility, and quality of life in individuals with chronic obstructive pulmonary disease (COPD). [PubMed/6734022]

Another study published in 2020 emphasizes the importance of monitoring respiratory rates for health and sports.

It provides diagnostic and management information for lung and cardiovascular diseases and helps optimize training and performance. [PubMed/7665156]


Breathing and Muscular Endurance

Breathing is crucial for holding a plank longer and boosting endurance.

Understanding how proper breathing supports your muscles helps you stay steady and improve performance.

  • Regulation of Muscle pH: During intense exercise, lactic acid builds up in the muscles, causing a decrease in pH—a phenomenon known as acidification.
    Breathing plays a key role in mitigating this process, as removing carbon dioxide helps buffer lactic acid, maintaining muscle pH balance.
    This delays fatigue and increases muscular endurance.
  • Pain Management: Conscious breathing can help manage the discomfort that arises during high-intensity exercises like the plank.
    By using controlled breathing techniques, you promote relaxation and distract from pain, allowing you to hold the plank longer.
  • Enhancement of Blood Flow: Deep and rhythmic breathing promotes optimal lung expansion and contraction, stimulating blood circulation.
    This increased blood flow helps transport more oxygen and nutrients to your working muscles, enhancing endurance.
  • Prevention of Hyperventilation: During intense exercises, it’s common to start breathing too rapidly.
    Hyperventilation can imbalance oxygen and carbon dioxide levels, limiting performance.
    Learning to control and regulate your breathing rhythm helps prevent this, keeping your workout efficient.


Getting Started: First Steps to Integrating Breathing into the Plank

I’ll be honest—when I first tried to focus on breathing during planks, I kept forgetting to breathe!

Yeah, it might seem tricky at the start, but trust me, with a bit of practice, it’ll come naturally.

Here are step-by-step guidelines to help you integrate breathing into your plank workout:

  1. Starting Position: Begin by getting into the correct plank position.
    Place your elbows directly under your shoulders, extend your legs behind you, and rest on your toes.
    Ensure your body forms a straight line from head to toe.
  2. Mindful Breathing: Before you start, focus on your breath.
    Feel the air entering and leaving your lungs.
    This prepares you to concentrate on your breath during the exercise.
  3. Diaphragmatic Breathing: While holding the plank, start breathing deeply into your diaphragm.
    As you inhale, your abdomen expands; as you exhale, it contracts.
  4. Maintain the Rhythm: Keep a steady rhythm with your breath.
    For example, inhale for a count of four, hold for four, then exhale for four.
  5. Focus on Your Body: Pay attention to how your breathing affects your body.
    Notice how your core lifts and lowers with each breath and how your muscles respond.
  6. Consistent Practice: Like any new skill, the key is consistent practice.
    It might be tough at first, but over time, you’ll find your rhythm and improve your technique.


Improving the Plank with Breath: A Training Plan

If you want to level up your plank game with some solid breathing, you’ve got to approach it with a plan.

I didn’t think much of it at first, but once I dialed in a routine, everything clicked.

Here’s a four-week plan to get you breathing like a pro during your planks:

Week 1 – Breath Awareness
Goal: Develop awareness of your breath during the plank.

  • Do 3 sets of planks, holding for 20-30 seconds each.
  • Focus on diaphragmatic breathing, syncing your breath with your body movements.

Week 2 – Increasing Duration and Breath Rhythm
Goal: Extend your plank time and establish a breathing rhythm.

  • Do 3 sets, holding for 30-45 seconds each.
  • Practice rhythmic breathing—consistent counts on inhales, holds, and exhales.

Week 3 – Introduction of Full Breathing
Goal: Incorporate full breathing into your routine.

  • Do 3 sets, holding for 45-60 seconds each.
  • Start with diaphragmatic breathing, then transition into full breathing.

Week 4 – Technique Refinement
Goal: Refine your breathing technique during the plank.

  • Do 3-4 sets, holding for 60-90 seconds each.
  • Focus on deep, rhythmic, and complete breaths.


Common Mistakes in Breathing During the Plank

Avoid these common pitfalls to maximize your plank benefits:

  • Shallow Breathing: Breathing shallowly or quickly limits oxygen to your muscles, leading to fatigue.
    Focus on deep diaphragmatic breaths, expanding your abdomen as you inhale.
  • Holding Your Breath: Holding your breath can decrease oxygen flow and cause dizziness or fatigue.
    Remember to breathe continuously during the exercise.
  • Breathing Only Through Nose or Mouth: Ideally, use both nose and mouth.
    Inhale through your nose to filter and humidify the air; exhale through your mouth to release more air.
  • Lack of Focus on Breathing: Don’t just concentrate on the physical aspect; pay attention to your breathing.
    Matching your breath rhythm with your movements can significantly improve performance.


The Importance of Proper Posture in the Plank

Proper posture is essential for effectiveness and injury prevention.
Here’s what to watch for:

  • Hand and Foot Placement: Hands aligned under shoulders; feet hip-width apart for stability.
  • Straight Back: Keep your body in a straight line from neck to ankles.
    Avoid arching your back or lifting your hips too high.
  • Engage Core Muscles: Feel your core muscles working.
    Engage them throughout to protect your back and increase effectiveness.

Breathing can help maintain proper posture during the plank.

When you inhale, imagine lengthening your spine and expanding your chest.

When you exhale, focus on your abdominal muscles, drawing energy from your core.

This not only helps you maintain posture but also makes the exercise more effective.


Conclusion

Combining proper breathing with your plank isn’t a new idea, but it works.

It helps you get more out of each rep.

You’ll feel steadier, more focused, and stronger.

So next time you hold a plank, remember to breathe.

It’s these small details that can level up your workout.


FAQs

Why is breathing important during the plank?

Breathing is crucial during the plank because it helps maintain core stability, improves muscle endurance, and aids in focusing your mind.

How should I breathe during the plank?

You should aim to maintain slow, deep, and controlled breathing. Diaphragmatic breathing is recommended—inhale so your abdomen expands, exhale so it contracts.

Can I hold my breath during the plank?**

It’s not advisable to hold your breath. This can increase blood pressure and decrease the oxygen available to your muscles. Keep a steady and controlled breath instead.

What happens if I breathe incorrectly during the plank?

Incorrect breathing can reduce the exercise’s effectiveness, leading to decreased muscle endurance, unnecessary tension, and reduced focus.

Is diaphragmatic breathing the only option for the plank?

No, diaphragmatic breathing is one technique. You can also use rhythmic breathing or full breathing, which combines diaphragmatic and chest breathing.

How can I improve my breathing during the plank?

Practice breathing techniques outside of exercise, focus on your breath during the plank, and strive to maintain a steady rhythm.

Does breathing affect my posture during the plank?

Yes, proper breathing helps maintain correct posture, especially by stabilizing your core.

Can I use plank breathing techniques in other exercises?

Absolutely. These breathing techniques can be applied to many other exercises to improve oxygenation, endurance, and focus.

What if I feel tired while doing the plank?

Listen to your body. If you’re tired, take a break and catch your breath. It’s better to perform the plank correctly for a shorter time than to hold incorrect form or rush your breathing.

Recommended
Categories
Beginner Workouts BODYWEIGHT EXERCISES

How Deep Should I Go When Performing Dips for Muscle Gain?

Dips have been around since folks started lifting heavy things for fun.

This natural movement uses your own body weight to hit the triceps, chest, and front shoulders.

I remember the first time I tried dips—it looked so simple, but halfway through, my arms felt like jelly.

That’s when I realized dips are no joke.

Over time, dips have evolved from gymnastic moves to military training staples, and now they’re one of the most respected (and sometimes feared) exercises in the gym.

But what makes dips so special, and why are they so effective for building muscle mass?

The secret lies in their complexity.

What seems like a straightforward up-and-down motion actually recruits multiple muscles, demands serious body control, and challenges your strength and endurance in ways you might not expect.

I underestimated them until I made dips a regular part of my routine and felt the difference.

Executing dips properly is almost an art form.

It’s not just about technique—it’s about understanding your body and knowing how far you can push it.

I’ve noticed that the more I focus on my form, the better my results and the less sore I feel afterward.

Then there’s the big question: How low should you go?

What’s the sweet spot to maximize each rep without risking shoulder injuries?

For a while, I thought the deeper, the better, but I quickly learned there’s a safe range that works best.

In the next sections, we’ll tackle these questions and clear up any confusion.

Whether you’re new to dips or looking to perfect them, this guide will help you get the most out of this powerhouse exercise while keeping you safe and injury-free.


The Science of Dips: Anatomy and Physiology of the Movement

Dips-Anatomy-and-Physiology-of-the-Movement

Dips are a compound exercise, meaning they work multiple muscle groups at once.

The main players are the triceps, chest (pectoralis major), and front shoulders (anterior deltoids).

But what surprised me when I first started was how much my other muscles—like the serratus anterior and core—had to jump in to keep me stable.

As you lower into a dip, your elbows bend, engaging your triceps.

At the same time, your shoulders extend, firing up your chest and shoulder muscles.

Meanwhile, your core and serratus anterior are working hard to keep your body aligned and steady.

This complex combo makes dips incredibly effective for building muscle mass.

But it also raises an important question: How deep should you go when performing dips?

There’s no one-size-fits-all answer.

The ideal depth depends on your flexibility, strength, body structure, and training goals.

Generally, aim to lower yourself until your elbows are level with or slightly below your shoulders.

This depth optimizes muscle engagement and keeps your shoulders safe from excessive strain.

While going deeper might seem like a good idea, it’s a fine line.

Going too low increases the range of motion but can also put unnecessary stress on your shoulders, leading to potential injury.

I’ve seen it happen, and trust me, you don’t want to go there.

So when doing dips, it’s not about how low you can go but finding the right balance between effective muscle engagement and protecting your joints.

A well-executed dip isn’t just about showing off strength—it’s about understanding your body’s limits and respecting them to train safely and efficiently.

By mastering the depth and technique, you’ll not only maximize your gains but also keep your body healthy and injury-free.


Debunking Common Myths About Dips

The fitness world is full of myths, especially about exercises like dips.

I’ve heard them all, and honestly, I used to believe some myself.

Let’s bust some of the most common misconceptions so you can get the most out of your training.

MYTH 1: Dips are dangerous for the shoulders

I’ve heard this one so many times.

While there’s a kernel of truth—dips can stress your shoulders if done improperly—it’s not the whole story.

With proper form and the right range of motion, dips are safe and super effective.

It’s all about knowing and respecting your body’s limits.

MYTH 2: The deeper you go, the more muscles you work

I used to think this too, believing that going lower meant more gains.

But I soon realized that going too deep just puts extra stress on the shoulders without much benefit.

Controlled depth is where it’s at.

It’s about balancing range of motion and safety, not seeing how low you can go.

MYTH 3: Dips are only for the triceps

I used to see dips as just another triceps exercise.

But once I honed my form, I noticed how much my chest, shoulders, and even core were getting in on the action.

Dips are more than a triceps burner—they’re an upper-body powerhouse.

Clearing up these myths helped me get so much more out of dips.

When you know what you’re doing, dips can elevate your training to a whole new level.

A well-executed dip can be a game-changer in your strength journey.


Dips and Muscle Growth: An Inseparable Connection

Dips are hands down one of the most effective bodyweight exercises for building muscle.

What makes them so powerful is how they hit multiple muscle groups at once, giving you a full upper-body workout in a single move.

But the real magic behind dips is the combo of intensity and range of motion.

When you drop into a dip, it’s not just one muscle doing the work.

Your chest, triceps, shoulders, and core all team up to lift and lower your body.

This collective effort creates serious muscle engagement, which is the foundation for growth.

I’ve noticed that after a solid set of dips, my muscles burn in a way that other exercises just can’t match.

Another key factor is the range of motion.

Compared to many other upper-body moves, dips give you a greater stretch, activating more muscle fibers.

That extra range really helps maximize muscle stimulation, leading to better gains over time.

For me, dips have been a total game-changer in building upper-body strength and size.

They might look simple, but don’t underestimate the power of this classic exercise.


Executing a Dip Correctly

Getting the technique right during dips can be the difference between an average workout and truly maximizing your potential.

Here’s how to nail each rep:

Hand Placement: Start by placing your hands on parallel bars, aligned with your shoulders.

This is your foundation, so it’s crucial to keep everything balanced from the start.

Initiating the Movement: Begin by bending your elbows and lowering your body.

Keep your chest up and back straight.

Trust me, it’s easy to let your body lean forward, but that puts unnecessary pressure on your shoulders.

Stay upright and controlled.

Dip Depth: Aim to lower yourself until your elbows are level with your shoulders or just a bit below (around a 90-degree bend).

But don’t go too far—going too low can overstress your shoulders, and that’s a quick way to get hurt.

I’ve learned that sometimes less is more when it comes to protecting those joints.

Ascending: After hitting the right depth, push yourself back up using your triceps, chest, and shoulders.

Rise until your arms are almost fully extended, but don’t lock out your elbows.

Keeping them slightly bent maintains tension on the muscles.

Repeat: Continue your reps, focusing on proper form from start to finish.

It’s easy to let technique slip as you get tired, but staying disciplined will give you better results and help prevent injury.

Breathing: Don’t forget to breathe.

Inhale as you lower yourself, and exhale as you push back up.

This rhythm helps you stay controlled and focused throughout the movement.


Consequences of Incorrect Dip Execution

Messing up your dip form can lead to a range of issues, from mild discomfort to serious injuries.

Here’s what can go wrong:

Shoulder Injuries: Going too deep or flaring your elbows can put excessive pressure on your shoulders.

This can lead to strains, tears, or even dislocations.

Trust me, shoulder injuries are no fun.

Wrist Problems: Incorrect hand placement or putting too much weight on your wrists can cause pain or discomfort.

Make sure your wrists are aligned and not overextended.

Limited Muscle Growth: Poor form not only increases injury risk but also limits your muscle gains.

If you’re not performing the exercise properly, you won’t effectively stimulate your muscles.


How to Position Your Legs During Dips

Leg positioning during dips might seem trivial, but it plays a role in your stability and form.

Here’s how to do it right:

Parallel Bar Dips: When you’re on parallel bars, your legs are hanging.

Keep your knees slightly bent and cross your feet behind you.

This helps balance your body and keeps your center of gravity stable.

I’ve found this position feels most natural and keeps me steady.

Bench Dips: If you’re doing dips on a bench, keep your feet flat on the ground with your knees bent at about 90 degrees.

Your legs provide minimal support—most of your weight should be on your arms.

Just avoid pushing off with your legs; let your upper body do the work.

Assisted Dips: Using an assisted dip machine?

Your knees will rest on a platform that supports some of your weight.

Keep your legs bent throughout the movement.

This setup helps you build strength until you’re ready for unassisted dips.


How to Optimize Dips with Proper Torso Inclination

Getting the angle of your torso right during dips can make a huge difference in which muscles you’re targeting and keeping your shoulders safe.

Here’s the lowdown:

Triceps-Focused Dips: To zero in on your triceps, keep your torso as upright as possible.

This position isolates the triceps more effectively.

But remember, don’t overdo it—avoid locking your elbows at the top and don’t go too low to keep your shoulders happy.

Chest-Focused Dips: Want to engage your chest more?

Lean your torso slightly forward.

This shifts the emphasis onto your chest muscles.

But be cautious—not too much lean, or you’ll strain your shoulders.

I’ve found that a slight forward angle hits the chest without compromising shoulder safety.

In both cases, keep your shoulders down and away from your ears throughout the movement.

This helps stabilize your shoulder joints and reduces injury risk.

If you have tight shoulders or limited flexibility, dips might feel uncomfortable.

In that case, work on shoulder mobility exercises before going all-in on dips.


Avoid Back Curvature

When performing dips, it’s crucial to keep your back straight and stable.

An exaggerated arch (lordosis) can put unnecessary stress on your lower back.

But keeping your back “straight” doesn’t mean rigid.

Maintain a neutral spine with the natural curves of your back gently intact.

Think of it like this: your back should feel strong but relaxed, not stiff.

I used to overcompensate by tensing up, but learning to maintain a natural spine position made a big difference in my form and comfort.


Look Straight Ahead

Keeping your head neutral and aligned with your spine is key during dips.

When your head is properly aligned, you reduce pressure on your neck and spine, avoiding potential strains.

Moving your head forward or backward can create tension and increase the risk of neck or back pain.

To maintain a neutral head position, imagine balancing a book on your head.

This visualization helps keep your gaze straight ahead—neither down nor up.


The Importance of Core Activation

Your core plays a fundamental role during dips.

Even though the focus is on your triceps and chest, the core is heavily involved in maintaining stability and control.

During dips, your core acts as a stabilizer, keeping your body upright and controlling movement.

Before you start, engage your abs.

Think about bracing as if someone might punch you in the gut (but hopefully they won’t).

As you perform dips, keep that core engaged.

This not only helps with control but also improves your overall posture.

If you struggle with stability during dips, incorporating core-strengthening exercises like planks can make a big difference.


The Role of the Latissimus Dorsi

While dips mainly target the triceps and chest, your back muscles, including the latissimus dorsi (lats), play a supportive role.

During dips, your lats act as stabilizers, helping control your body’s movement, especially on the way down.

They contribute to maintaining balance and proper form.

Strong lats can actually improve your dip performance.

If you notice weakness or imbalance, adding exercises like pull-ups or rows to your routine can strengthen your lats and enhance your dips.


The Role of the Deltoids in Dips

Your shoulder muscles, or deltoids, are definitely in the game during dips.

The front part of your shoulders (anterior deltoids) especially helps stabilize and control the movement.

If you lean forward during dips, your chest and front deltoids get more involved.

The back part of your shoulders (posterior deltoids) and muscles around your shoulder blades also chip in for stability and control.

This all adds up to a more balanced workout and better posture.


Don’t Drop, Control the Movement!

During dips, controlling the descent is crucial.

Don’t just drop down—lower yourself in a slow, controlled manner.

This not only effectively engages your muscles but also reduces the risk of shoulder and elbow injuries.

Imagine resisting gravity as you go down.

It’s not about speed; it’s about control.

Performing dips slowly and with intention maximizes muscle gains and keeps you safe.

You’ll see, keeping each rep controlled will push your strength to new levels.


Customizing Your Dip Execution

Everyone’s different—strength, flexibility, fitness level, and goals vary.

That means your ideal dip might look a bit different from someone else’s.

Here are some ways to tailor dips to you:

Dip Depth: As we’ve discussed, the right depth depends on your flexibility and shoulder health.

If you’re a beginner or have shoulder concerns, start with a shallower dip and gradually increase depth as you get stronger.

Repetition Range: The number of reps affects intensity and muscle impact.

If muscle growth is your goal, aim for a rep range that brings you close to muscle fatigue by the end of each set.

Tempo and Control: Playing with the speed of your dips can enhance muscle activation.

Try slowing down the lowering phase or pausing at the bottom to intensify engagement.

Added Resistance: Once bodyweight dips become easier, you can up the challenge with extra weight.

Use a weighted vest, dip belt with plates, or hold a dumbbell between your legs.

Adding resistance promotes further muscle growth and strength.


Dip Grips: Variations for Different Goals

Changing your grip during dips can shift the focus to different muscles.

Here’s how:

Neutral Grip: The standard grip—hands shoulder-width apart on parallel bars with palms facing each other.

This targets the triceps and chest evenly.

Close Grip: Placing your hands closer together emphasizes the triceps more.

It’s a subtle change but makes a noticeable difference.

Wide Grip: Setting your hands wider apart puts more emphasis on the chest muscles.

I like to mix this in when I want to give my chest extra attention.

Reverse Grip: Flipping your grip so palms face forward can engage muscles differently.

It’s a way to vary the exercise and challenge your muscles in new ways.


Beyond Dips: Integration with Other Exercises

Dips are versatile and pair well with other bodyweight moves for a balanced workout.

Here are some exercises that complement dips:

Pull-ups: These target your back and biceps.

Combining dips and pull-ups gives you a comprehensive upper-body session.

Squats: Don’t neglect the lower body.

Adding squats works your legs and creates a full-body routine.

Planks: Strengthening your core with planks improves stability, which helps during dips.

Push-ups: Alternating between dips and push-ups engages your muscles differently, promoting balanced growth.


Can Dips Replace Push-ups?

Dips and push-ups are both awesome bodyweight exercises, but they’re not exactly interchangeable.

Push-ups primarily hit the chest, front shoulders, and triceps, with some core involvement.

Dips focus more on the triceps but also engage the chest and shoulders.

Dips generally require more strength and may be more challenging.

Including both in your routine is the best approach since they complement each other and target muscles in slightly different ways.


Conclusion

So there you have it—a deep dive into the world of dips.

What seems like a simple exercise is actually packed with complexity and potential.

We’ve explored various techniques and how small tweaks in grip, elbow position, and body angle can change the game.

But remember, dips are just one piece of your training puzzle.

Each exercise has its own unique benefits, and together, they help you build a stronger, more balanced body.

Keep challenging yourself, try new things, and most importantly, pay attention to what your body needs.

Recommended
Categories
Beginner Workouts BODYWEIGHT EXERCISES

11 Calisthenics Exercises for Beginners: Benefits, Calories Burned and more

Decided to Take the First Step into Calisthenics?

Prepare to embark on an experience that will significantly enhance your physical well-being and stamina.

It all starts with nailing those key exercises.

Kick off with easy versions of classic exercises: push-ups, pull-ups, squats, and the good old plank.

When I first started working out, these exercises were tough but incredibly rewarding.

They’re your all-in-one workout tools, building up your strength in a way you’ll notice.

As you gain strength, you can elevate your routine – either by adding personal variations to these exercises or experimenting with new ones.

Calisthenics is great because it mixes up aerobic and anaerobic workouts.

Keep at it, and you’ll see your muscles growing and your body burning calories like crazy.

Here’s a tip: get to know your body.

When I started, I figured out what I was good at and what needed more work.

And one last piece of advice: chatting with a Calisthenics expert can help.

They’re like your personal coach, steering you in the right direction and helping you attain your goals quickly.

Ready to kickstart your Calisthenics adventure?

Let’s do this!


Calisthenics, Explained

A-simple-Calisthenics-exercise

Let’s jump into the world of Calisthenics!

Ever heard of working out without any fancy equipment or heavy weights?

That’s exactly what calisthenics is all about.

It’s all about challenging gravity using nothing but your own body.

Imagine that – your body as your gym!

Calisthenics isn’t just doing a couple of push-ups or squats.

It’s a whole range of movements where you’re standing, hanging, or even propped up on the ground.

But hey, there are some cool tools to spice up your workouts at home.

Take the Pull-Up bar, for instance.

It’s a game-changer for beefing up your back, chest, arms, and abs.

So, what’s a Pull-Up bar?

Think of it as a horizontal rod that lets you lift your entire body using your back, arms, and shoulders.

The coolest part?

You can set it up anywhere – on walls, ceilings, or even door frames.

There are different types to choose from: Parallel Bars, Doorway Pull-Up Bars, Ceiling Bars, Freestanding Bars, and Wall Bars.

Calisthenics is more than just a workout.

It’s about using different body levers to work every muscle group.

This means you get a full-body tone-up while boosting your strength, coordination, and flexibility.

Plus, you’re burning calories, and improving your posture, and hey, it even gives your self-esteem a lift!

The real deal in calisthenics is mastering how to move and control your body in space.

You’ve probably already tried some basic moves like push-ups, squats, lunges, dips, jumping jacks, crunches, and planks.

But trust me, there’s a whole world of moves waiting for you in calisthenics.


Types of Calisthenics

Calisthenics offers a diverse range of workout routines.

Whether you’re looking to shed some pounds or amp up your fitness game, there’s a style for everyone.

What sets this apart?

It’s all about how your muscles dance in eccentric/isometric rhythms.

If you’re new to this, starting with the basics is key.

They’re like your building blocks for better posture and stepping stones to more complex skills.

And hey, if you’re feeling adventurous, ramp up the challenge by adding weight, playing with leverage, or shaking things up with instability.

Think of calisthenics as your playground.

You can spice up traditional moves like Pull-Ups, Dips, or Squats by adding some weight.

But remember, once you’ve mastered the core exercises, it’s time to explore new frontiers to keep progressing.

Now, let’s break down the types of Calisthenics:


1. Military Calisthenics

Think of it as fitness boot camp style.

Here, the goal is to build soldiers who are quick, strong, and enduring.

This involves simple, effective exercises like Push-Ups, Pull-Ups, and Sit-Ups.

Perfect for beginners, these exercises boost your speed, endurance, and strength.


2. Freestyle Calisthenics

This is where things get acrobatic. Imagine combining strength with a flair for showmanship.

It’s all about explosive movements, swings, grip changes, and even flying off the bars.

Tools of the trade?

Parallel bars and rings.

But remember, this is advanced stuff – you need solid athletic skills to nail moves like the 270 Dip, Clap Muscle-Up, or the 360 Pull-Up.


3. Street Workout

Ever seen folks doing crazy workouts in parks or urban spaces?

That’s the essence of street workouts.

Popular from Russia to the heart of New York, this style is all about using public spaces as your gym.

It’s not just for show – these workouts pack a punch with moves like Handstands, the Human Flag, and One-arm Chin-ups.

It’s a perfect blend of advanced Calisthenics and urban cool.

Whether you’re a beginner or a seasoned pro, Calisthenics offers a rich variety to suit everyone’s taste.

It’s a fantastic way to engage your entire body, improve your fitness, and have fun while you’re at it.

So, are you ready to take on the Calisthenics challenge?


Why Should You Do Calisthenics Exercises?

Let’s break down the awesome perks of Calisthenics:

  1. Whole Body Activation: Imagine a workout that fires up every muscle in your body. That’s Calisthenics in action!
  2. Heart Health and Fat Loss: These moves don’t just sculpt your body; they rev up your heart and melt fat away. It’s like hitting two birds with one stone.
  3. Grip Strength Galore: Especially with those Pull-Ups. And guess what? This isn’t just about holding on tight; it’s crucial for weightlifting too.
  4. Become a Flexibility Wizard: Stretching those back and bicep muscles makes you more agile than ever. It’s like yoga meets strength training.
  5. Boost Your HGH Levels: Thanks to a symphony of muscles working together, your body pumps out more Human Growth Hormone. It’s like natural magic for muscle growth and repair.
  6. Posture Perfection: Ever noticed how Push-Ups and Pull-Ups make you stand taller? They’re like a secret weapon for a strong, confident posture.
  7. Injury Prevention: Strengthen your lower back and safeguard your shoulders.
  8. Joint-Friendly Workouts: Squats, when performed correctly, are a great ally for your knees. They help maintain knee strength and prevent injuries
  9. Bone Health Booster: Push-ups aren’t just for muscles; they’re like calcium for your bones, helping fend off nasty stuff like osteoporosis.
  10. Alleviate Back Pain and More: Resistance training in Calisthenics isn’t just about building muscle; it’s like a soothing balm for your lower back, easing arthritis and fibromyalgia discomfort.
  11. Mental Health Miracle: Calisthenics has the power to lift your spirits, zap fatigue, and boost your self-esteem.
  12. Natural Testosterone Boost: While the science world is still exploring, some studies hint that simple moves like push-ups might rev up testosterone production.
  13. Core and More: When you plank, you’re not just carving out abs of steel. You’re also fortifying your back and shoulders. Think of it as a full-core workout.


11 Basic Exercises in Calisthenics 

We’ve reached the heart of the matter with the 11 fundamental calisthenics exercises.

These exercises form a solid foundation on which to build your adventure in the world of calisthenics.

But remember, the key is to start with manageable exercises, paying close attention to technique.

As you gain familiarity and refine your movement techniques, it’s crucial to progress to variations that challenge you just enough while ensuring you maintain proper form during execution.

Are you ready to get started?


1. Push-Up

A cornerstone in bodyweight training, the push-up engages multiple joints and muscles, offering a full-body workout.

It’s a calorie burner that strengthens your chest, triceps, shoulders, abs, back, and legs.

Plus, its versatility allows for modifications to suit various skill levels.

How to do it:

  • Lie prone on the floor, hands placed a bit wider than shoulder-width, with elbows angled towards your toes.
  • Extend your legs back, balancing on your toes.
  • Engage your core to maintain a straight body line.
  • Press down, extending your arms to lift your body.
  • Lower yourself until your chest is just above the floor (avoid flaring your elbows out).

Beginner’s twist:

    • Knee Push-Up: Follow the same motion, but with your knees resting on the ground for reduced intensity.

2. Pull-Up

This classic upper-body exercise is perfect for developing strength and muscle coordination.

Suspended by your hands on a bar, the pull-up is a stellar way to engage your arms and back.

How to perform it:

    • Stand below a pull-up bar. Can’t reach? Use a box for a boost.
    • Grasp the bar with an overhand grip, hands a bit wider than shoulder-width.
    • Start by drawing your shoulders back and down.
    • Engage your arm and back muscles, pulling yourself up until your head is above the bar.
    • Lower back down with control.

3 Chin-Up

Similar to pull-ups but with an underhand grip, chin-ups primarily target your biceps and latissimus dorsi, while also engaging the upper back.

How to do it:

      • Position yourself under the pull-up bar.
      • Grab the bar with an underhand grip (palms facing towards you), hands roughly shoulder-width apart.
      • Concentrate on using your biceps to lift your body until your chin clears the bar, then lower back down smoothly.


4. Squat

Squats are the undisputed champions of lower body exercises.

They’re phenomenal for building strength and mass in your thighs and glutes.

Key players in this exercise are your quadriceps, gluteus maximus, and adductor Magnus.

Squats aren’t just about leg strength; they’re a core stabilizer too.

They’re essential for a well-rounded fitness routine, contributing to lower body muscle growth and overall core strength.

How to nail the perfect squat:

  • Stand with feet shoulder-width apart, creating a solid base.
  • Extend your arms parallel to the floor, palms down, for balance.
  • Shift your weight back onto your heels, bend your knees slightly, and push your hips back as if aiming to sit in an invisible chair.
  • Rise back up, straightening your knees, and bring your arms back to your sides.

The key to a great squat is in the details: slow, controlled movements, and a straight back.


5. Burpees

If there’s an exercise that truly tests your mettle, it’s the burpee.

Engaging practically every major muscle group in your body, burpees are a powerhouse movement suitable for cardio or strength training, depending on your focus.

This exercise is a calorie-torching dynamo.

The standard burpee strengthens your legs, hips, buttocks, arms, shoulders, chest, and abdomen.

Think of it as a two-for-one deal: a push-up and a jump squat combined into one fluid motion.

Here’s your burpee breakdown:

    • Start in a squat position, knees bent, back straight, feet shoulder-width apart.
    • Place your hands on the floor, just inside your feet.
    • Shift your weight onto your hands, kick your feet back to a push-up position, keeping your body straight.
    • Do one push-up.
    • Hop your feet back to the starting squat position.
    • Explode upwards into a jump, hands reaching for the sky.
    • Land with bent knees, returning to the squat position to complete one rep.


6. Crunches

Crunches are a timeless exercise focused on chiseling your core, specifically targeting the rectus abdominis – the coveted ‘six-pack’ muscles.

Ideal for beginners, crunches are straightforward yet highly effective for crafting those dream abs.

Remember, proper form is key to avoid any unnecessary strain on your back and neck.

How to do crunches:

  • Lie on your back with your feet flat and knees bent at 90 degrees.
  • Place your fingertips lightly behind your head or cross your arms over your chest.
  • Engage your core and lift your shoulder blades off the floor, curling towards your knees.
  • Lift just enough to feel the core engage; your body should be slightly off the ground.
  • Hold for 1-2 seconds at the top of the movement.


7. Plank

The plank, a staple in core strengthening, is integral to calisthenics.

It’s a full-body engagement exercise, working everything from top to bottom.

The primary muscles involved in the plank are the rectus abdominis, transverse abdominis, and obliques, counterbalanced by the spinal erectors, lumbar muscles, and to a lesser degree, the traps and rhomboids.

Additional muscle engagement:

  • Your forearms, placed on the ground, activate your deltoids, triceps, and cervical area.
  • The tension in your legs also involves the lumbar muscles, hamstrings, glutes, and adductors.
  1. How to plank:
    • Begin in a push-up position but rest on your forearms.
    • Tighten your core to form a straight line from your head to your heels.
    • Hold this position, keeping your hips up and aligned, for as long as you can manage.


8. Jumping Rope: A Cardio Power Move

Jumping rope isn’t just for kids; it’s a high-impact exercise that boosts endurance and strength in a short time.

It’s budget-friendly and portable, perfect for on-the-go workouts.

How many calories does it burn?

While individual results vary, you can burn approximately 150 calories in 10 minutes.

That’s up to 500 calories in a 30-minute session!

How to jump rope:

    • Hold the rope handles, keeping your arms at an even distance from your body.
    • Use your wrists to swing the rope over and under you.
    • Jump lightly, letting the rope pass beneath your feet, knees slightly bent.


9. Dips

Dips are a fantastic exercise for strengthening your upper body, especially the triceps.

They also engage your anterior deltoids, pectorals, and rhomboids.

How to do dips:

    • Stand inside the dip bars.
    • Grip the bars and lower your body until your shoulders dip below your elbows.
    • Push up, extending your arms fully, using your triceps.


10. Lunges

Lunges are a versatile leg exercise where one leg steps forward into a bent position, while the other extends behind.

How to do lunges:

  • Stand upright with feet together.
  • Step forward with one foot, bending the knee to form a right angle.
  • The back knee should almost touch the ground.
  • Push off the front heel to return to standing, then repeat with the other leg.


11. Leg Raises on a Pull-Up Bar

Ideal for an advanced core workout, this exercise targets your lower and upper abdominal muscles, as well as hip flexors.

How to do leg raises:

  • Grab the pull-up bar with an overhand grip, thumbs wrapped around for stability.
  • Raise your legs until parallel to the ground or higher.
  • Slowly lower them back down, maintaining a posterior pelvic tilt throughout.

Can’t use a pull-up bar?

Try lying leg raises to activate those hard-to-reach lower abs.


Shed Pounds with Calisthenics: A Holistic Approach to Weight Loss

Losing weight effectively through exercise hinges on your ability to elevate and sustain a high heart rate.

This is key to ramping up calorie burn and melting away fat.

Calisthenics shines in this aspect as its movements engage multiple muscle groups simultaneously, leading to higher calorie expenditure.

On average, you can torch about 400-600 calories in an hour of Calisthenics.

Here’s the kicker: as you build muscle through these exercises, your body demands more calories than it does for maintaining fat tissue.

Muscle is metabolically more active, meaning the more muscle you have, the more calories you burn, even at rest.

So, by boosting your physical strength with Calisthenics, you’re not only shaping up but also turning your body into a more efficient calorie-burning machine.

It’s a win-win.


Building Muscle Mass with Calisthenics: A Smart Strategy

Wondering if Calisthenics can help you bulk up?

Absolutely!

Whether the resistance comes from gym equipment or your body weight, the key lies in ensuring that the resistance provides enough challenge to trigger muscle hypertrophy.

While weightlifting is often seen as the go-to for muscle building, it can be tough on your joints.

Injuries can throw a wrench in your training routine, hindering muscle gain.

This is where Calisthenics steps in as a safer, joint-friendly alternative.

By progressively challenging your body, it not only enhances mobility but also strengthens your joints, reducing the risk of injury.

This means you can consistently train, build strength, and consequently, muscle mass.

However, Calisthenics is sometimes perceived as less effective for leg development.

Yet, by incorporating weights and gym machines, you can specifically target your leg muscles.

But wait, don’t go just yet!

Here are 5 tactics for upping your Calisthenics game:

  1. Optimize Your Grip: Ensure your grip is strong enough to avoid early fatigue before your muscles are fully worked.
  2. Vary Your Routine: Increase reps, sets, and rest time between sets to continuously challenge your muscles.
  3. Mix It Up: Combine both difficult and simpler exercises to keep your routine balanced.
  4. Add Weights: Consider using weighted vests or dip belts to intensify your workout without increasing reps.
  5. Track Your Progress: Keep a record of your workouts to celebrate small victories and set clear goals for each session.


Boosting Bone Strength with Exercises Like Push-Ups

Exercises that require your bones to bear weight, like push-ups, are not just about building muscle; they’re crucial for fortifying your bones too.

Besides push-ups, other closed-chain exercises like bench presses and pull-ups are excellent for increasing bone density.

Research suggests that the more weight your bones support, the stronger they become.

This is not just about enhancing strength; it’s a proactive step against bone-related ailments like osteoporosis.

The principle here is simple yet powerful: when you perform weight-bearing activities, the force against gravity stimulates your bones to grow stronger.

This is a natural response of your body to adapt and fortify itself.

Studies have repeatedly highlighted the significance of load-bearing physical activities for maintaining skeletal health.

In experiments where animals and humans experienced zero-gravity conditions or immobilization, a marked decrease in bone mineral density was observed.

Our skeletons need regular ‘loading’ to stay healthy.

Steven Hawkins, Ph.D., a professor of exercise science, underscores this.

He notes that when bones are subjected to moderate stress, they respond by building density.

Depending on your age and training routine, this can lead to an increase or maintenance in bone density.

So next time you’re doing push-ups, remember, you’re not just working on those muscles; you’re also investing in stronger, healthier bones.


Calisthenics: Elevating Stamina and Boosting Testosterone

Alright, let’s talk testosterone – the real muscle game-changer.

You see, when it comes to building muscle, it’s not just about lifting weights; it’s about optimizing that training volume.

We’re talking sets and reps here.

High-volume workouts, the ones that make you sweat, are like a secret potion for boosting testosterone.

And guess what?

It’s not just for the guys; ladies benefit from it too!

But wait, it gets better.

Calisthenics, yeah, those bodyweight moves, they’re not just about getting fit.

They’re like a holistic upgrade for your body.

Your endurance goes up, your heart health improves, and, oh, did I mention the hormonal balance?

Research shows that endurance exercises, the kind you find in calisthenics, are like a turbocharger for your hormones.

And multi-joint exercises, they’re the real MVPs, beating isolation moves any day when it comes to pumping up those anabolic hormones.


Final thoughts

These 11 beginner-friendly moves are like your golden ticket to becoming a stronger, more agile you.

But hey, it’s not just about physical strength; it’s about building up that mental and physical resilience too.

Listen up, the core of Calisthenics is all about progression and sticking with it.

You start right where you are, use whatever you’ve got, and do your absolute best.

Every workout is like a step on the ladder to a better you.

Now, here’s the deal – this journey is all about setting those personal goals, giving yourself a high-five for every milestone, and always pushing your limits.

So, strap in, stay committed, and get ready to unlock a whole new level of strength and confidence you didn’t even know existed.

Welcome to the Calisthenics world!

Recommended