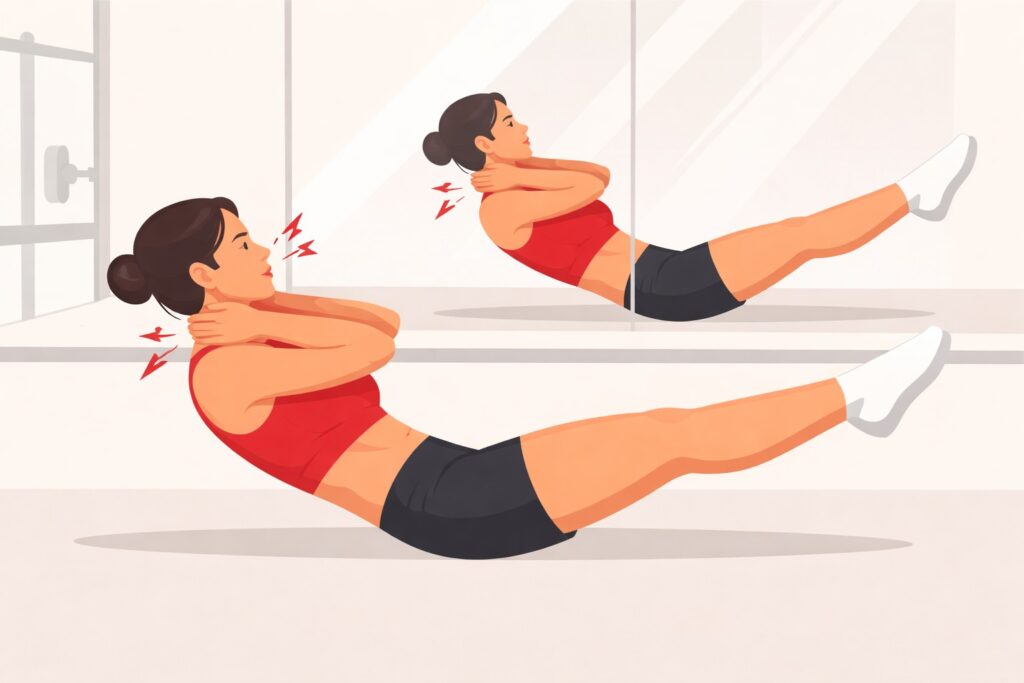
I used to think “core work” meant doing something that burns a bit, feeling productive for a minute, and moving on.
Then I met the hollow hold.
Not the polished gymnastics version that looks effortless.
The real one.
The one that makes you realize very quickly whether your ribs and hips are actually working together.
What surprised me wasn’t the hollow hold itself.
It was what happened after I kept practicing it consistently.
Other bodyweight skills started feeling more controlled.
Push-ups stopped turning into a quiet lower-back sway.
Pull-ups no longer felt loose at the bottom.
Even simple things like holding my knees up or staying tight in a plank felt more organized.
Nothing flashy.
More like adjusting something small and noticing it finally works the way it should.
The Shape I Didn’t Know I Was Missing
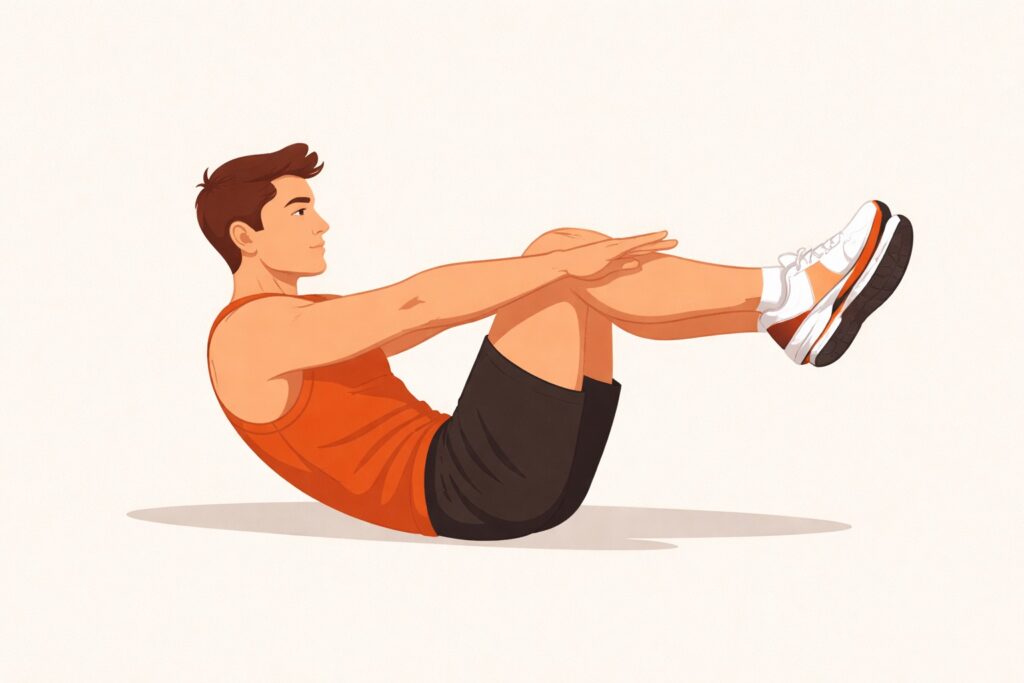
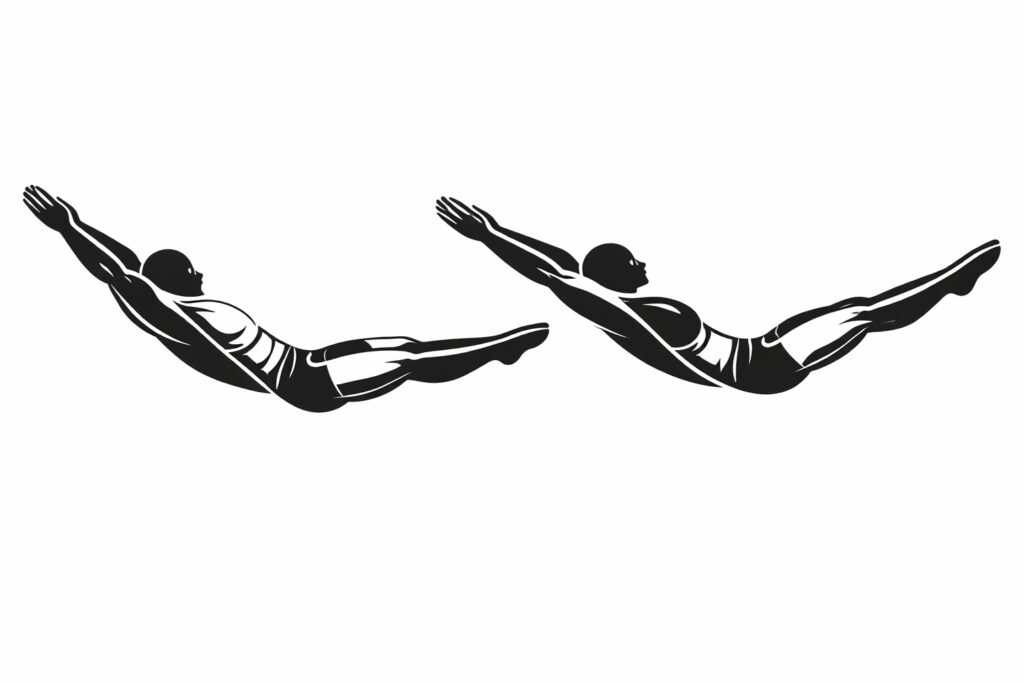
A hollow hold is a body position where the front of your body (abs) stays “on,” while your ribs and pelvis stop fighting each other.
It’s basically the opposite of that relaxed lounge position where your ribs flare up and your lower back arches like it’s trying to wave at people behind you.
In a hollow hold, you’re trying to create one smooth curve through your body.
Think “slightly rounded,” not “crunched into a ball.”
The goal is control, not suffering for no reason.
Here’s what I mean by “ribs and pelvis”:
If your ribs pop up and your lower back arches, your core isn’t really bracing.
Your body is borrowing stability from your spine instead of building it from your trunk.
That’s why so many bodyweight movements feel unstable even when the muscles are technically strong enough.
What Your Body Should Be Doing (Not Just What It Looks Like)
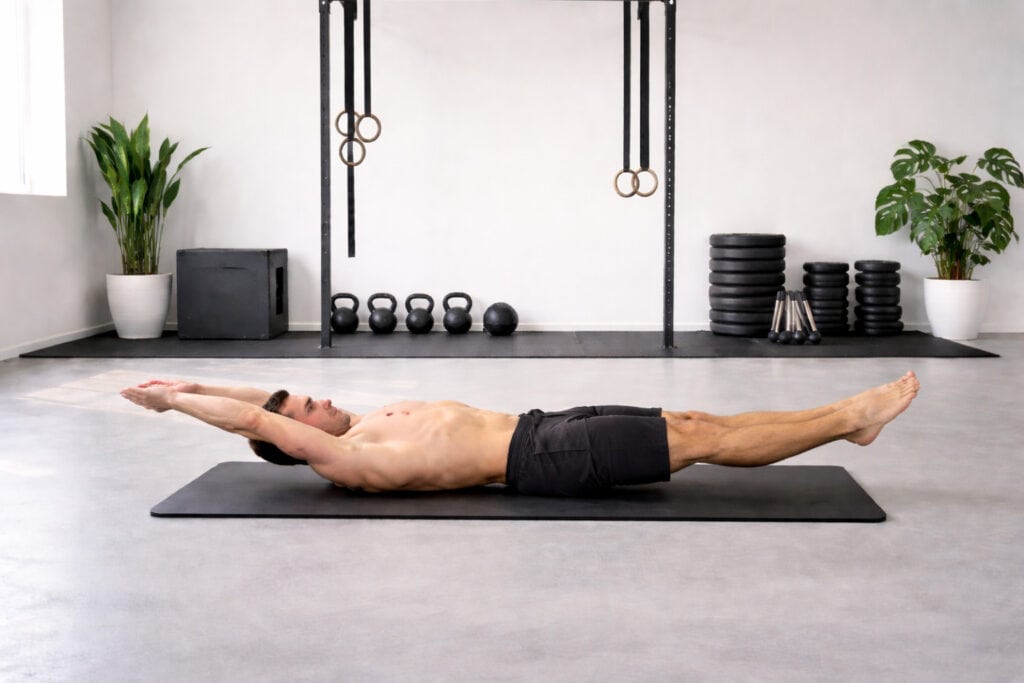
You lie on your back.
You lightly press your lower back toward the floor.
Your ribs stay “down,” like you’re zipping up your torso.
Your legs extend out (or tuck in, depending on level).
Your shoulders lift slightly off the floor.
And then you hold.
If it’s done right, you feel:
- A deep ab tension that isn’t just “top six-pack burn”
- Your hip flexors working, but not stealing the whole job
- Your breathing getting harder, but still possible
- Your lower back staying in contact with the floor (or very close)
If it’s done wrong, you feel:
- Neck strain like you’re trying to do a sit-up with your face
- Lower back arching and popping off the ground
- Hip flexors screaming while abs feel weirdly absent
- Shaking that feels more like losing position than building strength
Why I Stopped Trying to Make It Brutal

What fooled me early on was thinking I needed “max difficulty” to get results.
That turned hollow holds into a grim 10-second battle where form collapsed, and I just got better at suffering in a bad shape.
So I switched to a boring-sounding goal:
Hold a clean position long enough that my body learns it.
Not long enough that my spine starts improvising.
Most days, the work looked like this:
- 6 sets of 20 seconds
- 40 seconds rest between sets
- Total time: about 6 minutes including rest
And I kept the quality rule simple:
If my lower back started lifting, the set ended immediately.
No bargaining.
No “just five more seconds.”
Five more seconds of a broken position is five more seconds of practicing the thing I didn’t want.
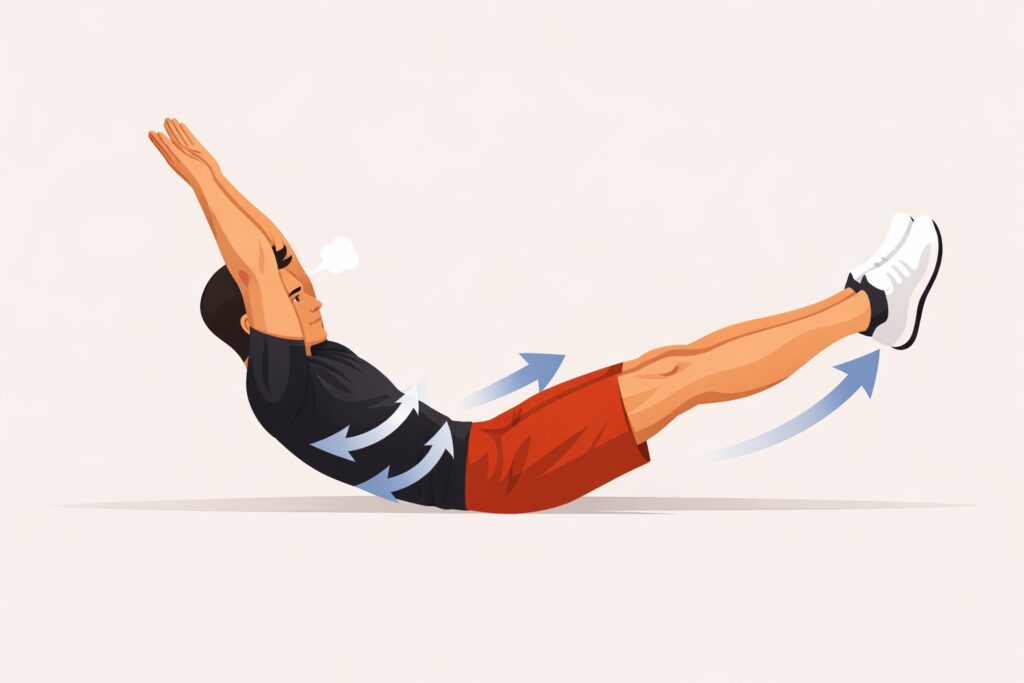
The Hollow Hold Position I Built Step by Step
Before every set, I checked these cues in this order:
- Exhale like you’re fogging a mirror, then stop halfway (ribs don’t pop up)
- Lightly tuck the pelvis so the lower back doesn’t arch
- Reach arms long so shoulders lift a little without shrugging
- Extend legs only as far as you can without losing the back position
That last one mattered more than my ego wanted to admit.
Some days my “best” hollow was with knees bent.
Other days I could extend more.
I stopped treating that like a failure and started treating it like feedback.
The Hollow Hold Variations I Used Before Attempting the Full Version
A lot of people hear “hollow hold” and immediately picture straight legs, arms overhead, full gymnast mode.
That’s like trying to learn to drive by hopping into a race car.
Here are the versions I rotated through depending on how my body felt that day.
1) Tuck Hollow Hold
Knees bent, thighs closer to chest, shins parallel to the floor.
Arms reaching forward by your sides.
This version lets you learn rib position and lower-back contact without your hip flexors hijacking everything.
What I did:
- 8 sets of 15 seconds
- 30–45 seconds rest
- Focus: smooth breathing while staying tight
2) One-Leg Extended Hollow
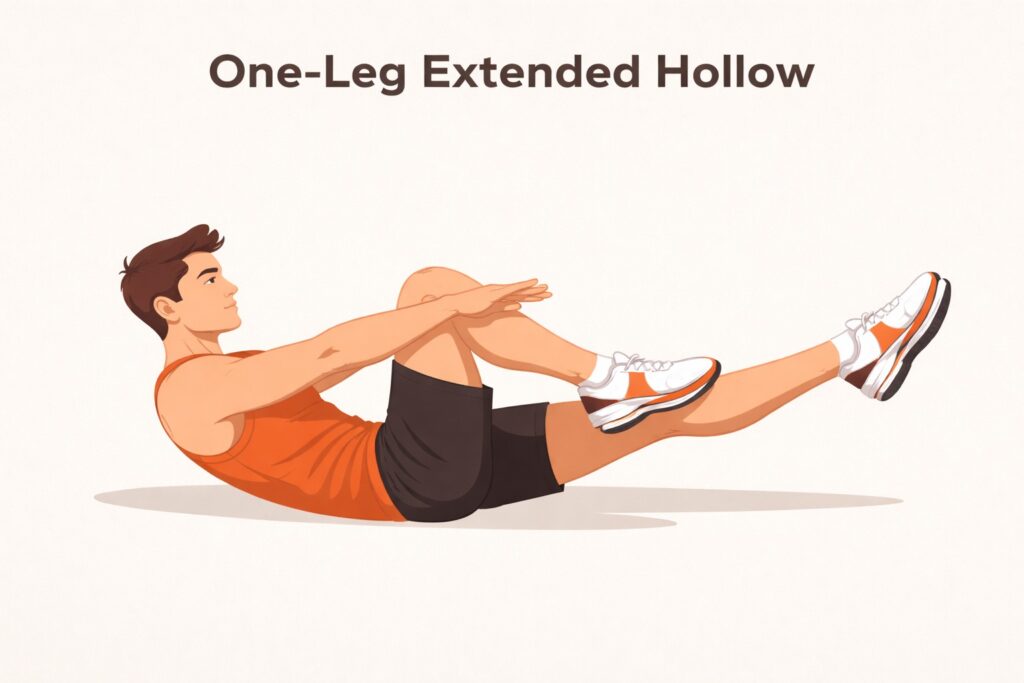
One leg stays bent, one leg extends out.
Then switch sides next set.
This is the “bridge” version that taught me control without instantly losing position.
What I did:
- 6 sets of 20 seconds
- Alternate which leg is extended
- 40 seconds rest
- Focus: keep both hips level (no twisting)
3) Full Hollow Hold (Only When It Stayed Clean)
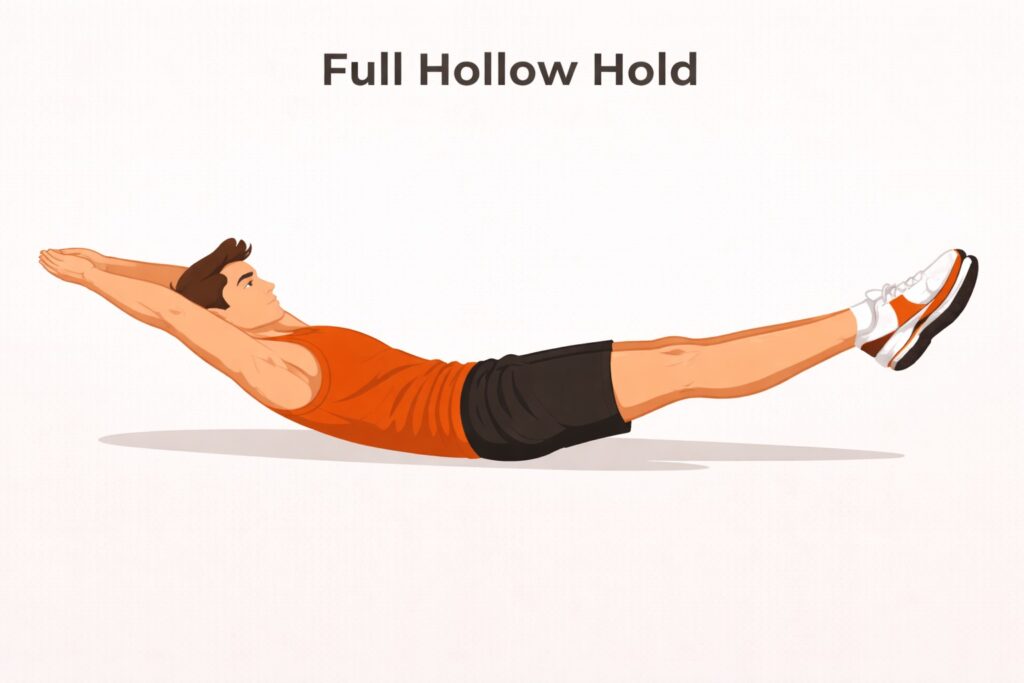
Both legs extended.
Arms either reaching forward or overhead.
Overhead is harder because it pulls your ribs up if you’re not controlling them.
What I did when it was a good day:
- 5 sets of 25 seconds
- 45 seconds rest
- Focus: slow exhale without ribs flaring
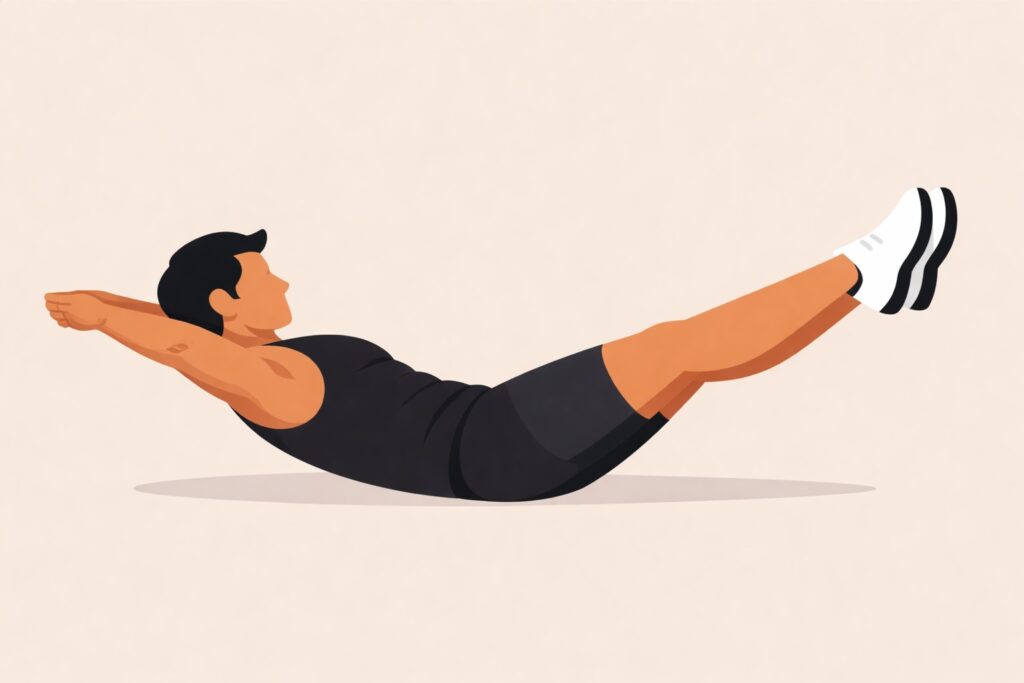
4) Hollow Rocks (When I Wanted “Movement Control”)
This is the hollow hold, but you gently rock back and forth without changing shape.
If you lose your position, the rock turns into a flop.
So it’s a brutally honest drill.
What I did:
- 6 sets of 12 rocks
- 45–60 seconds rest
- Focus: same lower-back contact the entire time
What Changed First (And It Wasn’t A Six-Pack Thing)
The first change was weirdly subtle.
I didn’t suddenly look different.
I didn’t suddenly feel “stronger” in the classic sense.
I just felt less… leaky.
Like my body wasn’t wasting effort through random spinal movement.
When I braced for anything, it felt like the brace actually stayed there.
Not for one second.
For the whole rep.
That’s the part people don’t explain enough.
Strength isn’t only “how hard you can contract.”
It’s also “how long you can keep the right muscles doing the right job.”
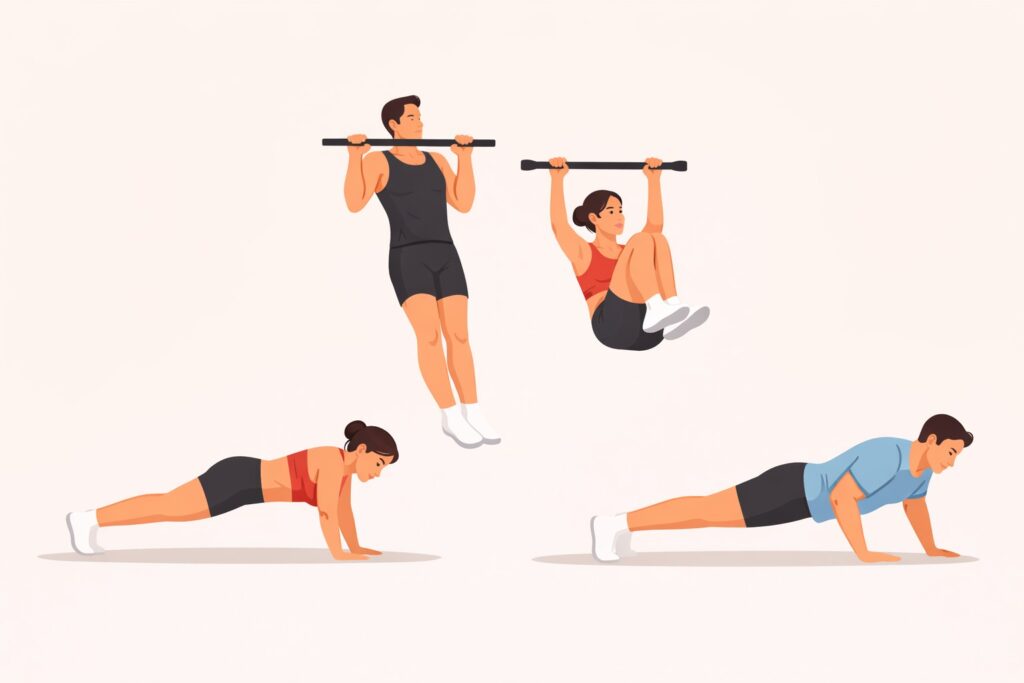
How Hollow Holds Carried Over To Push-Ups (Without Me Even Trying)
Push-ups are supposed to be a straight-line plank that moves up and down.
Most push-ups in the wild are more like:
“Upper body does a push-up while the lower back performs interpretive dance.”
That used to be me.
I could do reps, but the midsection would sag or the ribs would flare, and the rep would feel disconnected.
After hollow holds became familiar, my push-ups felt like one unit.
I stopped feeling like my shoulders were working alone.
The force transfer improved.
Like pushing the floor actually pushed my whole body, not just my chest.
The Push-Up Version I Used To Lock It In
I used a tempo push-up because it exposes control problems fast.
Here’s the exact setup:
- Hands under shoulders
- Feet together (harder, but cleaner feedback)
- 3 seconds down
- 1 second pause just above the floor
- Smooth push up without hips rising first
What I did:
- 4 sets of 8 reps
- 90 seconds rest
- Stop each set with 2 reps “in the tank” (so form stays honest)
What it felt like:
My abs weren’t “cramping.”
They were just present the entire time, like a seatbelt.
The lower back stayed quiet.
No pinching.
No arching.
Just pressure.
What I Did With My Ribs, Pelvis, and Legs in Every Hollow Hold
Right before each set, I did one long exhale.
Nothing exaggerated.
Just enough to feel ribs drop slightly.
Then I started the first rep without letting the ribs pop back up.
That cue alone made push-ups feel like a different exercise.
How It Showed Up In Pull-Ups and Hanging Work
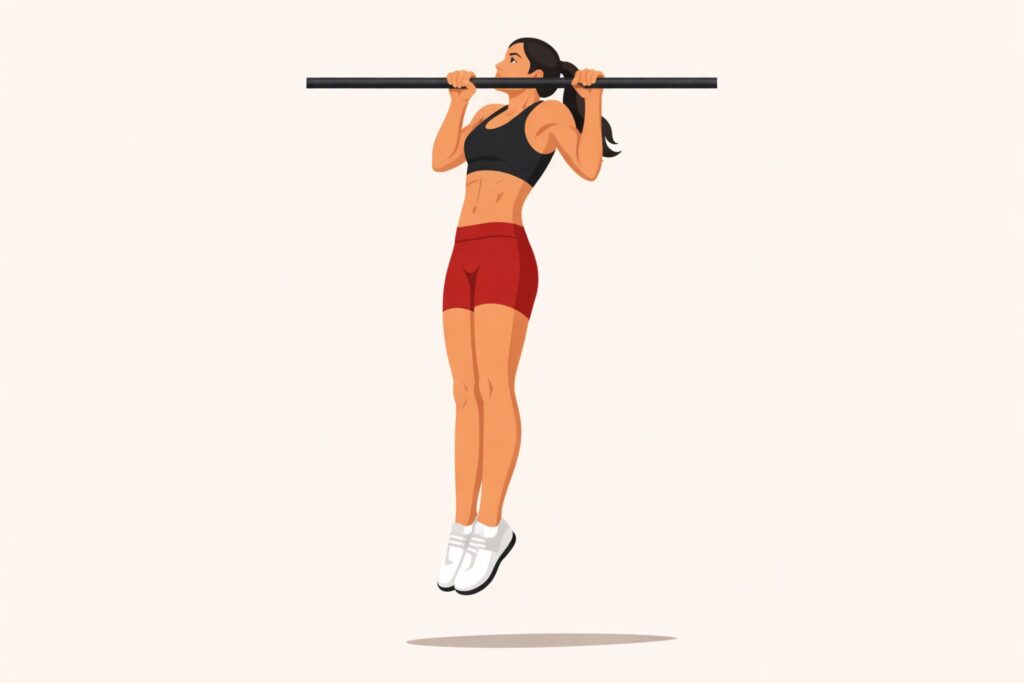
Pull-ups are “upper body,” sure.
But if your trunk is loose, your body swings, your ribs flare, your legs drift forward, and suddenly you’re not pulling… you’re surviving a moving target.
Hollow work trained the exact opposite shape:
Ribs down.
Pelvis slightly tucked.
No wild arch.
So when I hung from a bar, I started finding that shape naturally.
My legs stopped wandering around like they had their own plans.
And my pull started from a more stable base.
The Hanging Drill That Made The Connection Obvious

This is simple and humbling.
Hang from a pull-up bar.
Then gently bring your body into a hollow-ish position:
- Slight posterior pelvic tilt (butt lightly tucked)
- Ribs down
- Legs slightly forward, not swinging
- Shoulder blades pulled down a little (not shrugging)
Hold that for time.
What I did:
- 6 sets of 15–25 seconds
- 60 seconds rest
- If grip died early, I ended the set (no sloppy hanging)
What it felt like:
My lats engaged sooner.
My shoulders felt more “packed.”
The hang stopped feeling like my joints were taking all the load.
It felt muscular.
Pull-Up Sets That Felt Cleaner Afterward
I kept pull-ups boring on purpose:
- 5 sets of 4 reps
- 2 minutes rest
- 2 seconds up, 2 seconds down
- Pause 1 second at the top without craning the neck
The big change wasn’t that I magically added reps overnight.
The change was that every rep felt like the same rep.
Less swing.
Less random arching.
More repeatable tension.
Why L-Sits Started Feeling Less Like Hip Flexor Panic
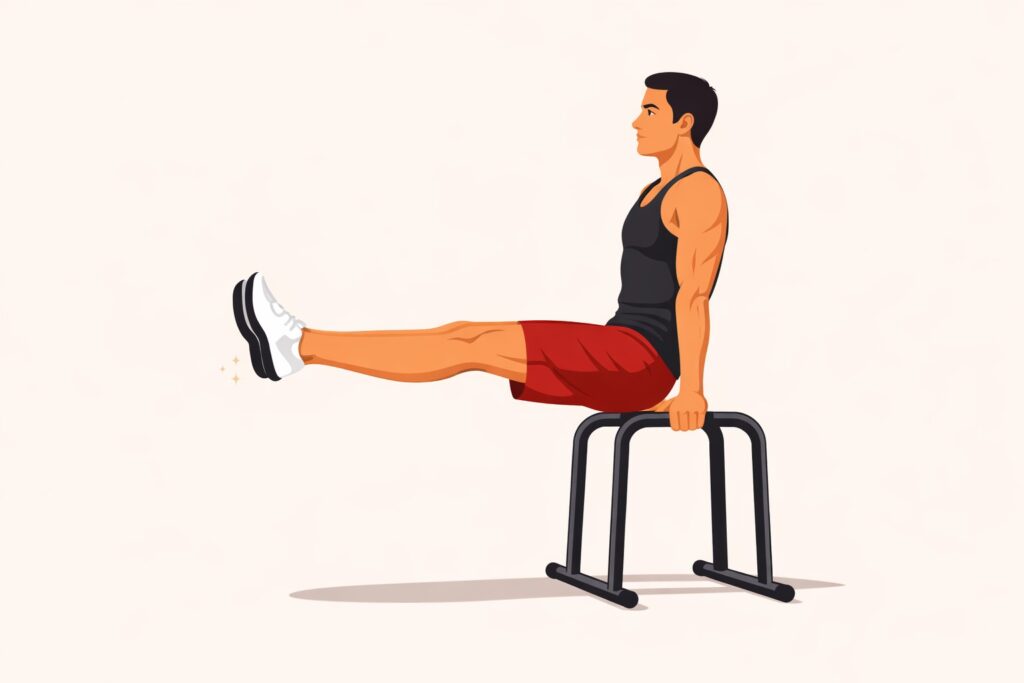
An L-sit looks like “abs and legs.”
In real life, it often feels like “hip flexors cramping while shoulders wonder why they’re involved.”
Hollow work taught me pelvic control.
That matters because the L-sit isn’t only lifting legs.
It’s keeping the pelvis from dumping forward while you compress.
Once I could hold a hollow without my ribs flying up, I could bring that same shape into a tuck sit.
Then into a longer hold.
Then into straighter legs.
Here’s How I Progressed My Tuck Sit

On parallel bars or sturdy dip bars:
- Support hold first (elbows locked, shoulders down) for 15 seconds
- Then tuck knees toward chest and hold
What I did:
- 6 sets of 10–18 seconds tuck sit
- 60–90 seconds rest
- Between sets, I shook out wrists and did one slow exhale to reset ribs
What it felt like:
At first, my hip flexors did most of the work and my lower back wanted to arch.
After a while, the hold started feeling more “stacked.”
Less shaking.
More pressure in the abs.
My shoulders stopped creeping up toward my ears.
Handstand and Wall Work: The Unexpected Place Hollow Helped
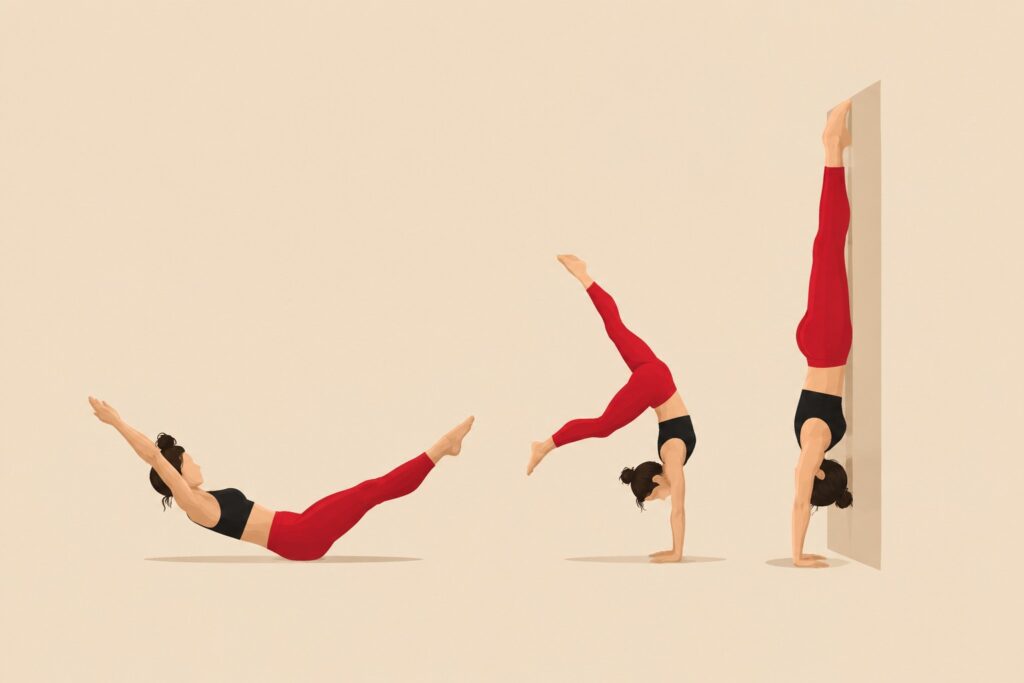
I’m not going to pretend hollow holds turned me into a handstand wizard.
But they did make the wall drills less messy.
A lot of beginner handstand problems are rib flare problems.
People kick up, the ribs pop, the lower back arches, and the whole shape becomes a banana.
That “banana” might still balance, but it’s a stressful way to live.
Hollow holds trained the opposite: ribs down and pelvis controlled.
So when I went to the wall, I had a shape to aim for.
Not just “don’t fall.”
The Wall Drill I Used (With Real Numbers)

Hands about 6–8 inches from the wall.
Walk feet up the wall until your nose is close enough that you can smell the paint (not required, but it happens).
Then:
- Exhale gently to bring ribs down
- Squeeze glutes lightly
- Push the floor away so shoulders elevate (like shrugging, but controlled)
What I did:
- 5 holds of 20–35 seconds
- 90 seconds rest
- End the hold if lower back starts arching hard
What it felt like:
When I stayed stacked, my shoulders burned in a “working” way.
When I arched, it felt like my lower back was doing a job it never applied for.
Where I Was Losing Control Without Realizing It
I’m not going to label these as failures.
They were simply parts of the movement that I hadn’t paid enough attention to yet.
At the time, everything felt fine on the surface.
But something in the position wasn’t holding steady the way it should.
Once I slowed down and looked closer, I noticed a few details that were quietly softening the shape of my hollow holds.
Here’s what I noticed — and what I adjusted to make the position feel solid instead of uncertain.
1) Turning It Into A Neck Exercise
If you lift your head like a sit-up, your neck takes over.
Fix that by thinking “shoulders up, chin neutral.”
I used this cue:
Look at your thighs, not your knees.
That kept my head from cranking forward.
2) Going Too Low With The Legs Too Soon
Straight legs are cool.
Straight legs with an arched lower back are just practice at arching under tension.
So I used a rule:
Legs only go as low as my lower back stays heavy on the floor.
Some days that meant knees bent and feet higher.
That wasn’t regression.
That was accuracy.
3) Holding My Breath Like A Statue
If you can’t breathe, the position is too hard or too aggressive.
I practiced “quiet breathing”:
- Inhale through nose for 2 seconds
- Exhale through mouth for 3–4 seconds
- Keep ribs from popping on the inhale
At first it was shaky.
Then it got smoother.
That smoothness showed up everywhere else.
4) Confusing Hip Flexor Burn for Core Control
Hip flexors will work in hollow holds.
That’s normal.
But if hip flexors are the only thing you feel, the pelvis usually isn’t controlled.
What helped me was a tiny glute squeeze.
Not a maximal clench.
Just enough to keep the pelvis from tilting forward.
That turned “hip flexor panic” into “whole trunk tension.”
The “Control Score” I Noticed In Real Sessions
This is how I personally measured progress without doing formal testing or obsessing over numbers.
I looked for these signs during normal workouts:
- Push-ups felt quieter in the lower back
- Pull-ups had less swing and less leg drift
- Planks felt like tension, not suffering
- Hanging knee raises stopped yanking on my spine
- Transitions between reps felt more repeatable
And I also noticed something very unsexy but important:
I recovered faster between sets when my positions were cleaner.
Less wasted motion meant less random fatigue.
It’s like walking with a limp versus walking normally.
Same distance, very different cost.
What My Workouts Looked Like Once Hollow Holds Came In
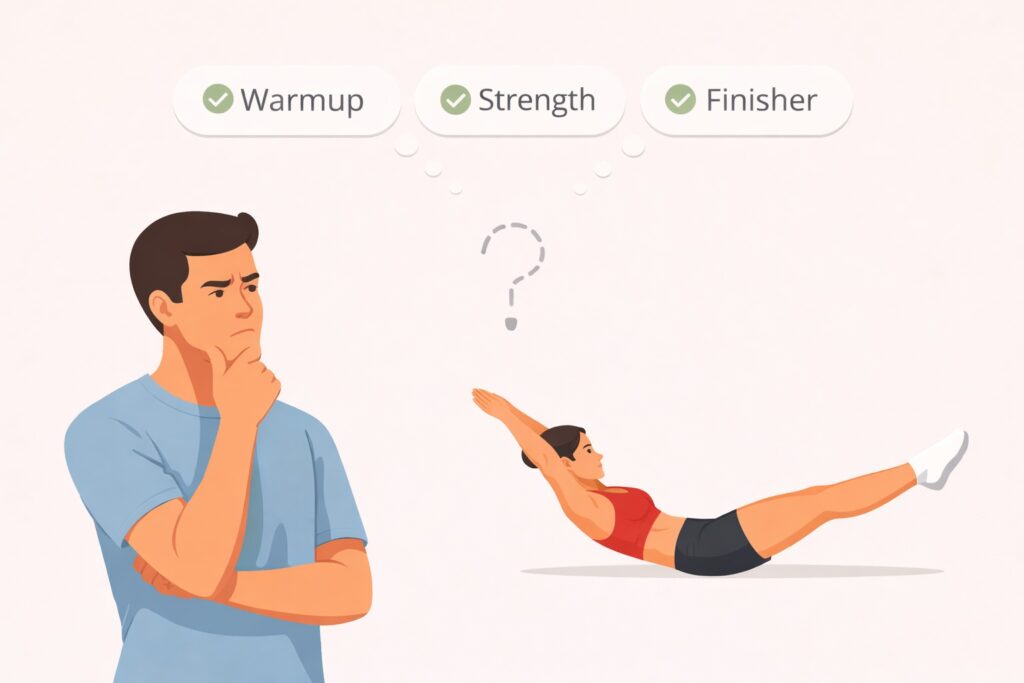
I didn’t want hollow holds to turn into the main attraction of the session.
They weren’t supposed to steal energy or attention from everything else.
Here are three plug-and-play options that worked without taking over the session.
Option A: Quick Starter (Good Before Skill Work)
- 5 sets of 20 seconds tuck hollow hold
- 40 seconds rest
- Then start your workout
This made my first working sets feel more “connected.”
Option B: Between Sets (Good With Push/Pull Days)
Pair hollow holds with something that has long rest anyway, like pulling sets.
Example session block:
- Pull-ups: 5 sets of 4 reps, 2 minutes rest
- During the rest: 1 hollow hold of 15–20 seconds
That kept it efficient and consistent.
Option C: Finisher (Good If You Don’t Want It To Affect Strength Work)
If hollow work makes your hip flexors tired and you hate that early, do it at the end.
- 6 sets of 15 seconds one-leg extended hollow
- 45 seconds rest
- Done
It’s short, clean, and doesn’t hijack the main lifts or skills.
How Long Each Hold Should Be (Without Turning It Into a Contest)

Long holds aren’t automatically better.
Clean holds are better.
If you’re brand new, even 10–15 seconds of a perfect tuck hollow is valuable.
If you’re more comfortable, 20–35 seconds with smooth breathing is a great range.
I rarely went beyond 40 seconds because quality would fade and I’d start “tolerating” the shape instead of owning it.
And the whole point was ownership.
Control you can bring into other movements.
If Someone Asked Me Why Hollow Holds Help So Many Skills
I’d say this:
Bodyweight skills are basically moving planks.
Push-ups are planks that bend at the elbows.
Pull-ups are planks hanging from a bar.
L-sits are planks with legs lifted.
Handstands are planks upside down with trust issues.
If your plank shape leaks, the skill leaks.
Hollow holds taught my body a default position where ribs, pelvis, and breathing could cooperate.
Not perfectly.
Just reliably.
And reliability is what makes skills feel smoother instead of “different every rep.”
Where I’d Start If I Had To Do It Again
If I could go back and re-teach myself, I’d do this exact starter plan:
- Pick tuck hollow hold
- Do 6 sets of 15–20 seconds
- Rest 40–50 seconds
- Stop every set the second the lower back peels off the floor
- Keep breathing calm, even if it feels awkward
Then I’d carry that same shape into one other drill:
A controlled plank or a hollow-style hang.
Not both.
Just one.
Because the win isn’t doing more things.
The win is doing one shape so well that it shows up everywhere else without you forcing it.
That’s what happened for me.
Not overnight, not dramatically, but steadily enough that one day I noticed my reps looked calmer… and my body felt like it finally got the memo.