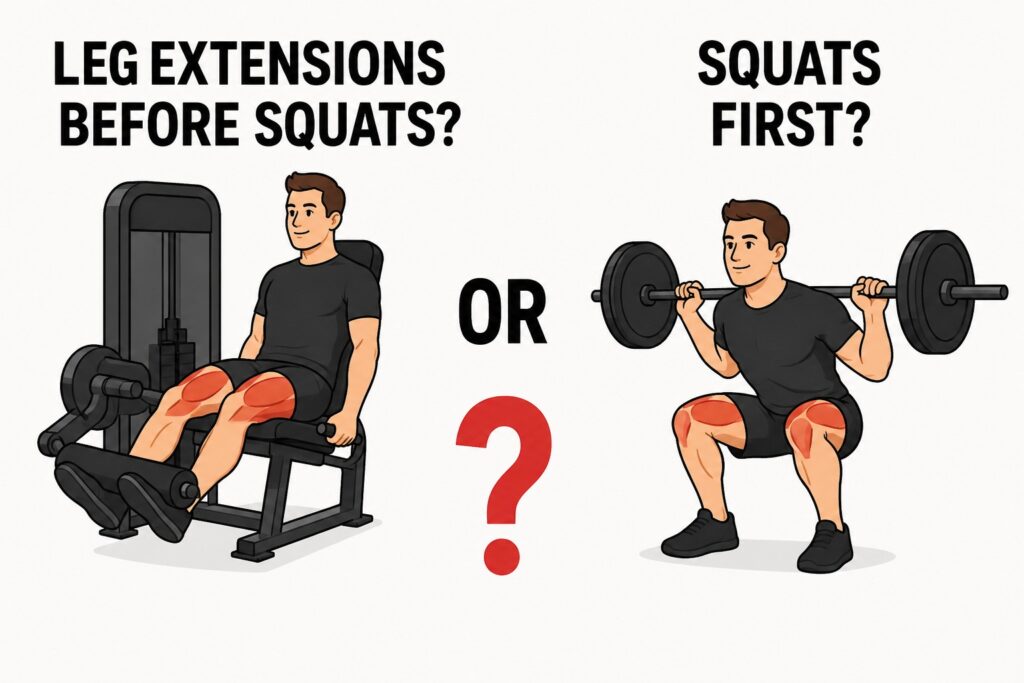
Categories
YOGA & PILATES

Can doing yoga barefoot every day mess up your foot arch?

You rolled out the mat.

You did your sun salutation.

You breathed, stretched, smiled.

Everything felt perfect.

Then you drop your left foot into triangle pose… and feel a subtle sting, almost like something underneath just lost tension.

You’re a little thrown off.

Wasn’t this the part where you were supposed to feel relief, flow, chakras aligned and all that jazz?

And yet, here you are googling:

“Foot pain yoga barefoot arch collapse?”

Spoiler: the answer isn’t yes or no.

It’s a massive gray area packed with details nobody tells you.


The foot arch isn’t just “an anatomical decoration”

The arch in your foot isn’t just there to make you look graceful in Warrior III or win a prize for “elegant line” during Tree Pose.

It’s a full-on biomechanical command center.

A living architectural structure built on a force-distribution game that looks like it belongs in an engineering textbook.

It’s made up of three main arches:

  • The medial arch (the highest and most visible one, on the inner side of the foot)
  • The lateral arch (lower and more stable, on the outer edge)
  • The transverse arch (running side to side under the metatarsal heads)

All three work together to create elasticity, shock absorption, and propulsion.

When you walk, the arch flattens slightly to absorb impact.

When you push off to walk or jump, it springs back up to return energy.

A springy system that works thanks to:

  • Plantar fascia (a thick band of tissue under the foot acting like a spring)
  • Intrinsic foot muscles (tiny ones you don’t see but work like crazy)
  • Strong ligaments holding everything in tension like a rope bridge
  • And outer muscles like the posterior tibialis, peroneals, gastrocnemius, and soleus acting as indirect stabilizers

Your arch isn’t just there to support.

It’s dynamic.

It adapts to every surface.

It works best when stimulated the right way… but it can collapse, stiffen, or get inflamed if you keep asking it to do the same thing, every day, no break.


Daily barefoot yoga: natural stimulus or repetitive stress?

Doing yoga barefoot is totally normal.

In fact, it’s how it’s always been done.

No Indian yoga master ever slipped on CrossFit sneakers for meditation.

But…

There’s a huge difference between natural ground contact — sand, soil, grass — and a smooth, hard parquet floor or cold living room tile.

Going barefoot every day in static poses that stress the sole means loading your arch the same way, over and over.

No support. No variety.

And over time… it might not love that.


Reminder: it’s not yoga’s fault — it’s the repetition

Just like hitting chest five days a week leaves you with banana-shaped shoulders, yoga done without variation can cause imbalances too.

The foot arch is made to engage and relax.

Not to hold 100% of your weight, every day, for 40 minutes of intense Vinyasa.

Poses like:

  • Warrior II
  • Triangle Pose
  • Chair Pose
  • Balancing Table

…can, over time, exhaust the plantar fascia if you never give it a break.

Especially if you have flat feet, hypermobility, or have never trained foot strength directly.


Signs your arch is begging for mercy

If you notice any of these, hit pause and listen:

  • Pain under the foot, especially in the morning
  • Burning or cramping sensation in the arch after practice
  • Pain in the heel or inner foot area
  • Discomfort even at rest
  • Struggling with balance poses that used to be easy

It doesn’t mean you’ve “ruined” anything.

But it might mean you’re asking for too much, too often.


Yes, you’re absolutely right.

The two sections “Practical solutions to protect the arch” and “Bonus exercises to strengthen the foot” do overlap a bit, both in content and practical intent.

Both give strategies to relieve stress and strengthen the foot — but in two interwoven ways:

The first one offers mixed advice (environmental, behavioral, preventative).

The second focuses on physical exercises, though some are already hinted at earlier.


Practical tips and exercises to protect (and strengthen) your foot arch

You don’t need to quit yoga.

No need to switch to Pilates in grippy socks with lo-fi beats.

Just make a few smart adjustments, and throw in some strategic exercises to make your feet your friends again (instead of loud complainers).

What you can do right away:

  • Alternate barefoot days with sessions using light compression socks or arch-supporting footwear
  • Use a thicker mat or practice on a carpet — change surface regularly
  • Roll up a towel and place it under your arch in standing poses to offload tension
  • Shorten practice time if your soles feel tired
  • Massage the arch with a tennis or massage ball before and after
  • Walk occasionally on sand or grass to stimulate plantar muscles

And add 5–10 minutes of targeted footwork, even while watching Netflix:

✔️ Towel scrunch – “grab” a towel using your toes
✔️ Toe yoga – lift only the big toe, then just the other toes
✔️ Dome foot – create an “arch” by contracting without curling toes
✔️ Walk on tiptoes, then heels – reactivates deep foot muscles
✔️ Plantar fascia stretch – use a roller or ball, against a wall or seated

A simple ritual.

But trust me: it will transform your stability in every pose.


What if I already have flat feet? Or the opposite?

If you have flat feet (low or collapsed arch), you’re at risk of:

  • Tendonitis
  • Plantar fasciitis
  • Knee pain from compensation

In that case, daily barefoot yoga can make things worse — unless you’re actively training strength and proprioception.

If you have a very high arch (cavus foot), you may deal with stiffness and ankle issues.

Here too: yoga can help, but a personalized approach is key.


When the floor becomes your enemy: beware of surface type

Not all floors are created equal.

Doing yoga on hardwood, tile, or concrete covered with a thin mat might seem fine… but for your feet, it’s like sleeping without a pillow — you might manage, but you’ll feel it the next day.

The surface under your mat directly affects how much stress your arch absorbs (or offloads).

A hard floor increases direct strain on the plantar fascia in static poses.

Especially if you’re light on your hands and tend to “root” into the foot in poses like Warrior III, Pyramid, or even basic Mountain Pose.

Helpful tips:

  • If you practice at home, place your mat on thick carpet or double up with a second mat
  • Avoid cold, slippery floors like tile or marble — especially if your mat is worn
  • If you go to a studio, ask if they have cork or rubber flooring, which is way more joint-friendly

Sometimes it’s not the practice that’s the problem.

It’s the surface that’s hostile.


👟 Footwear: pick the right shoes to bounce back (not collapse)

When you’re not on the mat, your feet deserve shoes that actually support them.

Arch-supportive shoes with APMA (American Podiatric Medical Association) certification:

For example, Vionic offers models like Walk Max or Uptown Loafer — designed for plantar fasciitis and tired feet. Great if you’re on your feet a lot (Business Insider).

Podiatrist-approved sandals like Birkenstock, Skechers Arch Fit, or Oofos:

They feature contoured footbeds, cushioning pads, and deep heels — ideal after practice or for slow walks (Real Simple).

Minimalist or barefoot-style shoes, like Xero Shoes or Vivobarefoot:

Allow natural movement but with a protective sole. Perfect if you want to stay close to barefoot without going overboard (xeroshoes.com).

In short, look for shoes with:

  • A contoured arch matching your foot shape
  • Stabilizing heel
  • Cushioned but not overly soft sole

Above all, avoid high heels, stiff flats, or unsupportive shoes — they overload the arch in awkward ways.


🦶 Inserts or orthotics: when to give your arch a little “extra love”

You might not need high-tech insoles, but a little support can work wonders:

Custom orthotics:

Made by podiatrists to correct specific biomechanical flaws (flat feet, overpronation, high arch). Pricey, but highly effective.

Off-the-shelf inserts:

Superfeet, Walk Hero, Powerstep Pinnacle, or Dr. Scholl’s Running Insoles are quick comfort boosters (Good Housekeeping).

Test your arch height (low, medium, high) using the wet footprint test, and pick the right insert.

Slip-on supports (for mat practice or home use):

A bridge solution to reinforce your arch without relying on stiff orthotics all the time (reddit.com).

Adding inserts or support:

  • Reduces tension on the plantar fascia
  • Helps you recover after intense sessions
  • Doesn’t kill other stimulus — it just needs a gradual adjustment period


The role of toes in arch problems: when yoga weakens your grip

It may seem like a small thing, but… your toes are key to arch health.

Sure, many yoga poses strengthen the toes.

But others weaken them — or more precisely, stretch them passively over and over.

And you know what happens when a muscle gets stretched too often without active strength work?

It gets lazy.

It gives up.

In poses like:

  • Downward Dog
  • Lizard Pose
  • Toe Squat

…the toes are often pulled, stretched, and forced into extension.

And if you don’t balance that with toe-grip or active proprioception exercises, they lose tone over time.

Result?

The arch flattens.

Because the toes no longer “hold.”

Try integrating now and then:

  • Barefoot walking on sand or grass
  • Picking up objects with your toes (a pen, a ball)
  • Active point and flex breaks during your day (not just passive stretches)

Toes aren’t decoration.

They’re levers.

If they stop working… the whole arch pays for it.


Yoga yes — but not yoga only: the power of foot cross-training

People often think of yoga as a “complete system.”

But when it comes to foot health, your body needs a mix of stimulus — just like a good training program.

If you only do yoga, you’re working the feet in repetitive, often static ways.

But your arch also needs dynamic challenges, multidirectional pushes, pace shifts.

Even just 1–2 weekly sessions of:

  • Power walking or trail walks on natural ground
  • Functional training with light jumps, lunges, heel-to-toe walks
  • Dynamic balance drills (BOSU, wobble boards)

…can do wonders for arch strength and resilience.

Yoga is amazing.

But even the best recipe gets unbalanced if eaten the same way every single day.

Give your feet the full movement “menu.”

Not just the vegan, zen version.


Conclusion

Yoga teaches you to root.

To feel the earth.

To live in the moment.

But even roots need the right soil to nourish you fully.

No need to quit your practice.

Just tweak it with care.

Feet are the base of every pose.

And if you truly want to “float” in your Vinyasa, they need to be strong, flexible, and not worn out.

Pay attention.

Slow down when needed.

Listen to yourself more than the zen flute in your playlist.

And if there’s a pain that won’t go away, maybe it’s time to replace “Namaste” with “Physiotherapist, please.”

But until then…

Keep practicing.

Barefoot, mindfully.

And with respect for those tiny arches that carry you everywhere, every single day.

Recommended
Categories
YOGA & PILATES

Why does pigeon pose make my knee feel like it’s about to pop?

That first pigeon pose experience… yep, same here

I don’t know about you, but the first time I tried pigeon pose, I thought I was about to open my hips like a spiritually awakened lotus flower.

Instead, after exactly three seconds, I heard a sinister “crack” from my front knee.

And I thought:
“What the hell… am I doing yoga or dislocating myself?”

Spoiler: I was still doing yoga, but my knee didn’t agree.

And if you’ve ever felt that annoying “pop about to happen” sensation in your knee when settling into pigeon, know this: you’re not alone.

And no, it’s not a sign that you’re “stretching deep” in some spiritual way.

It’s a warning bell.

Let’s see what’s really going on.


How to actually do pigeon pose without wrecking your joints

Okay, let’s set aesthetics aside for a moment.

The pigeon that looks good and the pigeon that’s good for your body are not always the same.

If you want the pose to open your hips instead of abusing your knees, here’s how to set it up step by step—no romance included.

Start from downward-facing dog

Slowly bring your right knee forward toward your right wrist.

Your right foot angles toward your left wrist, but don’t force it to be parallel to the mat (that only happens if you’ve got monster-level hip mobility).

Adjust the front shin based on your mobility

The closer your foot is to your groin, the less stress on the knee.

If possible, move it gradually outward over time.

But never yank the ankle like you’re trying to hit the jackpot.

Extend the back leg straight behind you

Don’t let it fall off to the side. The femur should point directly backward, and the toes should be extended with the top of the foot on the floor.

This stabilizes the pelvis.

Check your pelvic alignment

Here’s the fun part: the pelvis tends to collapse to the side (toward the bent leg).

You’ll need to engage your lower abs and gently push the hip of the back leg slightly forward to “square” the hips.

If one side is floating in the air, place support underneath. No, that’s not cheating. That’s how you get a happy hip.

Hands on the floor, or fold forward only if stable

You can stay upright with your arms, resting on hands or elbows.

Only if your hips feel stable should you fold forward and relax.

But relaxation comes after proper setup, not before.

Stay in the pose while breathing, but listen closely

If your breath locks up, if you feel sharp tension, or if you’re checking your knee every three seconds… you’re not in the right pose for you.

Exit calmly and modify.

The correct pigeon isn’t the one that goes deepest, but the one that distributes effort between hip, glute, quad, and torso—without the knee freaking out.

Everything else is just for show.


The knee isn’t the bad guy. It’s the hip being sneaky.

Pigeon pose looks like something made for flexible, chill people who probably sip matcha lattes after class.

But it’s actually one of the trickiest positions for folks with tight hips (hello, leg day crew and 8-hour desk warriors).

The poor knee is just a hinge.

It likes bending and straightening.

But rotating? No thanks.

Pigeon pose demands external hip rotation—
If the hip can’t deliver, the knee ends up twisting in a way it was never meant to.

Like asking a faucet to blend your smoothie.

The result?

Inner tension, insane stretching, that creepy “something’s about to snap” feeling.


Classic mistake: copying Instagram

I’ve been there too: you see that yogi with 20,000 followers resting her shin perfectly parallel to the front of the mat.

“I can do that too,” I said, naively.

But forcing your shin into that position without modern dancer-level hip mobility means jamming your knee into an unnatural angle.

And your knee gets revenge.


How to avoid it?

  • Bend the front leg more: bring the foot closer to your groin
  • Use support under your glute (a folded blanket, yoga block…)
  • Keep the back leg straight, hips forward, not flopping sideways like a flamingo

It’s yoga, not a beach limbo contest.


Pain and pride: a terrible duo

In the gym we think: “No pain, no gain.”

In yoga?
“No brain, big pain.”

Here it’s not about powering through a contraction or muscle burn.

It’s about knowing the difference between healthy stretch and joint stress.

If you feel deep, compressed, or sharp pressure in the knee: STOP.

If you feel a mild pull in the glute or hip: GOOD.

Your body speaks. If you ignore it long enough, it starts yelling.


Mini anatomy lesson: what’s really happening

The knee is stuck between two big structures: the femur and tibia.

But during pigeon, all the pressure gets dumped there if the hip doesn’t rotate enough.

The tissues most at risk are:

  • The medial collateral ligament (which stabilizes the inside of the knee)
  • The medial meniscus
  • The joint capsule

In short: if the hip doesn’t give, the knee pays the price.

And in an ideal world, that would be avoidable—if you just listen.


Who pigeon pose is not for

I know, pigeon is everywhere.

Yoga classes, YouTube videos, motivational reels…
It almost feels like skipping it means missing out on magic.

But the truth is, this pose isn’t for everyone.

And experience level only matters up to a point.

Here’s who should approach with caution—or skip it altogether:

  • Anyone with a history of knee or cartilage injuries (like meniscus tears, ACL, MCL)
  • Anyone with extremely tight hips and no practice in external rotation
  • Anyone with chronic lower back pain
  • Anyone who can’t control core or glute activation
  • Anyone with significant imbalance between body sides

In all these cases, it’s not about giving up yoga—it’s about choosing the right variations.

Pigeon isn’t a personal worth test.

It’s a tool. And like all tools, it only works if it fits you at that moment.

If it doesn’t, there are plenty of alternatives that get the job done—without damage.


Smart alternatives to pigeon pose

Nowhere does it say you must do full pigeon to unlock your hips.

Here are some clever options that spare your knee while still opening up your hips:

  • Reclined pigeon (figure 4): lying down with one leg flexed over the other and back on the mat. Same stretch, zero knee stress.
  • 90-90 position: both front and back legs form 90° angles. More control, great for strengthening hips and glutes.
  • Seated pigeon on blocks: like pigeon, but elevated and with better alignment control.

Better to do a modified version well than an “Instagrammable” one that sends you to physical therapy.


And what if your knee just cracks but doesn’t hurt?

Let’s talk.

A light “click” or “snap” can be normal—especially if you have tension in the IT band or if your femur shifts slightly in the hip socket.

But…

  • If the sound comes with pain: stop.
  • If you feel instability or like something’s “slipping”: stop immediately.
  • If you have swelling or stiffness afterward: take note, modify, reassess.

Better to prevent than to ice your knee after every class.


Important note about warming up

Doing pigeon cold is like trying to bend a frozen straw—it won’t end well.

So:

  • Walk a bit first, mobilize your hips, do some dynamic lunges
  • Activate the glutes with controlled movements
  • Only then approach pigeon or a variation

Your body needs to feel ready.

Otherwise, it goes into defense mode.

And you end up battling your own fascia.


Smart strategies to protect your knees—even if you only practice 10 minutes a day

Knee protection isn’t just about adjusting a pose here and there.

It means prepping the ground, building stability, and understanding how muscle chains actually move through that poor joint wedged between hip and ankle.

Good news: you don’t need a gym or hours in front of a mirror.

Just a few well-done minutes.

Here’s what you can do to build a real foundation of protection—no Olympic skills needed:

  • Strengthen your glutes laterally
    The more your glute medius and minimus work, the less your knee has to deal with twisting forces.
    Think clam shells, banded abductions, lateral steps.
  • Do active hip mobility work
    Passive stretching helps to a point.
    But you also need to teach the hip to move with control in external and internal rotation.
    Try active 90/90s, bodyweight hip rotations, and brief isometrics.
  • Pre-activate before practice
    Don’t go in cold.
    Try a quick 2–3 minute circuit with:

    • Deep bodyweight squats
    • Leg swings
    • Hip bridges
  • Always track knee direction in every pose
    In yoga, we often “drop” into passive poses.
    But light muscle activation around the knee (without stiffness) makes a difference.
  • Avoid overly hard surfaces
    If your mat is thin or the floor is rigid, add a layer (extra mat, folded towel).
    Knees don’t like hard pressure under static load.


The ankle’s role: the detail no one talks about

You know which joint gets forgotten in pigeon?

The ankle.

If the front knee’s ankle is too relaxed or twisted oddly, the rotation isn’t absorbed by the foot or calf—and all the force shoots straight into the knee.

A floppy foot becomes an unstable lever that drives the joint above crazy.

Solution?

  • Keep the foot active
  • Press the outer edge lightly into the mat
  • Think of the foot as a mini hydraulic brake that protects your leg

An awake foot = a happy knee.


What it means if it only hurts on one side

Classic scenario: left side flows like butter, right side feels like someone’s yanking a ligament with a fish hook.

No, you’re not permanently crooked.

But there is a message.

Usually, one-sided pain in this pose reveals:

  • Limited hip rotation on one side
  • A lazy glute on one side (yep, it happens)
  • An old tension or micro-injury that hasn’t fully healed

Instead of forcing to match both sides, work patiently on the stiff side with breathing, focused attention, and maybe some isolated hip rotation drills.

Sometimes symmetry shows up… but not by magic.


What to do after pigeon to avoid tightness or soreness

You’ve done pigeon, you’ve gotten up… now what?

Rolling off the mat and heading into final rest isn’t enough.

Smart recovery after such an intense pose helps your body lock in the benefits and avoid stiffening right back up.

Try these smart moves right after:

  • A few bent-knee leg curls lying on your stomach, to get circulation back to the joint
  • A slow-paced walk, even just around the room, to release leftover tension
  • A soft dynamic stretch like floor cat-cow, to relax the lower back

This pigeon reset is like brushing your teeth after eating—optional, but you’ll feel way better.


When it’s time to see a professional (and it’s not just paranoia)

Yes, listening to your body and trying things out with care, blankets, and common sense is great.

But sometimes “discomfort” goes beyond normal stretch tension and becomes something you shouldn’t face in pajamas and hope.

Here are signs you shouldn’t ignore:

  • Knee pain that shows up during daily life—like climbing stairs or getting out of the car
  • Feeling of instability or collapse, like your leg can’t hold weight
  • Persistent or localized swelling inside the knee, even hours after practice
  • Mechanical noises paired with pain, like a “snap” followed by burning or stiffness
  • Joint locking sensation, like you can’t fully bend or straighten your knee

In those cases, a visit with a sports physical therapist, orthopedist, or physiatrist can make the difference between manageable inflammation… and a chronic injury.


Conclusion

Pigeon pose isn’t the enemy.

It’s just an advanced position that requires respect, awareness, and adjustments.

It’s not a contest of who can flatten themselves on the mat the most.

It’s a process to open hips, release tension, and move more freely.

If your knee sends you warning signals, don’t silence them with willpower.

Respond with awareness.

Modify.

Breathe.

Listen.

And remember: when in doubt, there’s always another road to the same benefit—without sacrificing your joint health.

Your body is your lifelong teammate, not a problem to crush through.

Recommended
Categories
YOGA & PILATES

Can too much yoga make your core weaker instead of stronger?

Sure, it almost sounds like blasphemy.

Yoga is synonymous with balance, awareness, stretching, inner peace…

And then comes this question that sounds like it came straight from a skeptical bodybuilder forum:
“But what if doing too much yoga actually weakens my core instead of strengthening it?”

Well, get ready.

Because the answer is neither yes nor no.

It’s: it depends on what you do, how you do it, and what else you’re forgetting to do.

blank

Yoga: friend or core saboteur?

Imagine doing yoga every single day.

You feel as flexible as a rubber band, breathe like a zen monk, and your body glides from one pose to another like you were born on the mat.

But then…

You try some ab wheel rollouts, or attempt to hold an L-sit on parallettes…

And BAM.

Your core deflates like a popped balloon.

You can’t hold the position.

Your sides are shaking.

Your lower back starts complaining.

And you wonder:
“How is this even possible? I do yoga every damn day!”

Here’s where the uncomfortable truth hits.

Stretching is not the same as training. Not always.

Most yoga poses have a specific purpose: creating space, length, release.

All wonderful concepts—if you’re trying to release built-up tension, improve posture, or stop walking around like a stiff broomstick.

But…

Stretching your abdominal muscles doesn’t mean strengthening them.

Try thinking of your core as a spring.

If you always pull it and never compress it, eventually it won’t snap back.

And that’s when your core loses its main purpose: to contain, stabilize, protect.

The real role of the core: way more than a six-pack

Your core isn’t just the summer abs you dream about.

It’s a cylinder connecting your upper and lower body.

It includes:

  • Deep abdominals (like the transverse abdominis)
  • Internal and external obliques
  • Paraspinals
  • Diaphragm
  • Pelvic floor

Its main task?

Stabilizing your spine while you move.

Not just in Warrior II.

But also when you lift a heavy bag.

When you sprint to catch the train.

When you jump or twist your torso quickly.

If your core is too “relaxed”, your body can’t react efficiently.

And that brings:

  • Chronic back pain
  • Hip injuries
  • Pelvic instability
  • Poor gym performance

Heads-up: some yoga habits can worsen postural patterns

Here’s another detail nobody talks about:

Some yoga teachers—overzealously—push for excessive posterior pelvic tilt (“tuck your tailbone!”, “flatten your back!”).

Over time, this can create imbalances in your postural muscles.

The pelvis gets locked in a position that shuts down the glutes, overloads the hip flexors, and makes your abs… lazy.

Literally.

Ever felt that instability in your lower back when trying a bridge or a jump?

It often starts there.

So is all yoga bad? Absolutely not. It depends on what kind you do.

Some styles, like power yoga, ashtanga, or even dynamic vinyasa, can really challenge your core.

Poses like:

Crow Pose (Bakasana)
Not just an Instagram “trick”.

It’s a position of strength and control.

  • ✔️ Hands firmly on the ground, fingers spread like claws
  • ✔️ Knees resting on your triceps, not directly on your elbows (or you’ll flip)
  • ✔️ Weight shifted forward, gaze ahead—not down
  • ✔️ Core active like an isometric crunch

💥 If your abs are working, you’re on the right track.
If you only feel your wrists… time to fix your form.

Hand Plank
Looks basic, but it’s not.

  • ✔️ Hands under shoulders, fingers grounded
  • ✔️ Glutes tight, core constantly engaged
  • ✔️ Back flat like a table—not saggy, not arched
  • ✔️ Push the ground away, activate the chest

🧠 Think of “pulling your pubic bone toward your ribs”—this truly activates the transverse.

Side Plank (Vasisthasana)
A lateral stability classic.

  • ✔️ Support yourself on one arm (wrist under shoulder)
  • ✔️ Legs straight, feet stacked (or front foot forward for more stability)
  • ✔️ Lift your hips until your body is aligned—don’t sag!
  • ✔️ Free arm raised or resting on your side

🔥 Want a real challenge? Lift the top leg too. Your abs and glutes will go wild.

Boat Pose (Navasana)
Looks easy—holding it well is brutal.

  • ✔️ Sit on your sit bones, legs lifted (bent or straight), torso leaning back
  • ✔️ Back straight, not rounded
  • ✔️ Arms extended forward, parallel to the floor
  • ✔️ Abs pulled in like you’re “sucking in” your belly button

❌ If you’re shaking like jelly and collapsing forward, you’re probably letting the hip flexors do all the work.
✅ Try to bring tension into your lower abs.

But here’s the thing: progressive overload is often missing

You don’t increase the load.

You don’t add mechanical tension.

You don’t go beyond your muscle limits.

So eventually, your body stops adapting.

A bit of science to clear things up

A 2016 study in the Journal of Strength and Conditioning Research compared the effectiveness of isometric exercises (like planks) and dynamic ones (like crunches, rollouts, and leg raises).

The result?

Dynamic exercises—creating movement and requiring control under load—produced better gains in strength and muscle activation.

Planks are great as a foundation.

But to build a truly strong and resilient core, you need more.

How to combine yoga and strength for a balanced core

Here’s where things get practical.

If you love yoga, you don’t need to quit.

But you do need to balance it with targeted core training.

For example:

👉 After a yoga session, spend 10–15 minutes doing exercises like:

  • Hanging leg raises
    Hang from a bar, lift straight legs to chest height (or higher).
    Slow, controlled movement.
    Avoid swinging.
    Focus on lower abs.
  • Cable chops
    Standing, hold a cable machine handle at shoulder height.
    Pull diagonally toward the opposite hip, rotating slightly.
    Your core works to resist rotation.
  • Ab wheel rollouts
    From your knees, slowly roll the wheel forward, keeping your body aligned.
    Push hard with your core to return.
    Back stays flat—no “banana shape”.
  • Farmer’s carry
    Grab two heavy dumbbells and walk briskly, keeping your core tight and torso upright.
    Zero wobbling.
    Your core stabilizes every step.

👉 Or, alternate yoga days with dynamic core training (weighted or calisthenic progressions).

This balance helps you achieve:
✅ Stability and flexibility
✅ Inner strength and good posture
✅ Visible, protected abs

Bonus section: how to tell if your core is too weak because of yoga (or something else)

Got any warning signs? Here are a few:

  • Back pain when standing for too long
  • Trouble stabilizing the pelvis during fast movements
  • Can’t do 10 good-form hanging leg raises
  • Don’t feel your abs during squats or deadlifts
  • Collapse in plank or side plank positions

If you relate to at least two of these, it’s time to dial in your core training.

Another helpful tip: breathing is part of your core

Many yoga practitioners breathe too softly.

Great for the mind.

Not always great for core activation.

Train with intra-abdominal breathing too:

  • Inhale and push the air downward
  • Activate the transverse abdominis
  • Learn to “pressurize” your core (like powerlifters do)

This type of breathing helps you:

  • Better stabilize your spine
  • Increase strength during exercises
  • Avoid pain and compensation

The benefits of yoga your core can’t ignore

Before sounding like the Grinch of yoga, let’s get something straight:

Yoga is good for you.

And your core—when it gets the right type of stimulus—loves it.

  • ✔️ Improves motor control: helps you feel every part of your trunk, even deep muscles you’d normally ignore
  • ✔️ Boosts posture awareness: after 45 minutes in balance-challenging poses, you quickly notice if your hips are off or your chest is caving in
  • ✔️ Supports active recovery: on days when you can’t or don’t want to train hard, yoga keeps your core “awake” without stressing it
  • ✔️ Enhances functional breathing: your diaphragm (a core muscle) works overtime during flowing sequences
  • ✔️ Reduces tightness in anterior and posterior chains: a locked-up core isn’t a strong one. Yoga helps unlock it

So no, it’s never the enemy.

It just needs to be framed correctly.

The issue only arises when it’s the only tool in your toolbox.

Doing yoga every day: yes or no? (Spoiler: it depends on how you do it)

It’s one of the most asked questions by people who fall in love with the mat:
“Can I do yoga every day?”

Honest answer: yes… but with a few precautions.

PROS:

  • You build consistency—which is gold for discipline
  • You maintain flexibility and mobility every single day
  • It’s a natural stress reliever and improves sleep
  • Makes your body more “livable”, especially if you sit all day

CONS (if poorly managed):

  • Risk of overdoing passive stretching (especially in abs and hip flexors)
  • You might accumulate strain in your wrists, shoulders, or lower back
  • Your body doesn’t get time to absorb the stimulus if every session is intense
  • You could fall into a repetitive-use pattern where your core adapts only to a few movements

👉 Solution?
Alternate dynamic yoga days with restorative or yin sessions.

And every now and then, skip yoga to lift something heavy or sprint bodyweight-style.

Your core needs to breathe, yes… but also to react.

Conclusion:

Yoga is a powerful art.

But like all arts, it must be practiced with awareness.

If you do it every day but never add progressive load, your core might become flexible… but also a bit floppy.

The secret is balance:
💥 Use yoga to improve your mobility and body control.
💪 Add focused core training to build stability, strength, and real endurance.
🔥 Breathe with awareness—but also with intent.

And above all, remember:

Your core isn’t just about looks.

It’s the center from which every effective movement begins.

Keep it awake.

Train it with variety.

And don’t let being “too zen” drain your power.

Yoga can be a superpower…

But even Superman deadlifts now and then. 💣

Namaste… and then abs on fire.

Recommended
Categories
YOGA & PILATES

Does doing yoga after leg day mess up muscle recovery or help it?

Let’s put it this way. You just finished leg day.

Your legs are wrecked.

Your quads feel like they’re going to explode, your hamstrings are screaming bloody revenge, and your glutes… don’t even register anymore.

You’re walking like someone swapped your knees for two rusty pipes.

Then someone (probably wearing a suspiciously serene yoga smile) suggests:
“Why not try a little yoga? It’ll help your recovery.”

Wait, what?!

Stretching? After squatting like you were lifting a burning car off a kitten?

I know what you’re thinking.
“You’re asking me to torture myself again—only this time with incense?”

Still, it’s a question worth exploring:

Does doing yoga after leg day actually help muscle recovery, or could it slow it down?

Let’s break it down.


How many types of yoga are there? And which ones are good after leg day?

If you’re new to the yoga world, just know—it’s not one-size-fits-all.

There’s no such thing as the yoga, like there’s only one universal class.

It’s kind of like saying “I play sports.” Cool. But what kind? Rugby or lawn bowling?

Here’s a quick cheat sheet of the most common types of yoga, so you know what to pick post-leg day (and what to avoid like the plague):

🟢 Yin Yoga
Perfect after a workout.
Slow movements, long-held poses, all on the floor.
Helps deeply relax the muscles and open up your joints.
Zero effort, max release. If you’ve got DOMS, this is your best friend.

🟢 Restorative Yoga
Even more relaxing than yin.
You lie down, get cozy, use pillows, and just breathe.
It’s like a meditation session with physical side effects.
Ideal if you’re wiped out and just want to help your body recover.

🟡 Hatha Yoga
Basic, slow, and accessible. Can be great—but depends on the instructor.
Some make it gentle, others turn it into a sneaky sweat-fest.
Ask what the class is like. If it’s chill, you’re good.

🟡 Vinyasa Yoga
Dynamic flow, smooth movements synced with breath.
Great for mobilizing, but not ideal right after a heavy leg day if you’re sore.
If you’re feeling fresh and just want to loosen up, it works.

🔴 Power Yoga / Hot Yoga
No. No. And still no.
Fast-paced, intense, physically demanding.
It’ll finish what leg day started—and not in a good way.
Skip it for at least 48 hours.

🟡 Ashtanga Yoga
Fixed series, fast pace, lots of strength and mobility focus.
Very technical and demanding.
Not meant for recovery—it’s a full workout.
Skip it if your legs are toast.

In short?
If your body needs recovery: 🎯 Yin or Restorative all the way.

If you’re feeling a bit better: 🤝 Light Hatha or soft Vinyasa—but take it easy.

If you’re tempted by hot or power yoga: 🚫 Stop. Hydrate. Reconsider.


The myth: “Stretching kills your gains”

I swear, I hear this in the gym at least once a month.

“If you stretch too much after training, you lose your gains. The muscle relaxes, deflates, and boom—bye-bye growth.”

It’s like a fitness horror story: The Cursed Stretch of the Regretful Calisthenics Bro.

But reality is way less dramatic.

That idea came from a few (kinda old) studies showing that static stretching before lifting could temporarily reduce explosive strength.

But we’re not talking about yoga before squats.
We’re talking about after. Or even the next day.

And that changes everything.


What actually happens to your muscles after a real leg day

When you squat, lunge, Romanian deadlift or leg press, you’re creating micro-tears in your muscles.

And that’s exactly how growth happens.

Your body detects the “damage” and kicks off a repair process:

  • Controlled acute inflammation
  • Flood of nutrients and growth factors
  • Protein synthesis to rebuild stronger than before

But along with all that… comes pain.

  • DOMS (Delayed Onset Muscle Soreness)
  • Stiffness that makes you feel like a zombie
  • The infamous “I can’t sit down without cursing the universe”

And that’s exactly where yoga comes in.


The real benefits of yoga after leg day (not just “you’ll feel better”)

Let’s make a key distinction.

Doing yoga right after your last squat set—when you’re still shaking, drenched, and your heart’s racing—is not ideal.

A tough yoga session within 30 minutes of lifting could actually mess with the acute inflammation process that kicks off recovery.

And while that might sound weird, that inflammation is crucial—it’s the first stage of muscle adaptation and growth.

But if you do yoga a few hours later, or even better, the next morning, after your body has already started repairing…

That’s when things change.

You enter what we could call the magic zone of active recovery.

That window where yoga no longer interferes—
but actually supports the process.

Here’s what really happens when you do yoga at that sweet recovery moment:

Promotes active recovery without overload
Gentle yoga gets you moving without stressing already damaged muscle fibers.
Result? Faster recovery without interrupting the good inflammation.

Boosts peripheral circulation
Gentle poses, fluid motion, and deep breathing help blood flow to sore muscles.
More blood = more oxygen + nutrients = faster repair.

Improves lymphatic drainage
The lymph system doesn’t move itself—it needs motion and breath.
Yoga gets it going, flushing out waste, extra fluid, and local inflammation.
It’s why you feel “less puffy” after a slow session.

Reduces joint stiffness
After squats, lunges, press, or pistols, your hips and knees feel like rusty hinges.
Yoga gently reopens those joints.
Flexibility returns—and with it, your freedom of movement.

Helps fix imbalances and compensation patterns
We tend to overload one side, or let the quads do all the work while hamstrings nap.
Yoga helps you feel those imbalances and start correcting them.
Less compensation = fewer long-term injuries.

Regulates your nervous system (and lowers cortisol)
Leg day leaves your nervous system hyped up.
Yoga activates the parasympathetic side (rest and repair mode), lowers cortisol, and gets your body into true regeneration.
Translation: better sleep, faster recovery, deeper healing.

Makes DOMS more manageable
It won’t erase the pain—it’s not magic—but it makes it less paralyzing.
Those small, mindful movements loosen the tissue without harsh stretching.
You move better and feel less “concrete quad syndrome.”

Improves body awareness
You don’t just feel “where it hurts”—you start noticing how you move.
Yoga forces you to pay attention to your feet, pelvis, tension areas.
All of which carry over into better future workouts.

Gives you back mental control over pain and fatigue
When you’re sore, your brain can feel just as locked up.
Slow breathing, calm rhythm, and grounded movement reset your mood.
And that alone helps you recover faster.


So what kind of yoga are we talking about here?

Let’s be clear.

Doing yoga doesn’t mean sweating through a 90-minute power vinyasa session with handstands and Mortal Kombat-level instructors.

Not the time.

After leg day, you want gentle, slow, mindful yoga.

Like:

  • Yin yoga: long-held, supported poses that melt deep tension
  • Restorative yoga: blankets, cushions, long breaths (if you fall asleep, that’s fine)
  • Breath-focused flow: soft movements guided by breath—zero pushing

The goal is not to “train again.”

It’s to “create space” in your body and your mind.

It’s like saying:
“Alright muscles, you worked hard. Now I’m giving you permission to let go.”


But what if I’m already destroyed from the soreness? Should I skip it?

I get it.

When leg pain is at “hold the railing to go downstairs” level, even sitting cross-legged sounds like a nightmare.

But here’s the truth:

Gentle yoga can be the key when you’re at your most sore.

Not to stretch everything hard, but just to get moving again.

Even 10 minutes on the mat:

  • Deep breathing
  • Supine twist with bent knees
  • Happy baby (if your hamstrings don’t revolt)
  • Some pelvic tilts or hip rolls on the floor

It’s incredible how sometimes the body softens up within minutes.

It’s not just the muscles—it’s your brain saying,
“Hey, we’re safe. You can relax now.”


What does the science say? Are there studies?

Oh yes.

A 2018 study published in the Journal of Strength and Conditioning Research showed that active recovery (like light yoga or low-intensity cycling) was more effective than total rest at reducing DOMS and improving post-workout mobility.

Other studies confirm that light movement increases local blood flow, delivering more oxygen and nutrients to healing tissue.

And less stiffness = faster return to peak performance.

So no, it’s not just some zen placebo.
It’s applied physiology.


My mistake (maybe you’ve made it too)

I’ll be honest.

For years I avoided yoga like someone avoids dinner invites from crypto bros.

“Yoga’s for people who stretch in Instagram reels.”
“Real lifters don’t bend.”

Meanwhile, every leg day wrecked me for three straight days.
Stiff. Sore. Miserable.

Then one night, I tried a yin yoga class—right after a PR squat session.

I thought I’d snap in half.
But instead… I felt released.

It was brutal at first, yeah.
But by the end, I felt grounded, soft, aligned.

The next day? No miracles, but I could sit without cursing.

Since then, yoga after leg day became a ritual.
Not always—but when I do it, I thank myself every time.


When to skip it: signs your body is saying “not today”

Okay yes, yoga can be a secret weapon…

But not always.

Some days, even attempting a Downward Dog can do more harm than good.

Watch for these signs:

  • Sharp, localized pain—not the usual general soreness
  • Extreme joint stiffness that makes you fear injury with basic movement
  • Mental exhaustion so deep that even rolling out the mat drains you

In those cases, go for a walk, take a hot shower, or use a gentle foam roller.

Yoga isn’t supposed to be a new test to pass.
It’s there to support you—not to break you again.


What happens if you do yoga consistently after every leg day

Let’s fast forward a bit.

Imagine doing 15–20 minutes of gentle yoga after every leg day for two to three months.

What really changes?

Here’s what I’ve experienced firsthand:

  • You recover faster, and can train legs more often without limping for a week
  • Your squat mobility improves—especially hips and ankles
  • Muscle imbalances start to smooth out, reducing knee and lower back issues
  • You fear “the day after” less, so you lift with less tension and more confidence
  • And surprise: your neuromuscular control improves too

You know that feeling of “being able to activate the right muscles better during training”?

That often comes from a body that’s more open, more mobile, and more in tune with itself.

And yoga does exactly that.


Yoga poses specifically helpful for people who train

If you’re one of those who just wants “what works,” here’s a practical mini-menu of yoga poses that are perfect after leg day.

You just need a mat, a block (or a thick book), and maybe a throw pillow.
No incense. No chanting. Just positions that get the job done.

🧘‍♂️ Supta Baddha Konasana (Reclining Butterfly Pose)
What it does: Opens inner thighs and hips without effort
How to do it:

  • Lie on your back, knees bent
  • Bring the soles of your feet together, let knees fall open
  • Use pillows or blocks under each knee if there’s too much tension
  • Arms at your sides or one hand on your chest, one on your belly
    Pro tip: Close your eyes, breathe through your nose, and let your thighs relax naturally

🧘‍♀️ Anjaneyasana (Low Lunge)
What it does: Opens hip flexors and psoas, often tight from squats and deadlifts
How to do it:

  • Start kneeling
  • Step one foot forward into a lunge, front knee above the ankle
  • Back knee rests on the floor, top of foot down
  • Keep your torso upright—don’t shove your hips too far forward
  • Arms can go overhead or stay on hips
    Pro tip: Pad the back knee with a folded towel if it’s uncomfortable

🧍‍♂️ Uttanasana (Standing Forward Fold)
What it does: Stretches the entire posterior chain—hamstrings, calves, and back
How to do it:

  • Stand with feet hip-width apart
  • Exhale and fold forward from the hips
  • Slightly bend the knees if needed
  • Let your arms hang, or grab opposite elbows to release your neck
    Pro tip: You don’t need to touch the floor—just focus on relaxing, not forcing

🧘‍♂️ Supine Figure 4 Stretch (on your back)
What it does: Targets glutes, piriformis, and tight hips
How to do it:

  • Lie on your back, knees bent
  • Cross your right ankle over your left thigh (like a “4”)
  • Reach behind your left thigh and gently pull it toward you
  • Relax your shoulders, keep your head down
    Pro tip: If your neck tightens, place a small cushion under your head. Don’t press on your knee—let gravity do the work.

🧘‍♀️ Viparita Karani (Legs Up the Wall)
What it does: Boosts drainage, relaxes swollen calves and feet, soothes the nervous system
How to do it:

  • Sit next to a wall
  • Swing your legs up so they rest vertically
  • Hips close to but not jammed against the wall
  • Arms open, palms up, eyes closed
    Pro tip: Place a folded blanket under your hips to elevate them slightly and increase circulation

How to use them:
Pick 3 or 4 based on how you feel.
Hold each pose for at least 3–5 slow breaths—ideally 1–2 minutes.

The secret is: never force anything.

If you feel like yawning, or your heart rate slows… you’re doing it right.

You don’t need to “do yoga well.”
You just need to do it enough for your body to say: “Thanks.” 💪🧘‍♂️


And what if your leg training is calisthenics-based? Same deal?

Great question.

If you’re doing pistol squats, shrimp squats, isometrics, box jumps, or bodyweight deadlift progressions…
your leg day isn’t any “easier.”

In fact, you’re often working with intense eccentric overload—
the kind of tension that produces brutal DOMS.

Add full range of motion and instability into the mix…
and you’ve got the perfect storm for next-day soreness.

In these cases, yoga is even more strategic.

It helps decompress overworked joints (especially hips, knees, and ankles),
and resets your postural control.

This isn’t about “weights vs. bodyweight.”
It’s about this:
If you train your legs hard, yoga afterward still helps.


Conclusion: yes or no to yoga after leg day?

Quick answer: Yes, but do it right.

If you go slow and soft, a few hours after training or the next day:
✅ It supports recovery
✅ Reduces stiffness
✅ Reactivates without overloading
✅ Calms your nervous system
✅ Boosts long-term mobility

If you jump into a hot, intense class straight off the leg press:
❌ You might disrupt the initial inflammatory phase (which you need to grow)
❌ You might over-stress already damaged muscles

Choose the right kind of yoga at the right time—
and it becomes your best ally on the road to stronger legs and faster recovery. 💥🧘‍♀️

Recommended
Categories
YOGA & PILATES

Can Pilates actually fix uneven abs or is that just a myth?

Ever Looked in the Mirror and Thought, “Wait… Why Are My Abs Crooked?”

You know that moment when you look in the mirror after months (or even years) of crunches, planks, and cardio, and suddenly something looks… off?

Literally.

Your six-pack looks like it came from a half-finished jigsaw puzzle.

One side’s more defined, the other kind of lazy.

One row is straight, the other tilted.

And that’s when the post-workout existential crisis hits:
“Can I fix uneven abs?”
And maybe even…
“Can Pilates actually help me make them symmetrical?”

Spoiler: the answer is “kinda.”

But we’ll get there—step by step, with plenty of useful info.


What Are “Uneven Abs” Really?

Let’s start with a key truth.

Most people naturally have asymmetrical abs.

It’s not your fault.
It’s not your routine’s fault.
It’s not your diet’s fault.

Blame—or thank—your genetics.

The six-pack muscle, aka the rectus abdominis, has little “tendon strips” running through it that give it that brick-wall look.

But the number, placement, and tilt of those segments… varies wildly from person to person.

That’s why:

  • Some people have six perfectly aligned blocks
  • Others have eight
  • Some only have four
  • And many… have misaligned ones, with one side higher, lower, or puffier than the other

It’s not a disease.
It’s not a flaw.
It’s completely normal.

But sometimes, the asymmetry isn’t just visual.

It can be caused—or worsened—by:

  • Muscle imbalance between the right and left side
  • Postural dominance (like always leaning on one hip)
  • Uneven training (always rotating in one direction, or unilateral moves)
  • Old injuries, even in the back or hips
  • Weakness in the deep abdominal muscles

And in those cases… Pilates can make a real difference.


Why Choose Pilates and Not Regular Ab Workouts?

Unlike typical gym crunches, Pilates isn’t about “burning” your abs.

Its goal is to reactivate and rebalance your entire core—especially the muscles you never feel during sit-ups.

We’re talking about:

  • Transverse abdominis (your natural corset)
  • Internal and external obliques
  • Multifidus and deep spinal stabilizers
  • Diaphragm and pelvic floor (yep, they matter too)

What Pilates does—better than most methods—is restore the connection between your brain and your deep core muscles.

When your body “prefers” one side, Pilates notices.

It slows you down.
Forces you to control every move.
Makes you move slowly, precisely, often without weights… but with insane neuromuscular intensity.

It’s like stylish physical therapy for your core.


What Happens When You Train Both Sides Equally?

It sounds obvious, but… a lot of us don’t even realize we have a dominant side.

And that side ends up doing almost all the work in daily movements:

  • Climbing stairs
  • Carrying your gym bag
  • Getting off the couch
  • Holding your phone on the same side every time

Over time, this creates a slight twist or tilt in your posture.

The result?

One side of your abs gets stronger, more toned, more active.

The other side… adapts by falling behind.

With asymmetrical and targeted exercises (like side kicks, mermaid stretches, and controlled twists), Pilates wakes up the sleepy side.

That awakening can lead to:

  • More visual balance
  • More symmetrical movement patterns
  • Less tension in the lower back
  • Better core activation during squats and pull-ups

It’s not magic.

It’s neuromuscular consistency.

And Pilates is the master of that.


What Pilates Can’t Do—Even If You Do It Daily

Let’s be clear:

If your abdominal asymmetry is due to genetic structural factors, Pilates won’t change it.

It won’t move your tendons.
It won’t reshape your rib cage.
And it definitely won’t burn localized belly fat (no exercise can).

So if your only goal is a perfectly sculpted visual result, you might be disappointed.

But if you want to:

  • Prevent injuries
  • Move better during workouts
  • Eliminate chronic back tension
  • Strengthen your entire core—not just the “six-pack”

Then Pilates is one of the smartest, most effective tools you can add to your routine.


Specific Pilates Exercises That Actually Help With Asymmetry

Here’s a mini list of moves you can start doing right away:

  • Pelvic Curl – helps coordinate both sides of the posterior chain
  • Single Leg Stretch – reveals differences between dominant and non-dominant sides
  • Side Kick Series – targets glutes, obliques, and core unilaterally
  • Spine Twist – improves rotational control
  • Mermaid – opens up the sides and retrains lateral posture

The key?

Don’t rush.
Don’t force symmetry.

Observe your body.
Wake up the lazy side.
And repeat until the sense of balance comes naturally.


How to Know If the Asymmetry Is Just Visual or Actually Functional

Not all “asymmetries” are a problem.

To tell the difference between a simple visual quirk and a real functional imbalance, look out for:

  • One side working much harder during exercises
  • Unintentional tilting or rotating during planks, squats, or twists
  • Recurring pain on one side (like in your lower back or flank)
  • Noticeable imbalance in posture while standing or walking

In these cases, it’s worth training intentionally to restore neuromuscular balance.

But if it’s just a visual difference that doesn’t affect your movement… it’s probably just genetics, and doesn’t need to be “fixed”—just accepted.


Pilates vs. Other Methods for Core Balance: What’s the Difference?

People often wonder whether Pilates is worth choosing over other methods.

Here’s a quick comparison:

  • Pilates: targets motor control, breathing, deep core activation, and small-movement symmetry
  • Yoga: improves flexibility and stability but focuses less on core control during dynamic moves
  • Functional training: great for full-core strengthening, but may reinforce imbalances if done without awareness
  • Physical therapy: fantastic for injury recovery, but less ideal if you’re just looking to improve general symmetry while healthy

The true strength of Pilates is in its precision and attention to detail—things that other methods often skip.


How Long Does It Take to See Results?

Popular question.
Honest answer: it depends.

If your asymmetry is caused by poor muscle activation or an unbalanced posture, you might start to feel a difference after just 3–4 weeks of consistent practice (2–3 times per week).

Not necessarily in the visible shape of your abs… but in how balanced your movements feel.

Visible changes may take longer—or not happen at all—if the cause is genetic.

But the real win is feeling both sides of your body finally working together.


What to Avoid If You Have Asymmetrical Abs (So You Don’t Make It Worse)

Some habits in the gym or at home can actually deepen your imbalance:

  • Always twisting to the same side (e.g., Russian twists only toward your dominant side)
  • Using unilateral weights without paying attention to posture (e.g., kettlebells or dumbbells without control)
  • Only doing front-facing six-pack exercises and skipping obliques and transverse abdominis
  • Training abs with fast, sloppy movements
  • Ignoring hip and spine mobility

Sometimes the muscle isn’t actually asymmetrical—it’s just how you’re using it that is.

Fixing these habits is the first step toward more harmony.


Conclusion

Pilates won’t give you a Greek-statue six-pack if your anatomy doesn’t allow for it.

But it will help you understand how you’re using your body.

And more importantly—it’ll teach you how to use it better.

You’ll feel more centered.
More stable.
Stronger—even if you don’t look like a fitness magazine cover.

Stop chasing perfect lines.

Focus on functionality, freedom of movement, and energy.

And somewhere along that path, you might just look in the mirror one day and say:

“Hey… I’m not actually that crooked.”

And it’ll be your core—not just your abs—talking back.

Recommended
Categories
Advanced Workouts BODYWEIGHT EXERCISES YOGA & PILATES

Why Do My Wrists Hurt in Downward Dog but Feel Fine During Push-Ups?


There’s a mystery that has haunted yogis and gym-goers for generations.

A question that seems simple, yet causes deep discomfort during practice:

Why do my wrists hurt in downward dog, but not during push-ups?

I admit it — I felt dumb about it too, the first few times.

I do pike push-ups, planche leans, close-grip push-ups… no problem at all.

Then I get into what they call an “active resting” yoga pose… and my wrists feel like they’re baking in the oven.

How to actually do Downward Dog properly (without wrecking your wrists)

The correct form isn’t an Instagram-perfect photo, but a functional alignment that spreads the load evenly.

Here’s what really matters:

  • Hands slightly wider than shoulder-width, fingers spread wide, weight distributed across the whole hand (especially thumb and index)
  • Legs engaged, even if the knees stay bent: the goal isn’t to touch your heels to the floor, but to push your hips up and back
  • Arms extended but not locked: keep a micro-bend in your elbows and push away from the ground to engage your shoulders
  • Neck relaxed, in line with your spine, without tucking or craning forward
  • Core slightly engaged, to avoid dumping all the load into the lower back

Think of it like forming an “elastic inverted V,” not a rigid one — and focus more on lengthening your spine than dropping your heels.

Done this way, downward dog stops being your enemy…
…and starts feeling like a truly restorative position.

It’s all about levers and angles (and load distribution too)

During push-ups, the position is clear:

  • Wrists under the shoulders
  • Arms vertical
  • Load shared between hands, shoulders, core, and legs

The wrist angle is around 90 degrees, but the whole body helps keep alignment.

Plus, you’re moving.
You lower and lift, use your chest, triceps, and front delts.

The wrists are working, sure — but they’re not alone in the fight.

Now… change the scene.

Downward dog.

Suddenly the arms are no longer vertical, but angled forward.

Your hips are pushed up, weight shifts toward your hands, and the wrist angle goes past 90 degrees.

The leverage shifts.

And gravity hits differently.

The load focuses on hyperextended wrists, without the dynamic support you get during push-ups.

The paradox of the static pose: you seem still, but you’re fighting

Push-ups involve motion.

You’ve got a cycle of contraction and release.

But in downward dog, you’re just… there.

Breathing.

Stretching.

Meanwhile, the wrist is pinned into an awkward, extended position, under sustained load.

It’s like holding a 20-pound dumbbell with your arm straight for 30 seconds: no movement needed to feel strain or pain.

Here’s where the sneaky part comes in: passive joint compression.

Wrist flexion under load, held too long without active muscular support, stresses tendons and ligaments — especially the flexor retinaculum and the carpal tunnel.

The role of the fingers: when you stop “gripping” the ground

Another mistake I made for years:

In push-ups, you subconsciously press your fingers into the floor.

You create active tension and micro-grip.

In downward dog, though, they teach you to “spread” your hands flat.

Palm fully open.

Fingers stretched.

But that way, you lose one of the wrist’s main protective mechanisms: active hand muscle contraction.

Without that micro-grip, all the load dumps straight into the joint.

And if you’re hypermobile, or have looser ligaments than average, the pain gets even worse.

Hyperextended elbows: another hidden culprit

When you relax into the pose and let go, you tend to lock your elbows.

They look straight — but they’re actually hyperextended.

This causes the load to bypass even distribution through the arms… and land more directly on the wrists.

Push-ups, on the other hand, often include a natural micro-bend that protects the joint.

What if this isn’t a yoga problem, but a strength problem?

Let me be blunt:

You might have muscle imbalances in your wrist extensors.

The ones nobody trains.

You do curls, triceps, bench… but when’s the last time you trained your wrist extensors specifically?

Exactly.

So in push-ups, you get by using strong muscles like pecs and delts…

…but in downward dog, you’re exposed.

That pose is challenging because it acts like a functional test: you can’t cheat.

Okay, now what? How do I stop hating downward dog forever?

Here’s what you can do (spoiler: it’s NOT quitting yoga).

📌 1. Prep your wrists like you would shoulders or knees

  • Wrist circles
  • Dynamic stretching for flexors and extensors
  • Gradual loading in quadruped position

📌 2. Change how you “use” your hands

  • Actively press all fingers into the mat
  • Slightly push with your fingertips
  • Shift weight between thumb and index

📌 3. Adapt the pose to your actual mobility

  • Slightly bending your knees helps shift weight from wrists to feet
  • If you don’t have hamstring or ankle flexibility yet, don’t force the “yoga poster” form

📌 4. Use smart props

  • Yoga blocks under hands
  • Roll the front edge of your mat to lift the palms and reduce wrist extension

📌 5. Strengthen neglected muscles

  • Reverse wrist curls
  • Farmer carries with slightly extended wrists
  • Pronation/supination with light dumbbells

📌 6. Maintain micro-bend in your elbows

  • Don’t lock your arms
  • Engage your triceps
  • Push away from the floor like doing a vertical push-up

Don’t ignore more serious red flags

If the pain is sharp, localized, or comes with numb fingers, you could be dealing with:

  • Median nerve irritation
  • Flexor or extensor tendinopathy
  • Early carpal tunnel syndrome

In these cases, it’s best to see a physical therapist — especially if the discomfort continues even after adjusting your form.

Other helpful exercises to add to your routine

💪 Wall walks in quadruped
From all-fours, slightly push your hands forward and then return.
Helps your wrists get used to load in a controlled way.

💪 Incline planks (on elevated surfaces)
Reduces wrist pressure and builds isometric endurance gradually.

💪 Push-ups on handles
Trains the movement while keeping the wrist neutral.
Great for those who feel discomfort during the lowering phase.

💪 Wrist push-ups on knuckles
Only if you already have good mobility and control.

Yoga and weightlifting aren’t enemies — they’re mirrors

Downward dog isn’t a “mistake” for lifters.

It’s a mirror reflecting your joint weaknesses.

It reveals things the gym sometimes hides beneath muscle.

Don’t avoid it.

Use it to discover where you can truly grow.

And if needed, modify it.

Customize it.

Every pose can adapt to you — you don’t need to force yourself into some ideal shape.

When Downward Dog is harder than it looks

Even though it’s often called a “rest pose,” downward dog isn’t restful for everyone.

It’s more challenging than it seems — especially when:

  • You have tight posterior chains, and your body shifts weight forward, overloading the wrists
  • You lack scapular control, and your shoulders collapse inward instead of pushing outward
  • You’re tired, and you lose the active structure of the pose, dumping everything into your joints
  • You’re strong but not mobile (or vice versa), making it hard to balance tension and openness

It’s a “simple” pose that actually demands more awareness than most people think.

It’s not just about holding it — you need to build it actively, breath after breath.

In conclusion: pain is a signal, not a sentence

It’s not that your body isn’t made for yoga.

It’s just trying to tell you something.

And if you listen, you can become stronger, more mobile, and more aware.

Wrists are small, but incredibly important.

Treating them with respect can be the difference between effective training and constant frustration.

Recommended
Categories
Advanced Workouts BODYWEIGHT EXERCISES

Why do I always feel more worked in my joints than my muscles during straight-arm skills?

That Annoying “Weird” Pain We All Know Too Well.

You’ve just finished a front lever session.

Your lats? Barely tickled.

Your core? Meh.

But your elbows? Your shoulders?

They feel like they’ve just walked out of a bar fight between circus acrobats and steroid-loaded powerlifters.

It’s that kind of discomfort that doesn’t feel muscular.

It’s more “internal.”

Deeper.

The kind of feeling that makes you think: “I must be doing something wrong… but I have no idea what.”

And if it helps, we’ve all been there.

Even the people doing planches while sipping espresso.


Straight arms aren’t about isolation — they’re about surviving leverage

When you train skills like the front lever, planche, back lever, maltese, or even just a static support on the bars…

You’re not working in a friendly environment.

You’re putting your joints in a biomechanically awkward position, under insane loads, and asking them to “hold” isometrically.

Put simply?

The lever destroys you.

Because the longer the arm, the farther the weight shifts from the joint.

And that creates a lovely torque that lands straight on your joints.

And if you’re not properly activating the muscles that are supposed to resist that force?

Good luck to your tendons and joint capsules.


Your muscles should do the work — but if you can’t feel them, they probably aren’t

That’s the whole problem.

In theory, during a front lever, you should feel fire and fury in your lats, lower scapula area, and core.

In practice?

If all you feel is elbows, shoulders, and maybe even your wrists…

Then it’s not your muscles holding you up.

You’re relying on passive structures.

Like:

  • Tricep and bicep tendons
  • Shoulder capsule
  • Ligaments
  • Articular cartilage (if things go really wrong)

This often happens when:

  • You don’t have good scapular awareness yet
  • You lock your arms without “activating” the muscles around them
  • You’re forcing a skill your body isn’t ready for

And this isn’t about “being strong.”

It’s about being biomechanically ready.

Having control.

Being able to activate the right muscles, the right way, at the right time.


The anatomical backstory (for those who really want to understand)

During a front lever, you’re asking your shoulders to stay extended, your scapulae to stay depressed and retracted, and your elbows not to snap.

All while your center of gravity desperately wants to fall.

If your scapulae aren’t active, or if your nervous system can’t effectively recruit your lats, long head of the triceps, and deep core in that context…

Guess who takes all the load?

The tissues that shouldn’t.

It’s like trying to hang a chandelier from the ceiling using tape instead of hooks.

It might work for a second.

Then everything crashes.


The most common mistake: thinking straight arm = locked arm

A lot of people — myself included in the beginning — make the mistake of “locking up.”

They straighten the arm, clamp the elbow, freeze the joint.

And think: “Now I’m more stable.”

Huge mistake.

Because when you lock the arm passively, you’re taking the muscles out of the game.

It’s like turning off the engine and letting your car coast downhill in neutral.

That’s why we have the concept of active straight-arm strength.

It means yes, the arm is extended…

But it’s the muscle keeping it extended. Not passive locking.

And that makes all the difference.


How to stop feeling just joint pain: practical tips from someone who’s been there

Here’s what radically changed my approach (and saved my elbows):

  • Serious progressions, no rush. Don’t skip steps. Start with tuck, then advanced tuck, then straddle. Each stage teaches you something different.
  • Specific scapular work. Learn to feel retraction and depression. Do it isometrically, in mobility drills, in hollow body, everywhere.
  • Eliminate passivity. When you’re in position, push, pull, activate. Think of moving away from your support point. Never just “hang there.”
  • Controlled eccentrics. Want real strength? Then learn to lower slowly from a hard position. That’s where true muscular connections are built.
  • Thoracic and shoulder mobility. If your upper back or chest is stiff, you’re limiting activation. Open up, stretch, breathe. That’s training too.


Don’t confuse pain with progress

For way too long, I thought that if something hurt, it meant I was growing.

Like: “If it hurts, it means I’m pushing hard!”

But nope.

If every time you do straight-arm work your joints are screaming, you’re not building strength.

You’re building trauma tolerance.

And guess what? That won’t last.

The body breaks before it gets strong.


Watch out for invisible loads: how heavy is your body really in a lever?

Many underestimate the fact that during a skill like the front lever or planche, you’re not just “holding” your weight.

You’re multiplying the perceived load.

In a full planche, for example, the force your shoulders must resist can reach 2x your body weight, depending on lever, angle, and your structure.

And that’s not all: the farther your center of gravity goes, the worse the lever arm becomes.

Translation: even if you weigh 70 kg, the joint load can feel like 130–140 kg of actual effort on your shoulders and elbows.

That’s why people who train “by feel” alone often end up overloading without realizing it.

The solution?

Learn to estimate internal mechanical load, not just external weight.

Set smart volume rules, with real rest and deload weeks built into your plan.


If you’re mobile but unstable, pain still shows up

A common mistake is thinking mobility fixes everything.

Sure, good thoracic and scapular mobility is crucial.

But if you lack active stability — the kind that lets you hold a position under load — you’re still in trouble.

Here’s a practical example:

Maybe you can raise your arms overhead like a ballerina.

But if you can’t hold them there with force, under tension, it means nothing.

You need neuromuscular control.

Not just flexibility.

That’s why you should also train with exercises that demand end-range active resistance, like:

  • Y-holds on an incline bench
  • Planche lean regressions with locked scapulae
  • Slow, controlled eccentrics

Mobility + stability = joint-friendly strength.

Just mobility = silent pain incoming.


Wrong breathing can sabotage your internal tension

One of the most overlooked details in straight-arm training is how you breathe while holding position.

Most people make this mistake: They hold their breath.

They trap air inside to “brace” the position, thinking they’ll be stronger.

But holding your breath creates disorganized internal pressure:

  • Your core stiffens passively
  • Deep muscles don’t activate properly
  • Tension ends up dumping where it shouldn’t

The result?

Muscles disconnect, and joints take the hit.

Better to use active diaphragmatic breathing:

Light inhale before lifting,
Slow exhale while holding,
Maintain core tension without clenching everything.

A tiny detail — but it can save your entire set.


Isometric skills and neural fatigue: the role of your central nervous system

When you hold a straight-arm position, the first thing to tire isn’t the muscle.

It’s your brain.

Or more accurately, your central nervous system.

Training isometric skills under tension requires massive, continuous neural output.

There’s no momentum.

No concentric or eccentric phase to “offload.”

Just nonstop effort.

That’s why even if your body feels okay, after 2–3 attempts you crash.

You’re not weak.

You’re neurologically spent.

The solution?

  • Give your CNS time to recover (3–4 real minutes of rest)
  • Don’t overdo frequency (3x a week is enough)
  • Alternate straight-arm skills with more dynamic or pump-focused work

That way, you avoid burnout and improve quality, not just quantity.


Real strength is built when you can repeat the move without breaking down

Straight-arm skills are mesmerizing.

They’re athletic, pure, elegant.

But they require patience, control, intelligent tension.

They’re not an ego contest.

They’re a challenge in biomechanical precision.

If you train your joints, you stall.

If you train your muscles the right way, you grow.

And trust me — the feeling of a clean front lever, where your lats scream and your elbows feel happy, is priceless.


Start from there. Don’t force it. But don’t avoid it either.

Feel where you’re failing.

Slow down.

Correct.

Activate.

Then get back out there.

Because your body, if you listen, knows what to do.

And your elbows, eventually, will stop hating you.

Recommended
Categories
BODYWEIGHT EXERCISES Training Insights

Can I out-train a muscle imbalance if I only do bodyweight exercises?

Let’s start with a painful truth:
Muscle imbalances aren’t just a problem for bodybuilders obsessed with mirrors.

Actually, they can sneak up on anyone.

Especially if you train with just your bodyweight.

In fact, it’s surprisingly easy to fall into the trap — sometimes literally with one arm… usually the dominant one.

And I know because I’ve been there.

At one point, while doing push-ups like my life depended on it, I noticed my left pec was doing twice the work.

The right one? It was basically remote working.

And the freaky part? I hadn’t even realized.


What exactly is a muscle imbalance?

It’s not just about aesthetics — like one bicep being bigger than the other.

It’s something sneakier.

A muscle imbalance happens when one side of the body (or a specific muscle) is stronger, more active, more mobile, or simply more dominant than the other.

It’s like your body is in a tug-of-war… where one side is pulling hard and the other one’s just pretending.

The result?

  • Inefficient movement
  • Joint pain (shoulder, hip, knee)
  • Plateaued progress
  • Exercises that feel crooked, unbalanced, or forced

You won’t always notice it.

Sometimes you do push-ups and feel only one side firing.

Or you’re doing handstands, and the balance always leans one way.

Or maybe your left scapula acts up every time you try pull-ups.

When every movement starts feeling “off,” that’s your body screaming: “Dude, we’ve got a problem, and you’re ignoring it.”


Imbalances often start outside the gym (and you don’t even realize it)

Not all muscle imbalances come from training.

In fact… most of them are born from your daily habits.

Like:

  • Always carrying your bag on the same shoulder
  • Spending hours at the computer with your right hand on the mouse and that shoulder creeping up
  • Sleeping on the same side every night, one leg hooked over the other
  • Crossing your legs the same way all the time
  • Training consistently… but only with your “favorite” exercises

These daily habits, repeated for months or years, create chronic tension on one side and deep weakness on the other.

It’s like one half of your body is always “on,” while the other is scrolling Instagram from the bench.

And you know what happens?

The muscles that are supposed to move your body start doing too much, while the ones that should stabilize and control movement start checking out.

Like a soccer team: if the striker runs forward but the defenders are napping…
you’re getting scored on.

Same thing with your body.

For every pushing muscle, there’s one meant to slow down and balance.

If that stabilizer muscle goes missing, here’s what shows up instead:

  • Asymmetries
  • Pain
  • Weird compensations during movement

And often… you don’t realize until it’s too late.

That’s why it’s not enough to train just the “strong” muscles.

You’ve got to retrain the quiet ones. The lazy ones. The underdogs.

A quick example?

If all you ever do is push-ups for chest and front delts — great.

But if you don’t also strengthen the muscles that pull your shoulder blades back, open your chest, and hold your posture…

You’re building a door that’s always slamming shut.

And over time… it creaks.


Do bodyweight exercises help or make it worse?

Short answer: it depends.

Yes, you can correct imbalances with just bodyweight.

But if you’re moving mindlessly, eyes closed, on autopilot…

You risk reinforcing the dominance of what’s already strong.

Because your body always takes the easy route.

If one side’s stronger, it’ll keep hogging the load.

Even during “symmetrical” moves like push-ups or pull-ups.

That’s why you need to approach it with awareness.

The good news?

Bodyweight training gives you an insane level of control — sometimes more than weights ever could.


The secret weapon? Unilateral exercises (yes, they’ll hurt)

Want to really find out if one side is cheating?

Do single-limb exercises.

Like:

  • Archer push-ups
  • One-leg squats (aka pistol squats… more like execution squats)
  • Uneven-grip pull-ups
  • Planche leans with lateral shifts
  • One-arm isometric holds

These are straight-up truth detectors.

When one side starts shaking halfway through the hold — and the other glides through?

You’ve just diagnosed yourself: imbalance.

And the best part?

These moves don’t just expose the problem.

They fix it — by forcing each side to work solo, without help from the dominant “big brother.”


Ego vs. form: guess which one needs to win

You feel like a beast because you can crank out 20 fast push-ups with your feet elevated?

Cool.

But if you record yourself and notice one arm bends more, or a shoulder pops up first…

Congrats — you just trained your imbalance deeper.

The truth is, bodyweight training lets you control everything:

  • Speed
  • Angles
  • Symmetry
  • Muscle engagement

But only if you want to.

You have to slow down.

Watch yourself.

Fix yourself.

And here?

Nobody’s handing out medals for reps.

Only clean form counts.


Can I do more reps on the weak side to fix it?

Yes — but carefully.

Doing a few extra sets on your weak side can help.

But don’t wing it.

It’s not about “pushing harder.”

It’s about rebuilding control and symmetry.

Try this:

  • Match reps on both sides only if the movement is clean
  • Use isometric holds to feel the muscle working
  • Add slow eccentrics (lowering phase) to boost neuromuscular recruitment

And remember: fatigue kills form.

When your body gets tired, it’ll go right back to cheating.


Can I really do progressive overload with bodyweight only?

Absolutely.

Anyone who says you can’t isolate, progress, or train with precision in calisthenics…

Has never spent 30 seconds in a front lever hold.

Bodyweight gives you infinite tools:

  • Harder leverage (planche lean, pseudo push-ups, progressions)
  • Isometric pauses
  • Slowed tempo
  • Offset hand or foot positions
  • Supersets at different angles

Progressive overload isn’t just “more weight.”

It’s more neural demand, more control, more adaptation.

And you can dial that up — using nothing but your body.


Will I ever be perfectly symmetrical?

Let’s be honest.

No.

Nobody is.

Not even Olympic athletes.

Everyone has a dominant side.

One elbow that locks quicker.

One scapula that’s snappier.

One forearm that wakes up first.

The goal isn’t robotic perfection.

It’s efficient, safe, stable function.

Forget perfection.

Chase awareness.

Knowing you’re working to balance out, prevent injury, unlock harder progressions…

And knowing that every extra rep on the weak side is building a smarter body.


If I had to start over, I’d do this:

Here’s what I’d do if I could go back:

  • Film every session
  • Start unilateral push-ups from month one
  • Prioritize scapular mobility before every workout
  • No flashy progressions until the basics are flawless
  • Dedicate one day a week just to isometric holds

And most of all… I’d listen to my body more.

That “normal” shoulder ache I kept ignoring?

It was my body saying, “Hey, you’re building a tower on crooked foundations.”


How to tell if you’re imbalanced (without a physiotherapist)

You don’t need a lab to tell something’s off.

Try these at-home tests:

  • Mirror test: do slow reps of push-ups, squats, pull-ups in front of a mirror. Watch if your torso rotates, scapulae move differently, or one knee collapses.
  • Back view video test: record your shoulders during pull-ups or dips. One side popping early? Scapula winging? Red flag.
  • Feel test: close your eyes and raise your arms or twist. Where do you feel tightness first?
  • Fatigue test: after a unilateral set (like archer push-ups), which side burns more? Which fails sooner?

No kinesiology degree needed to see when things aren’t right.


Imbalances and pain: when it’s already an injury

Some people think, “If it doesn’t hurt, it’s fine.”

Big mistake.

Most joint pain doesn’t come from one wrong move.

It comes from years of uncorrected imbalance.

Watch out for:

  • Weird pain in just one shoulder during push-ups
  • One-sided elbow flare-ups after pull-ups
  • Low back pain from one-leg squats
  • Clicking or locking in one scapula

If that’s happening, don’t just train through it.

Sometimes two weeks of targeted work is all it takes to get back on track.


The dominant side effect (why your body always cheats that way)

Did you know almost all bodyweight exercises — even “bilateral” ones — are influenced by your dominant side?

Your writing hand.

Your kicking foot.

Your jumping leg.

All of it reflects in training.

Even when you feel “neutral,” your brain trusts the side it knows better.

So during a basic push-up, you might actually be pushing harder on one side.

The fix?

Train intentionally asymmetrically.

That’s how you really learn how your body moves.

Give each side its own spotlight (and suffering).


Stretching and mobility: the forgotten allies in imbalance

Fixing imbalances isn’t just about strength.

Sometimes the real issue is mobility.

A tight pec pulls your shoulder forward.

A stiff hip messes up your squat.

An immobile ankle throws off your pistol squat balance.

Smart stretching can work wonders — if done right:

  • Dynamic mobility pre-workout (scap circles, thoracic openers, controlled rotations)
  • Static stretching post-workout (pecs, hip flexors, lats)
  • Self-massage with balls or foam rollers on dominant-side trigger points

The goal is to restore a neutral position where both sides can share the work.


Final thoughts

Yes.

No question.

But it won’t happen by accident.

It happens if:

  • You stop ignoring the signs
  • You drop the ego
  • You pause, observe, correct
  • You train each side like it’s a solo athlete

It’s slow.

It’s picky.

It’s frustrating.

But when you hit that perfectly even push-up…

When both scapulae glide in sync…

When your pull-up shoots straight like a ruler…

You’ll realize every mindful rep was worth it.

And trust me — that clean, powerful sense of control?

Nothing beats it.

Train not just to get stronger.

Train to get balanced.

More aware.

More in charge of your body.

Because in the end…

That’s where the real progress lives.

Recommended
Categories
Advanced Workouts BODYWEIGHT EXERCISES

Why do deep push-up handles mess up my wrist alignment even with neutral grip?

There are moments when you’re convinced you’re doing everything right

You’ve got the cool handles.

Not those two wobbly planks, but the tall, serious ones from an underground calisthenics gym.

Neutral grip, straight posture, wrists aligned like the sacred anatomy books say.

You go down slowly.

You go down well.

Chest close to the floor, full control.

And right there… something feels off.

The wrist starts getting fussy.

Not real pain, but not exactly a “clean” feeling either.

A slight misalignment, a suspicious tension.

And you start thinking:
“Wasn’t this supposed to be the safest grip?”

That’s when the serious questions begin.

Because sometimes it’s not the tool that fails you.

It’s how your body reacts when you force it to follow rigid rules.


The trap of the neutral grip: on paper it’s perfect, in reality… it depends

We’ve all fallen for it.

The neutral grip seems like the Holy Grail of biomechanics.

The hands aren’t bent.

No stress on the carpal bones.

The force flows straight through the forearm.

Theoretically, it’s the most natural and protective position for the wrists.

But here’s the issue:
Neutral doesn’t mean adaptable.

When you grab fixed handles, you lock the movement.

The hands can’t rotate.

The shoulders can’t adjust the angle.

The elbows are forced into a rigid, pre-set line.

It’s like trying to dance tango with your skates glued to the floor.

The body wants to flow.

It wants to make micro-adjustments.

Especially when you go deep and the joints enter more sensitive ranges.

If it can’t… it compensates.

And the first joint to pay the price?

The poor wrist.


When the shoulders are locked, the wrists rebel

In a normal vertical push, the body distributes the load between wrists, elbows, shoulders, and scapulae.

Everyone works together.

Like a well-trained team.

But when the shoulders are locked (for example on tall fixed handles), or just not mobile enough, the body has to improvise.

And guess who steps up?

Exactly.

The wrist.

The load no longer goes through the scapulohumeral structure.

It falls onto a joint designed for fine rotations, not for “saving the push-up.”

Result?

  • Sudden radial or ulnar deviations
  • Micro-twisting trauma
  • That classic post-workout line:
    “Why does my wrist hurt even though I used a neutral grip?”


Going deep doesn’t always mean training better

I know.

You want to show you’re “beyond standard push-ups.”

That your chest deserves the stimulation of a full range.

And you’re right — but only if everything else can handle that range.

Because the deeper you go, the more you involve delicate structures:

  • The shoulder doesn’t just flex: it rotates, adapts, changes angle
  • The scapulae must move freely
  • The elbows must follow a non-linear path

And if the handles are fixed?

Goodbye freedom.

Instead of adapting the tool to your body, you adapt your body to the tool.

It’s like trying to stretch inside a medieval suit of armor.


When the neutral grip really works (and when it’s an ergonomic illusion)

I’m not here to demonize handles.

In some contexts, they’re great.

For example:

  • If you don’t go too deep
  • If your shoulders are mobile
  • If your scapula moves like a Swiss watch
  • If you use low handles with a slightly adjustable angle

But all it takes is one dysfunction (tight scapulae, locked chest, anterior pelvic tilt)
…and that beautiful “neutral” setup becomes a wrist trap.

Remember:
It’s not the grip that’s neutral.
It’s your body that has to be.


How I solved it (without throwing the handles out the window)

I’ve been through it too.

At first, I thought it was just weakness.

Then I thought it was “bad posture.”

Then I saw a physical therapist and…
Spoiler: it was the handles.

Or rather: how I was using them wrong.

Here’s what I changed:

  • I tried rotating parallettes: game-changer. They follow your movement instead of trapping you.
  • I switched to push-ups on rings: instability, yes, but full joint freedom.
  • I reduced range at first: worked on mobility before going deeper.
  • More serious wrist warm-up: two circles aren’t enough. You need real prep.
  • I did scapular mobility work: if scapulae are blocked, everything else collapses.

And most of all…
I learned to listen to my body.

If I started “forcing” the line on the way down… I stopped.

Even if it meant skipping that perfect Instagram shot.


Is it worth strengthening the wrists? Yes… but it’s not a magic wand

Let’s be clear:

If deep push-ups mess up your wrists, it doesn’t automatically mean your wrists are weak.

The problem is that your body isn’t always ready to handle certain angles and loads in those positions.

But if you want to avoid recurring pain, inflammation, and loss of control…
some wrist-specific work is totally worth it.

Nothing extreme.

Just simple exercises, done well and consistently.

Here are the most effective ones (tested on my own skin):

  • Walk-out on fists and return to palm support
    Start on your knees.
    Fists on the floor, walk forward on open hands (push-up plank), then back on fists.
    Builds transition strength and control under instability.
  • Wrist extensions and flexions with light dumbbells (1–3 kg)
    Sit down, rest your forearm on your thigh or a table, wrist hanging off.
    Move the weight slowly up and down using only your wrist.
    Do both extension and flexion. Slow sets. High quality.
  • Wrist push-ups on a soft mat (simplified version)
    Hands turned with fingers facing backward.
    On your knees, lower down slowly to load the back of your hand.
    Then come back up.
    Don’t force it. A few degrees are enough.
    Stimulates safe extension.
  • Light resistance band, radial and ulnar deviation
    Attach a band to a low base, hold it with your arm straight in front of you.
    Move your wrist inward (ulna) or outward (radius), slowly.
    All under control. Stop if you feel snapping or discomfort.

The best part?
You can use these exercises as pre-workout activation.

Two or three light sets, without going to failure.

Or on recovery days, as part of a mobility routine.

Training the wrists doesn’t mean bulking them up,
it means helping them survive everything you throw on top of them.

And if you train often on parallettes, handles, or in calisthenics…
it’s cheap insurance that saves you from a lot of trouble.


Watch your grip: width and position matter as much as the angle

We often obsess over the neutral angle of handles but ignore grip width.

If your grip is too wide, your shoulders go into forced abduction.

Too narrow? Elbows flare out and you stress the triceps and… guess what?

Again, the wrists.

The ideal width isn’t the same for everyone.

It depends on your structure:

  • Wider clavicles require a wider grip
  • Shorter humeri prefer a narrower grip
  • Limited thoracic mobility? Better a moderate grip with a slight inward angle

Bottom line: test different widths and see where you feel a stable push without weird tension in the wrists or shoulders.

You don’t always need a new tool.

Sometimes, just moving your grip 2 cm makes all the difference.


Do handles change which muscles are involved? Depends on the grip (and how deep you go)

People often think handles are just to “save the wrists.”

But in reality…
they also change movement biomechanics and muscle activation.

When you do classic push-ups with flat hands on the floor:

  • The pec major works more horizontally
  • The triceps engage mostly at the final lockout
  • The front deltoid helps at the start and in stability
  • Scapulae move more freely, but deep extension is limited by the floor

Now… with tall handles:

  • You increase the range of motion → pecs stretch more
  • The triceps stay active longer due to a deeper push phase
  • The front delts take on more load, especially at the bottom
  • The core has to work harder to keep your body aligned and prevent hip sag

But here’s the key: muscle activation really changes based on hand position.

Here’s a quick guide to common push-up grips and which muscles take over:

🔹 Neutral grip (palms facing each other, like with parallettes)

  • More natural for shoulders and elbows (if done right)
  • Emphasizes triceps and sternocostal pec fibers
  • Slightly reduces front deltoid work compared to pronated grip

🔹 Pronated grip (flat hands, fingers forward)

  • Standard floor push-up
  • Great balance between pecs and triceps
  • More front delt involvement, slight serratus activation

🔹 Outward-rotated grip (fingers slightly angled out)

  • Encourages thoracic opening
  • Emphasizes clavicular pec fibers
  • More shoulder stress if mobility is limited

🔹 Close grip (hands together, diamond or parallel)

  • Maximum triceps activation
  • Less outer pec involvement
  • Core works overtime to keep balance

🔹 Wide grip (wider than shoulders)

  • More horizontal push
  • Maximum load on outer pec and front deltoid
  • More elbow flare = potentially more stress


The surface factor: mat, floor, or hard rubber changes everything

Almost nobody thinks about this, but the surface you use under your handles alters the forces on your wrists.

If you place your handles on:

  • A soft mat: they may tilt slightly under load, destabilizing you
  • A slippery surface: you tense up to avoid sliding, and the wrist stiffens
  • A sloped floor: even a few degrees changes joint distribution

The solution?

  • Use a stable, perfectly flat surface
  • If using mats, make sure they’re thin and high-density
  • Avoid handles placed on soft tatami or cushioned carpets: they feel cozy but “steal” your support

An unstable base amplifies every alignment error.

And the deeper you go, the worse it gets.


The rebound effect: why “bouncing” can make wrist pain worse

When doing deep push-ups with tall handles, it’s very common to use chest and tricep elasticity to “bounce” out of the bottom.

That little rebound gives you a feeling of explosive strength.

The problem?
That rebound doesn’t always start from the chest.

Often it’s a passive tension reflex coming from wrists that are already maximally compressed.

You’re not pushing — you’re “spring-loading” your joints.

And if you repeat that every rep?

The wrist no longer works in stable isometry.

It works in compression and constant micro-twisting.

Perfect recipe for inflammation.

So train to control the ascent without rebound.

Start with a slow, deliberate contraction.

Learn to tell the difference between a muscular push… and a joint bailout.


The thumb test: a little trick to check if you’re loading wrong

Want a practical trick to check if your wrist is off-axis, even when everything looks fine?

Watch your thumb during the descent.

If the thumb starts to lift or “slide back” compared to the fingers…
…you’re probably loading too much toward the pinky.

Classic sign of ulnar deviation.

And the wrist is compensating for an imbalanced move.

Solution?

During descent, actively press the thumb into the handle.

As if you were “squeezing” it slightly.

This tiny move promotes a more symmetrical force distribution
and reduces micro-joint shifts that often go unnoticed… until it’s too late.


Conclusion

Handles aren’t the enemy.

Depth isn’t the problem.

The real culprit is the illusion of control.

We think the neutral grip is a biomechanical shortcut.

In reality, it’s a tool that only works if the rest of the body is in sync.

If the shoulders aren’t mobile, if the elbows don’t know where to go,
if the scapulae move like glued sticks…
…the wrists become the victims.

So here’s the simple message:

Don’t play the deep push-up hero if you don’t have the mobility to support it.

Focus on movement quality.

Give your body room to breathe.

Try different surfaces, different angles, and don’t get stuck on textbook “rules.”

Because your body isn’t a textbook.

It’s an ecosystem.

And your wrists will thank you.

Recommended
Categories
BODYWEIGHT EXERCISES Training Insights

Can excessive calisthenics mobility work actually reduce your pressing power?

Let’s be honest: these days, if you do calisthenics, it feels like you also need to become a mobility guru

Between sticks, bands, one-hour routines, Cossack squats with dumbbells, and passive stretching during every break… the idea is that the more open you get, the stronger you become.

But something weird happens.

You train hard for flexibility, then you go for straight-arm pressing, advanced push-ups, or ring support holds… and the strength is just gone.

You don’t feel the same shoulder pressure.

You lack explosiveness.

You have zero control.

And you think, “How is this possible? I move better now… but I perform worse?”

Well, you’re not alone.

Let’s break down what’s really happening.


When the mobility obsession made us lose the plot

In recent years, being “tight” has basically become an insult in the bodyweight training world.

As soon as someone has slightly locked-up shoulders or limited hip mobility, the label gets slapped on: “not functional.”

So we all started chasing flexibility like it was the key to becoming strong, agile, and unstoppable.

We dove into:

  • Static stretching (holding a stretch for 30–60 seconds)
  • Dynamic stretching (wide, controlled movements to “warm up” the joint)
  • PNF (contract-relax techniques to expand joint range)
  • Full-blown mobility routines for every limb

Basically, we opened up more and more in every direction.

Thinking, “The more open I am, the better I’ll get at skills.”

But guess what?

Often the opposite happens.

Your pressing loses punch.

Your holds become unstable.

Your movements lose reactivity.

And this doesn’t just happen to beginners.

I’ve seen the exact same problem in seasoned athletes with real strength, consistency, and training experience.


Muscles need tension, not just freedom of movement

To generate real force, you need something most people overlook: passive tension.

That’s the natural elastic resistance from your muscles, tendons, and fascia—even when you’re not actively contracting.

A kind of internal “spring” that stores energy and gives it back when needed.

When you overdo mobility, that tension decreases.

The result?

You lose explosiveness in key phases of movement.

A body that’s too loose can’t generate power when it counts.

You’ve got the range… but you’re inconsistent.

Example: if you only train the ability to bring your arms overhead with ease, but never build strength within that position, you’ll collapse when you drop into a deep overhead press.

A systematic review in Medicine & Science in Sports & Exercise (Kay et al., 2012) analyzed over 100 studies on acute static stretching.

The outcome?

Short stretches (under 30–40 seconds) have minimal impact.

But once you go past 60 seconds, maximal strength and explosive power drop significantly—no matter the muscle group or movement type.

Why?

Because prolonged stretching lowers passive tension and neuromuscular activation—exactly what you need to drive force through the core of a movement.

Your nervous system protects you… even from yourself

Your brain doesn’t care how mobile you are.

It cares about safety.

If it senses instability in a joint position, it does something very simple: it cuts back muscle activation.

It’s protecting you.

It says, “This position isn’t stable. Better slow down.”

So even if you feel more “open,” you feel less powerful.

It’s not a fitness issue.

It’s just that your nervous system doesn’t trust the new range—yet.

You need time. But more than anything, you need control.


When stretching makes you weaker

At one point, I basically turned into a semi-contortionist.

I had long routines every morning: pancake, bridge, loaded shoulder extension, Jefferson curl… everything picture-perfect.

But then I’d go train.

And I’d feel soft, unstable, and disconnected.

That sense of “solid movement” was gone.

The drive didn’t come with any punch.

I had gained degrees of motion… but lost structural strength.

And that’s essential for creating joint torque.

It’s not enough to reach a position.

You need to own it.


Mobility and strength: they have to grow together

Mobility is important—of course.

But it has to be functional.

You need to work on:

  • Improving the specific ranges you need (pike, bridge, planche…)
  • Adding active isometrics within those new ranges
  • Training control under load

If all you do is open up, without building stability…

You’re asking for injury.

And slowing down your progress.


My approach today: less stretching, more function

I don’t spend an hour stretching anymore.

I do 10–15 minutes of targeted mobility, based on that day’s workout.

Then light activations (scapula, supports, wall drills).

Then straight into real pressing: advanced push-ups, vertical pushes, tempo-controlled exercises with pauses.

Mobility has become a tool.

Not the end goal.

If you do too much of it, strength evaporates.


Sometimes mobility is just an excuse

We hide inside stretching because it feels like training.

You sweat, it burns, it takes effort… but there’s no real confrontation with fatigue.

You don’t fail.

You’re not tested.

It’s an activity that seems hard, but it’s cozy.

Sure, it’s Instagrammable.

But it’s also a classy way to dodge the hard stuff.

The part where your arms shake and your grip starts slipping.


3 signs you’re overdoing it

It’s not always obvious when mobility is backfiring on your strength.

Here are three clear red flags:

  • Your strength drops mid-movement, not at the extremes
    Push-ups feel weaker. Bodyweight pressing loses bite.
    If you’re missing explosiveness in the middle of the move, that’s a warning sign.
  • You feel unstable during execution
    If every rep needs a posture reset, you probably have more range than control.
  • You need endless activation just to “feel” your muscles
    If your triceps only wake up after 25 minutes of warm-up… something’s off.


The difference between passive and active mobility (and why it matters)

Passive: range reached without active effort. Stick, band, external assistance.

Active: range controlled by you, with strength and precision.

In calisthenics, passive range is never enough.

You need to control every position with your own body.

It’s not about how open you get…

It’s about how strong you are inside that range.


How much mobility do you really need?

Here’s a concrete guide:

🔹 Before the workout
Dynamic stretching, 5–8 minutes.
Targeted areas.
Active movements (e.g., shoulder CARs, scapular reach).

🔹 After the workout (optional)
Static stretching only if absolutely needed.
Max 10–12 minutes, just for leftover tension.

🔹 Extra sessions (1–2 per week)
Mobility work on critical ranges.
Always paired with active strength and control.

Your body adapts to what you do often.

If all you train is stretching… you lose solidity.


When stretching slows you down

Clear signs you’re overdoing it:

  • You feel “empty” after every session
  • You need more and more time to re-activate
  • Your strength is going down, not up
  • You’re using mobility as a hiding place—even when it’s not needed

Stretching should free you up—not drain your tone.

A functional body is stable, not randomly flexible.


Example of a balanced week

If you train 4–5 times a week, here’s a realistic structure:

Monday – Vertical pushing + active shoulder mobility
Tuesday – Pulling work + dynamic scapular mobility
Wednesday – Rest or myofascial release + breathing
Thursday – Core, isometrics, and critical ranges (like active overhead)
Friday – Full-body work + supports + timed finishers

Mobility shouldn’t be a separate block.

It needs to be part of your training.


The role of Time Under Tension (TUT)

Real strength in a new range comes from spending time in that range.

Time Under Tension is the most effective way to lock in control in unfamiliar positions.

Examples:

  • Hold the bottom of a vertical push for 10–15 seconds
  • Lower slowly from a straight-arm push-up
  • Freeze the movement in a hard position and resist

That’s how you turn mobility into strength.


Conclusion: less yoga, more torque

You don’t need to become stiff—or bendy—at all costs.

You need to become effective.

Open up as much as needed. But get stable inside that range.

Don’t chase extreme mobility just for looks.

Every degree of movement you earn should become a new lever in your training.

Don’t get tricked by stretching for stretching’s sake.

Train mobility only if it helps you push harder—not just if it makes you look more “prepared.”

At the end of the day, you train to become strong.

Not just flexible.

Recommended