As a kid, I could easily crank out ten push-ups without breaking a sweat.
At least, that’s what I thought.
Looking back, my form was all over the place—arched back, elbows flaring out, and a complete lack of control.
I wasn’t doing push-ups; I was doing something that vaguely resembled them.
It wasn’t until years later that I realized the importance of proper technique.
Push-ups aren’t just about pumping out reps—they’re about alignment, stability, and using the right muscles.
That’s why I want to share a progression that focuses on building strength step by step while perfecting your form.
Because when done right, push-ups are one of the best exercises you can do for your upper body.
My Roadmap, One Stage at a Time
When I realized my push-ups were more guesswork than proper technique, I knew a clean slate was in order.
It hit me that I was relying on momentum and bad habits rather than strength and control.
That meant spending time mastering simpler exercises that built core stability and shoulder strength.
And let me tell you, it wasn’t easy.
Even the most basic push-ups felt like a losing battle without a strong foundation.
But I quickly learned that push-ups aren’t just about your chest or arms.
They’re a full-body movement that demands stability, alignment, and coordination from head to toe.
Your core keeps your body straight, your shoulders provide support, and your legs act as a grounding force.
Skipping this foundational work is like trying to build a skyscraper on quicksand—it just doesn’t hold up.
By focusing on these fundamentals, I was able to build the strength and control needed to progress steadily, without struggling or risking injury.
Sure, it was a slower start, but it laid the groundwork for lasting success.
And that’s the key: mastering the basics sets you up for bigger wins down the line.
Paying Attention to Proper Push-Up Form: Mistakes to Avoid
When it comes to push-ups, form is everything.
It doesn’t matter how many reps you crank out—if your technique is off, you’re only cheating yourself (and risking injury).
Trust me, I’ve learned this the hard way.
Here’s how to keep your form dialed in and avoid the most common mistakes.
Keep Your Body in a Straight Line
Think of your body as a solid plank from head to heels.
One of the biggest mistakes I see (and yes, I’ve been guilty of this too) is letting the hips sag, turning your body into a droopy hammock.
On the flip side, some people lift their hips way too high, making their push-ups look more like a downward dog.
The fix?
Engage your core and glutes to stabilize your body.
Imagine someone is about to balance a glass of water on your back—no spills allowed!
Avoid Flaring Your Elbows
If your elbows are sticking straight out to the sides like chicken wings, we need to talk.
This puts unnecessary strain on your shoulders and takes the focus away from your chest and triceps.
Instead, keep your elbows at about a 45-degree angle from your torso.
It might feel awkward at first, but trust me, it’ll save your shoulders and maximize the effectiveness of each rep.
Go Full Range of Motion
I get it—half reps are tempting when you’re tired.
But if you’re only lowering halfway down, you’re cutting yourself short.
Bring your chest close to the ground (without actually resting on it), then push back up with control.
Remember, five perfect push-ups are far better than 20 sloppy ones.
Don’t Let Your Head Drop
I used to think lowering my head made it look like I was going deeper into my push-up.
Spoiler alert: it doesn’t.
Keep your neck neutral and your eyes slightly forward—not glued to the floor.
This keeps your head aligned with your spine and reduces unnecessary tension in your neck.
No Bouncing Off the Floor
If you’re using momentum to bounce yourself back up, you’re doing it wrong.
Push-ups are all about controlled movement, not shortcuts.
Lower yourself slowly, pause briefly at the bottom, and push back up with intention.
Think strength over speed—it’s a game-changer.
Master Your Breathing
Breathing might sound simple, but it’s a common issue.
Holding your breath or breathing erratically can throw you off your rhythm.
Here’s the golden rule: inhale as you lower, exhale as you push up.
It’s like giving your body a built-in rhythm to follow.
Mistakes in Advanced Variations
When it comes to advanced push-ups, like plyometric or one-arm push-ups, mistakes can multiply.
With plyometric push-ups, make sure you have a solid base before attempting explosive movements.
Landing poorly or overextending can wreak havoc on your joints.
For archer or one-arm push-ups, avoid leaning too heavily on your assisting arm.
The goal is to distribute the weight properly and gradually reduce your reliance on that arm.
1. Wall Push-Up

I like to call this the “gateway push-up.”
It’s the perfect starting point if you’re new to push-ups or need a gentle reintroduction after some time off.
Stand a couple of feet away from a wall, place your palms against it at chest level, and lean in.
Lower your body toward the wall, keeping your elbows at a natural angle, and then push back to the start.
It’s kind on your wrists, shoulders, and core, making it ideal for absolute beginners or anyone recovering from an injury.
What I love about wall push-ups is how adaptable they are.
As you get stronger, you can step your feet further back, increasing the angle and making the movement more challenging.
And once you’ve mastered that, why not take it up a notch?
Try the one-arm wall push-up.
With one hand behind your back, use the other to control your descent and press back to the start.
It’s a great way to build unilateral strength and prepare your body for advanced push-up variations down the line.
The wall push-up is simple but incredibly versatile, giving you endless room to grow as your strength improves.
2. Plank on the Knees
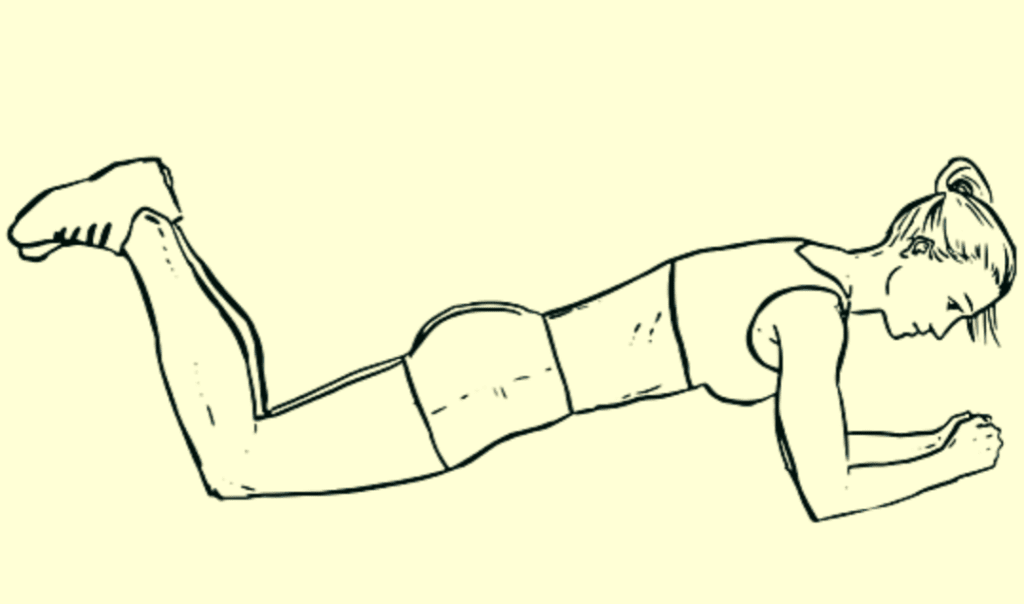
When I first discovered the plank on the knees, it looked almost too easy.
But the moment I tried to hold it steady, I realized how quickly my abs and lower back started to complain.
That’s the magic of this variation: it teaches you to keep your hips up, your belly button drawn in, and your spine long, without placing too much stress on your shoulders.
If you can breathe comfortably here for a good 20 seconds, you’re already setting a rock-solid foundation.
3. Negative Push-Up: The Perfect Starting Point
Struggling with regular push-ups?
Negative push-ups are a game-changer.
Start in a push-up position, lower yourself slowly to the floor, keeping your core tight and back straight.
Once your chest touches down, let your knees drop to help you push back up.
It’s simple, effective, and takes the pressure off while building strength where you need it most.
Stick with it, and you’ll be amazed at how quickly you’ll progress to full push-ups.
4. Knee Push-Up
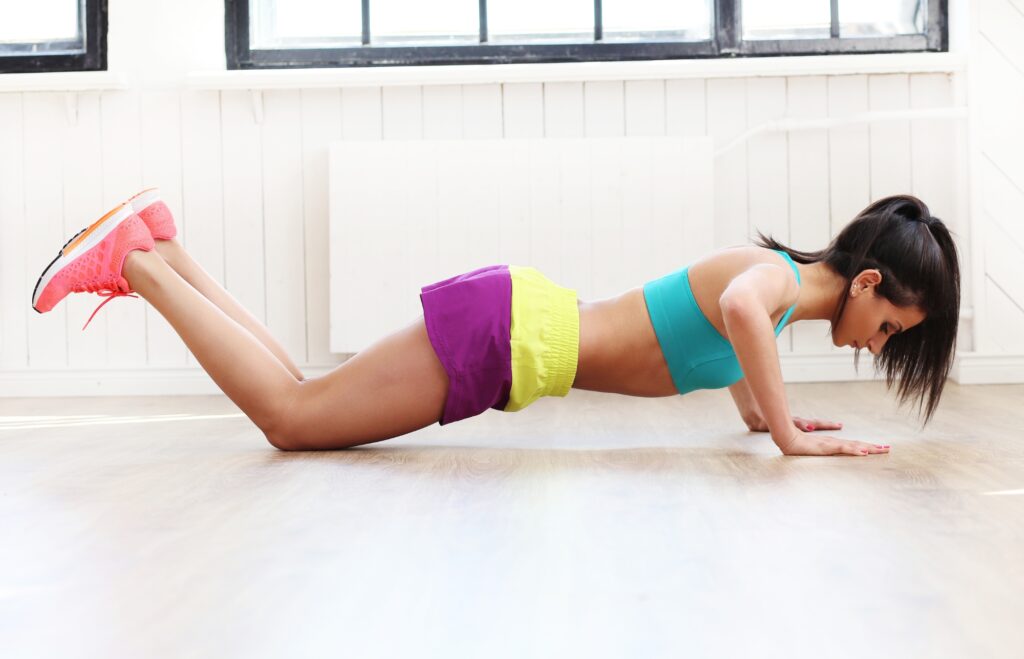
From there, it’s a small step to the knee push-up.
Yes, you’re still on your knees, but now your arms and upper body start handling more load.
I like to imagine my torso as a straight board, from my head down to my knees.
I lower my chest, keep my elbows tucked (around 45 degrees, give or take), and push back up in a controlled way.
It might not sound flashy, but staying focused on form here is what prevents injuries and sets you up for success later.
5. Elevated Push-Up
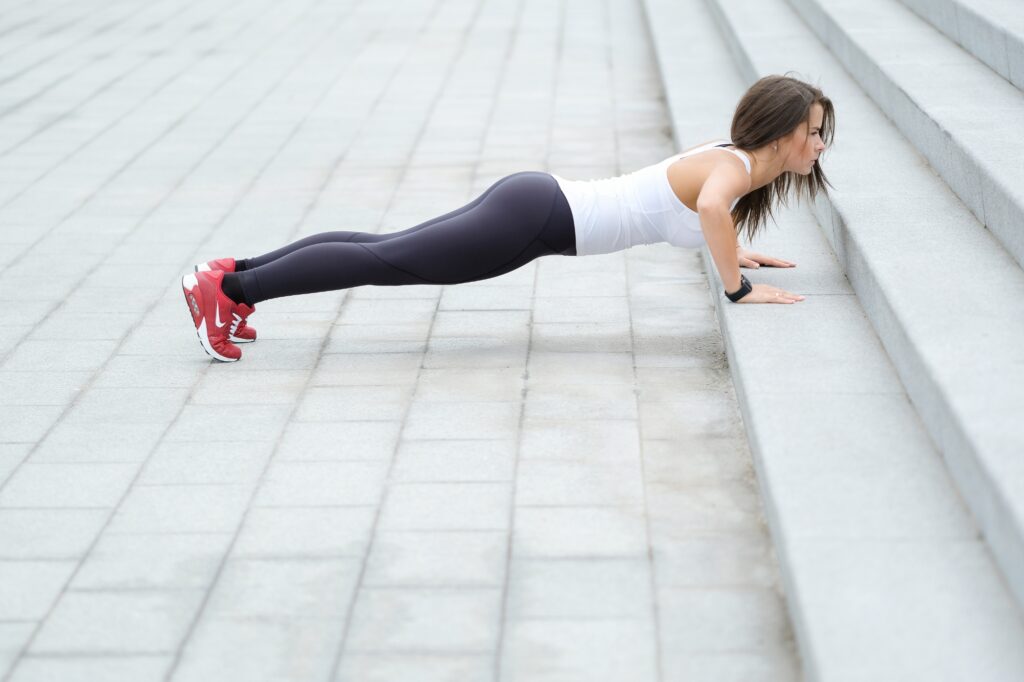
Ready for the next challenge?
Let’s raise the bar—literally.
Place your hands on a stable bench, couch, or step, with your legs extended behind you in a high plank.
Because of the angle, your arms will carry more of your body weight compared to the knee push-up, but it’s still more forgiving than the standard variation on the floor.
This step forces you to maintain a solid plank position while building that upper-body strength.
It’s the perfect way to push yourself without overwhelming your form or stability.
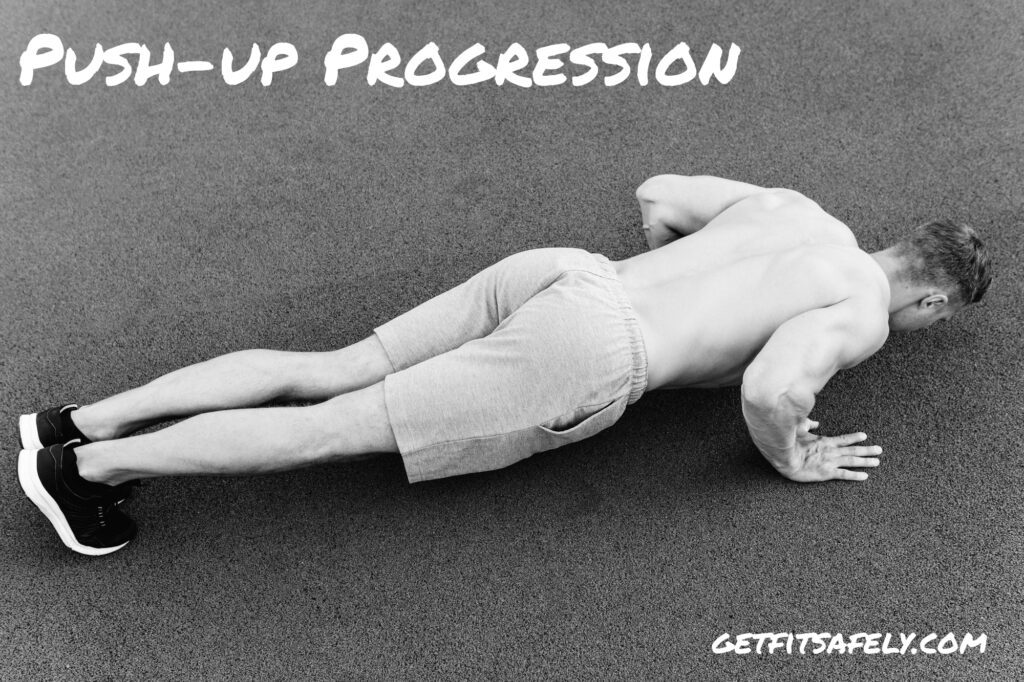
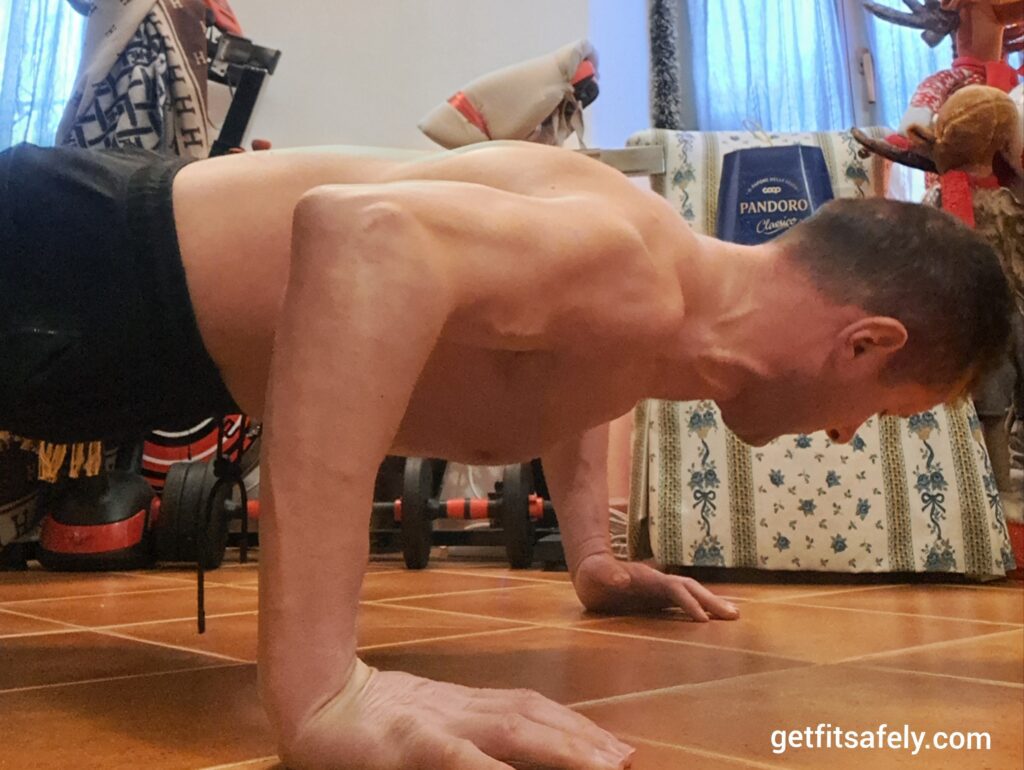
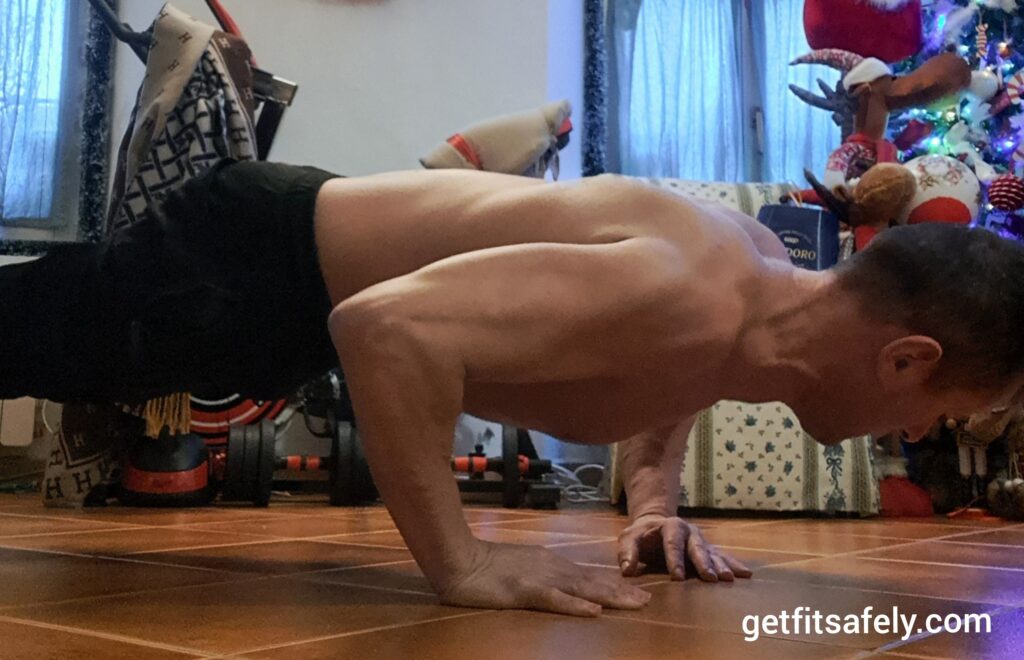
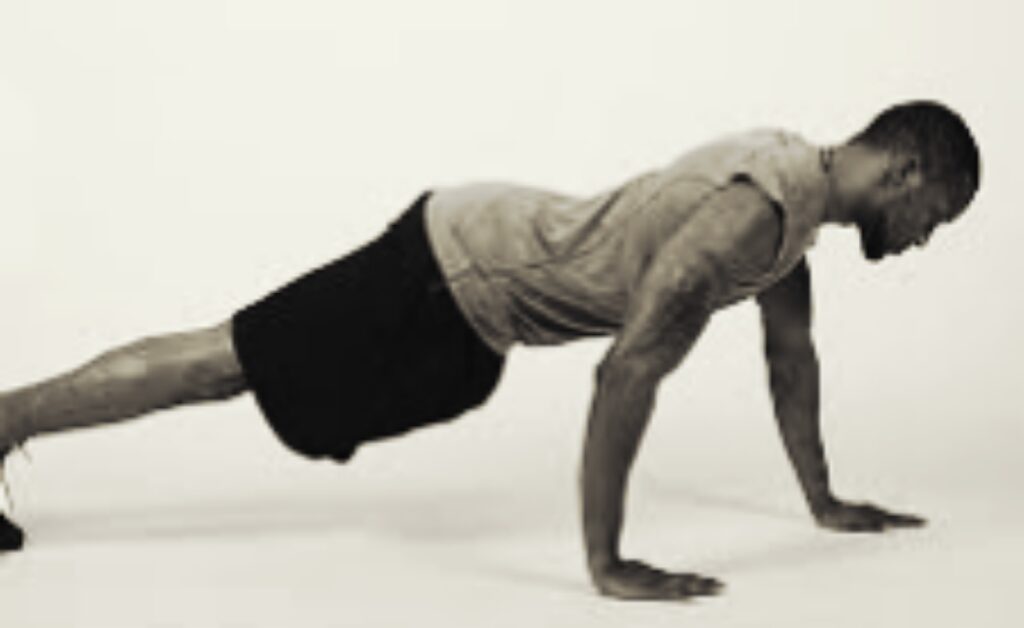
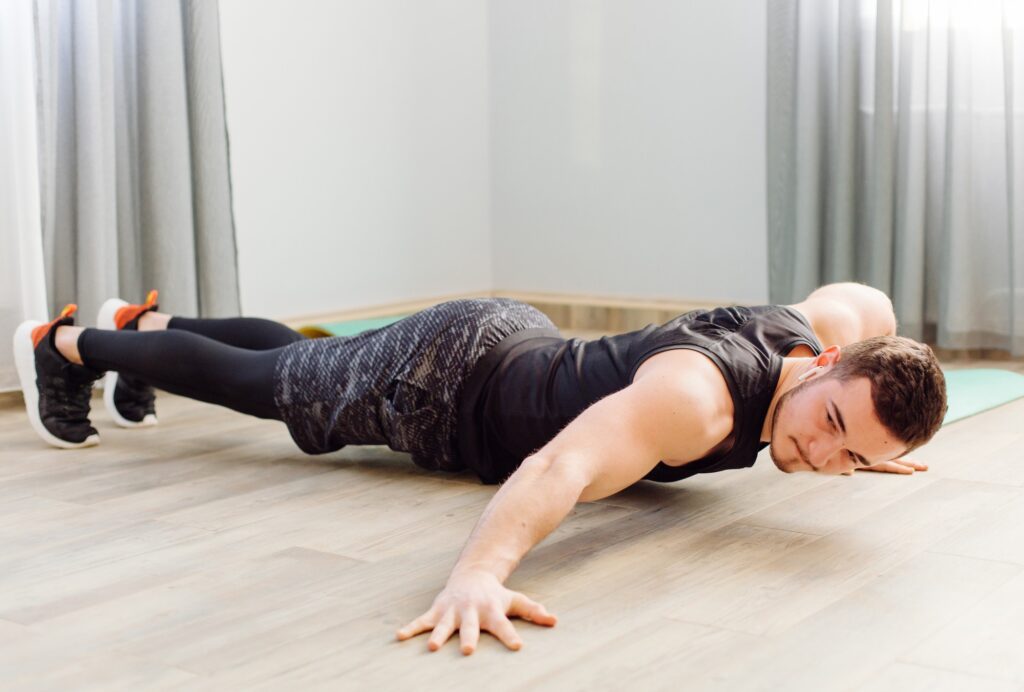
6. Classic Push-Up

Now We’re Talking!
This is the form most people picture when they hear the word “push-up.”
Place your hands on the ground, slightly wider than your shoulders, and position your body in a rigid plank with your core engaged.
As you lower your chest toward the floor, keep a steady tempo—no rushing.
Then, drive back up, exhaling as you go.
It’s a move that looks simple but demands a harmonious orchestra of muscles working together.
Practice it slowly and focus on quality reps over sheer volume.
Trust me, your body will thank you.
7. Wide-Grip Push-Up
Shift your hands even wider than the classic.
You’ll really feel your chest working hard, although it might take a bit of strain off the triceps.
Just be careful not to flare your elbows too much.
Keep the movement smooth, and your shoulder joints will stay happy.
8. Diamond Push-Up
Ready to spice things up?
Bring your hands closer, forming a diamond shape with your thumbs and index fingers.
Lower your chest, and you’ll feel the focus shift to your triceps and the inner portion of your chest.
This variation isn’t just a fancy trick—it’s a surefire way to boost arm strength.
But keep your hips in line.
Letting them sag or rise makes the movement easier while cheating your gains.
9. Staggered Push-Up
This variation is like learning to balance two different workloads—it keeps you on your toes, literally.
Place one hand slightly ahead of your shoulder line and the other just below your chest.
Lower your body slowly, feeling how each arm handles a unique share of the effort.
After a few reps, switch hand positions to even things out.
The key is maintaining control and avoiding leaning too heavily to one side.
It’s a brilliant way to build unilateral strength and add variety to your routine.
10. Spiderman Push-Up
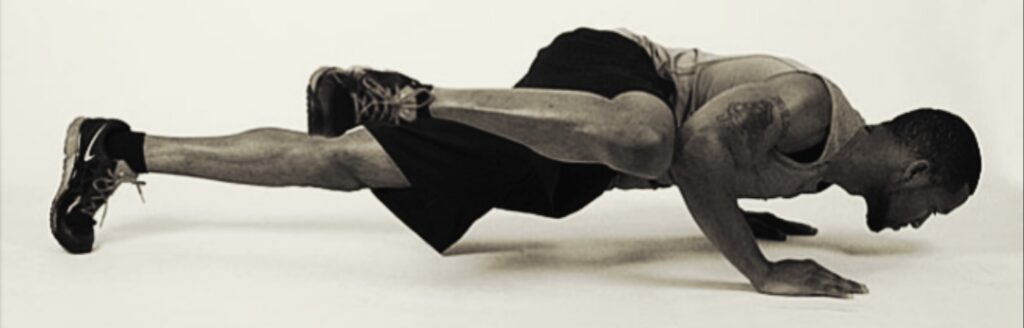
Looking for a sneaky core challenge? The Spiderman push-up delivers.
Start in a standard push-up position, and as you lower your chest, bring one knee up toward your elbow.
Keep your hips square to avoid twisting—it’s all about control.
Push back up, returning your foot to the starting position.
It’s like a mini ab workout tucked into each rep, and once you get the rhythm, it feels surprisingly smooth.
Just don’t be surprised if your first few attempts are a little wobbly—it’s all part of the fun.
11. Pike Push-Up

When my shoulders need extra love, pike push-ups answer the call.
Start by lifting your hips high, forming an inverted “V” shape, almost like a downward dog.
From this position, lower your head toward the floor, focusing the movement on your shoulders and upper back.
The first time I tried it, I underestimated how quickly my arms would start shaking.
But I love how it hammers the deltoids without needing a bunch of fancy equipment.
12. T Push-Up
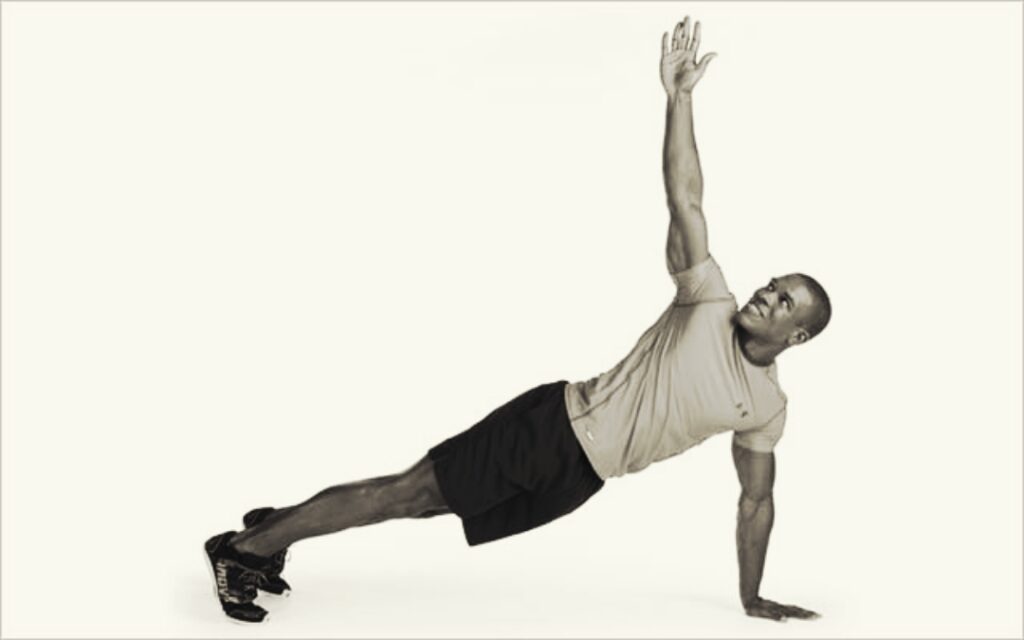
This variation feels more like a flow than a push-up—it’s push, twist, and reach for the sky.
Start with a standard push-up.
After pressing back up, rotate your torso and lift one arm toward the ceiling, letting your body turn into a side plank.
Hold that “T” shape for a moment to challenge your balance and engage your obliques.
Then, return to the starting position and repeat the movement, rotating to the opposite side on the next rep.
It’s a dynamic exercise that tests your stability and adds a full-body element to your push-up routine.
And yes, it’ll keep you on your toes—literally and figuratively.
13. Sphinx Push-Up
At first glance, the sphinx push-up seems deceptively simple—until your triceps start to burn.
Begin in a forearm plank with your arms parallel and your core engaged.
From there, press through your palms, lifting your upper body until your arms are fully extended.
Lower yourself back down slowly, keeping control to avoid flopping back onto your forearms.
This movement isolates the triceps while also demanding stability from your core.
It’s like a triceps isolation exercise disguised as a push-up.
Each rep reminds me to stay patient and move with control.
14. Hindu Push-Up
I love how this one combines flexibility and strength in one flowing motion.
Start in a high-hip position, forming an inverted “V” with your body.
From there, swoop your chest low toward the ground, transitioning smoothly into an upward dog pose with your back arched and chest lifted.
Then, reverse the movement, gliding back into the starting position.
The first time I tried it, I felt parts of my back and shoulders I didn’t know existed.
It’s all about a smooth glide—like you’re diving under a low fence and then returning gracefully.
A few reps in, you’ll realize just how powerful (and sweaty) this move can get.
15. Pseudo Planche Push-Up
I love how this move hints at the advanced world of planche training.
Start by rotating your hands slightly outward and leaning your shoulders forward so they pass over your wrists.
From this position, lower yourself into a push-up, keeping your core tight and your body straight.
I remember the first time I tried it: my arms wobbled, and my abs felt like they’d had a wake-up call.
But with practice, that forward lean becomes a hallmark of real calisthenics strength.
16. Fingertips Push-Up
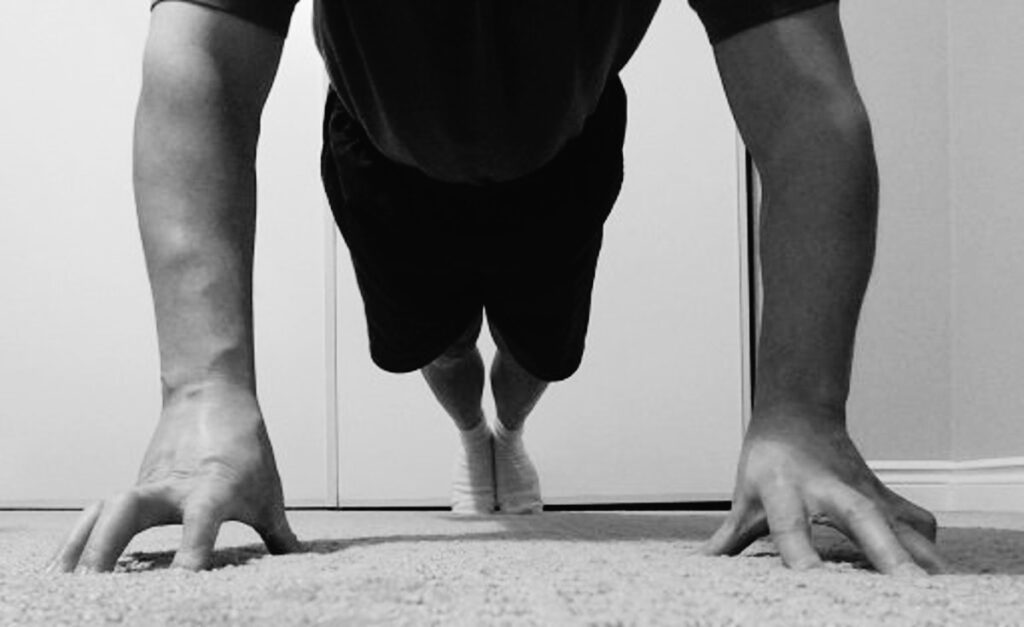
This one’s a grip challenge, plain and simple.
Instead of placing your palms flat on the ground, rise onto your fingertips—like a cautious cat testing the waters.
At first, I could barely hold a plank on my fingertips without cramping up.
Now, I treat it like a specialized skill, doing partial reps or static holds until I feel more confident.
It’s humbling, but it does wonders for wrist and forearm strength.
17. Decline Push-Up
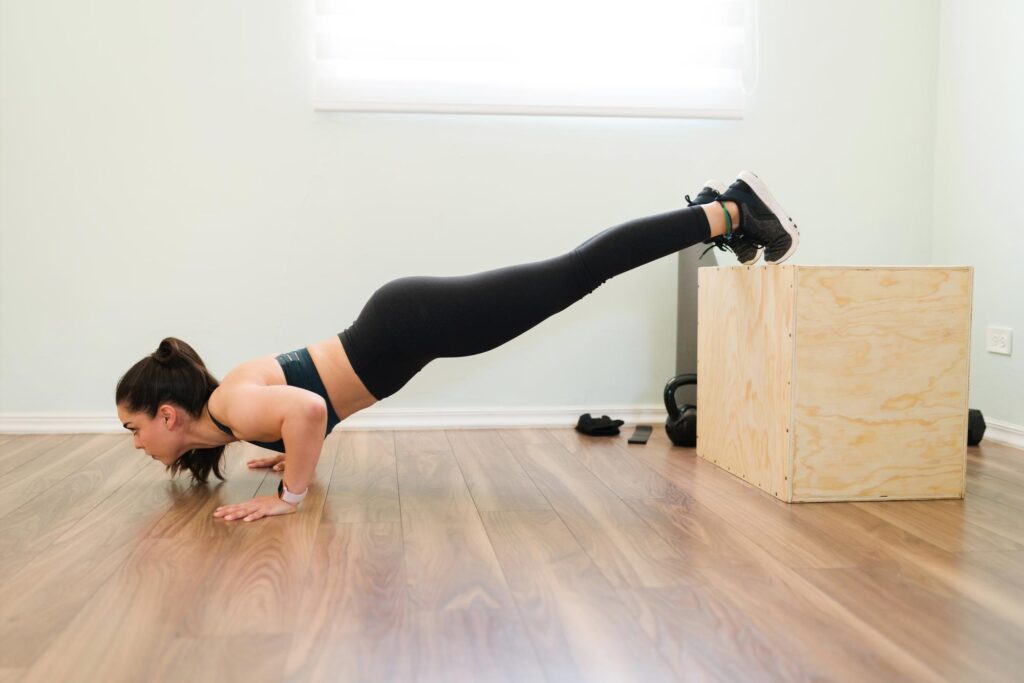
When you prop your feet on a bench or step, gravity shifts more of the work to your upper chest and shoulders.
Keep your core braced and your body straight to avoid arching your lower back.
This variation is essentially the opposite of the incline push-up, but with an added level of intensity.
Each rep brings a focused burn to your shoulders and upper chest—proof you’re targeting the right muscles.
Keep in mind: the higher the platform, the more intense the challenge.
It’s a simple yet effective way to take your push-up routine to the next level.
The Advanced Stuff: Plyometric and Archer
When you’re ready to turn up the heat, plyometric and archer push-ups are where things get exciting—and a little humbling.
Let’s start with plyometric push-ups.

This variation is all about power and explosiveness.
You lower yourself down as in a classic push-up, but instead of pressing up smoothly, you push off the ground so your hands momentarily leave the floor.
The goal is to generate enough force to defy gravity for a split second.
It’s not just your chest and arms working here—your shoulders and triceps are all-in for that explosive lift.
The first time I tried these, my hands barely left the ground, and my landing wasn’t exactly graceful.
But each attempt taught me how to engage my core and control the movement better.
Over time, I started adding more height and even experimenting with clapping mid-air (once I was sure I wouldn’t faceplant!).
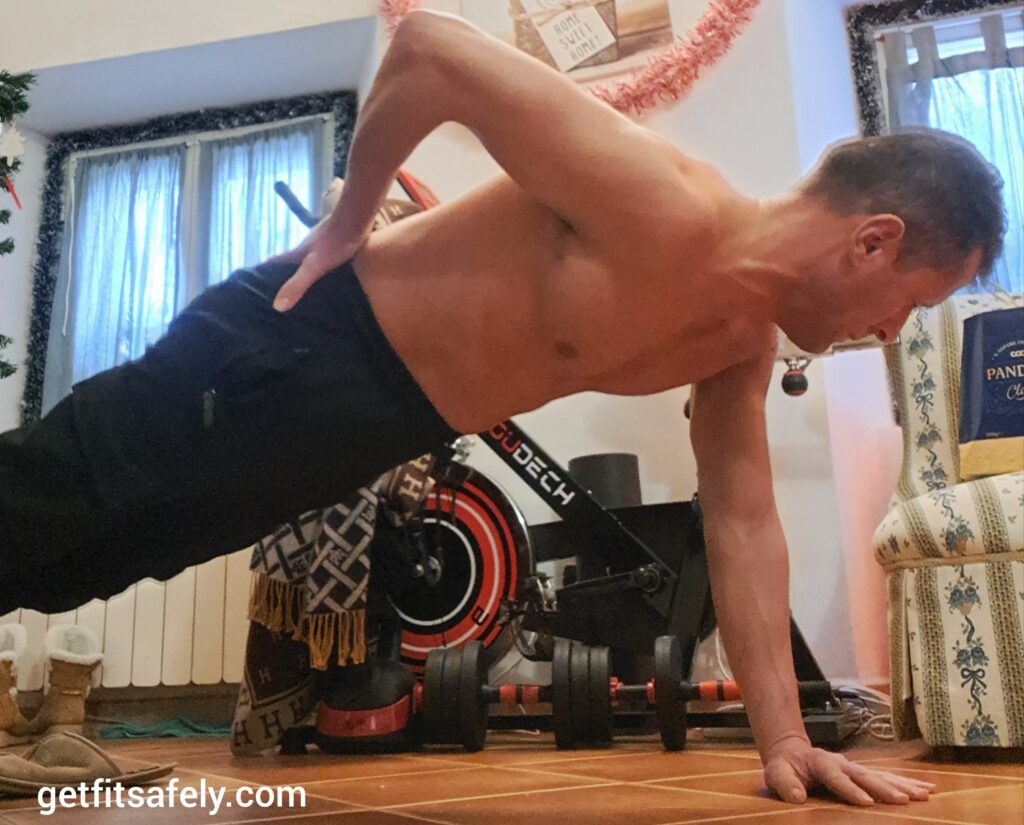
Now let’s talk about archer push-ups.
These are a personal favorite because they feel like a step toward the ultimate one-arm push-up.
Here’s how it works: you extend one arm far out to the side, keeping it straight, while the other arm stays close to your chest.
Lower yourself toward the bent-arm side, shifting most of your weight onto it.
The extended arm doesn’t just sit there—it provides just enough support to keep you balanced.
This movement forces each arm to take turns carrying the load, training unilateral strength and stability.
When I first attempted archer push-ups, my extended arm felt useless, like it wasn’t helping at all.
But as I practiced, I learned to rely on it just enough to maintain control without compromising the intensity on the working arm.
Both of these variations require focus and patience.
They challenge not only your strength but also your coordination and balance.
And while they’re tough, they’re also incredibly rewarding once you get the hang of them.
Plyometric push-ups teach you explosive power, while archer push-ups lay the groundwork for advanced unilateral moves.
If you’re feeling adventurous, give these a shot.
Eyeing the One-Arm Push-Up
The one-arm push-up is a showstopper.
It’s one of those moves that turns heads, but trust me—it’s not just about raw strength.
It’s also about balance, coordination, and core stability working together in perfect harmony.
If you’re dreaming of nailing your first one-arm push-up, the right one-arm push-up progression is key.
When I first decided to go for it, I had no idea where to start.
I quickly learned that trying to jump straight into a full one-arm push-up was like attempting a backflip without mastering a somersault.
So, I began with negatives.
This meant lowering myself with one arm in a controlled motion, then using my knees or my other hand to help push back up.
It felt clunky at first, but each attempt strengthened my stabilizers and taught me control.
Next, I worked on archer push-ups.
As I mentioned before, these are great for one-arm push-up progression.
They shift most of the weight to one arm.
The other arm helps with stability and offers minimal assistance
Once I felt strong and steady, I moved on to partial one-arm push-ups.
This stage tested everything—strength, form, and patience.
I focused on going halfway down and then gradually increasing my range of motion over time.
After weeks (okay, maybe months), I finally managed my first clean, full-range one-arm push-up.
It was humbling, and yes, it took a lot of shaky attempts, but the sense of accomplishment was worth every drop of sweat.
Putting It All Together: The Best Push-Up Workout
Some days, I like to switch gears and treat my push-up practice as a single, seamless routine.
Rather than repeating each variation back-to-back, I turn it into a circuit that keeps things fresh—and my muscles guessing.
I’ll set a timer for short intervals, say 30 to 45 seconds per exercise, followed by 15 seconds of rest.
Then I rotate through different push-up styles in each round.
It might look like this:
First round, I focus on slow negatives (lowering my chest in a super-controlled way).
When the timer beeps, I take a quick breather, then move to diamond push-ups for a triceps burn.
Next interval, I might throw in a few explosive reps, pushing off the ground with a little pop.
And if I’m feeling really good that day, I’ll challenge myself with a brief set of archer push-ups on each side.
I keep the total session to around 10 or 12 minutes of focused effort.
This helps me train multiple dimensions—strength, power, stability, and control—without rehashing the same exact sequence over and over.
As I wrap up, I’ll spend a minute or two decompressing with shoulder rolls and chest stretches, ensuring I stay limber for the next workout.
No single method is set in stone.
Feel free to shuffle your exercises, shorten or lengthen intervals, or slip a standard push-up set in wherever it makes sense.
The key is variety: by mixing tempos, grips, and intensities, you’ll keep your upper body guessing and growing.
Over time, you’ll notice how each variation feeds into the next, sharpening your technique and boosting your overall strength.
That’s what makes it a true “best” push-up workout in my book—simple, adaptable, and anything but repetitive.
When to Progress to a Harder Push-Up Variation
Figuring out when to step up your push-up game can feel tricky, but it’s all about listening to your body.
If you’re hitting 10-12 reps with perfect form—no sagging hips, no shaky arms—and you’re finishing your sets thinking, “That wasn’t so bad,” it’s time to push for more.
I remember when push-ups started feeling more like a warm-up than a challenge.
That was my cue to try something tougher, and it made all the difference.
Your breathing should stay steady, and your muscles should feel worked but not completely gassed.
When the movement feels smooth and controlled, it’s time to spice things up.
Don’t rush it, but don’t get too comfortable either—progress is waiting!
Wrapping It Up
This roadmap takes you from the basics to the one-arm push-up, showing that true strength comes from dedication and effort
I’m a firm believer that you don’t need fancy equipment to build real strength.
What you do need is consistency, patience, and a willingness to refine your form rather than rush the process.
Each variation is a milestone, and it feels great to celebrate every small victory along the way.
So pick your starting point.
Focus on mastery over flashiness.
And remember, it’s about the journey—one push-up at a time.
FAQs
How often should I practice push-ups?
Aim for 3-4 times a week, allowing your muscles time to recover and grow stronger. Consistency matters more than daily repetition.
Do push-ups only work the chest?
No, push-ups engage multiple muscle groups, including the chest, triceps, shoulders, core, and even your legs for stabilization.
What’s the best way to avoid wrist pain during push-ups?
Use push-up bars or perform push-ups on your fists to reduce wrist strain. Also, ensure your wrists are directly under your shoulders for proper alignment.
Can push-ups replace a chest workout
Push-ups are versatile and effective, but for well-rounded strength, pair them with other chest exercises like bench presses or dips.