The story begins with a heavy barbell and a very bad idea.
There was this old Ikea lamp too close to my barbell and a cat judging me from the couch.
That’s when I realized—if I was going to keep lifting at home, I needed an actual setup.
A real rack.
But then came the question that haunts every home lifter at 2 a.m. on Reddit: full power rack or half rack?
It sounds simple—until you realize this decision shapes your training, safety, and motivation for years.
So let’s break it down once and for all, with real-world details you won’t find in most “pros and cons” lists online.
Quick Take: Full Rack vs. Half Rack
- Full rack if you’ve got space, ceiling height, and budget.
- It’s safer, future-proof, and offers more training variety.
- Half rack if space is tight or you want something more mobile.
- Invest in solid spotter arms, anchoring, and good flooring.
- Either way, think long-term — your training will evolve.
- Start with what fits your life now, but pick a system that can grow with you.
The Full Power Rack: The Home Gym Fortress
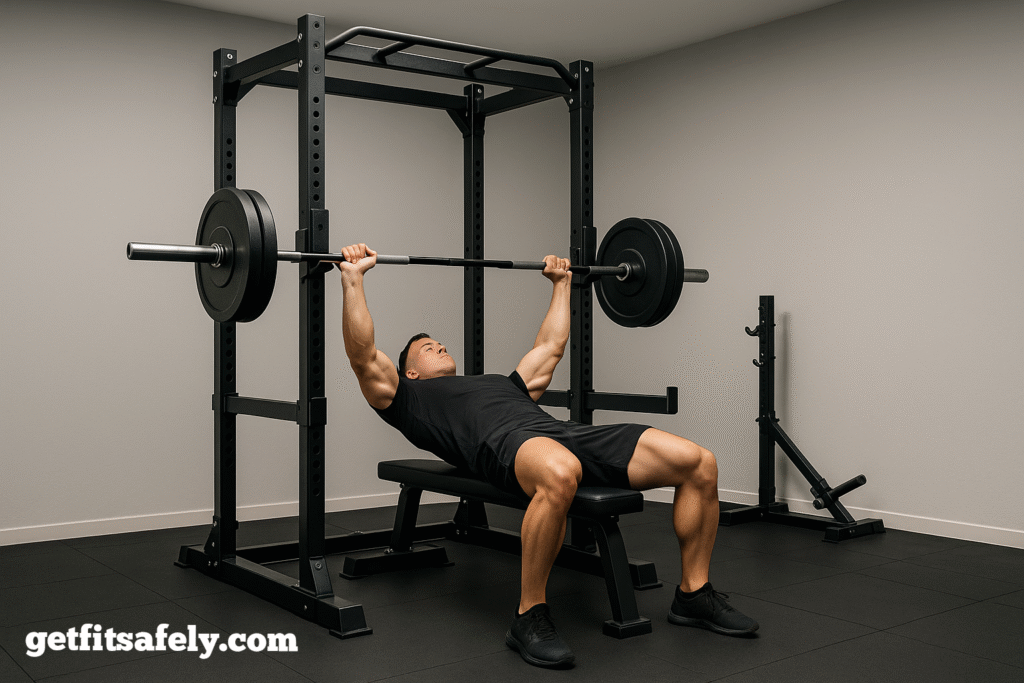
A full power rack is like the SUV of gym equipment.
Big, solid, protective—and surprisingly versatile once you learn to use it fully.
It’s built with four uprights, a full steel cage, and internal safety mechanisms like pins or straps.
Most models include multiple pull-up bars, dip handles, and the ability to attach pulley systems or landmine anchors.
In short, it’s the backbone of any serious home gym.
The main advantage?
Safety.
You can push your limits without a spotter, fail a rep mid-squat, and still walk away fine.
That’s huge if you train alone.
Those steel rails catch the bar like a loyal friend who never complains.
A full rack also gives you the flexibility to experiment—rack pulls, pin presses, floor presses, band-resisted lifts, even partial squats for overload work.
Add a cable attachment and you’ve basically built a mini commercial gym in your garage.
But let’s talk reality.
These things are massive.
A quality full rack can weigh 250–400 lbs and take up a 7×7-foot footprint, sometimes more.
You’ll need at least 7.5 ft of ceiling height to do pull-ups comfortably and space to walk the bar out.
Setup can also be a workout on its own.
Unboxing, bolting, anchoring—expect half a day and some creative language.
Still, once it’s up, it’s a tank that’ll outlive your PRs.
The Half Rack: Freedom with a Price Tag
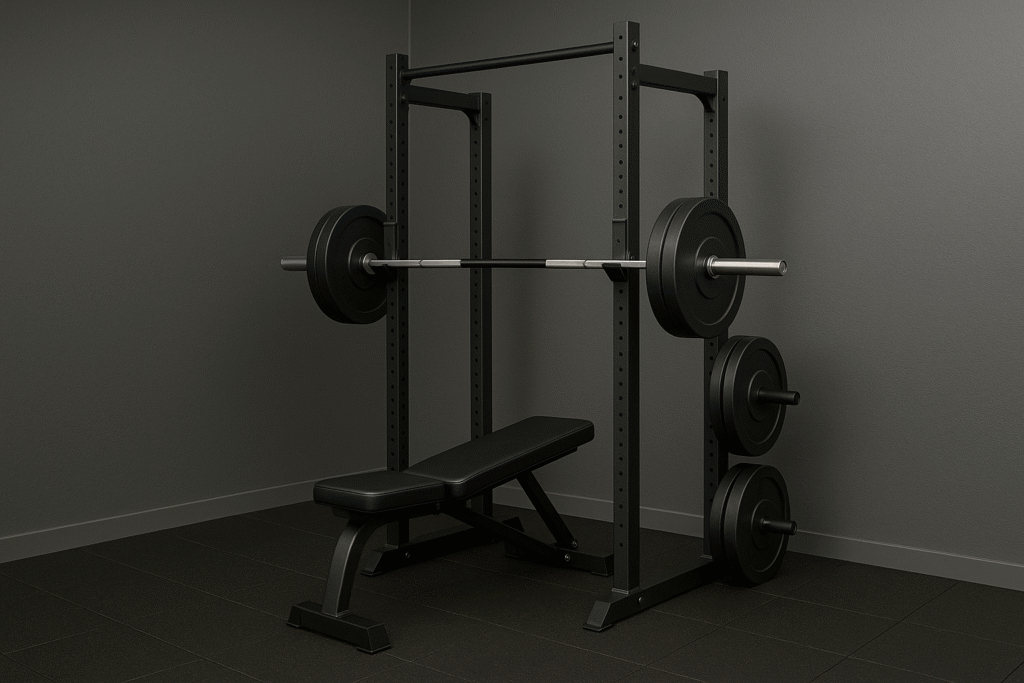
Now, the half rack is the minimalist’s dream.
It’s lighter, smaller, and easier to move.
You get two uprights instead of four, often with safety arms that extend forward.
It’s perfect if your training space doubles as a storage room or if you don’t want your garage to look like a prison gym.
The best part?
Accessibility.
You can step in and out easily, walk the bar out in one clean move, and it feels less claustrophobic.
There’s more open room for supersets—barbell rows, dumbbell presses, kettlebell swings—without feeling boxed in.
And the half rack wins on height efficiency.
If your ceiling is barely 7 ft high or you’re setting up in a basement, the half rack keeps everything ergonomic.
However, the trade-off is safety and stability.
Because it’s open, a half rack relies entirely on the safety arms.
If you’re benching heavy without spotters, you’ve got less margin for error.
There’s also less frame rigidity under max loads, especially on cheaper models.
Think of it like this: a full rack is a roll cage; a half rack is a roll bar.
Both can save you—but one’s built for crashes, the other for speed.
Training Goals Matter More Than Hardware

Before you buy anything, ask yourself what kind of lifter you are.
If you train for powerlifting or progressive overload, the full rack is your best ally.
You’ll appreciate the confidence it gives you when pushing 90%+ loads, doing rack pulls, or testing your 1-rep maxes.
If your training leans more toward hypertrophy, general strength, or CrossFit-style circuits, the half rack may be ideal.
You’ll move around more freely, superset easily, and save time switching exercises.
And if you’re an Olympic lifter, both can work—but make sure you have floor space in front for cleans, jerks, or snatches.
A half rack gives more clearance for bar drops and dynamic movement.
A key point that most lifters miss: upgrade potential.
Many half racks can evolve into full racks with additional uprights or extension kits.
So if you’re on a budget, start half—but buy a model that’s modular and upgradable.
Brands like REP, Titan, and Rogue have great expansion systems.
The Practical Side of Building a Home Gym
Forget marketing promises—this decision often comes down to cold hard logistics.
Space: a full rack needs a dedicated area with front clearance for walkouts and overhead space for pull-ups.
Always account for your barbell length (7 ft standard) and room for plates on both sides.
Budget: full racks cost anywhere from $600 to $1500+.
Half racks start cheaper ($300–$800), but once you add attachments—storage, dip bars, pulley systems—you’re often at the same total price.
Noise & neighbors: if you train early or late, noise matters.
A full rack confines movement better, reducing clangs and bar drops.
Add rubber flooring (½-inch or thicker) and you’ll absorb vibration better.
Half racks are louder when re-racking, especially without bumper plates or safety straps.
The Backbone of Every Good Rack
Here’s a detail most comparison guides gloss over: the steel gauge.
Cheaper racks use 14-gauge steel, fine for moderate weights (<500 lbs).
Serious lifters should aim for 11-gauge or 3×3-inch uprights with 5/8-inch hardware.
That’s the same quality you’ll find in commercial gyms.
Anchoring is another deal-breaker.
A lightweight half rack can wobble under load if not bolted down or weighted with plate storage.
Full racks, with their four-post design, naturally resist tipping.
If you ever plan to load beyond 400–500 lbs, go full rack or bolt the half securely.
Get the Power Rack Cage on Amazon
Lessons Learned from Lifting at Home

When I finally got my own setup, I went full rack.
It took me three hours, a lot of swearing, and two pizzas to assemble—but it changed everything.
The day I failed a heavy squat and the bar landed safely on the pins was the day I realized it was worth every dollar.
It removed the hesitation.
It made me train like I was in a real gym, without fear of breaking my floor or my spine.
Still, I’ve trained on half racks that felt great—especially with heavy spotter arms and stable flooring.
They’re simple, fast, efficient.
There’s something nice about stepping into an open rack, moving freely, and not being surrounded by metal.
So yeah—both have soul.
It just depends what kind of training energy you want in your space.
How to Plan Your Home Gym Space (Bonus Section)
This part nobody online explains clearly.
Before buying your rack, sketch your gym layout.
Ceiling height: minimum 8 ft for pull-ups. If lower, get a shorty rack or wall-mount half rack.
Depth clearance: leave at least 3 ft behind and 3–4 ft in front for movement and walkouts.
Flooring: use dense rubber mats to absorb impact. EVA foam is cheaper but slips more.
Storage: plate storage pegs double as counterweight for stability. Keep your barbell rack-mounted to save room.
Final Thoughts
A rack isn’t just metal—it’s proof that you showed up.
It’s the corner of your life where excuses don’t work.
Some days you crush PRs. Some days you just survive the warm-up.
But you keep coming back.
That’s what changes you more than any program ever will.