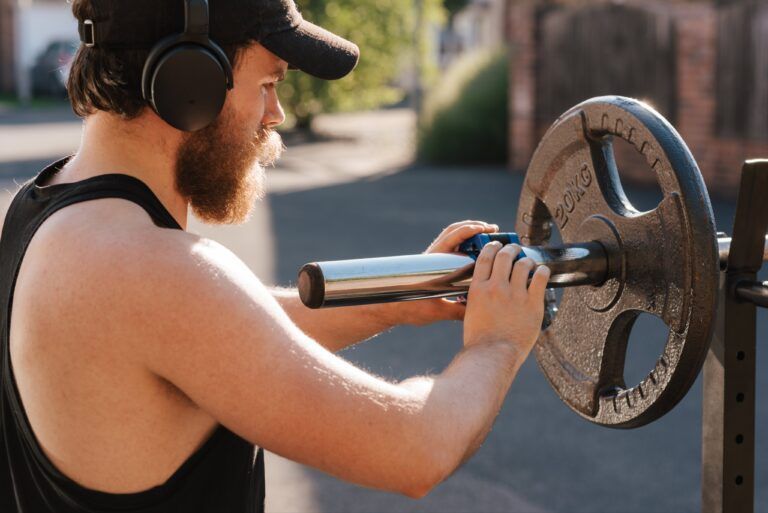
Forearm training order sounds like a small detail, but my elbows started to disagree.
I didn’t run this because I suddenly got obsessed with forearm size.
I did it because my elbows started acting like they were silently unionizing.
The frustrating part is how sneaky this kind of elbow annoyance can be.
Everything seems “manageable” enough to ignore.
Until one day you grab a bar, start to pull, and your elbow calmly replies, “Nope, I’m busy.”
So I stopped guessing.
I decided to change just one thing.
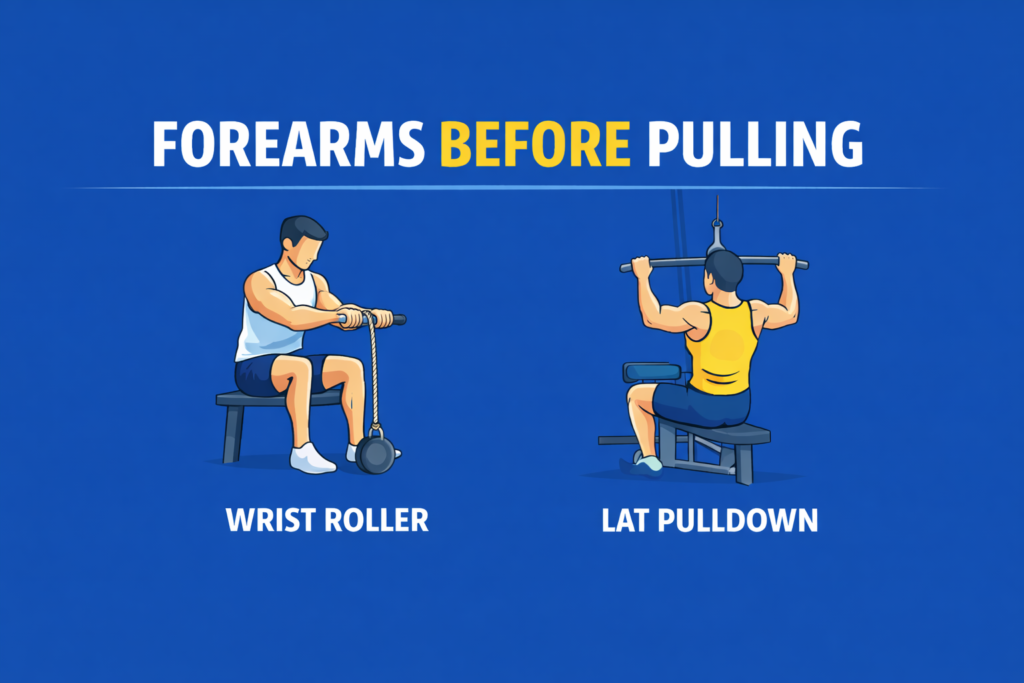
Forearms before pulling.
Or forearms after pulling.
That was it.
Why Forearm Training Order Can Make or Break Your Elbows
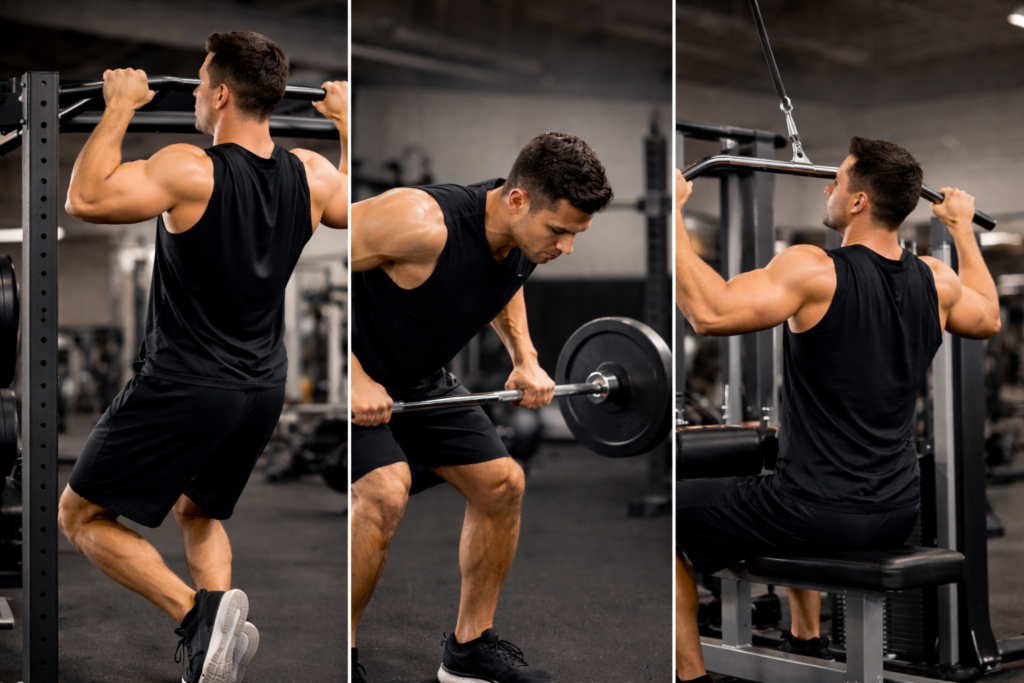
If you do pull-ups, chin-ups, rows, lat pulldowns, ring work, dead hangs, or even “light” band pulls, your forearms are not optional.
They are involved in every rep, even if your program pretends they aren’t.
Your back might be the star of the show.
But your forearms are the stage crew holding the lights, the cables, and the whole set.
When the stage crew is exhausted, the show gets messy.
And the part that often gets messy first is the elbow.
Here’s the simple kid-level version.
Your forearm muscles attach near your elbow through tendons.
A tendon is basically a thick, tough strap that connects muscle to bone.
Muscles can get sore and recover pretty fast.
Tendons recover slower and complain earlier when the stress pattern is dumb.
If a muscle is like a rechargeable battery, a tendon is more like a phone charger cable.
You can bend it and use it every day, sure.
But if you keep yanking it at a weird angle, eventually it starts failing right at the connector.
That connector area is your elbow.
So the question isn’t really “forearms before or after.”
The real question is:
Do elbows feel better when forearm tendons get a controlled warm-up dose first.
Or do elbows feel better when forearms get hammered only after they’ve already been used for everything else.
The Two Strategies People Argue About
1# Forearms After Pulling

This is what most people do.
You hit pull-ups and rows while your grip is fresh.
You get solid numbers.
You feel strong.
Then you finish with forearm work as a “burnout.”
It’s efficient.
It’s simple.
It’s also the exact setup that made my elbows feel like they were slowly being sanded down.
Because it creates a very specific stress pattern.
First you do big pulling, where you grip hard for a long time.
Then, when tissue is already tired, you isolate the same area again.
That’s like doing a long road trip, then immediately deciding to practice parallel parking for 30 minutes.
Your car might handle it.
Your clutch might not love you.
2# Forearms Before Pulling
This is the option that sounds wrong at first.
Because everyone assumes tired forearms will ruin pulling performance.
That’s not an irrational fear.
If grip fails, the set ends.
But here’s the twist.
This approach doesn’t try to make you “stronger in the moment.”
It tries to make the whole system calmer.
It warms forearm tissue first.
It gives tendons a controlled amount of tension with clean technique.
Then, when you pull, your grip is not at 100%, which forces you to pull cleaner and avoid aggressive yanking.
It also lowers the chances you turn every rep into a death-grip competition.
Your back still works.
You still get a stimulus.
But you stop doing that thing where your elbows and forearms fight the bar like it owes them money.
Inside the Structure of the 6-Week Trial
I treated this like a boring science project.
Boring is good.
Boring means repeatable.
Training Schedule
- Two pull sessions per week.
- Training days stayed consistent from week to week.
- The warm-up followed the same structure every session.
- Pulling exercises remained unchanged.
- Total sets were kept consistent.
- Rep ranges didn’t vary.
- Rest times were held steady throughout.
I did not add random new grips, new bars, or new fancy “tendon flossing” stuff midway.
Because if you change ten things, you learn nothing.
What Changed
Weeks 1–3: forearms after pulling.
Weeks 4–6: forearms before pulling.
Everything else stayed as stable as a normal human life allows.
What I Measured
I didn’t measure pump.
I didn’t measure “vibes.”
I measured annoying real-world things.
During the Session
Did the elbow feel cranky while gripping.
Did discomfort show up during pull-ups or only later.
Did pain increase set to set or stay flat.
After the Session
Did the inside or outside of the elbow feel tender when I pressed it.
Did I feel that “dense” loaded sensation around the joint.
Did the forearm feel trained or just fried.
Next Morning
Was there stiffness when making a fist.
Was there discomfort picking up something dumb like a backpack.
Did the elbow feel normal after moving around for five minutes, or did it keep complaining.
That morning test matters a lot.
Because tendons often “talk” the day after, not right away.
Weeks 1–3: Forearms After Pulling

The Pulling Workouts
My pulling work was consistent and pretty normal.
A main vertical pull.
A main row.
Then accessories.
Example layout.
Pull-ups or chin-ups for working sets.
Chest-supported rows or cable rows for working sets.
Then some lighter work like face pulls or pulldowns.
Nothing weird.
Nothing heroic.
How Forearms Were Done After
This is important because a lot of people say “I do forearms,” but they mean “I squeeze a gripper twice.”
I used three categories.
A flexion pattern.
An extension pattern.
And a grip hold pattern.
Not every session was identical, but the template was consistent.
I’ll explain the exact exercises in detail later, because the execution is the whole point.
What Happened by the End of Week 2
Pulling performance felt good.
Grip felt strong early.
But elbow sensation started creeping in.
It wasn’t sharp pain.
It was more like the area felt “overused.”
If you’ve ever written with a pen for too long and your hand starts feeling weird, it was like that, but at the elbow connector point.
By week 3, I started noticing a pattern.
After the session, elbows felt heavy.
The next morning, elbows felt stiff.
Not crippling.
But consistently noticeable.
And consistency is the red flag.
Random discomfort is life.
Repeatable discomfort is a system problem.
The Biggest Clue
Forearms didn’t feel “trained.”
They felt “done.”
Like I had poured all the remaining effort into them at the end when the tissue was already tired.
That’s when I started thinking the issue wasn’t forearm volume.
It was the timing of that volume.
Weeks 4–6: Forearms Before Pulling
The First Week Felt Worse for Performance
I’m not going to pretend it felt amazing.
It didn’t.
Pull-ups felt heavier.
Rows felt like they demanded more focus.
My grip hit fatigue sooner.
If you only care about numbers, this is the moment you’d call the test a failure and go back to the old way.
But I was tracking elbows, not ego.
And elbows immediately felt different.
Less irritated.
Less loaded.
Less “dense.”
Even in week 4, when performance felt slightly worse, the joint felt calmer.
That caught my attention fast.
Week 5 and 6: The Body Adjusted
By week 5, my grip started adapting.
Not magically.
Just normally, like it does when you train it in a consistent way.
Pull numbers went back close to baseline.
But the elbow improvement stayed.
And the next-morning stiffness dropped noticeably.
That was the big win.
Because waking up and thinking, “Oh, my elbow again,” is exactly the kind of small stress that makes training feel fragile.
When that goes away, training feels solid again.
Why Forearms Before Pulling Helped My Elbows
I’m going to explain this without pretending I’m a tendon whisperer.
This is just basic stress management.
Tendons Like Warm, Predictable Loading
When forearms were first, the tissue got loaded in a controlled way.
Slow reps.
Clean wrist angles.
No body swinging.
No panic gripping.
That’s like warming up the engine before driving on the highway.
You don’t start your car at -5°C and immediately redline it up a mountain.
Well, you can.
But it’s not a long-term love story.
Pre-Fatigue Reduced “Death Grip” Pulling
With slightly tired forearms, I couldn’t grip like a maniac on every rep.
So I naturally pulled with more control.
Less jerking.
Less aggressive initiation.
More stable shoulder positioning.
More steady tempo.
That change alone can reduce elbow irritation because the elbow often hates sudden acceleration under load.
Lower Peaks, Same Total Work
Forearms after pulling creates a peak.
You do big pulling.
Then you do forearm isolation.
So the same tissues get hit hard twice, back to back, when they’re already vulnerable.
Forearms before pulling spreads it out.
You get controlled forearm work first.
Then pulling happens with slightly reduced peak grip force.
The total work is similar.
But the spike is lower.
Tendons are like people in traffic.
They can handle a steady flow.
They hate sudden jams.
The Forearm Exercises I Used
Now the detailed part.
Because doing “wrist curls” badly is like brushing your teeth by chewing the toothbrush.
Technically you’re doing something.
But the result won’t be what you want.
And in this context, sloppy form can also irritate elbows more, not less.
So here’s exactly what I did, how I did it, what I focused on, and what mistakes I avoided.
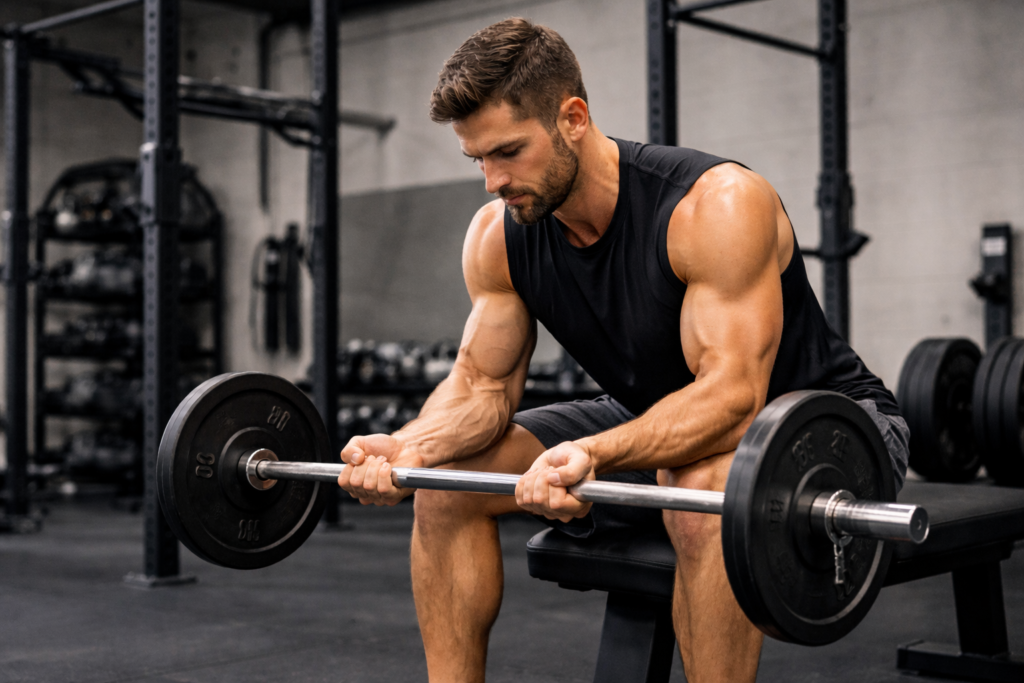
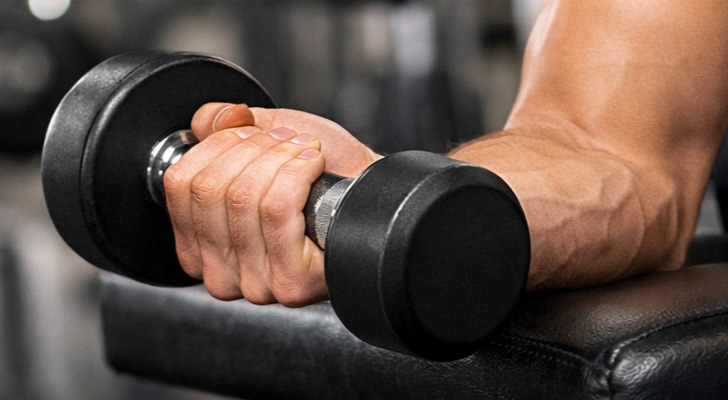
Exercise 1: Seated Dumbbell Wrist Curl
This is wrist flexion.
This targets the forearm flexors, which are often involved in “golfer’s elbow” type irritation if overloaded poorly.
So execution matters a lot.
Setup
- Sit on a bench.
- Hold a dumbbell in one hand.
- Rest your forearm on your thigh.
- Your palm faces up.
- Your wrist and hand hang slightly off the knee so the dumbbell can move up and down.
Execution
- Let the dumbbell roll slightly toward the fingers on the way down.
- Not because you want to be fancy.
- Because it increases range of motion without jerking the wrist.
- Then close the hand and curl the wrist up slowly.
- At the top, pause for about one second.
- Not a dramatic flex.
- Just a calm squeeze.
- Then lower slowly again.
- The lowering is where tendons get useful work.
So I made the lowering controlled and steady.
If the dumbbell “drops” at the bottom, you lose a lot of the benefit and you add stress in the worst way.
Tempo I Used
Up: about 1–2 seconds.
Pause: about 1 second.
Down: about 2–3 seconds.
What It Should Feel Like
A deep forearm burn.
Not wrist pain.
Not elbow pain.
Just the forearm working hard near the muscle belly.
Common Mistakes I Avoided
Using the shoulder to lift the dumbbell.
Bouncing at the bottom.
Curling so high that the wrist jams into a weird angle.
Gripping the dumbbell like I’m trying to crush it.
The grip should be firm but not insane.
Think “hold a hammer,” not “hold onto a cliff.”
Exercise 2: Seated Reverse Wrist Curl

This is wrist extension.
It targets the forearm extensors, which are often undertrained and can balance the system.
For many people, stronger extensors make elbows feel more stable.
Not always.
But often.
Setup
- Same position as the wrist curl.
- Forearm on thigh.
- Hand hanging off.
- But now palm faces down.
- Dumbbell held with knuckles up.
Execution
- Lower the dumbbell slowly into a comfortable stretch.
- Then lift the back of your hand up by extending the wrist.
- Keep the movement small and clean.
- Wrist extension doesn’t need huge range to be effective.
- It needs control.
- At the top, pause briefly.
- Then lower slowly again.
What It Should Feel Like
A burn on the top side of the forearm.
If you feel it mostly in the fingers, your grip might be doing too much.
If you feel it in the elbow joint itself, reduce load and tighten technique.
Common Mistakes I Avoided
Going too heavy.
Extension work punishes ego fast.
Letting the forearm lift off the thigh.
That turns it into a messy whole-arm move.
Using momentum.
Momentum is basically a way to pay less attention while demanding more from tendons.
Not a great deal.
Exercise 3: Hammer Curl Holds at 90 Degrees

This one helped a lot because it trains grip and brachioradialis in a steady, tendon-friendly way.
Not too flashy.
But very practical.
Setup
- Stand tall.
- Hold a dumbbell like a hammer, thumb pointing up.
- Curl it until your elbow is about 90 degrees.
- Your forearm is horizontal.
- Your upper arm stays close to your side.
Execution
- Hold that position.
- Breathe normally.
- Keep the wrist neutral.
- No bending the wrist to cheat.
- No shrugging.
- No leaning back.
- Just a clean isometric hold.
- I held for 20 to 40 seconds depending on the day.
- If form started breaking, the set ended.
What It Should Feel Like
A deep, steady fatigue in the forearm and upper forearm area.
Not sharp pain.
Not numbness.
Just “this is hard, but controlled.”
Why It Matters for Elbows
Isometrics can load tendons without the same kind of friction that comes from fast reps.
It’s like pushing against a wall.
Your muscles work.
But the movement is stable.
That stability often feels nicer on cranky elbows.
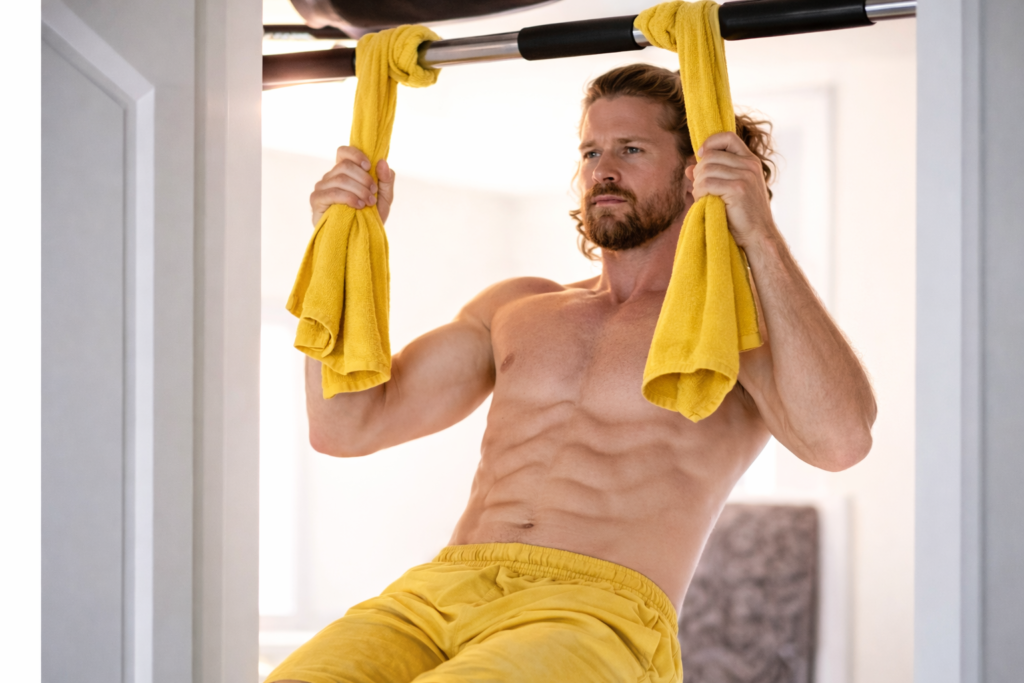
Exercise 4: Towel Dead Hang
This is the most humbling one.
And it’s also the one that instantly tells you if your grip is doing silly things.
Setup
- Loop a towel over a pull-up bar.
- Grab both ends of the towel.
- Hang with shoulders active.
- That means you’re not just dangling like a coat.
- Your shoulders are slightly pulled down and stable.
Execution
- Hang for time.
- Start with 10–20 seconds if needed.
- Build up gradually.
- Keep the elbows slightly soft, not hyperextended.
- Breathe.
- If the grip starts slipping, stop before panic-kicking starts.
Why It Helped
It trains grip in a very “real life” way.
It also spreads force across the hand differently than a metal bar.
That small change often changes how the elbow feels.
Sometimes for the better.
In my case, it felt better when used carefully and not to failure every time.
Mistakes I Avoided
Doing it at the end when I was already destroyed.
That would turn it into a survival hang.
Survival hangs build anxiety, not elbows.
Doing it with completely relaxed shoulders.
That can shift stress to places that don’t want it.
How the Pieces Fit Together
I didn’t do all of them every time.
Because the goal wasn’t to create a forearm marathon.
The goal was a consistent, repeatable dose.
Forearm Block Structure
Two exercises per session.
Sometimes three if I felt great.
Never four.
I rotated patterns so flexion and extension were both trained weekly.
Then I added one grip hold pattern.
Example rotation.
Day A: wrist curl + reverse wrist curl + short hold.
Day B: reverse wrist curl + hammer hold or towel hang.
The key rule was simple.
No sets taken to absolute failure.
Because failure with forearms often means grip breaks, form gets weird, and elbows take the hit.
I stayed around “hard but clean.”
If I had to assign a feeling number, it was around 7–8 out of 10 effort.
Not 10 out of 10.
Not “I hate life.”
Just “this is serious work.”
So Which Is Better, Before or After
For my elbows, forearms before pulling won clearly.
But not because it was magical.
Because it changed the stress pattern.
What Improved
Less next-morning stiffness.
Less lingering tenderness.
Less “loaded” feeling after sessions.
More stable joint sensation week to week.
What Got Temporarily Worse
Pulling felt harder in week 4.
Grip fatigue arrived sooner.
I had to be more honest about rest and technique.
Which, if we’re being real, is not a tragedy.
How to Try This Without Wrecking Your Pull Day
If you want to copy the test without turning it into a mess, do it like this.
Step 1: Keep Forearm Work Short
Pick two exercises.
One flexion or extension.
One hold.
Do 2–3 sets each.
That’s it.
Step 2: Use Moderate Loads and Slow Reps
The forearm block is not the place to go heavy and sloppy.
Slow reps are your friend here.
Control is the whole idea.
Step 3: Accept Slight Performance Changes for Two Weeks
You might lose a rep.
You might need longer rest.
That’s normal adaptation.
If elbows feel better, stay the course.
If elbows feel worse, you adjust.
No ego contracts signed in blood.
What This 6-Week Experiment Actually Taught Me
If your elbows feel perfectly fine, forearms after pulling is not automatically wrong.
It’s just the default.
And defaults are not personalized.
But if your elbows have that recurring annoyance, the “forearms first” approach is worth testing for a few weeks.
Not forever.
Not as a religion.
As a controlled experiment.
Because the best training plan is the one your joints will tolerate long enough for your muscles to actually grow.
Pain-free consistency beats heroic intensity every time.
And elbows, unfortunately, are very honest accountants.
They don’t care about motivation quotes.
They care about load management.
So if a simple order change makes them quieter, that’s not a small win.
That’s the kind of win that keeps you training for years instead of months.