Let’s cut the fluff.
If you’ve ever peeled off your straps after deadlifts only to see angry red lines circling your wrists, you know the pain.
It feels less like training gear and more like you just volunteered for medieval torture.
Now, if you’ve got smaller wrists, the problem multiplies.
Every strap feels oversized, like wearing your dad’s jacket when you were twelve.
You cinch tighter, the fabric digs in, and suddenly the thing designed to help your lift is the very thing distracting you from the bar.
I’ve been there.
I’ve tested, cursed, swapped straps with friends, and read enough blog posts at 2 a.m. to qualify as an unofficial strap historian.
This is the guide I wish I had when I started chasing a PR with wrists closer to bracelet size than tree trunk.
Why Lifting Straps Hurt Small Wrists (And What the Blogs Don’t Tell You)
Most lifting straps are made one-size-fits-all.
Which usually means: built for the guy with wrists the size of my ankles.
When you’re smaller framed, here’s what happens:
- The loop doesn’t cinch down evenly.
- Fabric stacks in awkward folds.
- Pressure gets funneled into a tiny surface area.
Biomechanically, that means the strap squeezes soft tissue against bone — basically pinching nerves and restricting blood flow.
Some coaches even call it the “noose effect.”
You don’t need an anatomy chart to know it feels wrong.
And no, it’s not about being weak or fragile.
It’s about leverage mismatch — gear designed for big wrists simply doesn’t scale down gracefully.
Anatomy of wrist pressure — where hot spots form
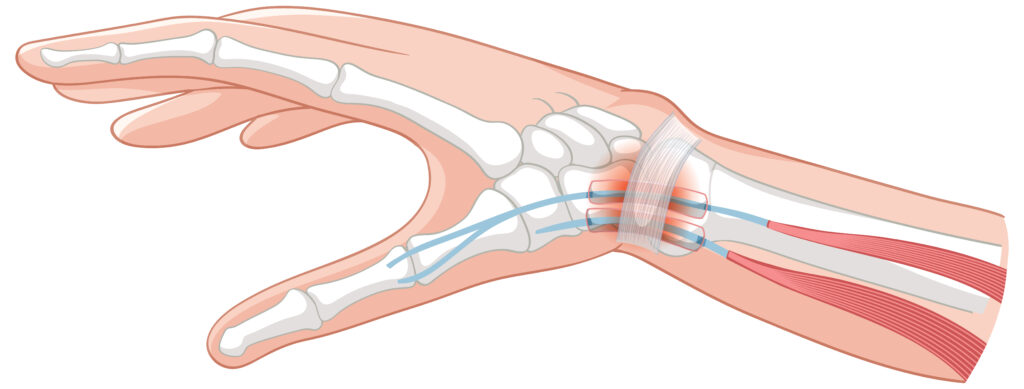
Most of the digging happens right at the distal radius and ulna (those little bony knobs on either side of your wrist).
That’s the strap’s favorite bite point.
Add load, and it presses like a clamp.
If you’ve ever felt tingling or numbness after a heavy set, that’s not just “normal.”
That’s your strap compressing nerves.
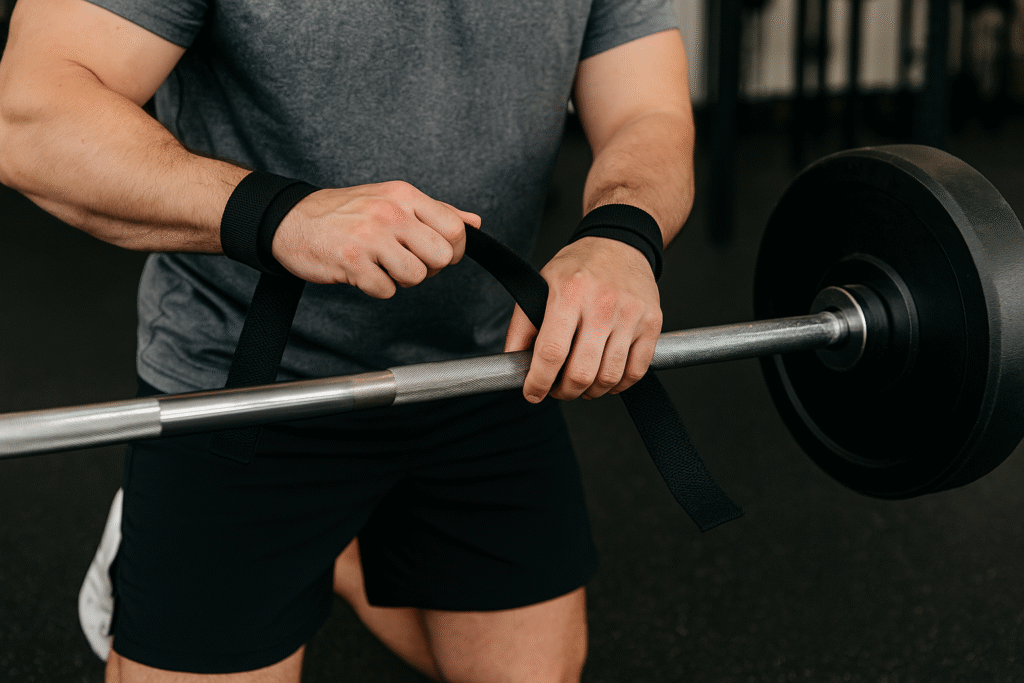
Common mistakes that make it worse
- Using straps that are way too long → extra fabric means more cinching.
- Pulling them “max tight” instead of adjusting tension gradually.
- Using raw-edged nylon with zero padding.
- Wrapping directly over the sharpest part of the wrist instead of shifting slightly toward the forearm.
Fixing just one of these can change the whole experience.
Choosing Straps for Small Wrists: What to Look For
This is where you stop buying whatever looks “hardcore” on Amazon and actually shop smart.
Material, width, padding, and edge finishing
- Cotton → soft, flexible, friendly on skin. Downside: shorter lifespan.
- Nylon → durable but stiff. Works better if blended with softer threads.
- Leather → molds over time, stylish, but bulkier.
Pro tip: check the edges.
Rounded edges or stitched binding = less chafing.
Raw cut = wrist shredder.
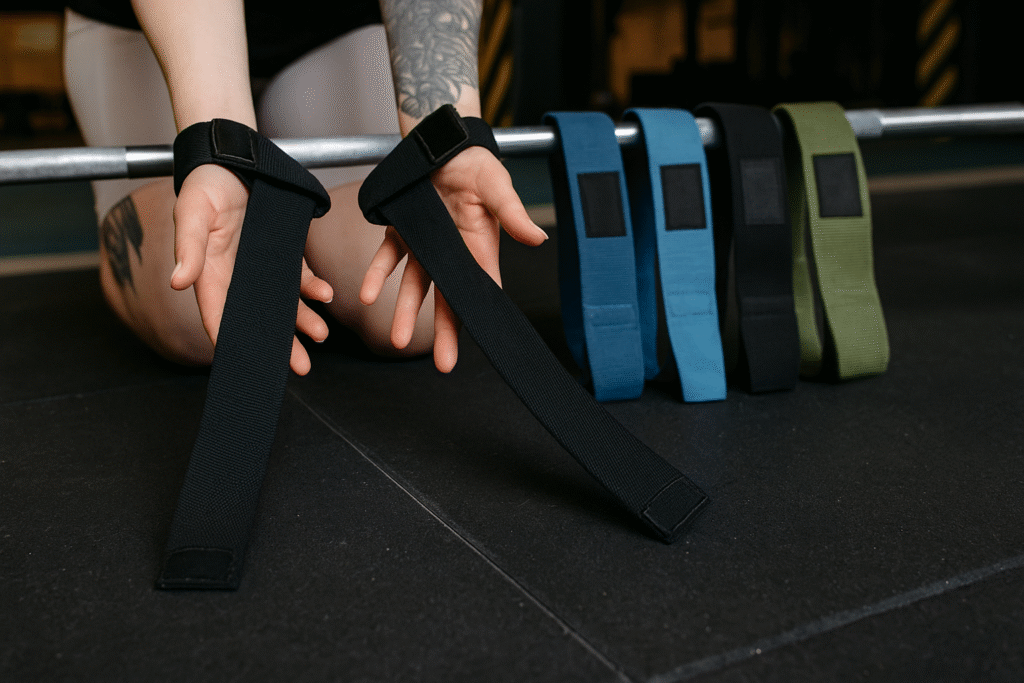
Loop vs lasso vs figure-8
- Shorter lasso straps → king for small wrists. Less bulk, quicker setup.
- Figure-8 → super secure, but bulky and awkward if your wrist isn’t filling the loop.
- Olympic/Oly style → fast release, minimal bulk, but less padding.
Pick your poison — just know that shorter is usually better when you’ve got smaller wrists.
Ideal length of the “tail”
Here’s something nobody told me:
If the strap tail is too long, you’re forced to wrap extra times, pulling harder against your skin.
Look for straps in the 18–20 inch range instead of the typical 22–24.
That small difference saves you from over-tightening.
Buy Short Gym Straps on Amazon
Setup & Hacks to Reduce Digging — Tested Tricks
This is where you get credit at the gym.
- Double wrap with micro-tension: instead of wrapping full loops around the bar, make your first loop snug, then use the extra fabric as a “safety tail” — don’t pull it fully tight. This spreads load.
- Pre-stress your straps: before you even hit a heavy lift, do a few light deadlifts or rows just to seat the strap fabric so it doesn’t shift mid-heavy set.
- Use a half-layer of neoprene or sweatband under strap: acts like a buffer without major bulk.
- Reverse threading trick: some people feed the strap from the “inside” of the loop first so the pull sits in a slightly different angle — for me, that little angle change can make or break comfort.
These tweaks don’t get mentioned often because they’re messy to explain, but if you try ’em, you’ll notice the difference.
When (and When Not) to Use Straps — Balancing Grip Training
Here’s where the smart lifter sets boundaries.
Use straps when your grip is the limiting factor — e.g. high-volume deadlifts, weighted pull-ups, rows when your forearms start screaming.
Don’t (or minimize) using straps during lighter sets, warm-ups, or when you’re trying to build pure grip strength.
Many blogs caution against over-reliance so you don’t “atrophy” your natural grip.
If your wrist pain comes even with straps, stop.
It’s not the straps’ fault alone.
Form, load progression, tendon health — all of it.
Common pain points and “oh crap” fixes
- Numbness / tingling: often caused by circulation cut-off or nerve compression. Loosen strap immediately; consider repositioning toward forearm slightly.
- Bruising / red lines: means too much pressure at a focal point. Add padding, widen contact area, or rotate strap position between sets.
- Skin abrasion: use fabric sleeves underneath or tape the strap edge.
- Joint ache (not just surface pain): may indicate the strap is misaligned — pull direction may be introducing torque to the wrist.
These are warning signs, not cute battle scars.
Treat them early — don’t grind on through expecting it to “toughen up.”
Get Olympic Lifting Straps on Amazon
Quick 60-Second Strap Test
Here’s the speed checklist before you commit:
- Wrap strap around wrist loosely.
- Flex your wrist front-to-back. If you feel sharp edge contact at full flex, fail.
- Wrap around bar, pull tension, but stop before it’s tight.
- Slide your finger between strap and wrist at 3 clock-positions (like 3 o’clock, 6 o’clock). If finger can’t slide or feels crushed — too tight.
- Do 10 reps with light weight. If you get a hot spot (burning or pinching) — that’s the trouble zone.
If it fails any of those, you’ll regret using it under heavy.
Real-World Favorites & Case Studies
After too many trial-and-error buys, here are the ones that actually worked for me and others with slimmer wrists:
- Harbinger Padded Cotton Straps → shorter, softer, no cuff-like squeeze.
- IronMind Strong-Enough (short version) → built for beasts, but the shorter cut fits small wrists surprisingly well.
- Rogue Ohio Cotton Straps → minimalist, durable, break in fast.
Pro hack: if a strap is slightly too long, tie a knot closer to the loop.
Looks scrappy, works brilliantly.
RELATED:》》》 Do Longer Wrist Wraps Actually Give More Support or Just Make Lifting Awkward?
Final Thoughts
Straps are tools, not punishers.
If they dig in, constrict, or distract, you’re doing it wrong — not your wrists.
Arm yourself with the right knowledge:
Understand how they should feel, know the red flags, get clever with setup, and balance their use with raw grip work.
When you find your pair (or pair + hack), it’s magic.
No more wrist warfare.
Just you, bar, weight, and that thrilling moment when you lock it out.
Go test.
Adjust.
Dominate.
Your wrists (and confidence) will thank you.
FAQs & Myths About Straps & Wrist Comfort
“Straps will kill your grip.”
Only if you overuse them.
Rotate with raw grip days.
“Padded = always better.”
Not true.
Too much padding can slip or bunch.
“If it hurts, you’ll toughen up.”
Wrong.
Pain here = bad setup or bad gear, not “adaptation.”
“Women don’t need straps.”
Tell that to the female powerlifters pulling 400+ pounds with cotton straps that actually fit.
Small wrists ≠ weak.