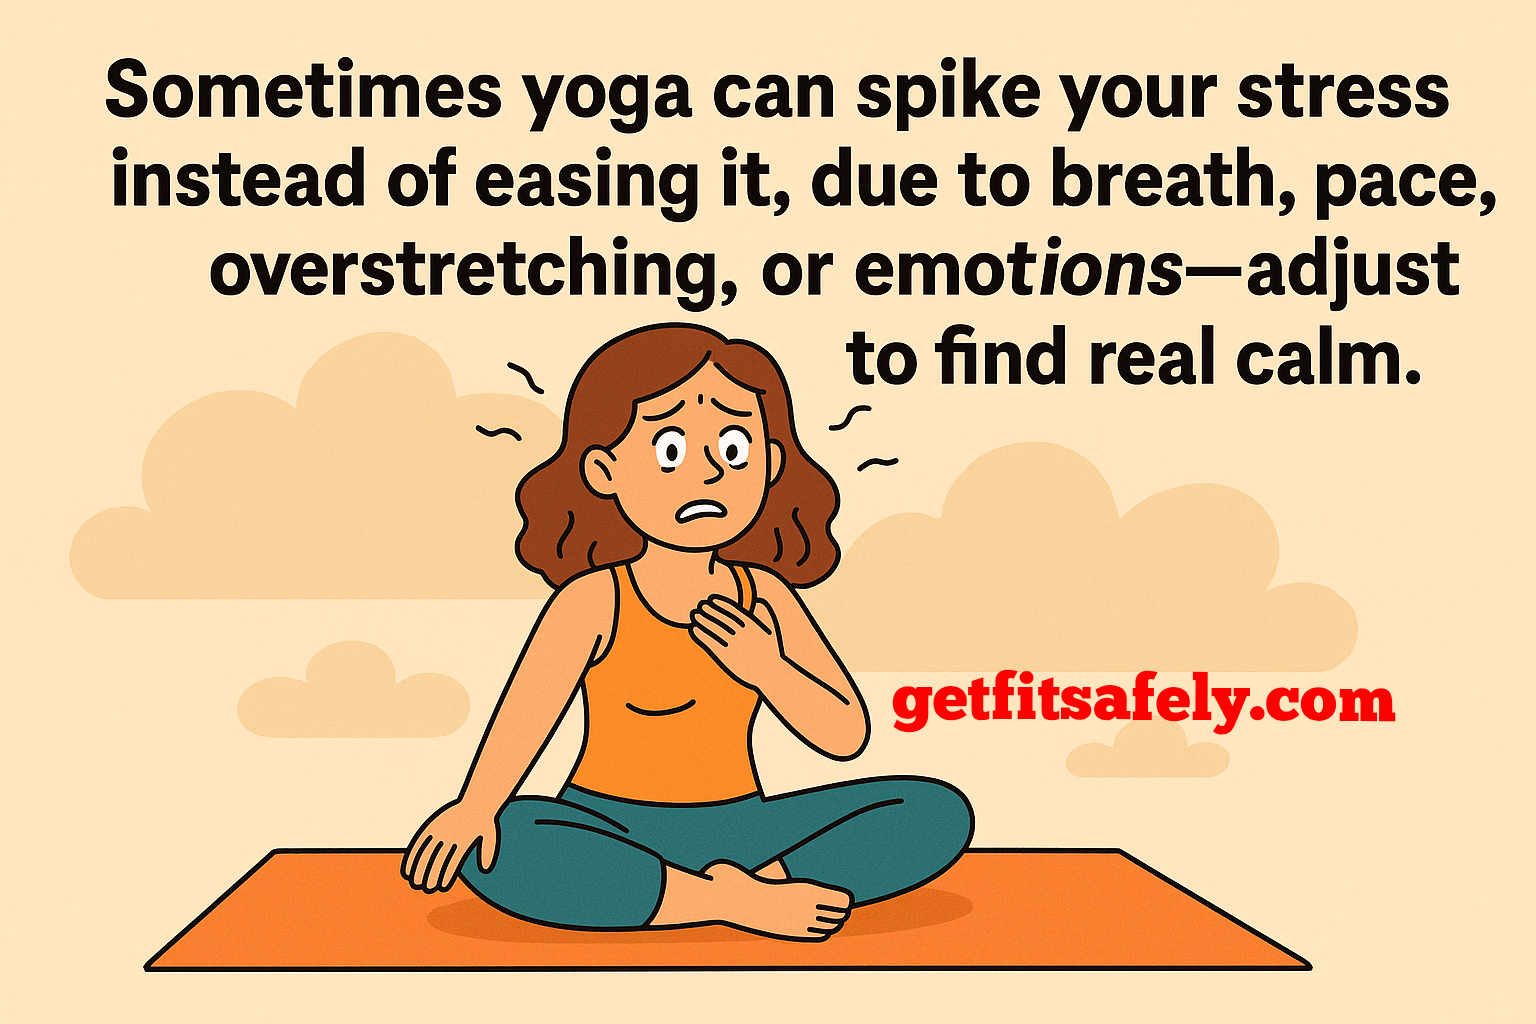
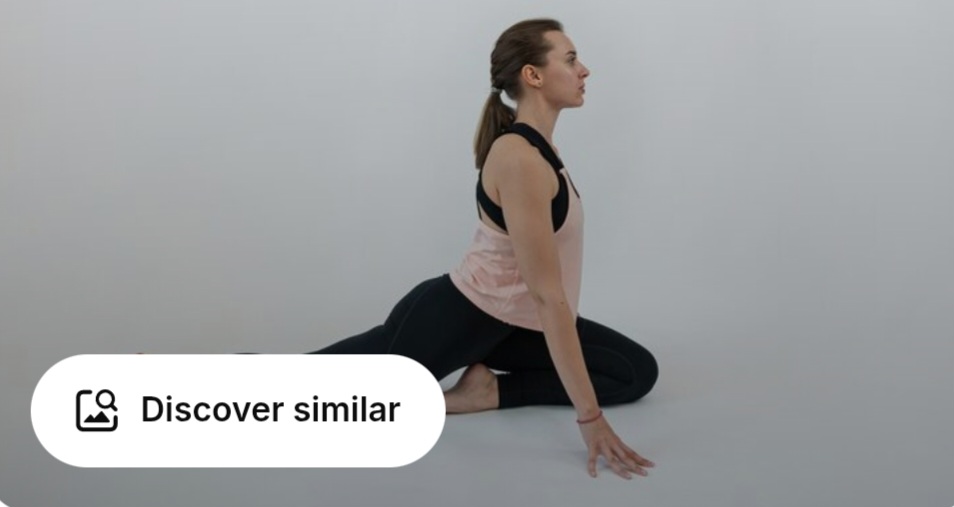
That first pigeon pose experience… yep, same here
I don’t know about you, but the first time I tried pigeon pose, I thought I was about to open my hips like a spiritually awakened lotus flower.
Instead, after exactly three seconds, I heard a sinister “crack” from my front knee.
And I thought:
“What the hell… am I doing yoga or dislocating myself?”
Spoiler: I was still doing yoga, but my knee didn’t agree.
And if you’ve ever felt that annoying “pop about to happen” sensation in your knee when settling into pigeon, know this: you’re not alone.
And no, it’s not a sign that you’re “stretching deep” in some spiritual way.
It’s a warning bell.
Let’s see what’s really going on.
How to actually do pigeon pose without wrecking your joints
Okay, let’s set aesthetics aside for a moment.
The pigeon that looks good and the pigeon that’s good for your body are not always the same.
If you want the pose to open your hips instead of abusing your knees, here’s how to set it up step by step—no romance included.
Start from downward-facing dog
Slowly bring your right knee forward toward your right wrist.
Your right foot angles toward your left wrist, but don’t force it to be parallel to the mat (that only happens if you’ve got monster-level hip mobility).
Adjust the front shin based on your mobility
The closer your foot is to your groin, the less stress on the knee.
If possible, move it gradually outward over time.
But never yank the ankle like you’re trying to hit the jackpot.
Extend the back leg straight behind you
Don’t let it fall off to the side. The femur should point directly backward, and the toes should be extended with the top of the foot on the floor.
This stabilizes the pelvis.
Check your pelvic alignment
Here’s the fun part: the pelvis tends to collapse to the side (toward the bent leg).
You’ll need to engage your lower abs and gently push the hip of the back leg slightly forward to “square” the hips.
If one side is floating in the air, place support underneath. No, that’s not cheating. That’s how you get a happy hip.
Hands on the floor, or fold forward only if stable
You can stay upright with your arms, resting on hands or elbows.
Only if your hips feel stable should you fold forward and relax.
But relaxation comes after proper setup, not before.
Stay in the pose while breathing, but listen closely
If your breath locks up, if you feel sharp tension, or if you’re checking your knee every three seconds… you’re not in the right pose for you.
Exit calmly and modify.
The correct pigeon isn’t the one that goes deepest, but the one that distributes effort between hip, glute, quad, and torso—without the knee freaking out.
Everything else is just for show.
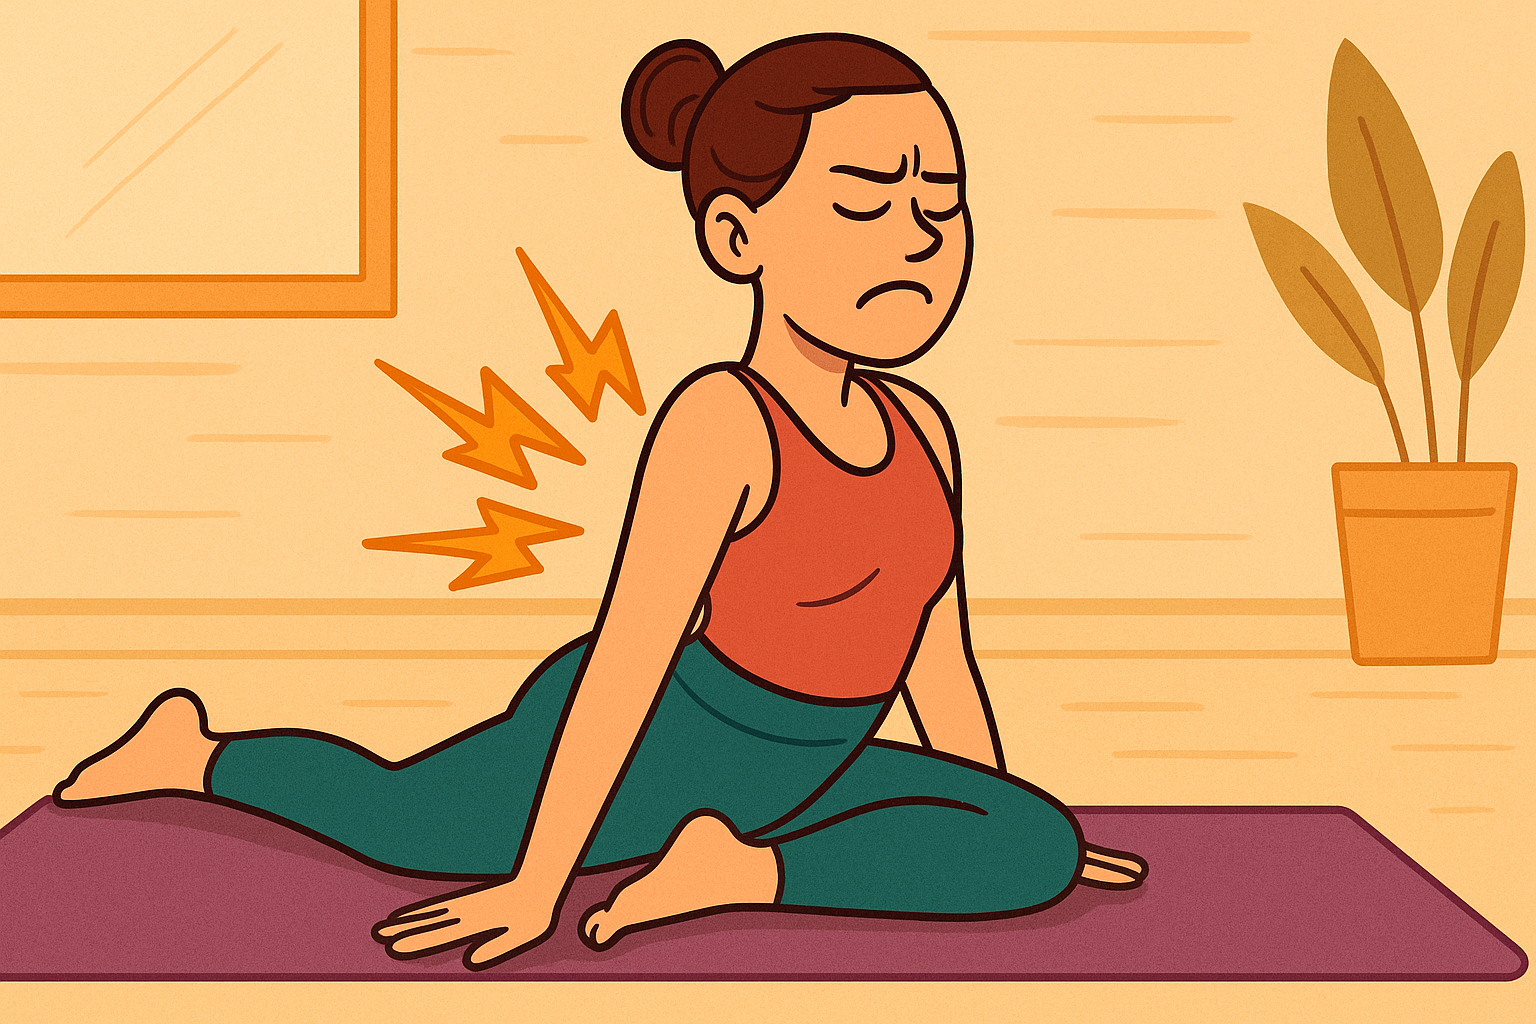
The knee isn’t the bad guy. It’s the hip being sneaky.
Pigeon pose looks like something made for flexible, chill people who probably sip matcha lattes after class.
But it’s actually one of the trickiest positions for folks with tight hips (hello, leg day crew and 8-hour desk warriors).
The poor knee is just a hinge.
It likes bending and straightening.
But rotating?
No thanks.
Pigeon pose demands external hip rotation—
If the hip can’t deliver, the knee ends up twisting in a way it was never meant to.
Like asking a faucet to blend your smoothie.
The result?
Inner tension, insane stretching, that creepy “something’s about to snap” feeling.
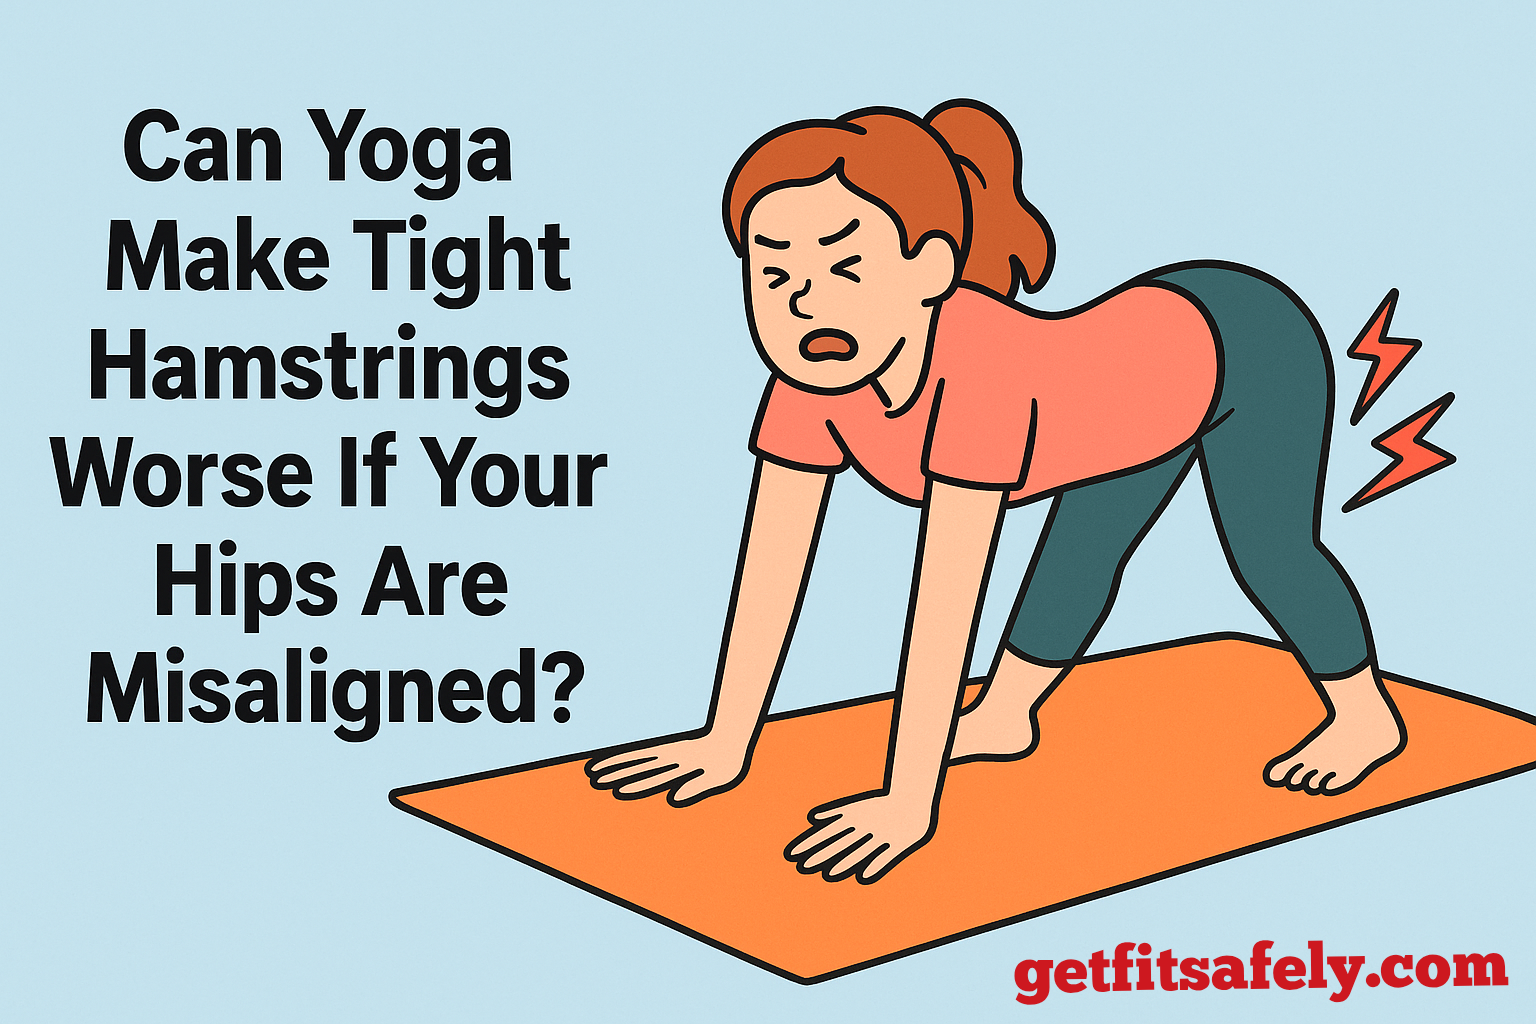
Mini anatomy lesson What’s really happening The knee is stuck between two big structures: the femur and tibia. But during pigeon, all the pressure gets dumped there if the hip doesn’t rotate enough. The tissues most at risk are:
In short: if the hip doesn’t give, the knee pays the price. |
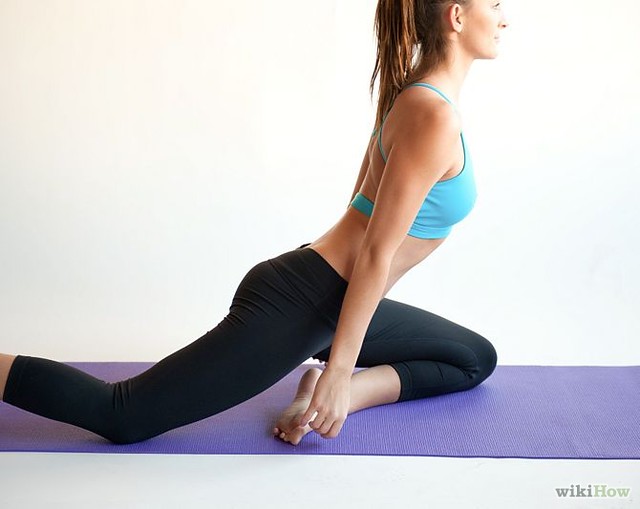
Classic mistake: copying Instagram
I’ve been there too: you see that yogi with 20,000 followers resting her shin perfectly parallel to the front of the mat.
“I can do that too,” I said, naively.
But forcing your shin into that position without modern dancer-level hip mobility means jamming your knee into an unnatural angle.
And your knee gets revenge.
How to avoid it?
- Bend the front leg more: bring the foot closer to your groin
- Use support under your glute (a folded blanket, yoga block…)
- Keep the back leg straight, hips forward, not flopping sideways like a flamingo
It’s yoga, not a beach limbo contest.
Pain and pride: a terrible duo
In the gym we think: “No pain, no gain.”
In yoga?
“No brain, big pain.”
Here it’s not about powering through a contraction or muscle burn.
It’s about knowing the difference between healthy stretch and joint stress.
If you feel deep, compressed, or sharp pressure in the knee: STOP.
If you feel a mild pull in the glute or hip: GOOD.
Your body speaks.
If you ignore it long enough, it starts yelling.
Who pigeon pose is not for
I know, pigeon is everywhere.
Yoga classes, YouTube videos, motivational reels…
It almost feels like skipping it means missing out on magic.
But the truth is, this pose isn’t for everyone.
And experience level only matters up to a point.
Here’s who should approach with caution—or skip it altogether:
- Anyone with a history of knee or cartilage injuries (like meniscus tears, ACL, MCL)
- Anyone with extremely tight hips and no practice in external rotation
- Anyone with chronic lower back pain
- Anyone who can’t control core or glute activation
- Anyone with significant imbalance between body sides
In all these cases, it’s not about giving up yoga—it’s about choosing the right variations.
Pigeon isn’t a personal worth test.
It’s a tool.
And like all tools, it only works if it fits you at that moment.
If it doesn’t, there are plenty of alternatives that get the job done—without damage.
Smart alternatives to pigeon pose
Nowhere does it say you must do full pigeon to unlock your hips.
Here are some clever options that spare your knee while still opening up your hips:
- Reclined pigeon (figure 4): lying down with one leg flexed over the other and back on the mat. Same stretch, zero knee stress.
- 90-90 position: both front and back legs form 90° angles. More control, great for strengthening hips and glutes.
- Seated pigeon on blocks: like pigeon, but elevated and with better alignment control.
And what if your knee just cracks but doesn’t hurt?
Let’s talk.
A light “click” or “snap” can be normal—especially if you have tension in the IT band or if your femur shifts slightly in the hip socket.
But…
- If the sound comes with pain: stop.
- If you feel instability or like something’s “slipping”: stop immediately.
- If you have swelling or stiffness afterward: take note, modify, reassess.
Better to prevent than to ice your knee after every class.
Important note about warming up
Doing pigeon cold is like trying to bend a frozen straw—it won’t end well.
So:
- Walk a bit first, mobilize your hips, do some dynamic lunges
- Activate the glutes with controlled movements
- Only then approach pigeon or a variation
Your body needs to feel ready.
Otherwise, it goes into defense mode.
And you end up battling your own fascia.
Smart strategies to protect your knees—even if you only practice 10 minutes a day
Knee protection isn’t just about adjusting a pose here and there.
It means prepping the ground, building stability, and understanding how muscle chains actually move through that poor joint wedged between hip and ankle.
Good news: you don’t need a gym or hours in front of a mirror.
Just a few well-done minutes.
Here’s what you can do to build a real foundation of protection—no Olympic skills needed:
- Strengthen your glutes laterally
The more your glute medius and minimus work, the less your knee has to deal with twisting forces.
Think clam shells, banded abductions, lateral steps. - Do active hip mobility work
Passive stretching helps to a point.
But you also need to teach the hip to move with control in external and internal rotation.
Try active 90/90s, bodyweight hip rotations, and brief isometrics. - Pre-activate before practice
Don’t go in cold.
Try a quick 2–3 minute circuit with:- Deep bodyweight squats
- Leg swings
- Hip bridges
- Always track knee direction in every pose
In yoga, we often “drop” into passive poses.
But light muscle activation around the knee (without stiffness) makes a difference. - Avoid overly hard surfaces
If your mat is thin or the floor is rigid, add a layer (extra mat, folded towel).
Knees don’t like hard pressure under static load.
The ankle’s role: the detail no one talks about
You know which joint gets forgotten in pigeon?
The ankle.
If the front knee’s ankle is too relaxed or twisted oddly, the rotation isn’t absorbed by the foot or calf—and all the force shoots straight into the knee.
A floppy foot becomes an unstable lever that drives the joint above crazy.
Solution?
- Keep the foot active
- Press the outer edge lightly into the mat
- Think of the foot as a mini hydraulic brake that protects your leg
An awake foot = a happy knee.
What it means if it only hurts on one side
Classic scenario: left side flows like butter, right side feels like someone’s yanking a ligament with a fish hook.
No, you’re not permanently crooked.
But there is a message.
Usually, one-sided pain in this pose reveals:
- Limited hip rotation on one side
- A lazy glute on one side (yep, it happens)
- An old tension or micro-injury that hasn’t fully healed
Instead of forcing to match both sides, work patiently on the stiff side with breathing, focused attention, and maybe some isolated hip rotation drills.
Sometimes symmetry shows up… but not by magic.
What to do after pigeon to avoid tightness or soreness
You’ve done pigeon, you’ve gotten up… now what?
Rolling off the mat and heading into final rest isn’t enough.
Smart recovery after such an intense pose helps your body lock in the benefits and avoid stiffening right back up.
Try these smart moves right after:
- A few bent-knee leg curls lying on your stomach, to get circulation back to the joint
- A slow-paced walk, even just around the room, to release leftover tension
- A soft dynamic stretch like floor cat-cow, to relax the lower back
This pigeon reset is like brushing your teeth after eating—optional, but you’ll feel way better.
When it’s time to see a professional (and it’s not just paranoia)
Yes, listening to your body and trying things out with care, blankets, and common sense is great.
But sometimes “discomfort” goes beyond normal stretch tension and becomes something you shouldn’t face in pajamas and hope.
Here are signs you shouldn’t ignore:
- Knee pain that shows up during daily life—like climbing stairs or getting out of the car
- Feeling of instability or collapse, like your leg can’t hold weight
- Persistent or localized swelling inside the knee, even hours after practice
- Mechanical noises paired with pain, like a “snap” followed by burning or stiffness
- Joint locking sensation, like you can’t fully bend or straighten your knee
In those cases, a visit with a sports physical therapist, orthopedist, or physiatrist can make the difference between manageable inflammation… and a chronic injury.
RELATED:》》》 Can doing yoga barefoot every day mess up your foot arch?
Conclusion
Pigeon pose isn’t the enemy.
It’s just an advanced position that requires respect, awareness, and adjustments.
It’s not a contest of who can flatten themselves on the mat the most.
It’s a process to open hips, release tension, and move more freely.
If your knee sends you warning signals, don’t silence them with willpower.
Respond with awareness.
Modify.
Breathe.
Listen.
And remember: when in doubt, there’s always another road to the same benefit—without sacrificing your joint health.
Your body is your lifelong teammate, not a problem to crush through.