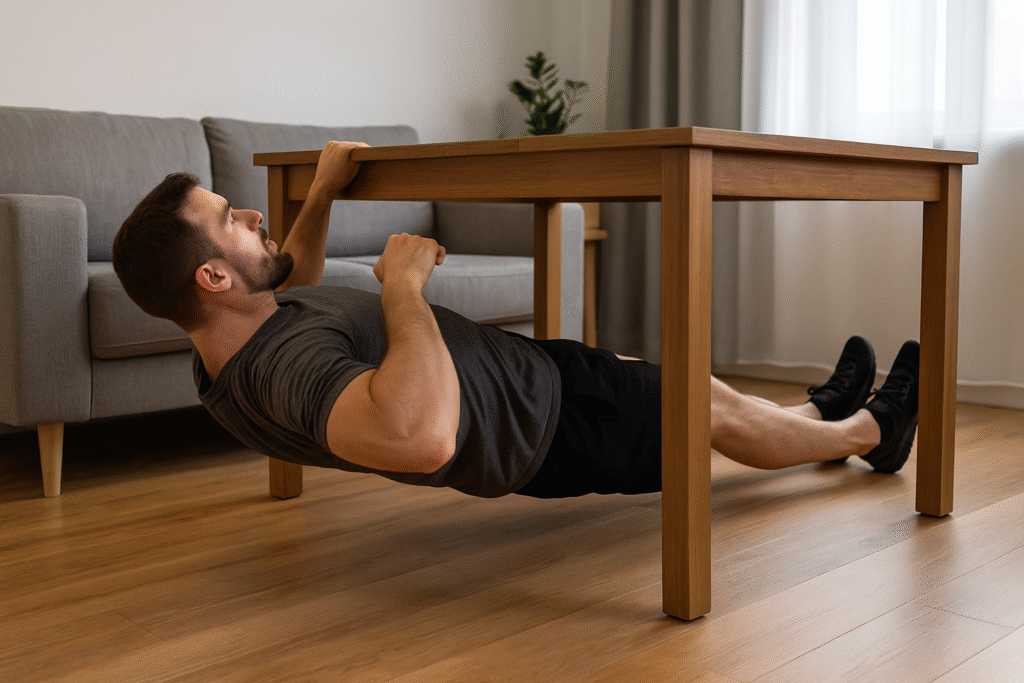
There’s a special kind of creativity that appears when someone wants to train their back but has absolutely no equipment at home.
That’s how the internet ended up obsessed with the idea of sliding under a table and pulling up like it’s a homemade rowing station.
At first glance, the whole thing looks like one of those fitness hacks that appear next to spoon workouts and suitcase deadlifts—fun to watch, questionable to trust.
But here’s the twist.
Every viral clip shows someone swearing that inverted rows under a table “light up the lats” better than half the machines at the gym.
And every skeptic shows up in the comments ready to call it pure folklore.
So the real question becomes simple.
Is this setup just another internet trick that refuses to die, or can a basic household table actually help build a stronger, wider back?
Let’s break down what’s legit, what’s overstated, and what happens when a budget-friendly idea accidentally turns into a real exercise.
Understanding Inverted Rows for Lat Growt
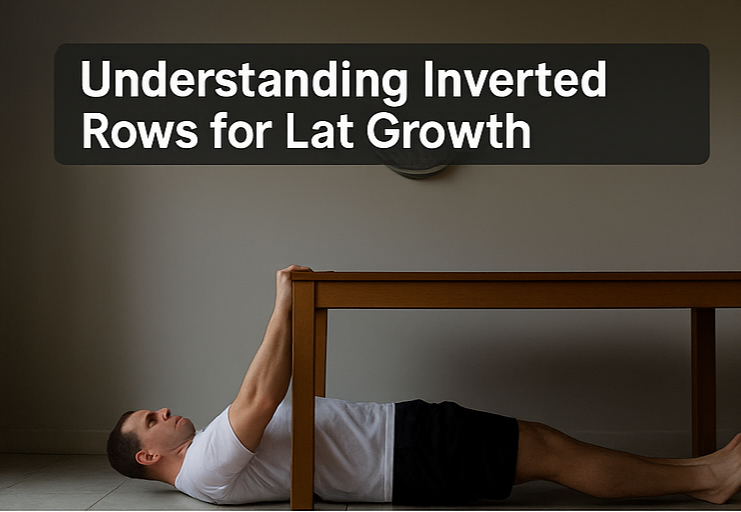
Inverted rows are basically a horizontal pulling pattern, the opposite cousin of the bench press and a safer relative of the pull-up.
The motion itself is legit.
You’re pulling your chest toward a fixed point, your spine stays neutral, and your shoulder blades get to do what they love—retract and depress.
Those two actions are the bread and butter of lat activation.
Even physical therapists use variations of inverted rows to train scapular mechanics before loading someone with heavy pulls.
So the movement pattern is sound.
The question becomes whether your table setup gives you the right angle, stability, and force production to make it worth your time.
INVERTED ROW VARIATIONS:You can check this video for a bunch of inverted row variations you probably can’t pull off under your kitchen table. But if you train at a park or anywhere with a solid bar, these versions will open up a whole new level of pulling strength. It’s the same movement pattern — just with way more room to grow. |
How a Table Setup Changes the Lat Stimulus
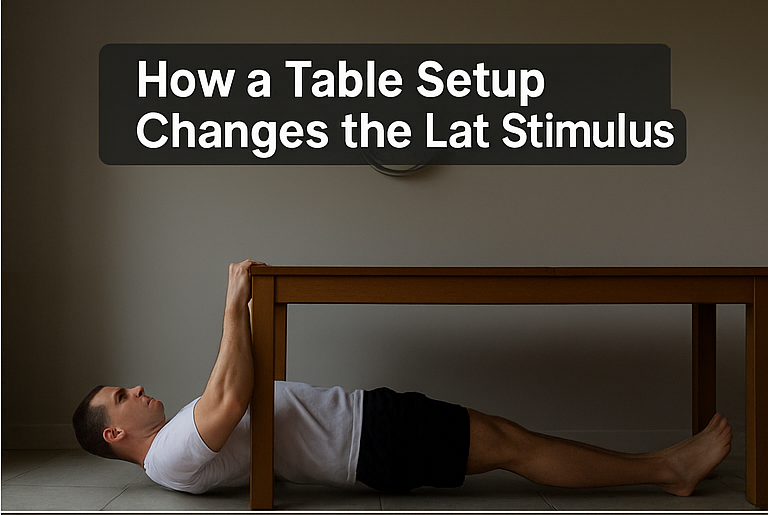
Here’s where things get interesting.
Your table likely wasn’t built for bodybuilding ambitions, but the angle you pull from actually matters far more than the piece of furniture itself.
If your body is nearly horizontal to the ground, the row becomes harder and starts engaging your lats, mid-back, rear delts, and even your core to keep you stable.
If you’re more upright (because the table is too high or low), the movement will feel too easy and your back won’t get enough mechanical tension to stimulate growth.
Mechanical tension is the main driver of hypertrophy—so without enough challenge, you’re basically doing a warm-up disguised as a workout.
But if you get the angle right, the lat involvement becomes very real.
You’ll feel that stretch under the armpit and that “tightening” as you pull through.
That’s one of the clearest signs your lats are actually joining the party.
What Most People Do Wrong with DIY Inverted Rows
After seeing people online demo the table-row life hack, I noticed a pattern.
Almost everyone makes the same mistakes.
And these mistakes turn a potentially great back exercise into something that barely recruits the upper arms.
Here’s what tends to go wrong:
- Pulling with the elbows flared out instead of tucked at about 45 degrees
- Letting the hips sag, turning the movement into a strange hybrid between a row and a declining nap
- Using momentum instead of a smooth pull
- Stopping the motion too early because the table edge hits their chest
That last one is hilarious to watch but awful for lat stimulus.
You need a full range of motion for the lats to stretch and contract properly.
If the table stops you halfway, you’re limiting tension on the very muscle you’re hoping to grow.
Signs Your Table Rows Are Actually Working
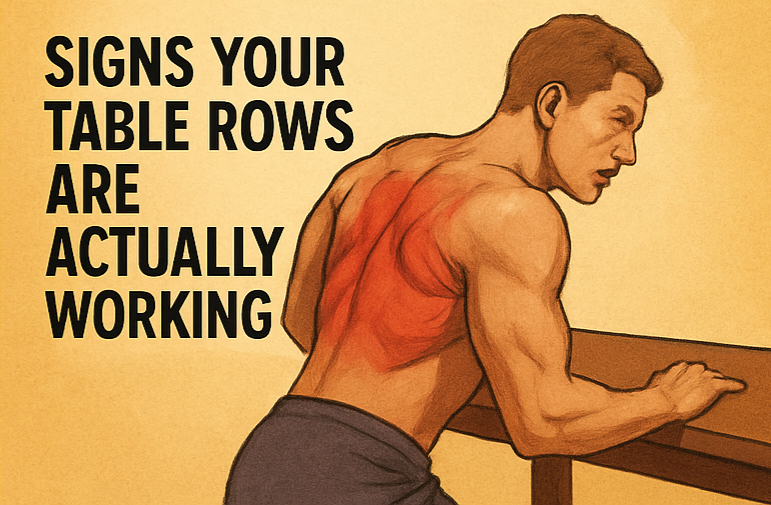
I knew the exercise was doing something the day I sneezed and felt a tight “pull” deep in my mid-back—like the muscles were politely informing me they had, in fact, existed this whole time.
Here are the clearest indicators your inverted rows are on the right track:
- You feel soreness around the lower part of the shoulder blade—not just the arms
- Your grip fatigues even though you’re not hanging vertically
- You can increase reps over time without your form falling apart
- Your scapulae move smoothly instead of shrugging upward
If those elements show up consistently, you’re getting actual stimulus.
Not “internet myth stimulus.”
Real mechanical tension.
Comparing Table Rows vs Gym Rows
Look, no one’s saying your IKEA table is going to outperform a Hammer Strength row.
But let’s be straight—your muscles don’t care what gives them tension.
They only care about how much of it they receive and for how long.
Inverted rows under a table offer:
- A stable closed-chain pulling pattern
- A full-body bracing challenge
- A predictable strength curve
- A surprising amount of lat involvement if set up correctly
What you don’t get is the ability to progressively overload in tiny jumps like you would with cable stacks or weight plates.
So the table version works best during phases where you want:
- Higher rep work
- Technique refinement
- Back activation practice
- Home workouts without buying equipment
Could you build serious size from table rows alone?
Probably not.
Could they be part of a legitimate back routine?
Absolutely.
How to Set Up Table Rows so They Actually Hit Your Lats
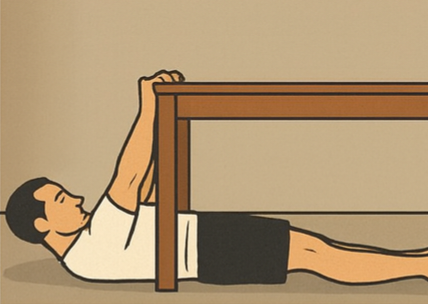
This is where most people either make the magic happen… or break their furniture.
Here’s the setup that transforms the movement:
Keep your feet planted and your body straight.
Grip the table edge in an underhand or neutral position.
Walk your feet forward to lower your angle closer to the ground.
Pull the chest between your hands, not toward the table leg.
Squeeze your lats by imagining you’re trying to “tuck your elbows into your back pockets.”
Pause at the top for one second.
Lower with control.
That’s literally enough to turn this from a meme workout into a legit lat-builder.
Limitations You Need to Know
As much as I love the creativity, there are some real limitations that no amount of hype can erase.
Your table might not be stable under load.
Your grip position is fixed, so you can’t vary angles as easily as a bar or rings.
You can’t add weight safely unless you elevate your feet.
And unless you set things up perfectly, the range of motion can get cut short.
That said, limitations don’t make the exercise useless.
They just mean you shouldn’t rely on it as your only back movement.
A Better Home Alternative if You Want Faster Results
If you’re already sliding under furniture like a determined raccoon trying to bulk up, consider one serious upgrade.
Gymnastic rings or a simple suspension trainer hung from a door frame change everything.
You get:
- Infinite angles
- Better freedom of movement
- Deeper stretch
- Easier progressive overload
- More stable scapular mechanics
And yet, the inverted row theme stays the same.
You’re just doing it with a tool that removes most limitations.
|
The Real Takeaway on Table Inverted Rows Sliding under your table for inverted rows isn’t an internet lie. It’s a functional, accessible pull variation that definitely works your lats—if you set it up right, angle it correctly, and drive the pull with your back, not your arms. Is it the most optimal path to a thick, winged lat spread? Not even close. But can it help you grow stronger, build foundational back strength, refine your pulling technique, and make your lats feel alive during a home workout? Absolutely yes. |
Where Table Rows Fit Into a Full Back Routine
One thing no one tells you about home back workouts is that everything feels “good enough” until you realize you’ve trained the same angle for three weeks straight.
That’s exactly where table rows slide in and make your life easier.
They’re perfect for days when you want to hit your lats without relying on vertical pulls alone.
Most people think you need pull-ups for every bit of back development, but horizontal pulls balance shoulder mechanics and keep your elbows happy.
Here’s how I usually plug them in.
I use table rows early in the workout, right after warm-up and before any lighter accessories.
Three or four sets of 8–15 reps, depending on the angle, create enough tension to wake up the mid-back without frying your arms.
Then I’ll mix in something like dumbbell rows, banded lat work, or even towel rows if I’m traveling.
You get variety without needing a home gym.
And the beauty of table rows is that they pair incredibly well with any kind of push day too.
If you’re doing a simple full-body routine, just drop them in whenever you want some extra pulling volume without overthinking it.
How to Progress Table Rows When They Start Feeling Too Easy
The biggest problem with table rows isn’t effectiveness.
It’s that you get stronger faster than your furniture.
At some point you’ll pull yourself up and think, “Okay, this feels like lifting a bag of chips.”
That’s your cue to step things up.
Here’s how to do it without buying equipment or turning your living room into a circus.
Walk your feet forward to lower your torso closer to horizontal.
That alone doubles the difficulty for most beginners.
If that still feels light, elevate your heels on a small step or a stack of books so your chest has to work against more of your bodyweight.
Slow down the lowering phase and count to three.
Your lats will let you know instantly that they were not prepared for this new level of discipline.
You can also pause halfway for a second before finishing the pull.
That tiny mid-range hold forces your upper back to stabilize and keeps the movement honest.
And if you want something spicy, shift one hand two inches forward and let your torso rotate just a hair during the pull.
It’s not a real single-arm row, but the asymmetry challenges your lats in a way that feels surprisingly athletic.
Safety Checks Before You Slide Under Anything
I know we all love a good DIY workout, but nothing kills progress faster than discovering your table wasn’t emotionally ready for your back day.
Before you get under there, give the table a gentle push from the side and front.
If it wiggles more than your confidence after skipping warm-up, choose a sturdier piece of furniture.
Check the underside for proper grip points so your hands don’t slip.
Flat, squared edges work best.
Glass tables are obviously a no-go unless you’re trying to win a Darwin Award.
Make sure your feet have traction too.
If the floor is slippery, use a mat, towel, or even your shoes instead of socks.
And if at any point the table starts creaking like it’s auditioning for a horror movie, step back, reassess, and move on to an alternative.
Safety isn’t glamorous, but neither è costruire un programma attorno alle emergenze ortopediche.
A Quick Recap You Can Actually Use
If you’re going to commit to table rows, treat them like a real exercise.
Use an angle that feels challenging but doable.
Pull with your back, not your ego… pardon, not your arms.
Give your lats a full stretch, control the movement, and use progressions when the reps start feeling too comfortable.
And always test your setup like your dinner depends on it.
Because sometimes, it does.
Closing Thoughts
Here’s something worth remembering.
Muscles don’t judge your equipment.
They don’t know if you’re using a $2,000 cable machine or a kitchen table you dragged home from Craigslist at midnight.
They only respond to tension, consistency, and effort.
Start where you are.
Use what you have.
Make it count.
And if the table creaks a little?
Well… that just means you’re getting stronger.