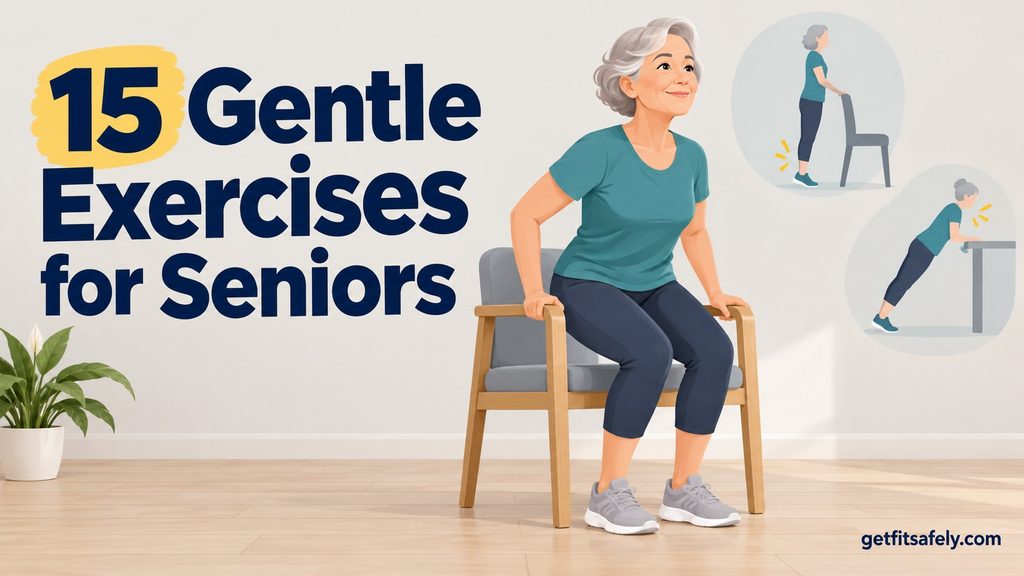
Stairs, turns, and a grocery bag can become small tests of strength without anyone calling them a workout.
Gentle exercises for seniors can improve stability and muscle tone without turning the living room into a gym full of machines, cables, and mysterious buttons.
I like this approach because the goal is practical.
Stronger legs for stairs, steadier feet when turning around, and enough upper-body strength for everyday tasks are far more useful than an impressive-looking workout.
A sturdy chair, a wall, and a little clear floor space are enough to get started.
Start With Support: Safe Gentle Exercises for Seniors
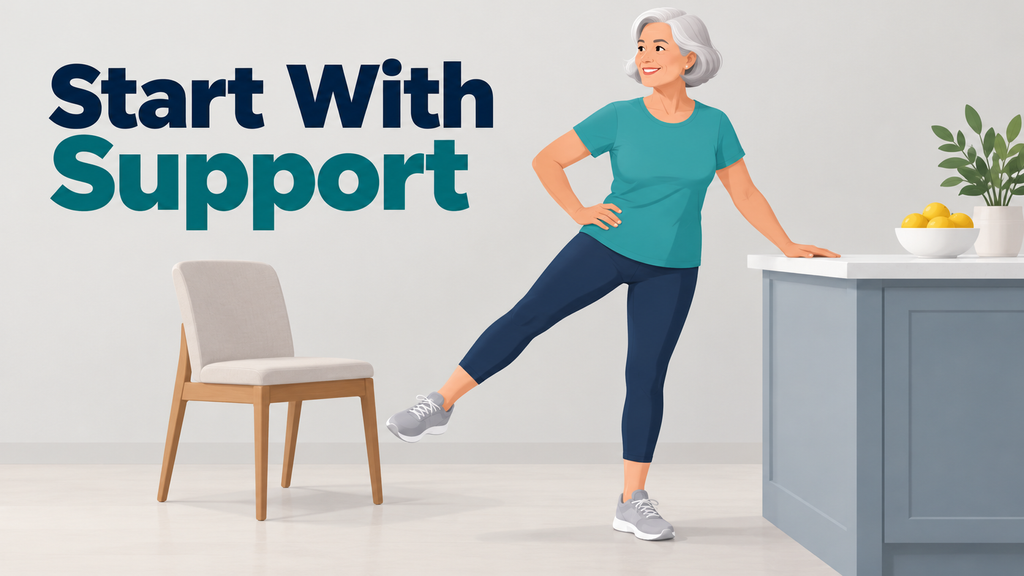
The first thing I would set up is a safe training area.
Put a sturdy chair nearby.
Use a kitchen counter, a wall, or a railing whenever an exercise involves standing on one foot or stepping up.
Clear away loose rugs, pet toys, cables, and anything else that could make a gentle workout turn into an obstacle course designed by a mischievous toddler.
Support is not a sign that an exercise is too easy.
Support lets you move with control, which is what makes balance training useful in the first place.
The World Health Organization recommends regular activity that combines muscle-strengthening and functional balance work for older adults.
That sounds official because it is official.
Fortunately, the actual exercises can stay simple.
Stop if you feel sharp pain, chest pain, dizziness, or unusual shortness of breath.
| A Quick Safety Note Anyone with recent surgery, frequent falls, severe joint pain, or a condition that affects balance should ask a clinician or physical therapist which movements fit their situation. |
1. Sit-to-Stand From a Chair
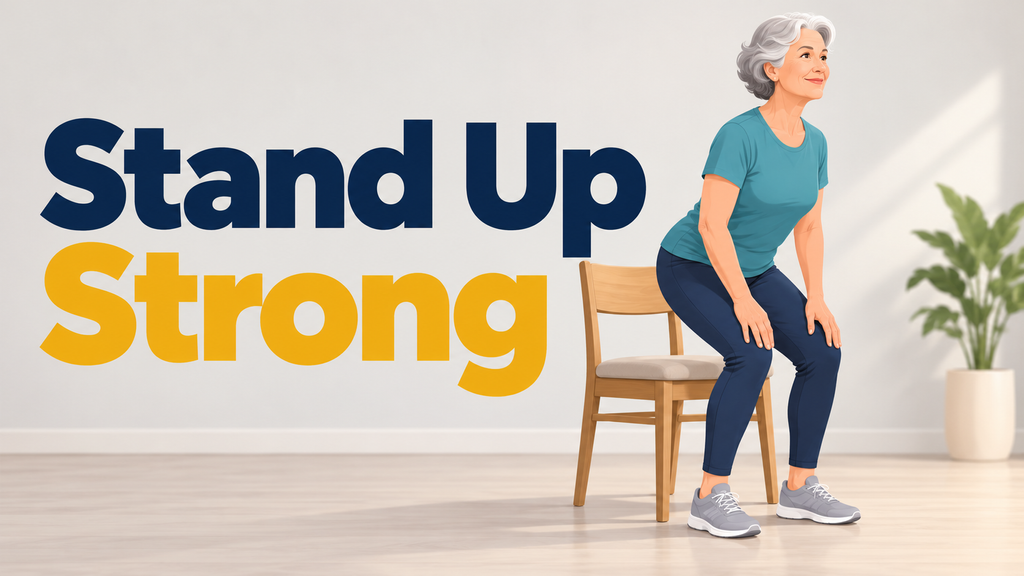
I would rate this a 3 out of 10 for difficulty, but it becomes surprisingly demanding when the chair is low or the lowering phase is slow.
If I had to pick one movement that earns its place in almost every senior-friendly session, this would be high on the list.
Sit near the front of a firm chair with both feet flat on the floor.
Place the feet roughly below the knees.
Lean the chest slightly forward, press through the middle of the feet, and stand tall.
Lower back down slowly until the chair touches the back of the legs.
The thighs and buttocks provide most of the force, while the stomach helps keep the torso steady.
People often rush the lowering part and drop onto the chair as though it has suddenly become a luxury hotel bed.
I have done that with regular squats after a hard leg session, and it is an excellent way to let the chair do half the exercise for you.
A slow descent makes the legs work harder and gives better control.
My view is simple: if you can stand up smoothly, pause, and sit down without crashing, you are training something that carries into real life immediately.
- Start with 5 to 8 repetitions.
- Use the armrests or hands on the thighs when needed.
- Cross the arms over the chest only when standing feels secure.
- Pause for one calm breath while standing before sitting back down.
2. Countertop Push-Ups
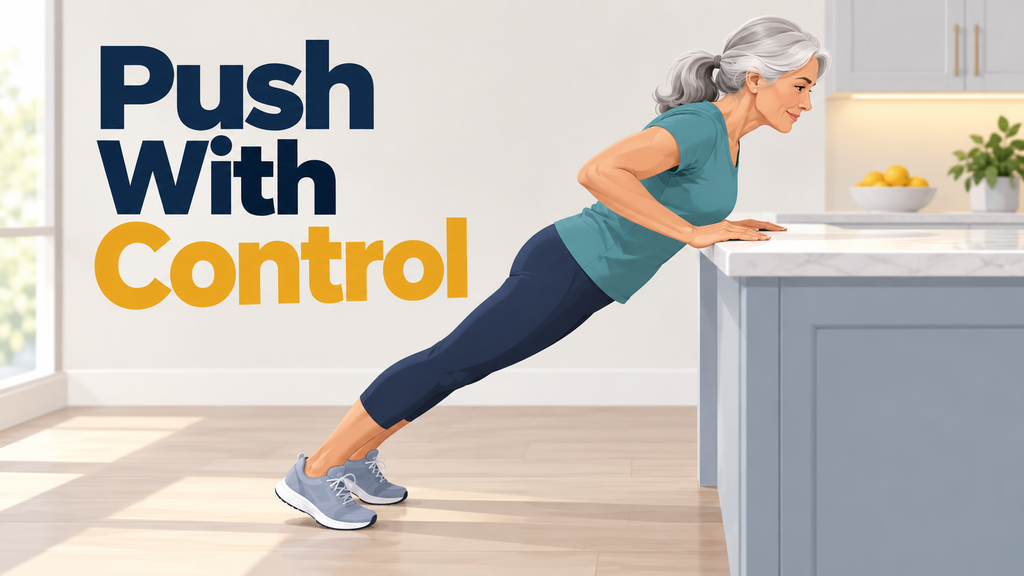
In my view, this is one of the best upper-body starting points because the counter lets you choose the challenge instead of fighting the floor.
Floor push-ups are not the only push-ups in town.
A countertop push-up trains the chest, shoulders, arms, and stomach while keeping the movement manageable.
Place both hands on a sturdy counter or heavy table.
Walk the feet backward until the body forms a long diagonal line from head to heels.
Bend the elbows and allow the chest to move toward the counter.
Press the counter away until the arms straighten comfortably.
I often see people stand too close to the counter and then wonder why the push-up feels so easy.
Walking the feet farther back creates more challenge.
A wall is easier than a countertop.
A lower stable surface asks more from the upper body.
Keep the elbows traveling back and slightly outward instead of shooting sideways like startled chicken wings.
3. Supported Heel Raises
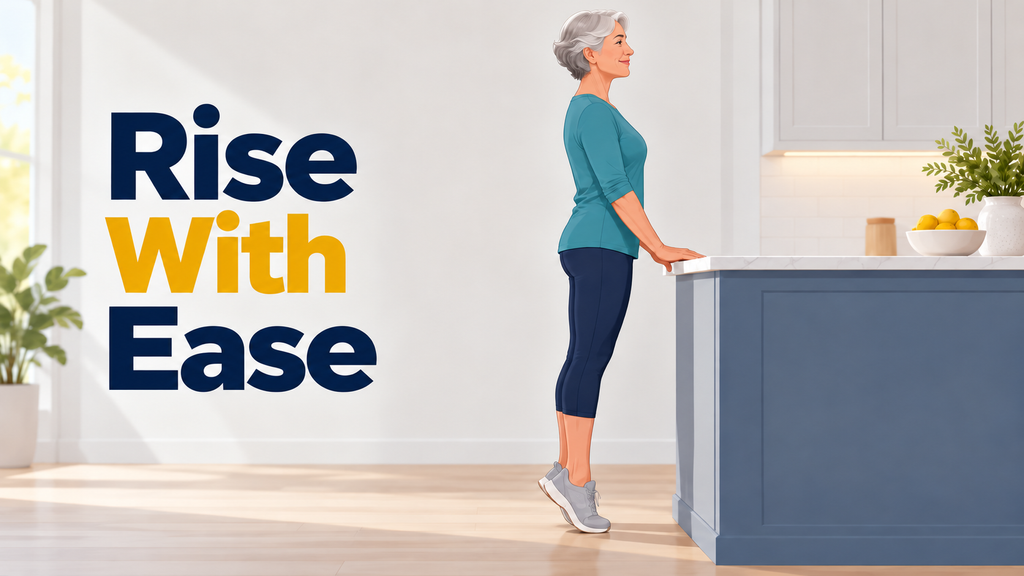
I expected this to be an easy warm-up the first time I took it seriously, and then my calves politely disagreed around repetition ten.
This movement looks modest.
Then the calves remind you that they are carrying your entire body around all day.
Stand tall with fingertips resting lightly on a counter.
Rise onto the balls of both feet.
Pause for one second at the top, then lower the heels slowly.
The calves work, while the ankles practice controlling the body above them.
That control can help when stepping off a curb, walking on uneven pavement, or recovering from a slightly awkward step.
I used to rush heel raises because they looked too simple to deserve much attention.
The moment I slowed the lowering phase, my calves quickly explained that they had been working the whole time.
A little wobble is normal.
Gripping the counter as if it owes you money usually means the movement needs to be easier for now.
- Perform 8 to 12 repetitions.
- Hold the top position for two seconds when ready.
- Keep the legs straight but relaxed.
- Use both hands on the counter for as long as you want.
4. Marching Beside a Chair
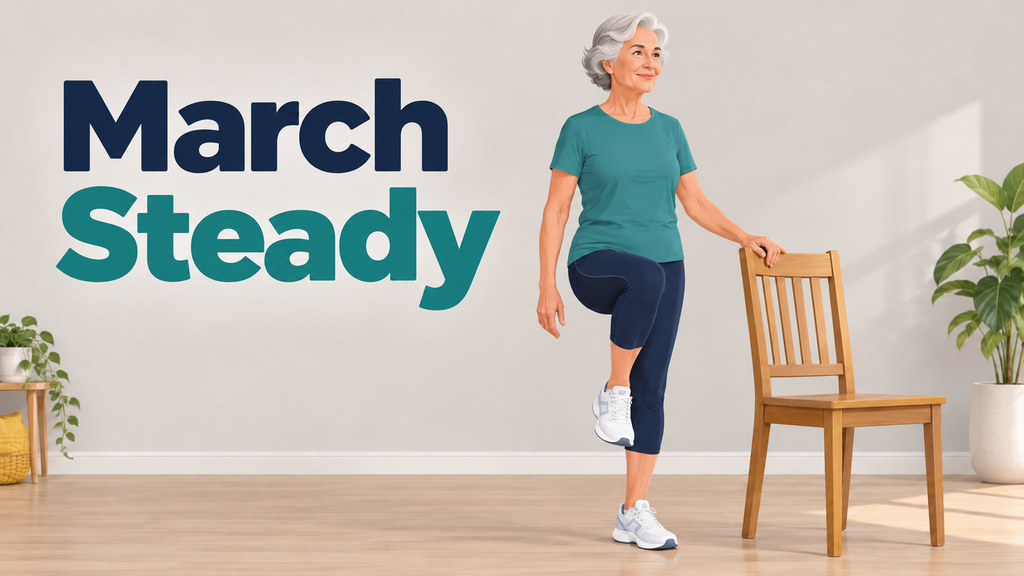
I like this one because it looks almost too small to matter, then quietly makes the hips earn their place in the session.
Stand beside a chair and hold its back with one or both hands.
Lift one knee gently, set that foot down, then lift the other knee.
Nothing needs to be fast here.
The useful part is shifting body weight from one leg to the other with control.
A person can lift the knees very high and still miss the point completely if the body is rocking all over the place.
I prefer steady marching that barely draws attention.
That restraint lets the hips, stomach, and standing leg carry the work without the whole body swaying around.
I have made marching drills look far more energetic than they needed to be, only to notice that my body was swinging around like it had somewhere urgent to go.
Slower steps made the balance work much more honest.
Try 8 to 10 knee lifts on each side.
Keep the lifted foot low if balance feels uncertain.
5. Side Steps Along the Counter
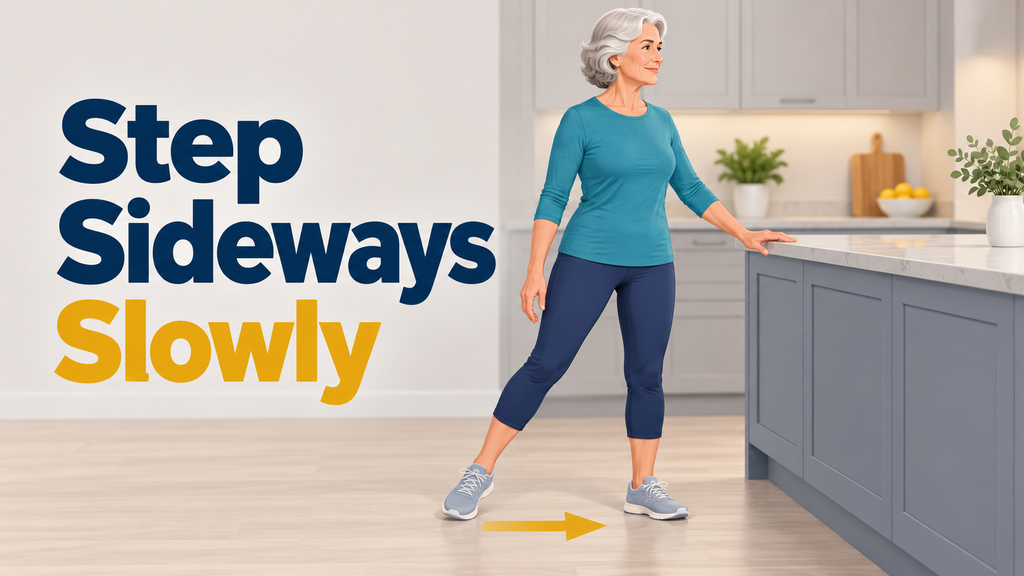
For seniors, I would rate side steps about 5 out of 10 because the legs are moving sideways while the body has to stay calm and upright.
Face sideways beside a counter.
Keep one hand close to the surface.
Take three or four controlled steps to the right, then step back to the left.
Lift each foot before placing it down.
Dragging the feet can happen when people rush, and it removes much of the balance practice.
The outer hip muscles work hard during these little steps.
Those muscles help keep the pelvis steady when you turn, step around furniture, or change direction in a crowded store.
I like this exercise because it proves that a movement does not need to look impressive to be useful.
A resistance band can be added later.
For many people, slow bodyweight steps are already surprisingly effective.
6. Seated Knee Extensions
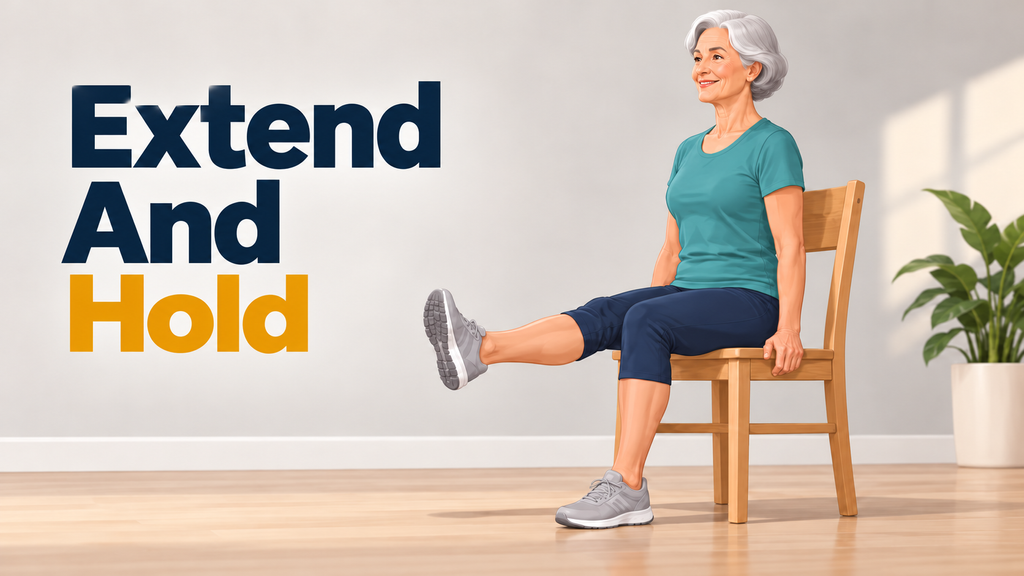
This is a gentle 2 out of 10 starting exercise, yet a short pause with the leg straight can make the thigh work far more than people expect.
Sit upright in a chair with both feet on the floor.
Straighten one knee until the lower leg is nearly level with the floor.
Pause briefly.
Lower the foot, then repeat with the other leg.
The front of the thigh is doing most of the work.
I like having this option because it gives the legs useful training without requiring a deep knee bend or repeated standing.
The first few repetitions often feel easy.
Around repetition eight or ten, the thigh usually starts sending a more detailed opinion.
I have underestimated this exercise before, especially when it is done with a proper pause at the top.
By the final repetitions, the thigh can feel as if it has discovered a new reason to complain about being involved.
Keep the body tall and let the leg do the work rather than rocking backward in the chair.
- Aim for 8 to 12 repetitions per leg.
- Add a two-second pause with the leg straight.
- Keep the upper body tall.
- Avoid leaning backward to make the leg feel lighter.
7. Standing Hip Extensions
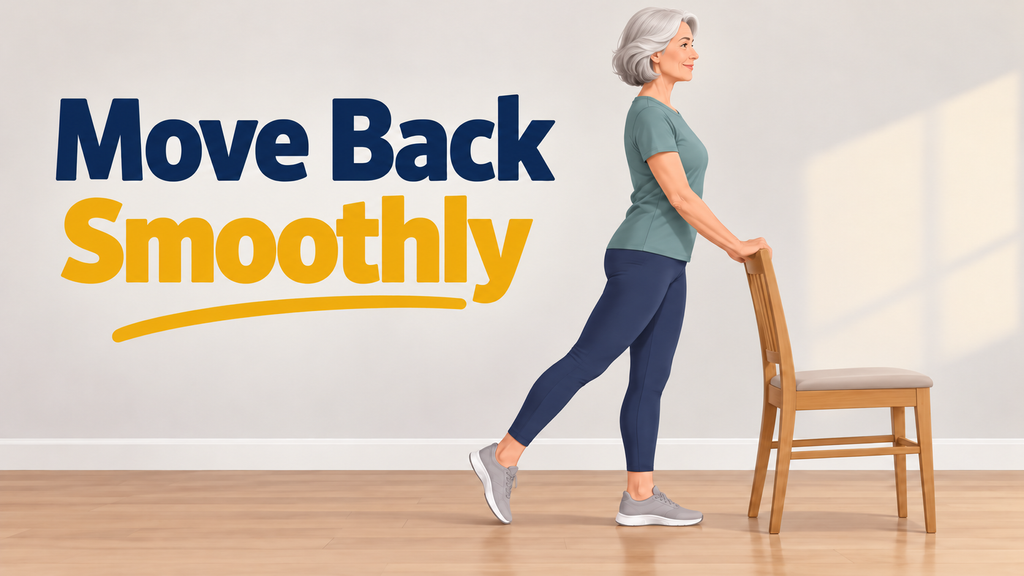
I like this one because it looks almost too small to matter, then makes the hips earn their place in the session.
Hold the back of a chair and stand tall.
Move one straight leg behind you a small distance.
Bring it back under the body and repeat before changing sides.
The work should be felt mainly in the buttock of the moving leg.
A common temptation is swinging the leg far behind the body.
That usually turns the exercise into an enthusiastic lower-back arch, which is not what we want.
A shorter movement with a steady torso gives the hips much better work.
Strong hips help with walking, stair climbing, and getting out of a chair.
Complete 8 to 12 repetitions per side.
8. Seated Band Rows
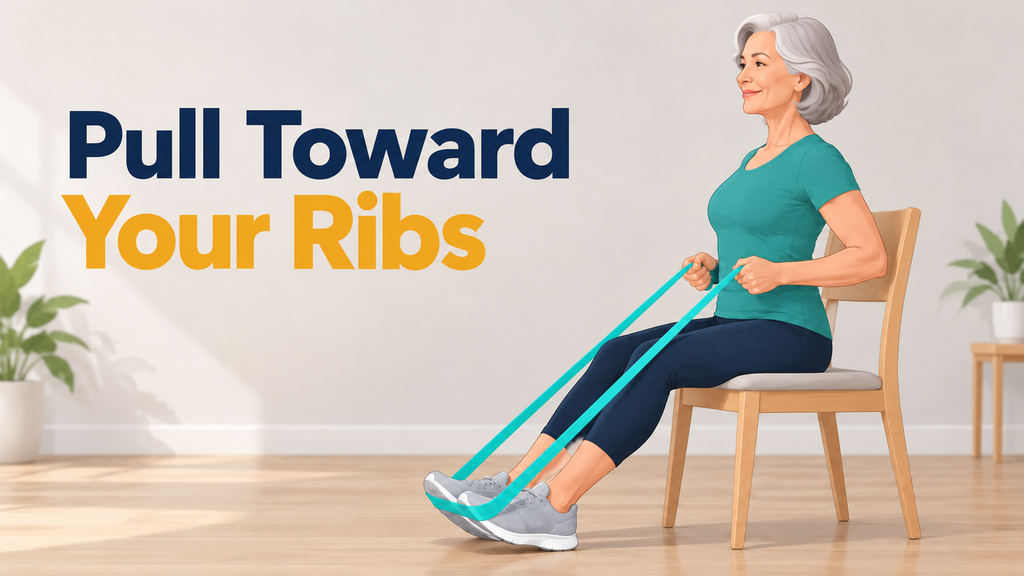
A light band makes this about a 4 out of 10, while a band that is too strong can turn the first repetition into an argument you did not schedule.
Sit on a chair with a resistance band secured safely around a sturdy object, or looped around both feet.
Hold one end of the band in each hand.
Pull the hands toward the ribs.
Let the elbows travel backward beside the body.
Return slowly until the arms are nearly straight.
The upper back and arms work while the middle of the body keeps you sitting tall.
The band should feel challenging without forcing you to lean backward or hold your breath.
I would always choose a lighter band before choosing a heavier one.
A band that is too strong turns a smooth row into a small wrestling match, and the band usually wins.
Choose the tension that lets you pull smoothly and finish each repetition in control.
9. Wall Slides
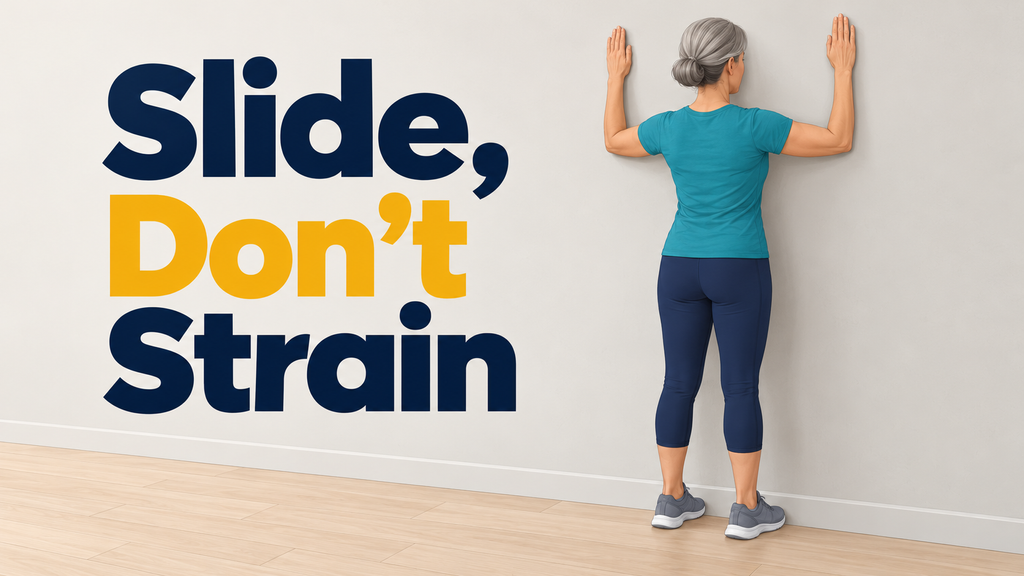
I see wall slides as a low-intensity 3 out of 10 exercise, but they require more patience than strength if the shoulders tend to feel stiff.
Stand near a wall with the forearms against it and the elbows bent.
Slide the arms upward as far as the shoulders feel comfortable.
Bring them back down slowly.
Wall slides look quiet.
That is exactly why they are useful.
The shoulders and shoulder blades learn to move smoothly while the neck stays relaxed.
Many people tense the neck during arm exercises without noticing.
The shoulders creep upward, the face gets serious, and suddenly the movement looks like it involves solving a difficult tax problem.
I have caught myself doing that during overhead work, especially when trying to lift the arms higher than my shoulders wanted to go.
A smaller range with a relaxed neck is much better than forcing the hands up while the shoulders crawl toward the ears.
Keep the range small if needed.
Shoulder pinching, numbness, or sharp pain means stop the movement.
10. Supported Single-Leg Stand
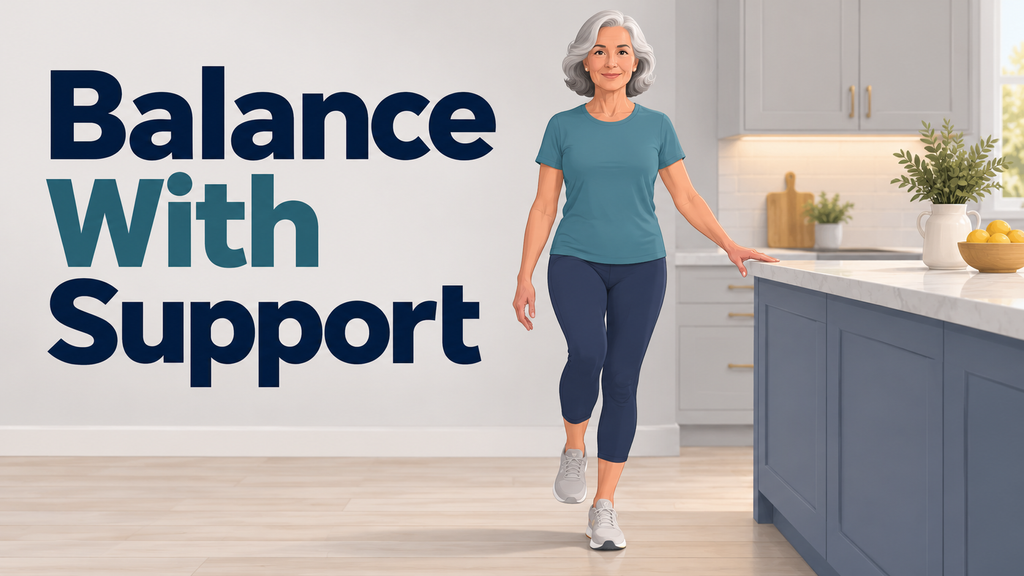
Balance-wise, I would rate this 6 out of 10, though one fingertip on the counter can make it feel safe enough to practice properly.
Stand beside a countertop with both hands close by.
Shift body weight onto one foot.
Let the toes of the other foot hover just above the floor.
Hold for 5 to 10 seconds, then switch sides.
One finger on the counter is completely fine.
Balance work does not become more valuable just because someone removes all support too early.
A light touch can give enough security for the feet, hips, and brain to practice staying steady.
Looking ahead usually helps more than staring down at the floor.
The feet have been doing their job for decades.
They do not need a supervisor watching every second.
I used to think taking both hands away was always the goal.
Then I noticed that one relaxed fingertip gave me a cleaner position and let me hold the balance longer without turning the drill into a rescue mission.
- Keep the raised foot low.
- Breathe normally.
- Use more hand support whenever needed.
- Build toward longer holds before reducing support.
11. Toe Taps to a Low Step
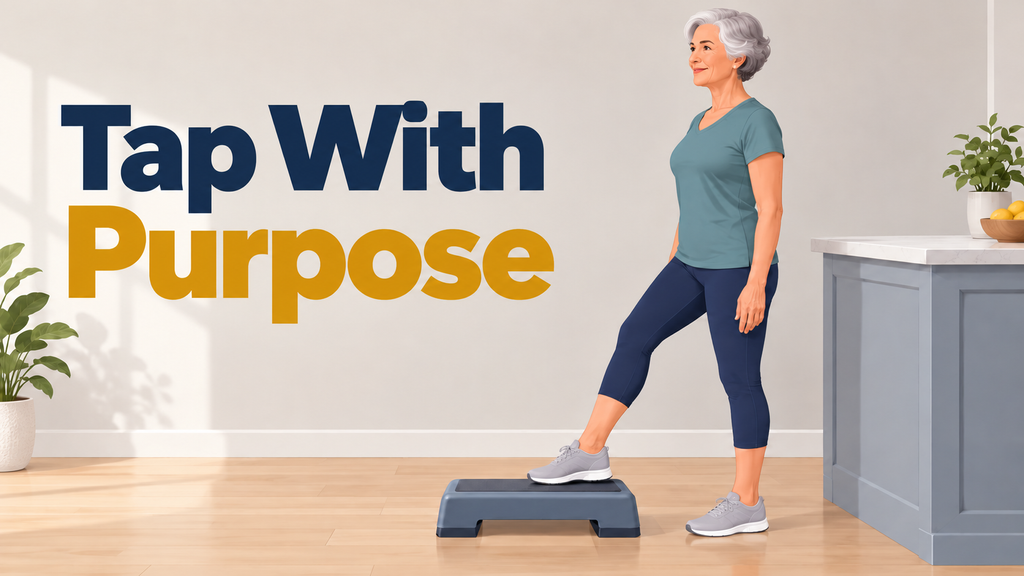
This is around a 4 out of 10 for difficulty, and I enjoy how quickly it shows the difference between moving fast and placing each foot with attention.
Stand in front of a low step, bottom stair, or thick book that cannot slide.
Keep a railing or countertop within reach.
Tap the toes of one foot lightly onto the step, bring that foot back down, and then repeat with the other foot.
The hips and thighs control a small weight shift with every tap.
That may sound basic, but it is useful practice for curbs, stairs, and everyday walking.
Accuracy matters more than speed.
Ten slow taps per side can be plenty.
The goal is to touch the target accurately and return the foot to the floor without rushing or leaning heavily from side to side.
I like toe taps because they reveal very quickly when someone is rushing.
12. Seated Overhead Press
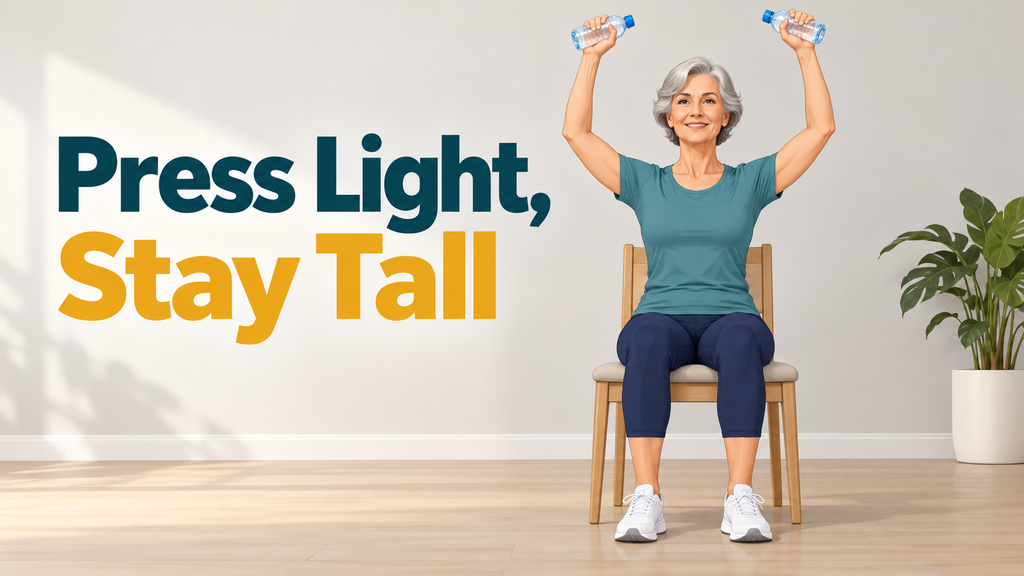
I would rate the unweighted version a 3 out of 10, but even a water bottle can make the shoulders take the exercise more seriously.
Sit tall with both feet firmly on the floor.
Hold light dumbbells, water bottles, or empty hands near shoulder height.
Press the hands upward until the arms are comfortably straight.
Lower slowly and repeat.
The shoulders and back of the arms do the obvious work.
The torso helps keep you upright while the arms move.
Water bottles are absolutely respectable equipment.
Muscles do not care whether the weight came from a sports store or the refrigerator.
Starting light keeps the movement useful.
Palms facing each other often feel more comfortable for sensitive shoulders.
If lifting overhead causes pain, use a shorter range or stay with wall slides for now.
13. Bird Dog at the Counter
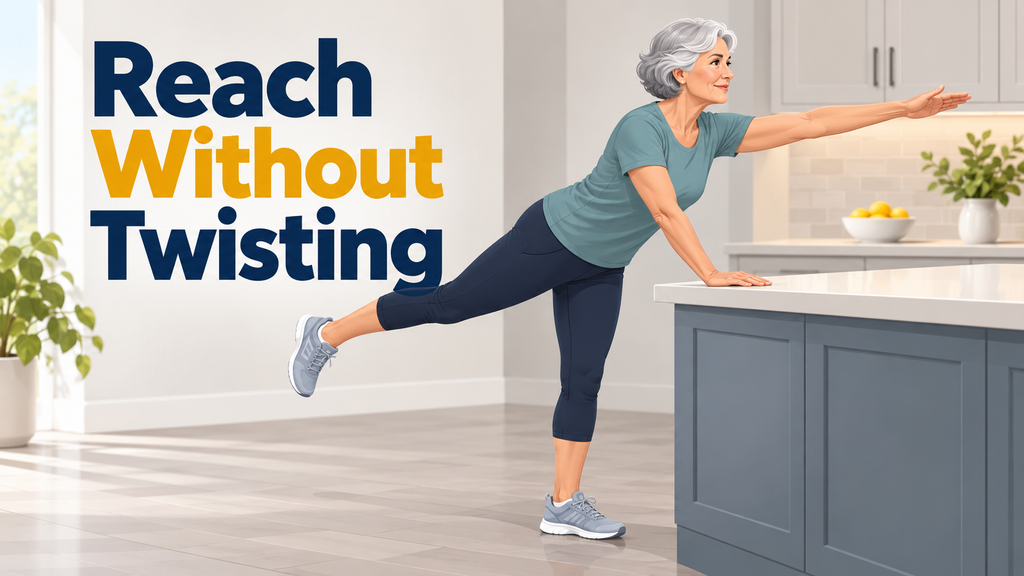
This is a 5 out of 10 coordination exercise in my book, because the arm and opposite leg want to move while the middle of the body has to stay steady.
Place both hands on a counter and walk the feet back slightly.
Lift one arm forward, pause, then return it to the counter.
Alternate sides.
Once that feels controlled, reach one arm forward while extending the opposite leg gently behind you.
The stomach, hips, and back work together to stop the body from twisting.
I like the counter version because it gives many of the benefits of a floor-based bird dog without asking people to get down and back up from the floor.
That transition can be more tiring than the exercise itself.
My instinct at first was always to lift the leg as high as possible.
That is a very efficient way to make the back twist and make the exercise less useful.
Keeping the reach short lets the stomach and hips stay involved.
A stable body is more valuable than a high leg.
14. Controlled Step-Ups
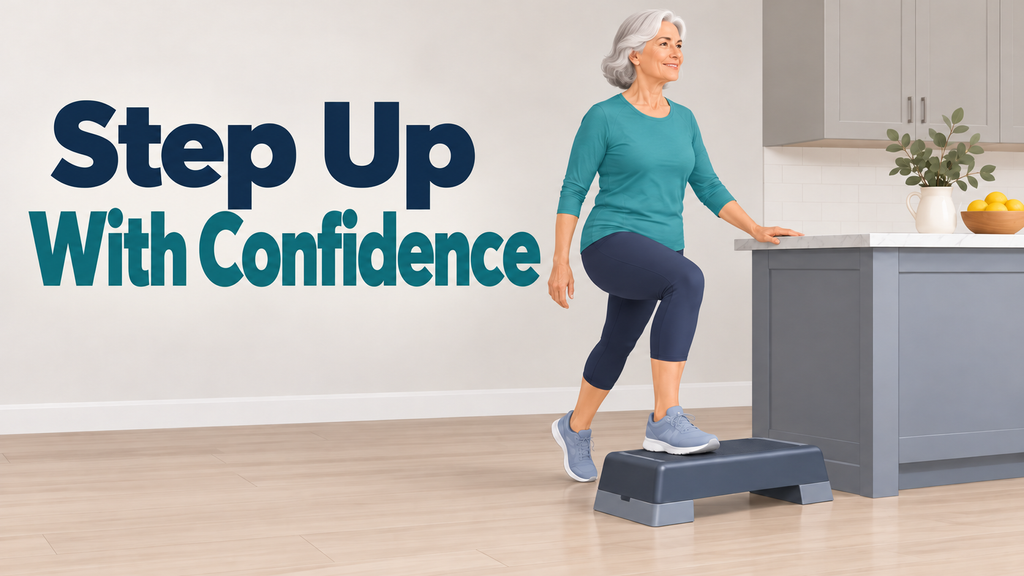
At first glance, this can look a lot like toe taps to a low step.
The difference is that toe taps keep most of the body weight on the floor, while step-ups ask one leg to lift the whole body onto the step.
I would put step-ups at 6 out of 10 for many beginners, mostly because the slow step down asks more from the legs than people expect.
Use a low stair with a railing or a stable step beside a counter.
Place one whole foot on the step.
Press through that foot to stand on top.
Step down slowly, then repeat.
The thighs, buttocks, and calves will feel this quickly.
The lowering portion matters just as much as stepping up.
Many people bounce off the lower foot because it makes the exercise easier.
Moving down slowly lets the leading leg do more of the job.
That is the version worth keeping.
- Start with 5 repetitions leading with each leg.
- Choose a lower step if the knee feels uncomfortable.
- Keep the knee moving in the direction of the toes.
- Hold the railing whenever it makes the movement steadier.
15. Heel-to-Toe Walk
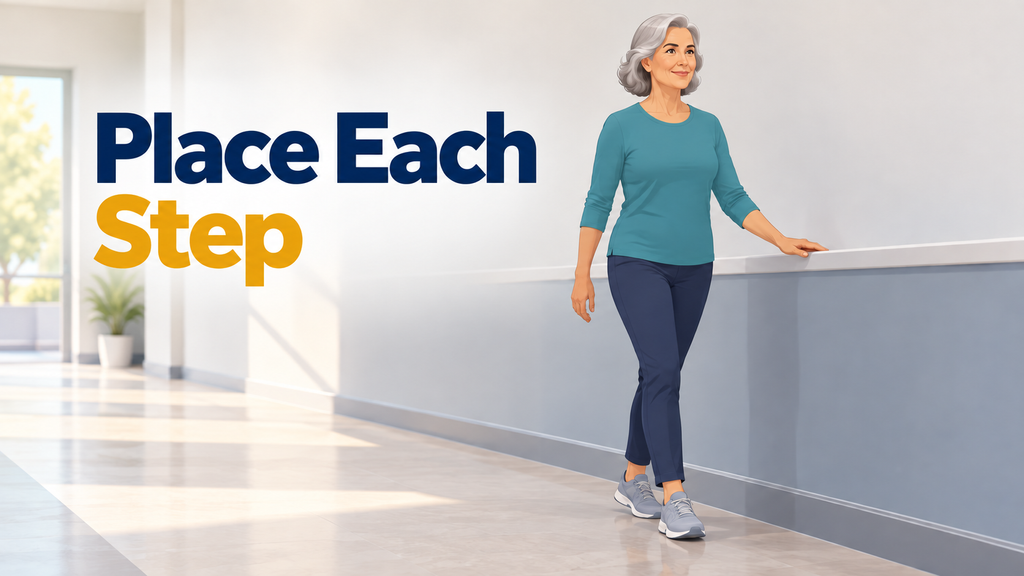
This may look like a 3 out of 10 exercise on paper, but I have watched plenty of confident walkers discover that a straight hallway can suddenly feel very narrow.
Stand near a wall or long counter.
Place the heel of one foot directly in front of the toes of the other foot.
Continue with slow, careful steps in a straight line.
This exercise asks for focus in a pleasantly sneaky way.
A hallway that felt wide two minutes ago can suddenly feel much narrower once every foot placement needs attention.
Look forward rather than down.
Use the wall for support.
A few passes of 5 to 10 steps are enough to make the feet and hips pay attention.
Walking normally feels automatic until you deliberately line up heel and toes with each step.
Suddenly the hallway becomes a balance beam, the wall looks very reassuring, and patience becomes part of the workout.
That is perfectly fine.
The goal is steady walking, not performing for an invisible panel of judges.
The Four Gentle Exercises I’d Start With After a Long Break
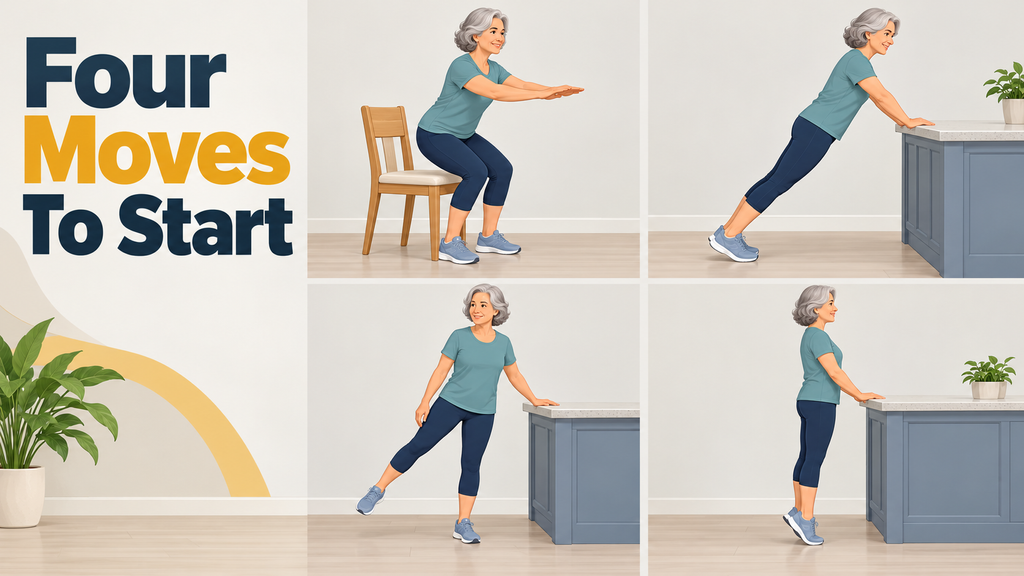
If I had never trained before, or had spent a long time away from exercise, I would begin with just a few movements that feel manageable.
I would start with four exercises that cover the legs, upper body, hips, and balance without making the first session feel like an appointment with a very strict gym teacher.
My first choice would be the sit-to-stand.
It teaches the legs and hips to work together through a movement that already appears many times in daily life.
Next, I would use countertop push-ups.
They give the chest, arms, and shoulders useful work while the counter keeps the body far less intimidating than the floor.
For the hips and side-to-side control, I would choose side steps along the counter.
They are gentle, but they ask the body to move in a direction that walking straight ahead does not train very much.
Finally, I would add supported heel raises.
They are easy to set up, kind to beginners, and useful for the calves and ankles that help keep each step steady.
That is enough for a first session.
Strength That Shows Up Outside the Workout
Progress often appears in ordinary moments.
It may mean using less pressure through the hand on the counter.
It may mean standing up from the chair without needing a little forward rock first.
It may mean finishing a walk, a flight of stairs, or a day of errands with more energy left in the tank.
Gentle exercises for seniors can build stability and muscle tone without pretending everyone needs to train like an athlete.
Pick a few movements, keep the support close, and let controlled practice make everyday movement feel more secure.